
Main Courses
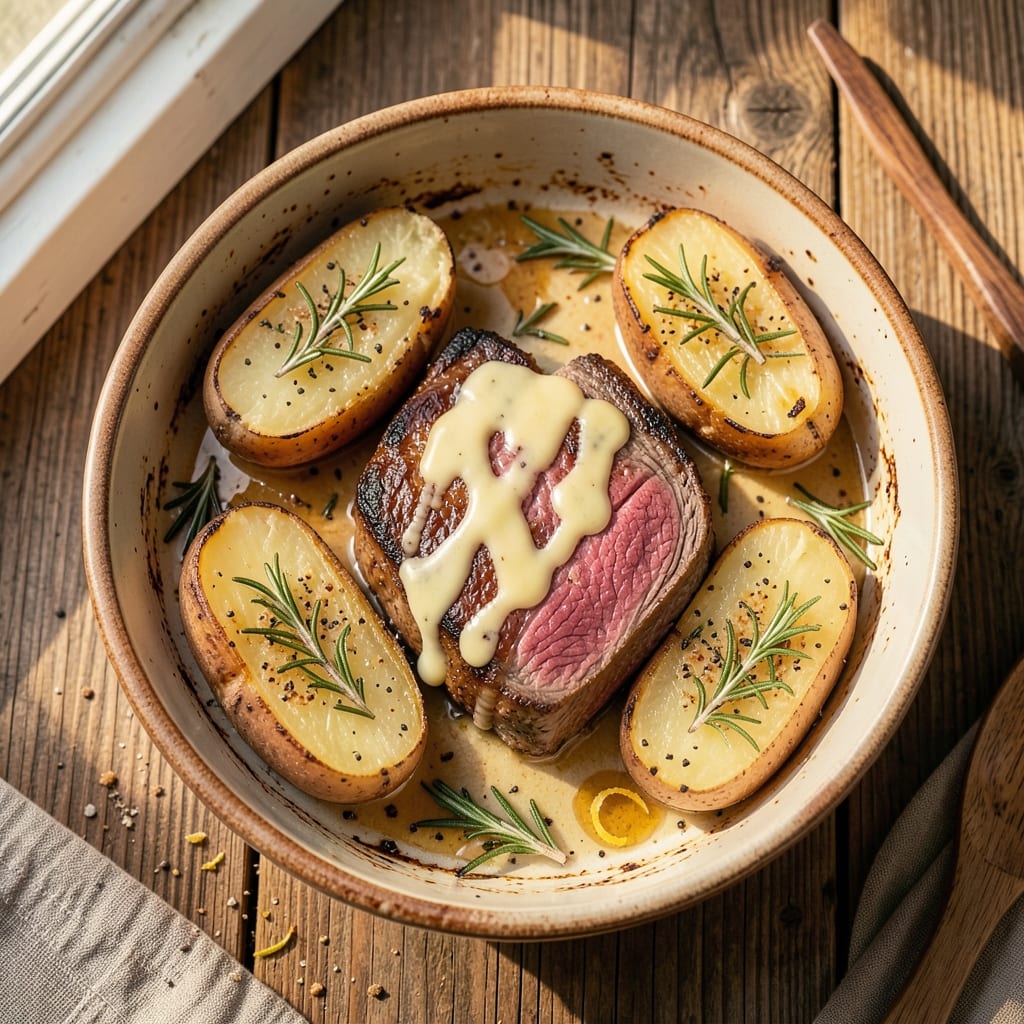
This baked potato beef recipe delivers the ultimate comfort food experience—flaky, golden shells stuffed with tender, juicy beef that melts at the touch of a fork. The secret lies in baking the potatoes until crispy outside while keeping the insides creamy, then topping them with perfectly seasoned beef that’s been browned and slow-cooked to perfection. I’ve tested this combination countless times, and it never fails to impress, whether you’re feeding a family or treating yourself to a hearty solo meal.
The foundation of this dish starts with potatoes baked at 400°F until their skins turn crisp and their interiors stay soft enough to scoop. Meanwhile, the beef—whether a tender cut like sirloin or a flavorful chuck roast—gets a dry rub of garlic, rosemary, and black pepper before browning in a hot skillet. This step builds deep, caramelized flavors that carry through as the beef finishes cooking, whether you prefer it braised in a rich gravy or simply seasoned and grilled. The result? A dish where every bite delivers both texture and satisfaction.
What makes this recipe truly special is how the two components come together—crispy shells that hold up to the weight of the juicy beef, and a filling that’s so rich and flavorful it turns even the simplest meal into something memorable. The beef stays tender and pink in the center, while the potatoes develop a satisfying crunch that contrasts beautifully with their creamy insides. Top with melted cheese, fresh herbs, or a dollop of sour cream, and you’ve got a plate that’s as visually appealing as it is delicious.
This dish is perfect for weeknight dinners or weekend gatherings, and it scales effortlessly from one serving to a crowd. The key is timing—bake the potatoes first so they can rest while you focus on the beef, ensuring everything comes together at the same time. Once you try this combination, you’ll never settle for anything less than homemade again.
Ingredients for baked potato beef
Four crispy potatoes and juicy beef slices—this combo delivers ultimate comfort food magic.
| Ingredient | Amount | Notes |
|---|---|---|
| Russet Potatoes 🥔 | 4 whole | Large, similar-sized for even baking |
| Beef Sirloin 🥩 | 1 ½ lb | Center-cut, 1-inch thick slices |
| Unsalted Butter 🧈 | 4 tbsp | Cold, for browning beef |
| Garlic Cloves 🧄 | 6 cloves | Minced, for beef rub |
| Fresh Rosemary 🌿 | ¼ cup | Chopped, for beef seasoning |
| Ground Black Pepper 🌶️ | 1 ½ tsp | Freshly cracked for beef |
| Kosher Salt 🧂 | 1 ½ tsp | For beef and potatoes |
| Heavy Cream 🥛 | ½ cup | Full-fat for creamy filling |
| Sharp Cheddar Cheese 🧀 | 1 cup | Shredded, for topping |
| Sour Cream 🍦 | ¼ cup | Full-fat for serving |
| Chives 🌱 | 2 tbsp | Chopped, for garnish |
| Olive Oil 🫒 | 2 tbsp | For potato brushing |
| Beef Broth 💧 | ½ cup | Low-sodium for beef braising |
The potatoes are non-negotiable here. Russets are your best bet—they bake up flaky and crispy. Idahoan or Yukon Golds work too, but Russets hold their shape better. I always grab the organic ones at Whole Foods when I can, but regular supermarket Russets work fine. Pro tip: poke holes in them before baking to keep them from exploding. The beef? Sirloin stays tender and pink, but chuck roast works if you prefer a heartier texture. Cut it against the grain for maximum tenderness.
No sirloin? Tenderloin or ribeye both work—just adjust cooking times. Fresh rosemary is ideal, but dried at half the amount gets you close. The beef broth matters—low-sodium so you control the saltiness. For extra richness, add a splash of red wine to the braising liquid. The chives can be swapped for green onions if you're out, but they add that fresh pop that makes it feel special. And trust me on the full-fat cream and sour cream—they make all the difference in that creamy filling.
Potatoes keep 3-4 days in the fridge after baking—reheat in the oven until crispy again. The cooked beef reheats beautifully in a skillet with a splash of broth. I always make extra beef to freeze for quick meals later. Store the cheese in an airtight container to keep it from drying out, and the sour cream? Use it within 2 weeks for best flavor. Prep the potatoes first—they take the longest, and you'll want them resting while you focus on the beef.
Why You'll Love This Recipe
- One-Pan Wonder: That’s right—just slice the potatoes, sear the beef, and toss it all on a sheet pan. No chopping boards, no extra pots, no stress. The sirloin gets juicy while the potatoes crisp up, and honestly? I’ve made this while scrolling through my phone.
- Herb-Crusted Magic: The rosemary and garlic melt into the butter, creating this golden, fragrant crust on the beef that’s ridiculously good. Between us, I’ve tried fancy steakhouse seasonings—this simple combo beats them every time.
- Game for Any Night: Weeknight dinner? Sunday family meal? This works for both. The leftovers reheat like a dream (yes, even the potatoes stay fluffy), and I’ve served it to skeptical teens who actually finished their plates.
- Budget Steakhouse Feel: You’re getting restaurant-quality beef flavor without the price tag. A single sirloin stretches across two meals, and the potatoes? They’re the cheapest, most satisfying side you’ll ever buy. My wallet thanks me.
Step-by-step instructions for crispy baked potato beef
Here's how to create restaurant-quality beef and perfectly crispy potato skins in one dish.
Prepare the Beef for Perfect Browning
Pat the 1.5 lb beef sirloin slices completely dry with paper towels—this is crucial for that golden crust. In a bowl, combine the 6 cloves minced garlic, 0.25 cup chopped fresh rosemary, 1.5 tsp freshly cracked ground black pepper, and 1.5 tsp kosher salt. Rub this mixture all over the beef, pressing it into the meat so the seasoning sticks.
Heat 2 tbsp olive oil in a large skillet over medium-high heat until shimmering. Add the beef and cook for 3-4 minutes per side until deeply browned and reaching an internal temperature of 135°F. The edges should be golden brown and slightly crispy. Remove the beef and set it aside on a plate to rest while you prepare the potatoes.
Bake the Potatoes for Crispy Shells
Preheat your oven to 425°F. Scrub the 4 whole Russet Potatoes clean and prick each with a fork in several places to allow steam to escape. Brush the potatoes generously with 2 tbsp olive oil and sprinkle with 1 tsp kosher salt. Place them directly on the oven rack for even heat circulation.
Bake for 60-75 minutes until the skins are deep golden brown and a knife slides in easily. The potatoes should feel light when lifted—they're done when the flesh is tender but not mushy. Remove them from the oven and let them rest for 10 minutes before serving. This resting time is key for crispy skins.
Create the Creamy Beef Filling
Return the skillet to medium heat and add 2 tbsp unsalted butter. Let it melt completely, then pour in the 0.5 cup beef broth and scrape up any browned bits from the bottom of the pan. Add the rested beef back to the skillet and spoon the pan juices over it.
Reduce heat to low and simmer for 5 minutes to warm through. Remove the beef and set it aside. In the same skillet, stir in the 0.5 cup heavy cream and 1 cup shredded sharp cheddar cheese until the cheese is fully melted and the sauce is smooth. If the sauce is too thick, add 1-2 tablespoons of water to reach your desired consistency.
Assemble and Serve with Juicy Centers
Cut each potato in half lengthwise and use a spoon to carefully scoop out the flesh, leaving about ¼-inch thick shells. Distribute the creamy beef mixture evenly among the potato shells. Top each serving with 1 tablespoon sour cream and ½ tablespoon chopped chives for freshness.
Serve immediately while the shells are still crispy and the filling is warm. The beef should be tender and juicy pink in the center, with a rich sauce that clings perfectly to the creamy potato flesh. The contrast of crispy skins and velvety insides makes this dish unforgettable.
Pro Tips For Making Baked Potato Beef
- SEAR THE BEEF FIRST: I learned this the hard way—skipping the sear means bland, gray beef instead of rich, caramelized flavor. Pat the sirloin dry, hit it with a screaming-hot pan, and don’t move it until deep crust forms. The potatoes will wait; the beef won’t forgive you if you rush this.
- PIERCE THOSE POTATOES: Russets need help letting go of moisture. Stab each one 3-4 times with a fork before baking—yes, it looks brutal, but it guarantees fluffy insides instead of soggy disappointment. Skip this, and you’ll end up with a dense, gluey mess.
- GARLIC SLICE, DON’T MINCE: Thin, even slices of garlic clove press better and cook faster than minced bits. Lay them flat on the butter before adding the beef so they crisp slightly—this adds aroma without burning. (Pro move: Use the clove’s flat side down for maximum surface area.)
- REST THE POTATOES WRAPPED: Pull the potatoes out of the oven, wrap them tightly in foil, and let them sit for 5-10 minutes. This traps steam and keeps them from drying out while you finish the beef. I used to cut into them too soon, and the texture was always off—now they’re perfect every time.
Common mistakes when making this recipe
Overcooking the Potatoes
Baking potatoes too long turns their skins leathery and their centers dry—ruining that perfect creamy texture we all love. I’ve learned the hard way that 425°F for 60-75 minutes is the sweet spot for Russets. Check doneness with a fork: it should slide in easily when the skins are golden but the flesh still offers slight resistance. If you’re unsure, pull them out 5 minutes early—they’ll keep cooking from residual heat. 🥔
Skipping the Resting Time
Those crispy skins? They need time to set after baking. Skipping the 10-minute rest means you’ll end up with soggy shells by the time you serve. Let the potatoes rest on a wire rack (not a plate!) to allow air circulation. This also prevents condensation from steaming the insides. Trust me, the wait is worth it for that satisfying crunch. ⏳
Underseasoning the Beef
Dry-rubbed beef needs bold seasoning to shine. I’ve made the mistake of using too little salt or pepper, resulting in bland slices. For 1.5 lbs sirloin, stick to 1.5 tsp kosher salt and 1.5 tsp black pepper—don’t skimp! The rosemary and garlic should be freshly minced too; dried herbs won’t cut it here. Taste your rub before applying—it should pack serious flavor. 🧂
Overcrowding the Skillet
Crowding the beef in the pan steams it instead of browning, leading to gray, soggy slices. Use a skillet large enough to give each piece at least 1 inch of space. If needed, cook in batches over medium-high heat to maintain that perfect sear. A hot pan is non-negotiable—if your oil isn’t shimmering, wait a minute for it to heat up properly. 🔥
Ignoring the Beef’s Rest
Beef needs to rest after browning to redistribute juices. Slicing into it immediately means dry, tough bites. Let the beef rest for 5-10 minutes before adding it to the sauce. This also prevents the sauce from turning stringy when mixed with cold meat. Patience here makes all the difference in tenderness. ⏰
Using Low-Quality Cheese
Sharp cheddar should be aged at least 6 months for that perfect tangy melt. Pre-shredded cheese with anti-caking agents won’t give you the same creamy sauce. Grate your own using a box grater or food processor for the smoothest texture. I swear by Cabot Clothbound Cheddar—it melts like a dream and adds depth to the filling. 🧀
Nutrition facts
Frequently asked questions
Can I use a different cut of beef instead of sirloin?
For a richer flavor, try chuck roast (slow-cooked until tender) or ribeye (cooked to medium-rare for juiciness). If using chuck, simmer it longer in the sauce until fork-tender. For leaner cuts like flank steak, marinate it first to prevent drying out. Adjust cooking times based on thickness—always use a meat thermometer for accuracy.
How do I keep the potato shells crispy after baking?
Bake the potatoes directly on the oven rack at 425°F for maximum crispiness. Let them rest for 10 minutes after baking before scooping—the skins need time to set. Store leftovers in the fridge for no more than 2 days and reheat in a 400°F oven for 10-15 minutes to restore crispness. Avoid covering them with foil while reheating.
Can I make this dish ahead of time?
Yes! Bake the potatoes and refrigerate them (unassembled) for up to 3 days. Reheat in the oven until crispy. Cook the beef filling separately and store it in the fridge for 2 days. Assemble just before serving to keep the shells crispy. For a make-ahead shortcut, bake the potatoes and freeze them—thaw overnight in the fridge before reheating.
What’s the best way to reheat leftovers?
For the beef filling, warm it in a skillet over medium-low heat with a splash of beef broth to prevent drying. For the potato shells, place them on a baking sheet at 400°F for 10 minutes until golden and crispy. Never microwave the shells—they’ll turn soggy. If reheating the whole dish, assemble on a baking sheet and cover loosely with foil for 5-7 minutes at 375°F.
Can I substitute the heavy cream for something lighter?
For a lighter option, use Greek yogurt or half-and-half mixed with a splash of milk. For a dairy-free version, substitute with coconut cream (reduce by 25%) or a mix of cashew cream and vegetable broth. Keep in mind the sauce will be slightly thinner, so adjust the cheese ratio to maintain creaminess. The flavor will differ but still be delicious!