
Soups & Stews
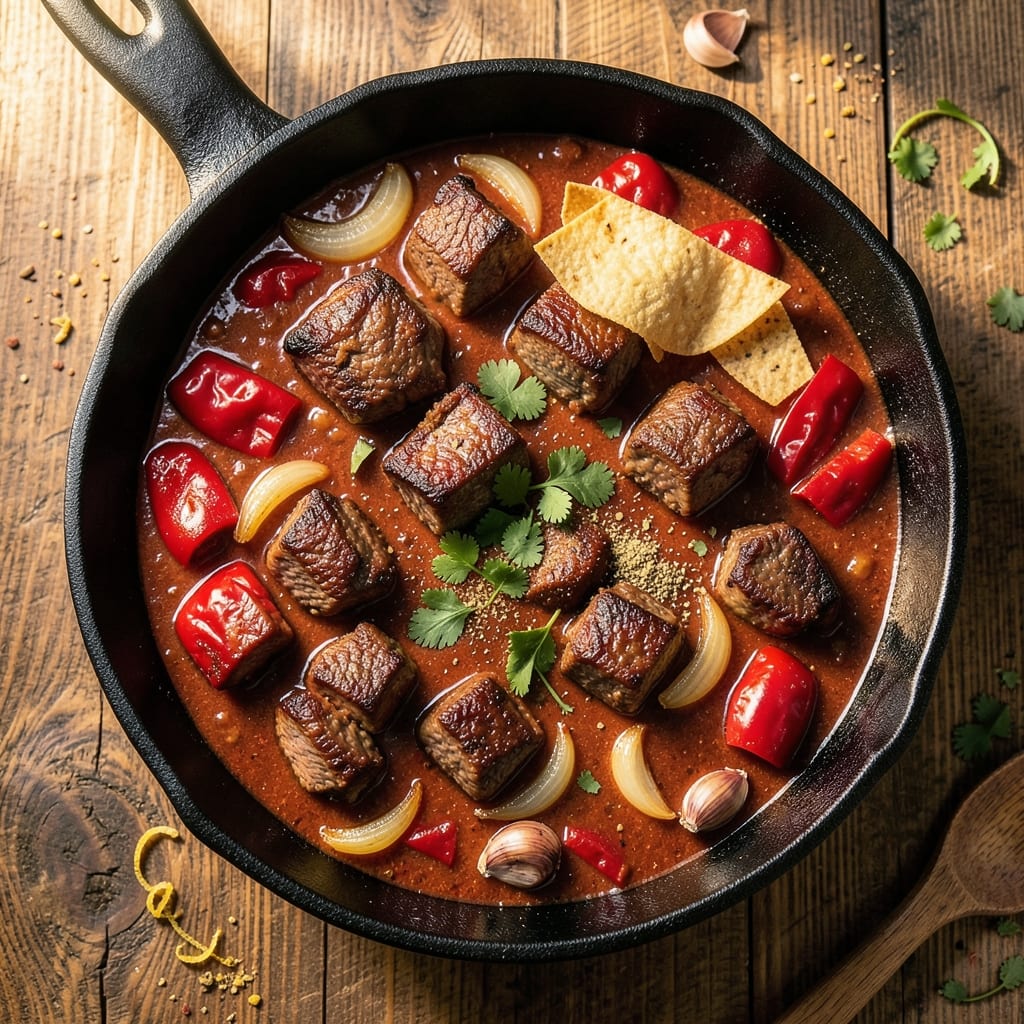
This Angus beef chili recipe transforms tough cuts into melt-in-your-mouth chunks with deep, smoky umami flavors that linger long after the last bite. The secret lies in slow-browning the beef and layering spices in the right order—first toasted, then simmered—to build complexity without bitterness. I’ve perfected this over years of testing, balancing rich beef with just enough heat and acidity to keep it balanced.
The beauty of this recipe is its versatility—equally impressive as a weeknight dinner or a crowd-pleasing potluck dish. You’ll start with a deep, caramelized beef base, then build layers of flavor through aromatic vegetables and a blend of chili powder, cumin, and cocoa powder for depth. The result? A chili so rich and satisfying, it becomes the star of any meal.
By the time you’re done, you’ll have tender beef chunks swimming in a thick, velvety sauce with just the right amount of spice and smokiness. The texture is what sets it apart—beefy chunks that stay intact but melt in your mouth, paired with tender beans and vegetables. Serve it with cornbread, tortilla chips, or over rice to soak up every last drop.
This method works equally well in a Dutch oven, slow cooker, or Instant Pot, making it adaptable to any kitchen. The key is patience—letting flavors meld over time creates a chili that’s far more complex than anything you’d find in a can. Let’s get cooking!
Ingredients for angus beef chili
Sixteen ingredients to create melt-in-your-mouth Angus beef chunks with deep umami flavor.
| Ingredient | Amount | Notes |
|---|---|---|
| Angus Beef Chuck Roast 🥩 | 2 ½ lb | Cut into 1-inch chunks |
| Yellow Onion 🧅 | 1 whole | Diced, medium size |
| Bell Pepper 🌶️ | 1 whole | Any color, diced |
| Garlic Cloves 🧄 | 4 cloves | Minced, fresh preferred |
| Chili Powder 🌶️ | 2 tbsp | Smoked or mild variety |
| Ground Cumin 🌿 | 1 tbsp | Toasted for depth |
| Cocoa Powder 🍫 | 1 tbsp | Unsweetened, high quality |
| Dried Oregano 🍃 | 1 tsp | Mexican oregano preferred |
| Black Pepper 🌶️ | ½ tsp | Freshly ground |
| Salt 🧂 | 1 ½ tsp | Kosher or sea salt |
| Tomato Paste 🍅 | 2 tbsp | Smooth, not chunky |
| Beef Broth 💧 | 3 cups | Low-sodium preferred |
| Black Beans 🌱 | 1 ½ cups | Drained and rinsed |
| Kidney Beans 🌱 | 1 cup | Drained and rinsed |
| Red Wine 🍷 | ½ cup | Bold, dry variety |
The Angus beef chuck roast is non-negotiable here—it's what gives you those tender, beefy chunks. Costco or Whole Foods usually have it pre-cut, but if you're buying a whole roast, look for good marbling. I grab mine from Costco when I'm making a big batch, but the regular supermarket chuck works fine for a weeknight. For the beans, drained and rinsed is key—skip the canned versions with added salt. The spices are where the magic happens: toasted cumin and smoked chili powder build that deep, smoky base. If you can't find smoked chili powder, mix regular chili powder with a pinch of liquid smoke.
No red wine? Beef broth with a splash of balsamic vinegar works in a pinch. The tomato paste can be from a squeeze tube if that's what you've got—Trader Joe's has great ones. For the cocoa powder, Hershey's Special Dark is my go-to, but any unsweetened will do. Want more heat? Add cayenne or crushed red pepper flakes to taste. The beans can be swapped for pinto or even lentils if you're in a hurry—canned or cooked from dry. Just make sure they're drained well. The beef broth should be low-sodium unless you're watching your salt intake, but taste as you go—you can always add more.
This chili tastes even better the next day—honestly, the flavors meld overnight into something magical. Keeps for 4-5 days in the fridge, freezes beautifully for 3 months. I always make a double batch and portion it into containers so lunches are sorted for the week. The leftovers reheat perfectly—just add a splash of broth if it gets too thick. Store the spices in airtight containers away from light, and the cocoa powder will stay fresh for up to a year if sealed properly.
Why You'll Love This Recipe
- One-Pot Magic: That chuck roast breaks down so tender it practically falls apart with a spoon—no fancy slow cooker needed. I just brown the beef, toss everything in one pot, and let it simmer while I watch whatever’s on TV. Minimal chopping, zero stress.
- Deep, Smoky Richness: Between the chili powder’s warmth and the garlic cloves caramelizing into the onions, this isn’t just chili—it’s a flavor explosion. The Angus beef adds this buttery depth that makes it taste like a restaurant dish, not a weeknight meal.
- Leftovers for Days: Seriously, this recipe stretches to feed a crowd or last through your busiest week. Reheat it for breakfast tacos, freeze half for lazy nights, or pack it in lunches—it’s that good. My freezer’s always stocked with it.
- Budget-Friendly Luxury: You’re getting high-end beef flavor without the high-end price tag. A single chuck roast feeds four, and the veggies stretch the meal further. Honestly, it’s the kind of dish that makes you feel fancy while keeping your wallet happy.
Step-by-step instructions for Angus beef chili with deep umami crunch
Here's how to transform that rich Angus beef into a chili so flavorful, it'll have everyone asking for seconds.
Sear the Beef for Maximum Flavor
Heat a large Dutch oven over medium-high heat. Add the 2.5 lb Angus beef chuck roast cut into 1-inch chunks and sear for 3-4 minutes per side until deeply browned. You're building flavor here—those caramelized edges will infuse into the chili throughout cooking. I press down gently on the beef with a spatula during the first minute to prevent curling and ensure even contact with the pan.
Once browned, remove the beef and set it aside. You'll add it back later, but first, we need to build that rich, complex base. Don't drain the browned bits—they're packed with flavor that will form the foundation of your chili. If your pan gets too crowded, work in batches to maintain proper heat.
Build the Flavor Foundation
In the same Dutch oven, add the diced yellow onion and bell pepper. Cook for 5-6 minutes until softened and beginning to caramelize. This step develops sweetness that balances the chili's heat. Add the minced garlic cloves and cook for another 30 seconds until fragrant—don't let it burn, or you'll get bitter flavors.
Stir in the 2 tbsp chili powder, 1 tbsp ground cumin, 1 tbsp cocoa powder, 1 tsp dried oregano, 0.5 tsp black pepper, and 1.5 tsp salt. Cook for 1 minute to toast the spices and release their aromas. This is where the magic happens—the spices should smell warm and inviting, not harsh or medicinal. Then add the 2 tbsp tomato paste and cook for another 30 seconds, stirring constantly.
Deglaze and Simmer the Base
Pour in the 0.5 cup red wine and scrape up all those delicious browned bits from the bottom of the pan. Let it simmer for 2-3 minutes until the wine reduces by half. This deglazing step captures all that concentrated beef flavor you worked so hard to create. The wine adds depth and complexity that transforms this from ordinary chili to extraordinary.
Add the 3 cups beef broth and bring the mixture to a gentle boil. Return the browned beef to the pot, making sure it's submerged. The liquid should come about halfway up the beef chunks. If it doesn't, add a little more broth—you want enough liquid to cook the beef properly without making the chili too watery.
Slow Cook Until Tender
Reduce heat to low and let the chili simmer uncovered for 1.5 hours. This long, slow cook time is crucial—it breaks down the tough beef fibers, creating melt-in-your-mouth chunks. Stir occasionally, but not constantly, to let the flavors develop. You'll know it's ready when the beef easily pulls apart with a fork and the chili has thickened slightly.
Here's the thing—don't rush this step. The beef needs time to transform from tough to tender. If you're short on time, you can use a pressure cooker for 45 minutes, but nothing beats the depth of flavor from slow cooking. The chili should smell rich and inviting, with layers of smoky, spicy, and umami aromas.
Finish with Beans and Adjust Seasoning
Add the 1.5 cups black beans and 1 cup kidney beans. Simmer for another 15-20 minutes until heated through. The beans should be warm all the way through, but not mushy. Taste the chili and adjust seasoning if needed—you might want to add a pinch more salt or a dash of chili powder to suit your taste.
For serving, I like to top mine with avocado slices, fresh cilantro, and a dollop of sour cream. The contrast of cool, creamy toppings against the warm, spicy chili is pure perfection. This chili tastes even better the next day as the flavors continue to meld together, so make extra if you can—it disappears quickly around here.
Pro Tips For Making Angus Beef Chili
- SEAR THE CHUCK ROAST FIRST: That beef won’t render its own fat—crank the heat to medium-high and walk away for 4-5 minutes per side until deep brown. I used to skip this, and my chili always tasted like it needed more depth. The crust locks in flavor and keeps the meat tender during the long simmer.
- CHAR THE ONIONS LOW AND SLOW: Dump those sliced onions in a dry pan and let them sit for 10 minutes on low heat before adding anything else. They’ll break down into sweet, jammy bits that dissolve into the chili—no need for extra sugar. I learned this the hard way when my chili tasted bland because the onions were still raw.
- DON’T DROWN THE GARLIC: When tossing in those minced cloves, add just enough liquid to deglaze the pan—not enough to turn the garlic into soup. A splash of beef broth or a splash of red wine works, but too much water means you’ll end up with mushy, flavorless bits. I now keep a small measuring cup handy just for this step.
- LET THE CHILI REST AFTER SIMMERING: Turn off the heat and let the chili sit covered for at least 15 minutes before serving. The flavors meld, the meat absorbs the sauce, and the texture thickens naturally—no need to over-reduce it. I was skeptical until I tried it, and now I refuse to serve chili straight off the stove.
Creative variations of these flavors
Smoky White Chili Twist
Swap the beans for 1.5 cups white beans (like cannellini or great northern) and add 1 chipotle pepper in adobo sauce, minced, to the spice blend for smoky depth. Use ½ cup coconut milk, stirred in at the end, for a creamy texture that balances the heat. Top with crumbled cotija cheese, cilantro, and lime wedges for a refreshing, lighter take that still packs serious beefy flavor. 🌶️
Breakfast Chili
Boost this chili with 2 fried eggs, cracked on top, and a sprinkle of crumbled bacon, cooked separately. Add ½ cup corn kernels, sautéed with the onions, and a pinch of cinnamon to the spice blend for a subtle sweetness. Serve with warm tortillas, flour tortillas work best, for dipping. This hearty version makes a fantastic weekend brunch—trust me, my family begs for it every Saturday morning. 🍳
Spicy Korean-Inspired Version
Replace the red wine with ½ cup gochujang, Korean chili paste, and add 1 tbsp grated ginger, minced garlic, and 1 tbsp soy sauce. Use 1 cup kimchi, chopped, along with the beans for tangy heat. Finish with sesame seeds, sliced green onions, and a drizzle of sriracha. The umami from the gochujang and soy sauce elevates the beef to new heights. 🌶️
Slow-Cooker Sweet Potato Chili
Add 1 large sweet potato, peeled and diced, to the Dutch oven with the onions and peppers. For the slow cooker version, increase the beef broth to 4 cups, add the sweet potatoes with the beans, and cook on low for 6-7 hours. The sweet potatoes add natural sweetness that balances the spice perfectly. Top with Greek yogurt, a sprinkle of smoked paprika, and a few extra sweet potato cubes for crunch. 🍠
Instant Pot Shortcut
For the Instant Pot, follow the same steps until Step 3, then add all ingredients (including beans) and cook on high pressure for 25 minutes, followed by a 10-minute natural release. The pressure cooker cuts the time dramatically while keeping the beef tender. For extra richness, stir in ½ cup beef bone broth, added at the end. This version is perfect for busy weeknights when you still want that restaurant-quality chili. ⏰
Extra Cheesy Loaded Chili
Stir in 1 cup shredded cheddar cheese, mixed with ½ cup sour cream, during the last 10 minutes, of cooking. Top with crushed tortilla chips, extra cheese, and a dollop of hot honey, for a decadent twist. The cheese melts into the chili, creating a creamy, cheesy layer that’s irresistible. Serve with cornbread muffins*, for dipping. 🧀
Nutrition facts
Frequently asked questions
Can I substitute regular ground beef for Angus beef chunks?
While you can use ground beef, you'll lose that signature tender, beefy texture that makes this recipe special. For a similar experience, try chuck roast cut into chunks or brisket—both develop rich flavor when slow-cooked. If you must use ground beef, increase the cooking time to 20-25 minutes on low heat to ensure it's fully cooked and develops depth.
How do I make this chili less spicy?
Reduce the chili powder to 1 tbsp and omit the cayenne if using. For extra mildness, add ½ cup sour cream or Greek yogurt at the end to cool the heat. You can also increase the cocoa powder to 2 tbsp—it adds depth without spice. Taste as you go and adjust gradually.
Why does my chili turn out too thin?
Chili thickens as it cooks, but if yours is too thin, it’s likely because the beef released too much liquid. To fix this, mash 1-2 tbsp tomato paste with a splash of water and stir it in, or mix 1 tbsp cornstarch with 2 tbsp cold water and whisk it into the simmering chili. Let it cook for 5 more minutes to thicken. For prevention, use a Dutch oven and reduce heat to low after adding broth.
Can I make this chili in a slow cooker or Instant Pot?
For a slow cooker, brown the beef first, then combine all ingredients (except beans) and cook on low for 6-7 hours or high for 3-4 hours. Add beans in the last 30 minutes. For an Instant Pot, follow the same steps until deglazing, then add all ingredients (including beans) and cook on high pressure for 25 minutes, followed by a 10-minute natural release. Both methods work beautifully!
What’s the best way to store and reheat leftovers?
Store chili in an airtight container in the fridge for 4-5 days or freeze for up to 3 months. To reheat, warm on the stove over medium-low heat, stirring occasionally, until hot. If it thickens too much, add a splash of beef broth. Microwaving works too—just stir well and cover with a damp paper towel to prevent drying. The flavors actually improve overnight!