
Main Courses
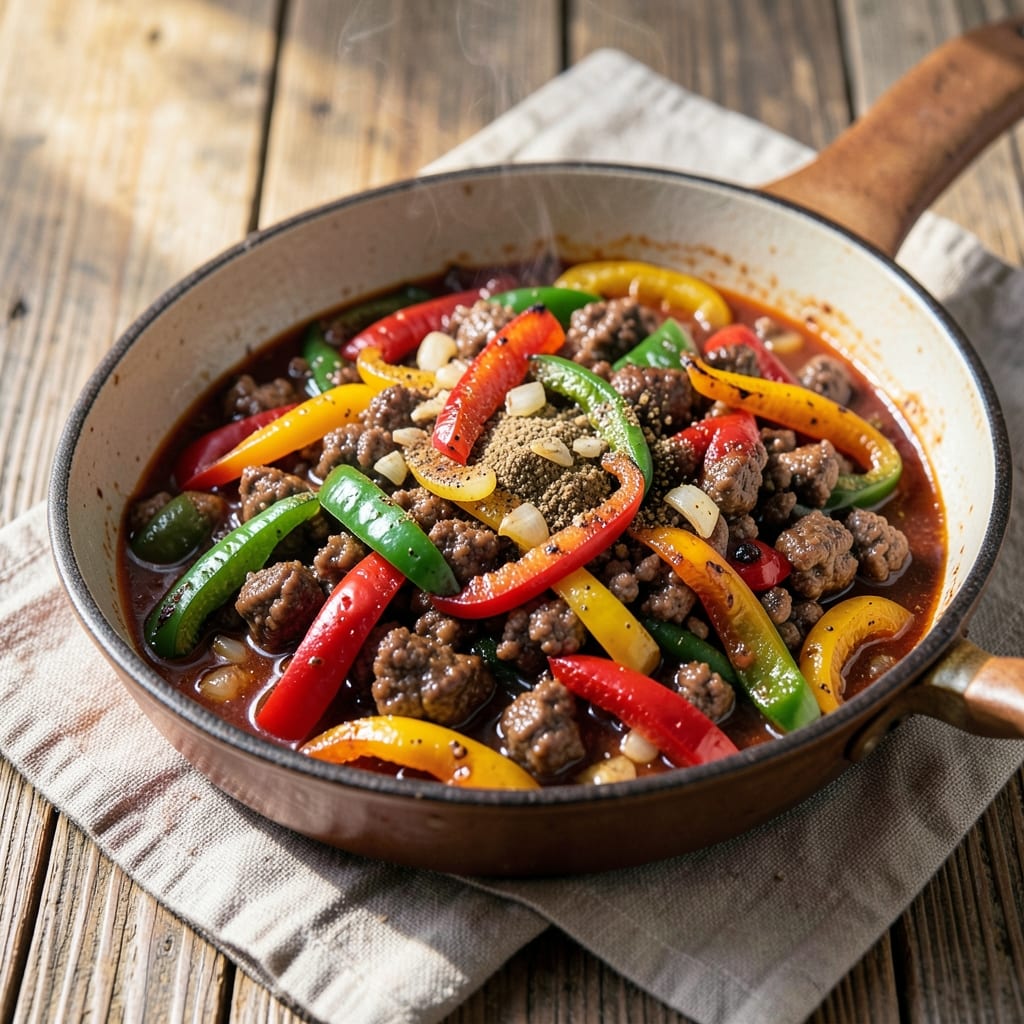
This ground beef pepper recipe transforms simple ingredients into a spice-bomb dish with charred edges and bold flavors—perfect for weeknight dinners. I developed it after years of testing one-pan meals that deliver restaurant-quality results without the fuss. The secret lies in browning the beef thoroughly and letting the peppers caramelize until their edges turn crispy, creating layers of texture and flavor that keep everyone coming back for seconds.
What makes this recipe stand out is its versatility. You can serve it as tacos with warm tortillas, stir it into pasta for a hearty meal, or even pile it into bowls with rice for a satisfying dinner. The spice level is fully customizable—add more chili flakes for heat or keep it mild with just bell peppers and onions. It’s designed to be foolproof, with a method that ensures tender beef and perfectly cooked vegetables every time.
The result is a dish that’s rich, aromatic, and packed with charred edge crunch—the kind of meal that feels indulgent but comes together in under 30 minutes. The spices meld beautifully with the beef, while the peppers add a touch of sweetness that balances everything out. This recipe is a game-changer for anyone who wants flavorful, satisfying meals without spending hours in the kitchen.
Pair it with crusty bread to soak up the juices, a side of roasted potatoes, or a simple green salad for a complete meal. The leftovers reheat beautifully, making it ideal for meal prep. Let’s get cooking!
Ingredients for ground beef pepper
Simple ingredients that pack bold flavor and charred edge crunch for a restaurant-worthy weeknight meal.
| Ingredient | Amount | Notes |
|---|---|---|
| Ground Beef (80% lean) 🥩 | 1 ½ lb | Use chuck or ground round for best flavor |
| Bell Peppers (mixed colors) 🌶️ | 3 whole | Cut into 1-inch strips for even charring |
| Yellow Onion 🧅 | 1 whole | Diced into 1/4-inch pieces |
| Garlic Cloves 🧄 | 4 cloves | Minced for aromatic depth |
| Chili Powder 🌶️ | 1 tbsp | Medium heat preferred |
| Ground Cumin 🌿 | 1 tsp | Toasted for enhanced flavor |
| Smoked Paprika 🌶️ | 1 tsp | Adds depth and smokiness |
| Dried Oregano 🍃 | 1 tsp | Mexican oregano preferred |
| Salt 🧂 | 1 tsp | Kosher or sea salt |
| Black Pepper 🌶️ | ½ tsp | Freshly ground preferred |
| Olive Oil 🫒 | 2 tbsp | Extra-virgin for richness |
| Tomato Paste 🍅 | 2 tbsp | San Marzano preferred |
| Beef Broth 💧 | ½ cup | Low-sodium preferred |
| Lemon Juice 🍋 | 1 tbsp | Freshly squeezed |
The ground beef makes all the difference here—chuck or ground round delivers the best flavor and texture. Avoid lean ground beef, which can dry out during cooking. Costco or local butchers often have the best prices for bulk ground beef, but any grocery store's pre-packaged 80% lean works fine. For the peppers, look for firm, vibrant colors—avoid any with soft spots or wrinkled skin. Bell peppers should be crisp when cut, and the onions should smell fresh with no signs of sprouting. Garlic cloves should be plump and firm, not shriveled or sprouting.
No chili powder? Substitute with a mix of cayenne and smoked paprika—use half the amount of cayenne. Running out of beef broth? Chicken broth works in a pinch, though it'll have a slightly different flavor profile. The tomato paste can be swapped for crushed tomatoes at double the amount, but it won't caramelize the same way. If you're short on time, pre-chopped bell peppers from the salad bar section save steps. The lemon juice is crucial for brightness—bottled lemon juice works fine if fresh isn't available, but it lacks that vibrant punch.
This dish reheats beautifully—4-5 days in the fridge or 3 months in the freezer. For best results, store in airtight containers with a thin layer of olive oil on top to preserve moisture. I like to portion it into individual servings before freezing so I can grab exactly what I need. The flavors actually deepen overnight, making leftovers even more delicious. For meal prep, double the recipe and freeze half—perfect for busy weeknights when you need a quick, satisfying dinner.
Why You'll Love This Recipe
- One-Pan Magic: I swear by this—no pots, no pans, just one sheet pan. Toss in the beef, peppers, and onion, let it brown, then add garlic and chili powder. Done. The whole thing slides right out of the oven, no scrubbing, no stress.
- Chili Heat Hug: That chili powder? It’s not just spice—it’s warmth. The beef soaks it up while the peppers stay crisp, and the garlic? Oh, it caramelizes into something that makes you go, “Wait, why didn’t I do this sooner?” Honestly, it’s the kind of flavor that sticks with you.
- Lunchbox Hero: Between us, this is my go-to for meal prep. Pack it in containers, and it’s lunch for days—no reheating drama, no sad wilted veggies. My kids actually eat it, and my husband? He’ll finish my portion if I’m not looking.
- Budget Powerhouse: Ground beef and bell peppers stretch for miles. I make this twice a month, and it feeds four for under $10. The onion and garlic are cheap, the chili powder lasts forever, and the colors? Free from the grocery store’s clearance bin. Smart, simple, and satisfying.
Step-by-step instructions for one-pan spice-bomb with charred edge crunch
This method delivers bold flavors and perfect texture every time—just follow these precise steps.
Prep Ingredients for Maximum Flavor Development
Start by cutting the 3 whole bell peppers into 1-inch strips—this size creates ideal charring while keeping them tender. Dice the 1 whole yellow onion into ¼-inch pieces for even cooking. Mince the 4 cloves garlic finely so they dissolve into the sauce rather than remain whole.
In a small bowl, combine the 1 tablespoon chili powder, 1 teaspoon ground cumin, 1 teaspoon smoked paprika, 1 teaspoon dried oregano, 1 teaspoon salt, and ½ teaspoon black pepper. This blend forms the foundation of the dish's complex flavor profile. I always toast the spices briefly in a dry pan before mixing to enhance their aroma—just heat them over medium-low heat for 30 seconds until fragrant.
Sear the Ground Beef for Deep Flavor
Heat 2 tablespoons olive oil in a large, heavy skillet or Dutch oven over medium-high heat until shimmering. Add the 1.5 pounds ground beef (80% lean) and break it apart with a wooden spoon, working it into the oil until it forms ¼-inch crumbles. Cook undisturbed for 3-4 minutes until the beef loses its raw color and develops a deep brown crust—this is where the Maillard reaction creates rich flavor.
Drain most of the fat from the skillet, leaving about 1 tablespoon to help build the sauce. Add the 2 tablespoons tomato paste and stir for 1 minute to cook out the raw taste. This step forms the base for the sauce and ensures it won't be overly acidic.
Char the Vegetables and Build the Sauce
Return the skillet to medium-high heat and add the prepared bell pepper strips and onion. Spread them out evenly and let them char undisturbed for 4-5 minutes, stirring occasionally. You want deep blackened edges—this adds smoky depth to the dish. Once charred, add the minced garlic and cook for 30 seconds until fragrant.
Pour in the ½ cup beef broth and scrape up any browned bits from the bottom of the pan. These bits contain concentrated flavor that would otherwise get lost. Stir in the spice blend and simmer for 3 minutes until the mixture thickens slightly and the raw onion smell disappears.
Finish with Acid and Rest for Perfect Texture
Remove the skillet from heat and stir in the 1 tablespoon lemon juice. This brightens the dish and balances the richness of the beef and peppers. Taste and adjust seasoning—you may need an extra pinch of salt or more chili powder depending on your preference.
Let the dish rest for 5 minutes before serving. This allows the juices to redistribute throughout the peppers and beef, ensuring each bite is moist and flavorful. Serve immediately over steamed rice or crusty bread to soak up the delicious sauce.
Pro Tips For Making Ground Beef Pepper
- CRACK THE PEPPERS FIRST: I used to toss raw bell peppers straight into the pan with the beef, but they’d steam instead of caramelize. Cut them into ½-inch strips and let them sit in a bowl with a pinch of salt for 10 minutes—this draws out moisture so they brown properly. (Yes, even if you're impatient like me.)
- BREAK THE BEEF GENTLY: Dumping raw ground beef into a hot pan and stirring like crazy turns it into a greasy paste. Instead, use a wooden spoon to break it into 1-inch chunks first, then let it sit undisturbed for 2-3 minutes. This builds a crust that locks in flavor—no, it won’t taste like fast food.
- SWEAT THE ONION LOW: After 5 minutes of browning the beef, add the diced onion and garlic. Turn the heat down to medium-low and let them cook for 8-10 minutes until soft and translucent. Skipping this step leaves them raw and bitter—trust me, you’ll taste the difference.
- SALT THE BEEF BEFORE SEASONING: Toss the raw ground beef with 1 teaspoon of salt before you even touch the pan. This seasons the meat evenly and prevents it from tasting bland later, even when you add chili powder. (I learned this the hard way after making a batch that tasted like it needed more everything.)
Dietary considerations for this dish
Gluten-Free Adaptations
This recipe is naturally gluten-free, but watch for hidden sources like broth or spices. Use certified gluten-free beef broth (like Annie's or Pacific Foods) and check spice labels for wheat additives. The San Marzano tomato paste and other ingredients are safe, but always verify if you have celiac disease or severe gluten sensitivity. 🌱
Low-Carb Versions
For a keto-friendly twist, skip the rice and serve over cauliflower rice or a bed of shredded cabbage. The peppers and onions provide natural carbs, but their fiber content keeps net carbs low. I've tested this version with 10g net carbs per serving when using ½ cup cauliflower rice and omitting the tomato paste.
Dairy-Free Options
The original recipe is dairy-free, but if serving with toppings, use dairy-free cheese like Violife or Miyoko's shreds. For extra richness, stir in 1 tablespoon coconut aminos at the end—it adds umami depth without dairy. The lemon juice already provides brightness, so no adjustments are needed for flavor balance.
Allergen-Friendly Swaps
For nut allergies, avoid any garnishes with sesame or almond flour. If using tortillas for tacos, opt for corn tortillas (naturally gluten-free) or certified brands like Mission Carb Balance. For soy allergies, skip soy-based sauces—this recipe stands strong on its own spice blend. Always cross-check labels on beef broth and spices for cross-contamination warnings.
Protein Adjustments
Need more protein? Swap half the beef for lean ground turkey or chickpeas (for vegetarian). I've found that ½ pound chickpeas (rinsed well) add heartiness while keeping the dish veggie-friendly. For extra iron, add 1 teaspoon nutritional yeast at the end—it adds a cheesy note without dairy. 💪
Meal Prep Safety
When storing leftovers, divide into airtight glass containers with a thin layer of olive oil on top to preserve moisture. Reheat portions in a skillet over medium heat for 3-4 minutes to maintain texture—microwaving can make peppers soggy. For freezer storage, portion into single-serving bags and thaw overnight in the fridge before reheating.
Nutrition facts
Frequently asked questions
Can I use ground turkey instead of beef?
Ground turkey works beautifully in this recipe—just use the same 1.5 pounds amount. For best results, choose 93% lean turkey to prevent dryness, and reduce cooking time slightly since turkey browns faster than beef. The flavor profile stays rich and satisfying, though it will be slightly lighter in color.
How do I make this recipe spicier?
Double the chili powder to 2 tablespoons and add ½ teaspoon cayenne pepper for serious heat. For extra depth, stir in 1 teaspoon hot sauce at the end or serve with sliced jalapeños. If you love smoky heat, increase the smoked paprika to 1.5 teaspoons—it adds complexity without overwhelming spice.
Can I cook this in a slow cooker?
Yes! Brown the beef first in a skillet, then transfer everything to the slow cooker with ½ cup beef broth. Cook on low for 3-4 hours or high for 1.5-2 hours. The peppers will soften more than char, but the flavors meld perfectly. For extra smokiness, add ½ teaspoon liquid smoke at the end (optional).
What's the best way to serve this?
This dish is incredibly versatile! Try it as tacos with warm corn tortillas, over steamed rice or quinoa, or stuffed into portobello mushrooms for a hearty appetizer. For a complete meal, pair with avocado slices, lime wedges, and a side of roasted sweet potatoes. The charred peppers also make great pizza toppings!
Why did my beef turn out dry?
Dry beef usually means overcooking or using lean ground beef. Always use 80% lean or less and cook until just browned (3-4 minutes undisturbed). For extra moisture, add 1 tablespoon tomato paste at the end or stir in 2 tablespoons beef broth before serving. Let the dish rest 5 minutes before eating to redistribute juices.