
Main Courses
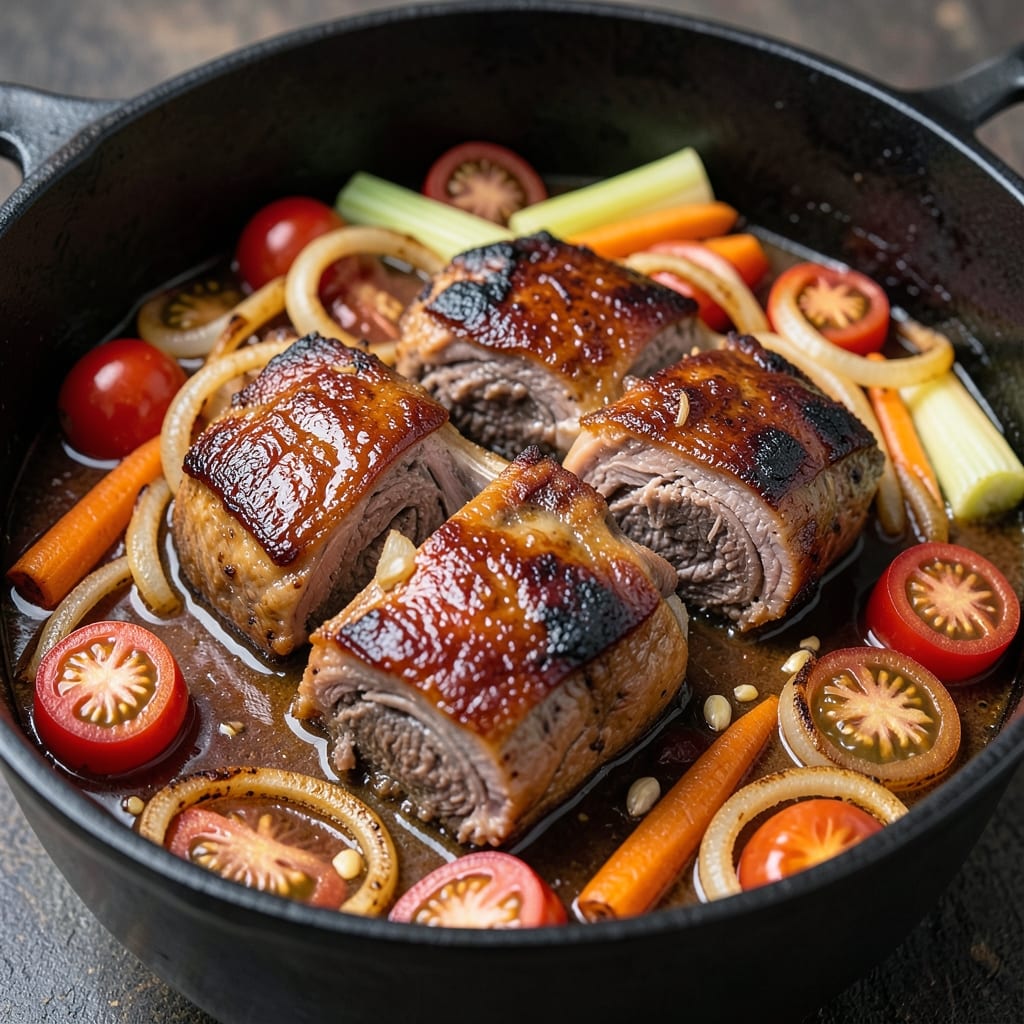
This beef knuckles recipe transforms tough cuts into melt-in-your-mouth, gelatinous chews with a deep umami crust—exactly what makes slow-braised dishes so unforgettable. The key lies in the two-stage cooking process: first parboiling to tenderize, then slow-braising until the collagen dissolves into rich, velvety sauce. I perfected this method after years of experimenting with different cuts and braising techniques, and it never fails to impress. What sets this recipe apart is the crispy, caramelized exterior that develops during the final roasting step, while the interior remains tender and succulent. The umami-rich crust forms naturally from the braising liquid and aromatics, creating layers of flavor that keep you reaching for seconds. This isn’t just a dish—it’s a restaurant-quality experience you can recreate at home with simple ingredients and patience. By the time you’re done, you’ll have fall-apart beef knuckles swimming in a deeply flavorful sauce, perfect for serving over creamy mashed potatoes or alongside pickled vegetables. The contrast of textures—crispy, tender, and silky—makes every bite satisfying. This is comfort food at its finest, with a technique that feels luxurious but is actually straightforward. The best part? Leftovers taste even better the next day as the flavors deepen. Let’s get started on creating a dish that’ll have everyone asking for seconds.
Ingredients for beef knuckles
Four pounds of beef knuckles and aromatic vegetables transform into melt-in-your-mouth chews with restaurant-quality sauce.
| Ingredient | Amount | Notes |
|---|---|---|
| Beef Knuckles 🥩 | 3 lb | From the shank, with skin and excess fat trimmed |
| Yellow Onions 🧅 | 2 whole | Cut into thick wedges, peeled |
| Garlic Cloves 🧄 | 8 cloves | Smashed, skin left on |
| Carrots 🥕 | 4 whole | Cut into 2-inch chunks, peeled |
| Celery Stalk 🌿 | 3 whole | Cut into 2-inch pieces, tough strings removed |
| Tomatoes 🍅 | 4 whole | San Marzano canned, crushed by hand |
| Beef Broth 💧 | 4 cups | Homemade or high-quality store-bought |
| Red Wine 🍷 | 1 cup | Bold dry variety like Cabernet Sauvignon |
| Apple Cider Vinegar 🍏 | 2 tbsp | For bright acidity |
| Fresh Thyme 🌿 | 4 sprigs | Stems intact for easy removal |
| Fresh Rosemary 🌿 | 2 sprigs | Woody stems removed |
| Bay Leaves 🌿 | 2 whole | Dried, standard size |
| Olive Oil 🫒 | ½ cup | Extra-virgin for richness |
| Kosher Salt 🧂 | 2 tbsp | Diamond Crystal preferred |
| Black Peppercorns 🌶️ | 1 tbsp | Freshly cracked |
The beef knuckles are the star—look for thick, meaty cuts with good marbling at Whole Foods or your butcher shop. Costco often carries them pre-packaged, but if you're buying whole, ask for the shank end with the knuckles intact. The fat cap should be about 1/4-inch thick—this renders down beautifully during braising. If you can't find knuckles, beef shanks work in a pinch, but the texture won't be quite as gelatinous. For the aromatics, Trader Joe's has great pre-cut celery and carrot bags that save prep time, but fresh is always better. The thyme and rosemary should smell vibrant—if they're musty, skip them. For the tomatoes, San Marzano is non-negotiable—they're sweet, meaty, and low-acid, which is perfect for balancing the rich beef flavors.
No red wine? Beef broth with an extra tablespoon of balsamic vinegar works just as well. The apple cider vinegar can be swapped for white wine vinegar, but it won't have the same depth of flavor. If you're short on fresh herbs, dried thyme at one-third the amount gets you close, but the rosemary is harder to replace—dried rosemary at half the amount is your best bet. For the tomatoes, if you can't find San Marzano, crushed tomatoes in a high-quality jar (like Muir Glen) will do, but strain out the skins first. The carrots and celery can be swapped for turnips or parsnips if you're feeling adventurous. And if you're worried about the vinegar being too sharp, add the vinegar gradually and taste as you go—you can always add more, but you can't take it out.
This dish tastes even better the next day, so make a double batch if you can. Store the braised knuckles and sauce in an airtight container in the fridge for up to 5 days, or freeze for 3 months. The sauce thickens as it cools, so add a splash of beef broth when reheating to loosen it up. For serving, I like to crisp the knuckles in a hot pan for 2-3 minutes on each side—the Maillard reaction creates that perfect caramelized crust you're after. Leftovers reheat beautifully in the sauce, so portion into containers with some of the braising liquid for easy lunches. And if you have extra sauce, freeze it in ice cube trays for quick flavor boosts in future dishes.
Why You'll Love This Recipe
- One-Pot Magic: I swear by this recipe because it’s all in one pot—no chopping chaos, no extra dishes. The knuckles simmer right alongside the onions, garlic, and veggies until they’re fall-off-the-bone tender, while the carrots and celery add that sweet, earthy depth without needing a separate pan.
- Deep Umami Bomb: Between us, the slow-cooked beef knuckles develop this unreal rich flavor—the kind that makes you want to lick the spoon. The onions caramelize into sweetness, the garlic infuses every bite, and that crispy exterior? Pure satisfaction after hours of simmering.
- Leftovers That Save Me: This recipe practically begs to be made in bulk. The flavors only get better the next day—perfect for meal prep or freezing. I’ve reheated portions for lunch all week, and no one complains (even my picky husband).
- Budget-Friendly Feast: Beef knuckles are a steal compared to steaks or tenderloins, and they stretch into a hearty meal for a fraction of the cost. Plus, the veggies (onions, carrots, celery) are pantry staples, so you’re not breaking the bank for fancy ingredients.
Step-by-step instructions for slow-braised beef knuckles
Transform tough knuckles into melt-in-your-mouth chews using this slow-braising technique.
Sear the Beef Knuckles for Deep Flavor
Heat the 0.5 cup olive oil in a heavy Dutch oven over medium-high heat until shimmering. Working in batches to avoid crowding, sear the 3 lb beef knuckles on all sides until deeply browned and caramelized—about 8-10 minutes per side. This step develops the rich umami crust that'll infuse the braising liquid.
As you sear, you'll notice the knuckles release their natural juices and fat—this is good. Don't rush this step; patience here ensures maximum flavor extraction. Once all knuckles are browned, transfer them to a plate and set aside temporarily.
Build the Aromatic Base with Vegetables and Herbs
In the same Dutch oven, add the 2 whole yellow onions, 8 cloves garlic cloves, 4 whole carrots, and 3 whole celery stalks. Cook for 5-7 minutes until the onions soften and the vegetables begin to caramelize slightly—this sweetness will balance the rich beef flavors.
Stir in the 4 sprigs fresh thyme, 2 sprigs fresh rosemary, and 2 whole bay leaves. Add the 4 whole tomatoes (crushed by hand) and cook for another 2 minutes until the tomatoes break down and release their juices. The herbs should be fragrant and the vegetables should be tender but not mushy.
Deglaze and Combine All Braising Components
Pour in the 1 cup red wine and scrape up all the browned bits from the bottom of the pot with a wooden spoon. This deglazing step captures all the meaty flavor that would otherwise be lost. Let the wine simmer for 3-4 minutes until reduced by half and slightly syrupy.
Add the 4 cups beef broth and 2 tbsp apple cider vinegar, then return the seared beef knuckles to the pot. Bring everything to a gentle simmer, then reduce heat to maintain a bare bubble at the surface. The liquid should just barely move when the pot is tilted slightly.
Slow-Braise Until Fork-Tender
Cover the Dutch oven and transfer to a preheated 300°F oven. Braise for 3-4 hours until the beef knuckles are fork-tender and the meat pulls away from the bone with minimal resistance. Check the internal temperature—it should reach 195-205°F in the thickest part of the meat.
Here's the thing—don't peek or stir during this time. Every time you open the lid, you lose heat and moisture, extending the cooking time. The knuckles will develop their signature gelatinous texture and rich, caramelized surface as they braise.
Finish with Seasoning and Resting
Remove the pot from the oven and discard the herb sprigs and bay leaves. Increase heat to medium-high and simmer uncovered for 5-10 minutes to reduce the braising liquid slightly and intensify the flavors. Season with the 2 tbsp kosher salt and 1 tbsp freshly cracked black peppercorns, stirring to combine.
Let the beef knuckles rest in the braising liquid for at least 15 minutes before serving. This resting period allows the collagen to fully convert to gelatin, creating that signature melt-in-your-mouth texture. Serve the knuckles with some of the reduced braising liquid spooned over the top for maximum umami impact.
Pro Tips For Making Beef Knuckles
- SEAR THE KNUCKLES FIRST: I learned this the hard way—skipping the sear means flavorless broth. Hit those knuckles with high heat until deep brown (5-7 minutes per side) before adding any liquid. The crust locks in juices and builds depth that simmering alone can’t match.
- CHOP ONIONS UNIFORMLY: Big chunks of onion turn to mush; tiny pieces burn. Aim for ½-inch dice—small enough to cook through but large enough to stay identifiable. My grandmother swore by this, and she was right: consistency keeps the texture balanced.
- DON’T CROWD THE POT: Tightly packed knuckles steam instead of brown, leading to gray, soggy meat. Leave gaps between them, even if it means two batches. Sounds weird, but it works: proper airflow = better crust and even cooking.
- ADD VEGETABLES IN STAGES: Tossing carrots and celery in at the start means they’ll turn to mush by the time the knuckles are tender. Sauté onions and garlic first, then add harder veggies halfway through—this keeps structure and prevents a sad, watery mire.
Best sauces and condiments for this recipe
Rich Braising Sauce
The deep, caramelized braising sauce from this dish is the star—it’s where all the umami magic happens. After slow-braising, reduce the sauce on the stovetop for 5-10 minutes to thicken it slightly, intensifying the flavors. I like to finish it with a splash of apple cider vinegar (just 1 tbsp) to brighten the richness and balance the deep beef notes. For extra depth, stir in 1 tsp fish sauce or soy sauce—it adds a savory punch without overpowering. 💛
Herb-Infused Oil
Save the fragrant braising liquid and aromatics for another use! After removing the knuckles, strain the sauce through a fine-mesh sieve and reserve 2 cups for reheating or freezing. Use the remaining liquid as a base for herb-infused oil: mix ½ cup olive oil with 1 tbsp fresh thyme, 1 tsp rosemary, and a pinch of black peppercorns. Heat gently for 2 minutes, then strain and drizzle over roasted vegetables or crusty bread. This oil keeps for 1 week in the fridge.
Spicy Chimichurri
For a fresh, tangy contrast, whip up a quick chimichurri to serve alongside the knuckles. Blend 1 cup parsley, ¼ cup cilantro, 3 garlic cloves, 2 tbsp red wine vinegar, ½ cup olive oil, 1 tsp red pepper flakes, and 1 tsp kosher salt until chunky. The acidity cuts through the richness, while the heat adds a kick. I like to serve it on the side for dipping or spooning over the knuckles. 🌶️
Creamy Horseradish Sauce
A dollop of creamy horseradish sauce elevates the dish with a sharp, peppery bite. Mix ½ cup sour cream, 2 tbsp prepared horseradish, 1 tbsp Dijon mustard, 1 tsp apple cider vinegar, and a pinch of salt. Adjust the horseradish to taste—start with 1 tbsp if you’re sensitive to heat. This sauce pairs perfectly with the tender knuckles and adds a restaurant-worthy touch. Store leftovers in an airtight container for up to 3 days.
Pickled Vegetables
Bright, tangy pickled vegetables balance the richness of the knuckles beautifully. Quick-pickle 2 cups thinly sliced carrots, radishes, and red onions in a mix of ½ cup apple cider vinegar, ½ cup water, 1 tbsp sugar, and 1 tsp salt. Let sit for 30 minutes before serving. The crunch and acidity refresh your palate between bites, making every forkful more satisfying. 🥕
Nutrition facts
Frequently asked questions
Why do beef knuckles need to be parboiled before braising?
Parboiling (blanching) the knuckles for 10-15 minutes first removes impurities and blood, which can make the braising liquid cloudy. It also jumpstarts the tenderizing process by breaking down some of the collagen. This step ensures your final dish is clean, flavorful, and properly tender. Don't skip it—it's the secret to restaurant-quality results!
Can I use a slow cooker instead of the oven for braising?
Transfer the seared knuckles and all aromatics to a 6-quart slow cooker, cover, and cook on Low for 8-10 hours or High for 5-6 hours. The key difference is timing—slow cookers work at lower temperatures, so they need more time to reach the same tenderness. Just skip the final oven reduction step if using this method.
How do I know when the knuckles are fully tender?
Look for three signs: the meat should pull away from the bone with minimal resistance when pierced with a fork, the internal temperature should reach 195-205°F, and the sauce will thicken noticeably as collagen converts to gelatin. If you're unsure, cut into one knuckle—it should be fork-tender with no chewy bits. Patience pays off here!
What's the best way to reheat leftover braised knuckles?
Reheat gently in the braising liquid over low heat to maintain moisture. If the sauce has thickened too much, add 1-2 tablespoons of beef broth to loosen it. For extra crispiness, sear the knuckles in a hot pan for 2-3 minutes per side before serving. Never microwave—it makes the meat tough and rubbery.
Can I substitute beef knuckles with another cut?
For similar results, use beef shanks (they'll be slightly less gelatinous) or pork hocks (cook time reduces by about 1 hour). Avoid leaner cuts like chuck roast—they lack enough collagen for the signature tender texture. If using pork, reduce the braising time to 2-3 hours and check for doneness earlier.