
Soups & Stews
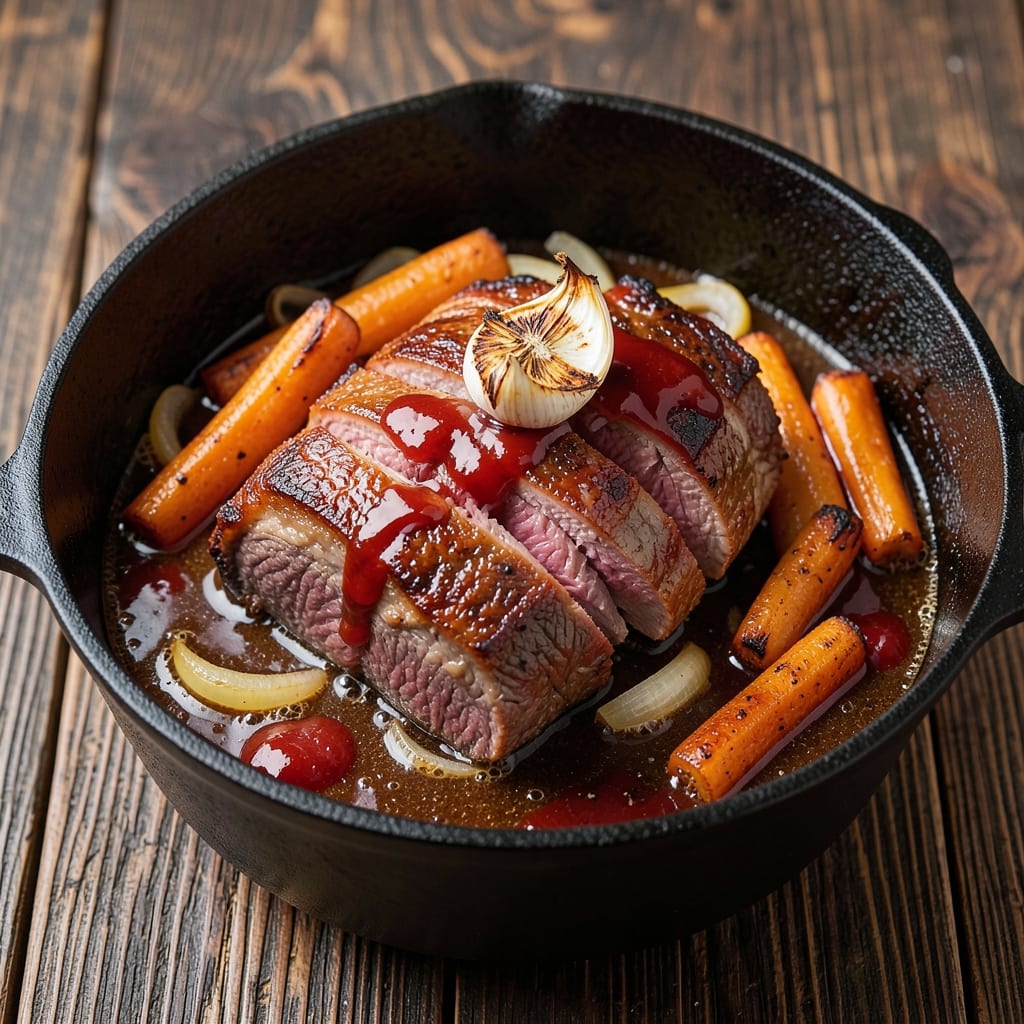
This beef and ale recipe transforms tough cuts into melt-in-your-mouth tenderness through slow braising and malty depth. The secret lies in searing the beef first to lock in juices, then letting it simmer for hours in a rich ale-based sauce until it practically falls apart. Every bite delivers a perfect balance of savory beef, caramelized edges, and that unmistakable malty richness that makes this dish unforgettable.
What sets this recipe apart is the technique of deglazing the pan with ale after searing, creating a flavorful foundation that builds as the stew simmers. The slow cooking process transforms tough chuck roast into tender slices that practically melt on your tongue, while the ale adds complexity that store-bought broths simply can't match. This is comfort food at its finest—warm, hearty, and packed with restaurant-quality flavor.
The result is a deeply aromatic stew where the beef absorbs all the malty, caramelized flavors of the ale and vegetables. The sauce thickens beautifully as it reduces, coating every piece of beef in a glossy, savory glaze. This dish pairs perfectly with crusty bread to soak up every last drop of that rich, velvety sauce. The aroma alone will have everyone gathering at your table.
Perfect for chilly evenings or special gatherings, this beef and ale recipe delivers satisfaction in every spoonful. The slow-cooked method means you can prepare it ahead and let the flavors develop even more over time. Whether you're serving it to family or impressing guests, this dish promises to be the centerpiece of your meal.
Ingredients for beef and ale
Six hearty ingredients and a malty beer create this unforgettable slow-braised masterpiece.
| Ingredient | Amount | Notes |
|---|---|---|
| Chuck Roast 🥩 | 3 lb | Tough cut for slow braising |
| Dark Ale 🍺 | 2 cups | Any malty, non-light beer |
| Yellow Onion 🧅 | 2 whole | Chopped into 1/2-inch pieces |
| Carrots | 4 medium | Peeled and cut into chunks |
| Garlic Cloves 🧄 | 6 cloves | Smashed for deeper flavor |
| Tomato Paste 🍅 | ½ cup | For rich depth of flavor |
| Beef Broth 💧 | 2 cups | Low-sodium preferred |
| Olive Oil 🫒 | 2 tbsp | For searing beef |
| All-Purpose Flour 🌾 | 2 tbsp | For thickening sauce |
| Fresh Thyme 🌿 | ½ ounce | Or 2 tsp dried thyme |
| Fresh Rosemary 🌿 | ¼ ounce | Sprig for aroma |
| Bay Leaves 🍃 | 2 whole | For subtle herbal notes |
| Salt 🧂 | 1 ½ tsp | Kosher or sea salt |
| Black Peppercorns 🌶️ | 1 tsp | Freshly cracked |
| Worcestershire Sauce 🍶 | 1 tbsp | For umami depth |
The chuck roast is non-negotiable here—it's the tough cut that transforms into melt-in-your-mouth perfection. Costco or local butchers usually have it pre-cut, but if you're buying a whole roast, ask for something with good marbling. The ale? Any dark, malty beer works—Guinness, stout, or even a robust IPA. Avoid light lagers though. Fresh thyme and rosemary are ideal, but dried works in a pinch at half the amount. The tomato paste is key for that rich, caramelized depth—Trader Joe's squeeze tubes are perfect for this since you only need half a cup.
No dark ale? Substitute with beef broth plus a splash of balsamic vinegar—it mimics that malty tang. Worcestershire sauce missing? Extra soy sauce plus a pinch of sugar gets you close. Prefer less acidity? Reduce the tomato paste to 2 tablespoons and add a splash of apple cider vinegar. The carrots can be baby carrots if that's what you've got—no need to peel them unless they're super dirty. For extra richness, add a splash of red wine along with the ale. And trust me, don't skip the Worcestershire—it's what ties all the flavors together.
This dish tastes even better the next day as the flavors meld. Store leftovers in the fridge for up to 5 days, or freeze portions for 3 months. I like to portion it into containers so lunches are ready to grab. The sauce thickens as it cools, so you might want to add a splash of broth when reheating. And if you make extra? Turn it into beef and ale tacos—just shred the beef and pile it high on corn tortillas with pickled onions and avocado.
Why You'll Love This Recipe
- One-Pot Magic: I swear by this recipe on nights when I’d rather not wash a million dishes—just dump everything into one pot, cover it, and walk away. That chuck roast practically melts into tender perfection while the ale and onions caramelize into a glossy, savory sauce.
- Rich, Deep Taste: Between us, the dark ale isn’t just for flavor—it’s the star. The bitterness balances the beef’s richness, and the garlic? Oh, it’s there, but in the best way—like a warm hug for your taste buds. (Yes, even on a Tuesday night.)
- Leftovers That Shine: This dish actually improves the next day, which is rare. I’ll make a double batch on Sundays and reheat slices for sandwiches or toss them into pasta—every time, it’s just as good, if not better, than the first bite.
- Budget Beef Boost: A chuck roast is cheap, but it feels like a fancy cut when it’s slow-cooked in ale until fall-apart tender. Honestly, I’ve served this at potlucks and no one’s ever guessed it wasn’t a $20 cut—just smart shopping and a little patience.
Step-by-step instructions for slow-braised beef and ale
Here's how to transform tough chuck roast into melt-in-your-mouth beef with deep malty richness.
Sear the Chuck Roast for Maximum Flavor
Heat a heavy Dutch oven over medium-high heat until very hot. Add the 2 tablespoons olive oil and let it shimmer for 1 minute. Pat the 3 lb chuck roast completely dry with paper towels—this ensures a proper sear. Place the roast in the pot and sear on all sides until deeply browned, about 8-10 minutes total.
Here's the thing—don't rush this step. You want that beautiful crust that'll carry through the braising. If the pan gets too crowded, sear in batches. Once browned, remove the roast and set it aside on a plate. You'll notice the bottom of the pot has those gorgeous browned bits—don't scrape them out yet, we'll use them later.
Build the Aromatic Base
In the same Dutch oven, add the 2 whole yellow onions chopped into ½-inch pieces, 4 medium carrots cut into chunks, and 6 smashed garlic cloves. Cook for 5-6 minutes until the onions soften and the carrots begin to caramelize slightly. Stir occasionally to prevent burning.
This is where the magic starts. The caramelization from the vegetables adds layers of sweetness that'll balance the beer's bitterness. If you notice the vegetables sticking, add a splash of the 2 cups dark ale to deglaze. Pour in the 0.5 cup tomato paste and stir well to coat everything. Let this cook for 2 minutes until the tomato paste darkens slightly.
Deglaze and Combine All Ingredients
Pour in the 2 cups dark ale and scrape up all those browned bits from the bottom of the pot with a wooden spoon. This deglazing step captures all the meaty flavor that would otherwise stick to the pan. Let the mixture simmer for 3-4 minutes until it reduces by about half and the alcohol smell dissipates.
Now return the seared chuck roast to the pot. Add the 2 cups beef broth, 1.5 teaspoons salt, 1 teaspoon black peppercorns, 1 tablespoon Worcestershire sauce, and the 2 whole bay leaves. Bring everything to a gentle simmer, then cover the pot with a tight-fitting lid. The liquid should come about halfway up the roast.
Slow Braise Until Fork-Tender
Transfer the Dutch oven to a 300°F oven and braise for 3 hours. Here's where patience pays off—this low-and-slow cooking transforms tough chuck into tender, pull-apart beef. After 3 hours, check the internal temperature. It should read 195-200°F in the thickest part of the roast.
If the liquid has reduced too much and the roast isn't fully submerged, add ½ cup hot water or beef broth. The roast should feel like butter when you press it with tongs. If it's not quite there yet, return it to the oven for another 30-60 minutes. Real talk: this is the moment that matters—don't rush it.
Finish with Herbs and Rest
Remove the roast from the pot and transfer it to a cutting board. Tent loosely with foil and let it rest for 15-20 minutes. While it rests, remove and discard the bay leaves. Add the 0.5 ounce fresh thyme and 0.25 ounce fresh rosemary sprigs to the braising liquid. Simmer uncovered for 5 minutes to infuse the sauce with their aromas.
Strain the sauce through a fine-mesh sieve into a bowl, pressing on the vegetables to extract all the flavor. Discard the solids. The sauce should be thick and rich, with just the right consistency to coat the beef. Slice the roast against the grain into ¼-inch thick slices and serve with the sauce spooned over the top.
Pro Tips For Making Beef And Ale
- SEAR THE ROAST FIRST: Chuck roast loves a good crust, so hit it with a screaming-hot pan—no oil needed. I used to skip this and wondered why the flavor felt flat; that caramelized layer locks in the ale’s richness when it braises.
- USE STALE ALE: Fresh ale is too fizzy and will make your stew bubble over like a science experiment. Grab one that’s been open for a few days (or even a bottle that’s been sitting in your fridge for weeks)—it’s less aggressive and lets the flavor shine.
- CHOP ONIONS UNEVENLY: Big chunks of onion caramelize better and stay intact longer in the braise. I learned this after mashing mine into oblivion and ending up with mushy, flavorless pulp. Aim for 1-inch pieces—some thick, some thin, but nothing smaller than a dime.
- SKIP THE CROWDED PAN: If you pile everything in the pot at once, the carrots and onions will steam instead of caramelize. Sear the meat first, then set it aside and build layers of flavor in the pan—onions first, then garlic, then carrots—before adding the ale and returning the beef.
Pro cooking tips for this recipe
Sear Like a Pro
Pat the chuck roast completely dry before searing—this creates that perfect crust. Use a heavy Dutch oven (I swear by Le Creuset) and medium-high heat until the oil shimmers. Sear each side for 3-4 minutes until deep brown. Pro tip: If your pan gets crowded, sear in batches to avoid steaming instead of browning. 🔥
Deglaze with Precision
After removing the roast, don’t scrape out those golden browned bits—they’re flavor bombs! Pour in 2 cups dark ale (I love Guinness or Samuel Smith’s Nut Brown Ale) and scrape vigorously with a wooden spoon. Let it simmer for 3-4 minutes until the alcohol smell dissipates—this ensures a smooth, rich sauce. The key is patience here; rushing leads to a thin, bitter liquid.
Low-and-Slow Wins
The 300°F oven is non-negotiable for tender beef. Cover the pot tightly and let it braise for 3 hours—no peeking! Check the internal temperature at 195-200°F in the thickest part. If the sauce reduces too much, add ½ cup hot beef broth to keep the roast submerged. Trust me, this is where the magic happens. ⏰
Herb Infusion Trick
After resting the roast, add fresh thyme and rosemary to the braising liquid and simmer uncovered for 5 minutes. This step infuses the sauce with aromatic depth without overpowering the beer’s malty notes. Strain the sauce through a fine-mesh sieve to remove any herb stems—smooth texture is everything. The result? A velvety, herbaceous sauce that clings perfectly to the beef.
Resting Matters
Never skip the 15-20 minute rest—this lets the juices redistribute, ensuring every slice is moist. Tent the roast loosely with foil and let it sit while you finish the sauce. Skipping this step means dry, stringy beef. I’ve learned this the hard way—don’t be that person! The wait is worth it for that first forkful of tender perfection. 💫
Sauce Thickening Hack
If your sauce is too thin after braising, mix 2 tbsp all-purpose flour with 1 tbsp cold water to form a slurry. Stir it into the sauce and simmer for 2-3 minutes until thickened. For extra richness, whisk in 1 tbsp butter at the end. This trick ensures a luscious, clingy sauce that’ll have everyone asking for seconds. It’s a game-changer for presentation too!
Nutrition facts
Frequently asked questions
Can I substitute ale with another type of beer or non-alcoholic option?
For a non-alcoholic version, use 2 cups beef broth plus 1 tablespoon balsamic vinegar to mimic the malty depth. For beer substitutes, dark stouts or porters work best—avoid light lagers as they lack the rich flavor. If using wine, opt for a dry red like Cabernet Sauvignon (1 cup) mixed with 1 cup beef broth for balance.
How do I know when the beef is tender enough?
The beef should reach an internal temperature of 195-200°F in the thickest part. When you press it gently with tongs, it should feel like butter and nearly fall apart. If it's not quite there after 3 hours, add ½ cup hot broth and cook another 30-60 minutes. Never rush this step—patience is key for perfect texture!
Can I make this recipe on the stovetop instead of the oven?
Yes, but it'll take longer! After braising on the stovetop for 2.5-3 hours at a gentle simmer (covered), check for doneness. Keep the heat low to prevent boiling, which can make the beef tough. For best results, use a heavy pot with a tight lid and stir occasionally to prevent sticking. The oven method is still preferred for even cooking.
What's the best way to reheat leftovers?
Gently reheat leftovers in a saucepan over low heat with a splash of beef broth or water to prevent drying. Avoid microwaving as it can make the sauce watery. For extra richness, stir in 1 tablespoon butter while reheating. Leftovers taste even better the next day as flavors meld—store in the fridge for up to 5 days or freeze for 3 months.
Why did my sauce turn out too thin?
This usually happens if the liquid reduced too much or the beef wasn't submerged enough. To fix it, mix 2 tablespoons flour with 1 tablespoon cold water to make a slurry, then stir into the sauce and simmer for 2-3 minutes until thickened. For extra richness, whisk in 1 tablespoon butter at the end. Always keep the beef partially submerged during cooking to prevent this!