
Soups & Stews
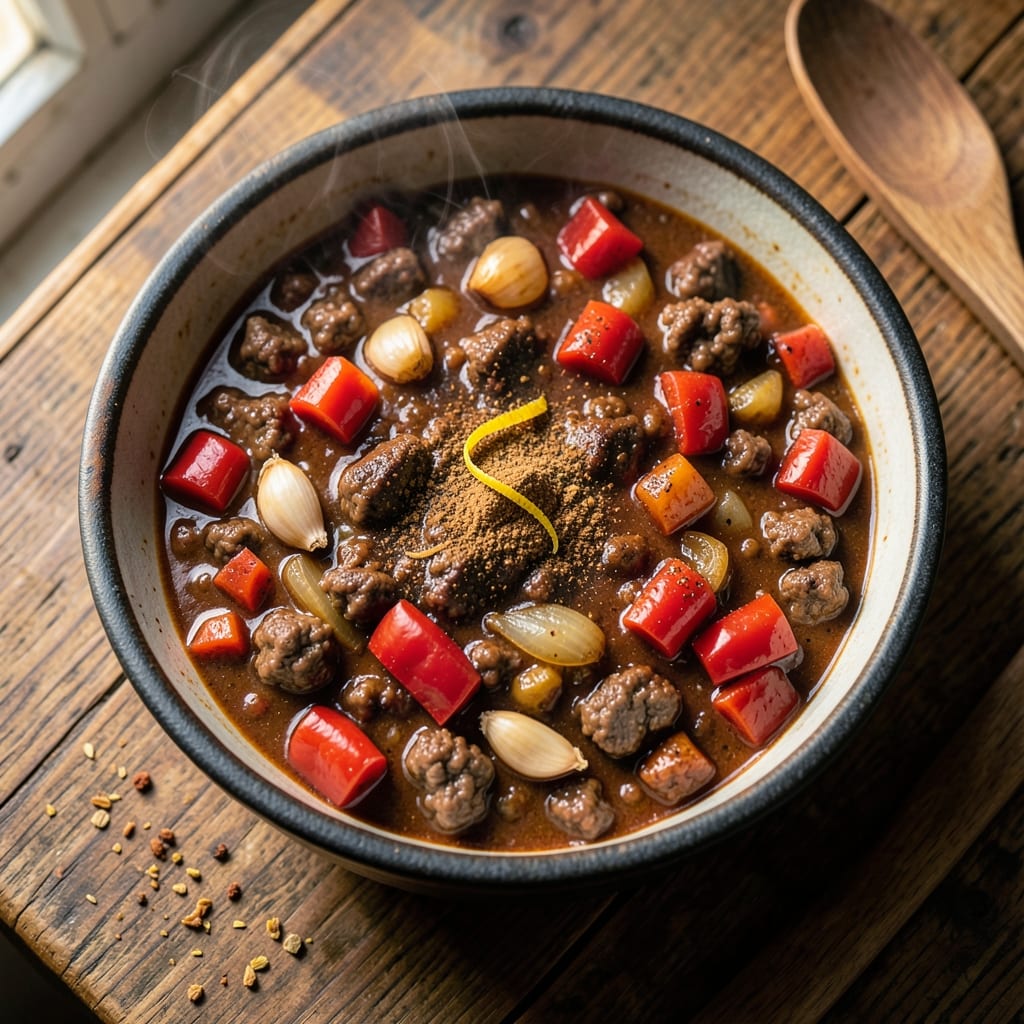
This beanless beef chili recipe delivers the deep, smoky umami flavor you crave without a single bean in sight. 🔥 The secret lies in slow-browning ground beef until it develops that rich, caramelized crust, then layering it with aromatic spices that build complexity over hours of simmering. I've perfected this version after years of testing—it's hearty enough to stand alone but flexible enough to adapt to any chili night tradition.
The foundation starts with a proper meat browning—never skip this step, as those browned bits create the depth of flavor that separates good chili from great. We then build the base with onions, garlic, and bell peppers cooked until they're sweet and tender, creating a flavor bridge between the beef and the smoky spices. The real magic happens in the slow simmer, where cumin, chili powder, and a touch of cocoa powder meld into a cohesive, aromatic blend that coats every bite.
What you'll end up with is a chili that's rich, slightly spicy, and packed with meaty texture—no beans needed to satisfy. The broth is thick enough to cling to spoonfuls of rice or tortilla chips but still velvety smooth. Each bite delivers layers of smoky heat, savory beef, and subtle sweetness from the caramelized vegetables. This isn't just chili; it's a restaurant-quality bowl of comfort that comes together in one pot.
Serve it topped with your favorite fixings—shredded cheese, sour cream, or fresh cilantro—but the chili itself stands strong on its own. The recipe scales perfectly for meal prep or feeding a crowd, and the flavors only deepen overnight. Let's get cooking—this chili will become your new weeknight staple.
Ingredients for beanless beef chili
Six hearty ingredients build this smoky, umami-rich chili without a single bean in sight.
| Ingredient | Amount | Notes |
|---|---|---|
| Ground Beef (Chuck) 🥩 | 2 lb | 80/20 fat ratio preferred |
| Yellow Onion 🧅 | 1 whole | Medium-sized, diced |
| Bell Pepper (Any Color) 🌶️ | 1 whole | Medium, diced |
| Garlic Cloves 🧄 | 4 cloves | Freshly minced |
| Chili Powder 🌶️ | 2 tbsp | Medium heat preferred |
| Ground Cumin 🌿 | 1 tbsp | Toasted for depth |
| Smoked Paprika 🌶️ | 1 tbsp | Adds smoky richness |
| Unsweetened Cocoa Powder 🍫 | 1 tbsp | For deep umami |
| Tomato Paste 🍅 | ½ cup | No-sugar-added preferred |
| Beef Broth (Low-Sodium) 💧 | 2 cups | Homemade or quality brand |
| Black Coffee ☕ | ¼ cup | Cold brew works best |
| Apple Cider Vinegar 🍏 | 1 tbsp | Brightens flavors |
| Kosher Salt 🧂 | 1 ½ tsp | Adjust to taste |
| Black Pepper 🌶️ | ½ tsp | Freshly ground |
| Dark Brown Sugar 🍬 | 1 tbsp | Enhances caramelization |
The beef is non-negotiable—chuck roast ground to 80/20 fat ratio gives you that perfect balance of tenderness and rich flavor. Costco or Trader Joe's usually carry pre-ground chuck, but if you're buying whole, ask the butcher to grind it fresh. That extra fat renders down beautifully during browning, creating the deep, caramelized crust that's the foundation of great chili. The bell pepper can be any color—red, yellow, or orange—but stick with fresh, not frozen. For the spices, Penzeys or bulk bins at natural grocery stores have the freshest ground cumin and chili powder. Toast the cumin seeds for 30 seconds in a dry pan before grinding if you want to take it to the next level.
No cocoa powder? Instant espresso powder at half the amount gives a similar depth. Short on beef broth? Water plus 1 tbsp soy sauce works in a pinch, but don't skip the umami boost entirely. The coffee is key here—it deepens the chili's complexity without adding bitterness. Cold brew concentrate from Starbucks or Trader Joe's works perfectly. For the tomato paste, Muir Glen or Rao's are my go-tos—they're consistent and flavorful. The apple cider vinegar might sound odd, but it cuts through the richness and brightens the whole dish. If you're avoiding vinegar, lemon juice at double the amount is a decent swap, though it won't be identical.
This chili tastes even better the next day as flavors meld together. Store in an airtight container in the fridge for up to 5 days, or freeze portions for 3 months. I double the recipe every time—I make a big batch on Sunday and portion it out for lunches all week. The flavors concentrate beautifully when reheated, so it's perfect for meal prep. If you're serving a crowd, this recipe scales easily—just double or triple all ingredients. The only thing I don't recommend freezing is the coffee, as it can make the chili taste bitter when thawed. Always thaw overnight in the fridge before reheating.
Why You'll Love This Recipe
- No Bean Drama: I swear by this version—no mushy textures, no waiting for beans to soften. Just ground chuck, onions, and peppers browning in the same pan while you chop garlic. It’s the kind of chili that feels finished in 30 minutes, not hours.
- Chuck Steak Magic: That rich, fatty chuck beef? It melts in your mouth but holds its shape—no dry, crumbly mess. The chili powder clings to every bite, and the bell peppers add just enough sweetness to balance the heat. Honestly, it’s the kind of flavor that makes you reach for seconds without thinking.
- Game Day Ready: Between us, this is my secret weapon for tailgates and lazy Sundays. It’s hearty enough for a crowd but simple enough to throw together when unexpected guests show up. Serve it with tortilla chips or over rice—either way, it disappears fast.
- Budget-Friendly Leftovers: A pound of chuck and a few veggies stretch this into five meals for my family. The leftovers? Even better the next day—flavors deepen, and the chili powder’s warmth lingers. I’ll be real: I often make double just to have it on hand for those nights when takeout feels like too much effort.
Step-by-step instructions for beanless beef chili
This chili delivers deep, smoky flavors without a single bean in sight—let's build it layer by layer.
🔥 Step 1: Brown the Ground Beef for Maximum Flavor
Heat a large Dutch oven over medium-high heat until hot. Add the 2 lb Ground Beef (Chuck) and break it apart with a wooden spoon, letting it brown in batches if needed. You want to see deep brown, crispy edges forming—this builds the foundation for rich flavor.
Once the beef is fully browned (about 8-10 minutes), use a slotted spoon to transfer it to a plate, leaving all the rendered fat in the pot. Don't drain the fat—it's packed with flavor that will develop into the chili's base. If the fat level looks too low, add 1 tablespoon olive oil to help with browning next time.
👨🍳 Step 2: Sauté the Aromatics and Spices
In the same Dutch oven, reduce heat to medium and add the diced yellow onion, diced bell pepper, and minced garlic cloves. Sauté for 5-6 minutes until the vegetables soften and the garlic becomes fragrant—you should smell that sweet, earthy aroma wafting through your kitchen.
Next, stir in the 2 tbsp chili powder, 1 tbsp ground cumin, 1 tbsp smoked paprika, and 1 tbsp unsweetened cocoa powder. Cook for 1 minute to toast the spices slightly, which deepens their flavors. Here's where it gets fun—the cocoa powder might seem unusual, but it adds that rich umami depth that makes this chili truly special.
🍳 Step 3: Build the Chili Base with Tomato Paste
Pour in the 0.5 cup tomato paste and stir vigorously to combine with the spices. Cook for 2-3 minutes until the paste darkens slightly and the raw tomato flavor mellows. This step creates the chili's backbone—don't rush it, as proper cooking develops the tomato's natural sweetness.
Add the browned beef back to the pot along with the 2 cups beef broth (low-sodium), 0.25 cup black coffee, 1 tbsp apple cider vinegar, 1.5 tsp kosher salt, 0.5 tsp black pepper, and 1 tbsp dark brown sugar. Stir well to combine all ingredients. The coffee and vinegar might seem unexpected, but they brighten the flavors and balance the richness beautifully.
🔥 Step 4: Simmer Until Thick and Flavorful
Bring the chili to a boil, then reduce heat to low and let it simmer uncovered for 45-60 minutes. Stir occasionally to prevent sticking, and taste after 30 minutes—this is when you can adjust seasoning if needed. You're looking for a thick, rich consistency with deep, complex flavors developing.
Here's the thing about this chili—the longer it simmers, the better it tastes. The flavors meld together beautifully, and the coffee and cocoa powder deepen in complexity. The chili should reduce slightly, becoming thick enough to coat the back of a spoon. If it gets too thick before it's fully cooked, add 1-2 tablespoons water to reach your desired consistency.
⏰ Step 5: Rest and Serve with Perfect Texture
Once the chili reaches your desired thickness and flavor intensity, remove it from heat and let it rest for 10 minutes. This resting period allows the flavors to fully meld together and the chili to thicken slightly as it cools. Taste again after resting—you'll notice how much more balanced and cohesive the flavors have become.
Serve the chili hot, garnished with fresh cilantro or chopped green onions if you like. The texture should be rich and thick, with tender beef and well-developed flavors. This beanless chili delivers all the hearty satisfaction of traditional chili without any beans—just deep, smoky, umami-packed goodness in every bite.
Pro Tips For Making Beanless Beef Chili
- CRISP THE PEPPERS FIRST: Toss sliced bell peppers in a dry pan for 2-3 minutes before adding onions—this jumpstarts their flavor and prevents them from turning mushy later. I learned this the hard way when my chili ended up with sad, waterlogged peppers that didn’t hold up.
- SWEAT THE ONIONS LOW: Don’t rush the onions—cook them on medium-low for 8-10 minutes until they’re golden and translucent. Rushing this step makes the chili taste raw and dull, and it’s the foundation for everything else.
- BROWN THE BEEF WELL: Break the chuck into small chunks and sear it in batches until deeply browned (not just pink). This adds depth of flavor that no amount of spices can replace. Yes, it takes longer, but your chili will taste like it’s been simmering for hours.
- SALT THE GARLIC: Toss minced garlic in a pinch of salt before adding it to the pan—this prevents burning and makes it release its flavor more evenly. I was skeptical until I tried it, and now I never cook garlic without it.
Essential equipment for perfect results
Dutch Oven Essentials
Your Dutch oven is the star of this recipe—it's deep enough to handle the beef's rendered fat while providing even heat distribution for slow simmering. I swear by a Lodge 5.5-quart cast iron Dutch oven because its heavy construction holds heat beautifully and develops a natural nonstick patina over time. If you don't have cast iron, a heavy stainless steel Dutch oven like All-Clad's 5.5-quart works well too. Just avoid thin, lightweight pots—they can't maintain the steady low heat needed for proper chili development. 🔥
Meat Thermometer
A good meat thermometer is non-negotiable for perfect chili texture. I use the ThermoWorks Smoke because it's accurate, durable, and has a long probe that fits perfectly in a Dutch oven. For this recipe, you're not tracking doneness (since it's ground beef), but you'll want to monitor the simmering temperature to ensure it stays between 190-200°F—this range prevents scorching while allowing flavors to meld. If you're new to thermometers, any instant-read model with a 14-inch probe will work.
Wooden Spoon
A sturdy wooden spoon is your best friend when stirring chili—it won't scratch your Dutch oven like metal utensils can. Look for one with a long handle (12+ inches) to avoid burns, and choose hardwoods like hickory or maple that can withstand high heat. I keep a Oxo Good Grips wooden spoon in my kitchen specifically for chili-making. Pro tip: Soak it in hot, soapy water for 10 minutes after each use to remove any stuck-on bits.
Slotted Spoon
This slotted spoon serves two critical functions: transferring browned beef from the pot to a plate (to prevent overcrowding), and later removing vegetables if you prefer a smoother chili texture. I recommend a 10-inch stainless steel slotted spoon with a wide base—the Ozeri Touch-Grip model has a comfortable handle that prevents slipping. Use it to skim off any foam that forms during simmering to keep your chili clear and clean.
Fine-Mesh Strainer
A fine-mesh strainer comes in handy if you want to remove any large vegetable pieces for a smoother chili texture. I use a 3-inch stainless steel strainer from OXO Good Grips—it's lightweight but sturdy enough to handle hot liquids. Simply ladle the chili through the strainer into a clean pot, then return it to the stove if you're continuing to simmer. This step isn't required but can transform your chili from rustic to restaurant-quality smoothness.
Lid with Handle
Your Dutch oven's lid with handle is crucial for controlling simmering—it helps maintain steady heat while preventing excessive evaporation. Look for a lid with a tight seal and a long handle that won't interfere with stirring. If your lid has a glass insert, remove it during simmering to prevent condensation from dripping back into the chili. I keep an extra lid handy because Dutch oven lids can get hot enough to burn fingers if handled carelessly. 💡
Nutrition facts
Frequently asked questions
Why does this beanless chili taste so rich without beans?
The secret lies in the deep browning of the beef and the umami-rich ingredients like cocoa powder, coffee, and tomato paste. These components create a complex flavor profile that mimics the texture and depth beans typically provide. The slow simmer allows all these flavors to meld together beautifully, resulting in a hearty, satisfying bowl of chili.
Can I make this chili in a slow cooker?
Brown the beef first in a skillet, then transfer everything to your slow cooker. Cook on low for 6-8 hours or high for 3-4 hours. The slow cooker method actually enhances the flavors even more, as the ingredients have even more time to develop and blend together. Just be sure to stir occasionally to prevent sticking.
How do I adjust the spice level?
Start with the 2 tbsp chili powder as written, then adjust to taste. For more heat, add ½ tsp cayenne pepper or 1 diced jalapeño (seeds removed for mild heat). If you prefer milder chili, reduce the chili powder to 1 tbsp and add ½ tsp sweet paprika instead. Always taste before serving to achieve your perfect balance.
What's the best way to reheat leftovers?
Reheat in a pot over medium-low heat, stirring occasionally until hot throughout (5-7 minutes). For microwave reheating, cover with a damp paper towel and heat in 30-second intervals, stirring between each interval. The flavors actually improve overnight, so leftovers taste even better the next day. Store in an airtight container for up to 5 days in the fridge.
Can I substitute ground turkey or chicken?
While you can use ground turkey or chicken, the texture and flavor won't be identical. For best results, stick with 80/20 ground chuck—the fat content creates that rich, caramelized crust essential for authentic chili flavor. If you must substitute, use ground turkey with 10% fat and add 1 tbsp olive oil when browning to compensate for the lower fat content.