
Soups & Stews
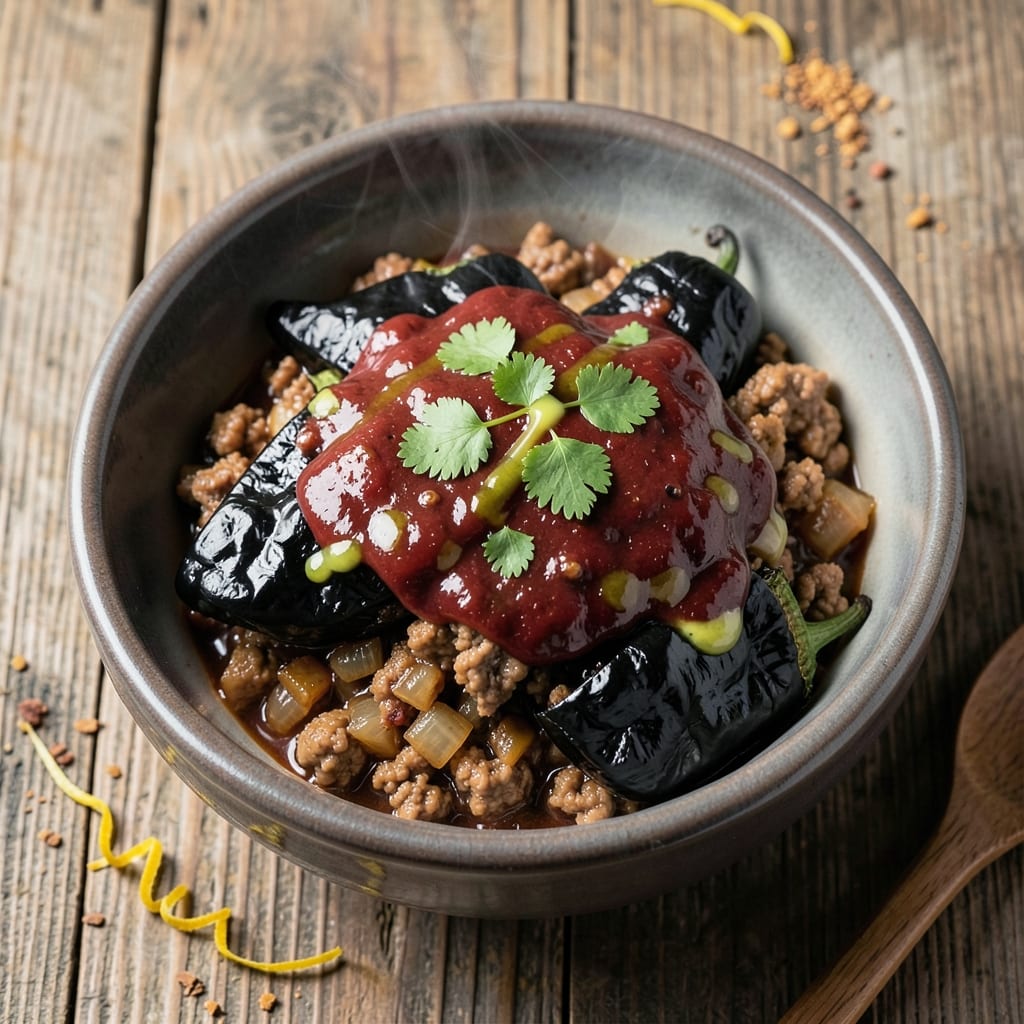
This baked beef chili relleno recipe transforms classic chili into a showstopping dish with crispy tortilla crust and layers of melted cheese. The secret starts with charring poblano peppers over an open flame to deepen their smoky flavor—this step makes all the difference. I developed this version to balance traditional techniques with modern convenience, using slow-cooked chili for rich, tender beef and a crispy tortilla topping that holds up to every bite.
The filling combines ground beef, tomatoes, and spices into a hearty chili that simmers until deeply flavorful, while the peppers get stuffed and topped with a blend of cheeses that melts into golden perfection. What sets this apart is the crispy tortilla crust—lightly fried before baking to create a satisfying crunch that contrasts beautifully with the creamy cheese. This dish delivers restaurant-quality results without requiring advanced skills.
By the time it emerges from the oven, you'll have a dish that looks impressive yet comes together with straightforward steps. The charred peppers add a smoky depth, the chili filling is rich and satisfying, and the cheese layers create a gooey, golden finish. Serve with warm tortillas or a side of rice to complete the meal—this is comfort food at its finest.
Perfect for game day gatherings or a special weeknight dinner, this recipe scales easily for crowds while keeping prep manageable. The slow-cooked chili can be made ahead, making it ideal for meal prep. Here's how to achieve that perfect balance of textures and flavors.
Ingredients for baked beef chili relleno
Sixteen ingredients for a dish that tastes like restaurant-quality comfort food.
| Ingredient | Amount | Notes |
|---|---|---|
| Ground Beef 🥩 | 1 ½ lb | Lean or 80/20 for best flavor |
| Poblano Peppers 🌶️ | 4 whole | Fresh, medium-sized, charred |
| Medium Onion 🧅 | 1 whole | Yellow or white, diced |
| Garlic Cloves 🧄 | 4 cloves | Fresh, minced |
| Canned Tomato Sauce 🍅 | 1 can | 28 oz, San Marzano preferred |
| Chicken Broth 💧 | 1 cup | Low-sodium preferred |
| Chili Powder 🌶️ | 2 tbsp | Ancho or mild variety |
| Ground Cumin 🌿 | 1 tsp | Toasted for depth |
| Salt 🧂 | 1 ½ tsp | Kosher or sea salt |
| Black Pepper 🌶️ | ½ tsp | Freshly ground |
| Large Flour Tortillas 🌯 | 6 whole | 10-inch, low-carb optional |
| Shredded Monterey Jack Cheese 🧀 | 2 cups | Freshly shredded |
| Shredded Cheddar Cheese 🧀 | 1 cup | Medium sharp |
| Sour Cream 🥛 | ½ cup | Full-fat preferred |
| Fresh Cilantro 🌿 | ¼ cup | Chopped, for garnish |
The poblano peppers are non-negotiable here—they need that charred smokiness. Look for medium-sized peppers at your local market—they should be firm but not rock-hard. If you can't char them over an open flame, broil them for 5-7 minutes until blackened. The ground beef is where the richness comes from—80/20 blend gives the best flavor, but lean works if you prefer. For the tortillas, Mission brand or any sturdy 10-inch size holds up best during frying. Pre-shredded cheese is convenient, but freshly shredded melts more smoothly—worth the extra minute. The cilantro adds freshness, but skip it if you're not a fan.
No poblano peppers? Bell peppers work in a pinch, but they won't have the same depth of flavor. Substitute 1 tbsp smoked paprika for the chili powder if you want extra smokiness. Out of chicken broth? Beef broth or water will do, though the flavor will be slightly different. For the cheese, Oaxaca or queso fresco adds a nice contrast to the sharp cheddar. If you're watching carbs, low-carb tortillas work just as well—they just need a few extra seconds in the fryer. The tortillas should be warm but not crispy before stuffing—just enough to hold their shape.
The chili filling keeps well in the fridge for 4-5 days, making this perfect for meal prep. Store the stuffed peppers separately in an airtight container, and assemble when ready to bake. The tortillas can be fried ahead and stored at room temperature for 2 days, but they're best used fresh. If you make extra chili, freeze it for up to 3 months—it reheats beautifully. For serving, I like to add a dollop of sour cream and extra cilantro right before eating. The crispy tortilla topping stays crunchy for about 10 minutes after baking, so serve it promptly.
Why You'll Love This Recipe
- One-Pan Magic: I swear by this recipe when I’m too tired to scrub pots—just brown the beef, stuff the poblanos, and bake. The onions caramelize right in the oven, so you’re left with a single pan that’s basically self-cleaning. (Yes, even on a Tuesday night.)
- Smoky Depth Bomb: That charred poblanos and garlic combo? It’s what makes this dish ridiculously good. The slow bake lets the flavors meld with the tomato sauce until every bite has this perfect balance of heat, richness, and earthiness. Honestly, the kind of flavor that makes you forget takeout exists.
- Meal Prep MVP: Between us, this is my go-to for game days, potlucks, or lazy Sundays. The stuffed poblanos hold up perfectly in the fridge—reheat in the oven or microwave, and it’s like it was just baked. Plus, it’s the kind of dish that disappears fast, so you won’t end up with sad leftovers.
- Budget-Friendly Powerhouse: Ground beef and canned tomatoes keep this cheap, but the poblano peppers (or even jalapeños in a pinch) add that restaurant-quality kick. I made a double batch last week and fed four people for under $15. Not the prettiest, but the taste makes up for it every time.
Step-by-step instructions for baked beef chili relleno
Here's the method for achieving that signature crispy tortilla crust with perfectly melted cheese layers.
Char the Poblano Peppers and Prepare Aromatics
Preheat your broiler to high. Place the 4 whole poblano peppers directly on a baking sheet and broil for 5-7 minutes, turning occasionally, until the skin is completely charred and blackened. This step develops their signature smoky depth.
While the peppers char, dice the 1 whole medium onion into small, even pieces. In a separate bowl, mince the 4 cloves garlic cloves finely. The onions should be uniformly cut so they cook evenly with the beef later. Set these aside for now.
Cook the Chili Filling
In a large skillet, heat 1 tablespoon olive oil over medium-high heat. Add the 1.5 lb ground beef and cook, breaking it apart with a wooden spoon, until it's well browned and no longer pink in the center—about 6-8 minutes. This browning creates deep flavor.
Add the diced onion and minced garlic, cooking for 3-4 minutes until the onions are translucent. Stir in the 2 tablespoons chili powder, 1 teaspoon ground cumin, 1.5 teaspoons salt, and 0.5 teaspoon black pepper, mixing well to coat the beef. Pour in the 1 can canned tomato sauce and 1 cup chicken broth, then bring to a simmer.
Reduce heat to low and let the mixture cook uncovered for 15-20 minutes, stirring occasionally, until it thickens slightly. The filling should have a rich, chunky consistency—this is your chili base. Remove from heat and let it cool slightly before proceeding.
Prepare the Tortilla Crust
Preheat your oven to 375°F. Lay out the 6 whole large flour tortillas on a clean work surface. Spread 1/3 of the chili filling evenly over each tortilla, leaving a 1-inch border around the edges. This border will help create that crispy crust.
Sprinkle 1/3 of the 2 cups shredded Monterey Jack cheese and 1/3 of the 1 cup shredded cheddar cheese over each tortilla, pressing down gently to help the cheese adhere. Fold each tortilla in half, then in half again, creating a compact square. Place the folded tortillas seam-side down in a greased 9x13-inch baking dish.
Bake to Crispy Perfection
Bake the folded tortillas for 20 minutes until the edges are golden brown and crispy. Remove the dish from the oven and carefully spread the remaining chili filling evenly over the top of all tortillas. Sprinkle the remaining 1 cup Monterey Jack cheese and 2/3 cup cheddar cheese over the filling.
Return to the oven and bake for another 10-15 minutes until the cheese is fully melted and bubbly, and the tortilla crust is deep golden brown and crispy. The filling should be hot and the cheese should have a slight pull when you gently tug at it.
Serve with Fresh Garnishes
Let the chili relleno rest for 5 minutes before slicing into 6 equal portions. Garnish each serving with 2 tablespoons of the 0.5 cup sour cream and 1 tablespoon of the 0.25 cup chopped fresh cilantro. The contrast of cool sour cream and bright cilantro against the warm, spicy filling makes every bite perfect.
Serve immediately while the tortilla crust is still crispy. The filling should be rich and flavorful, with each bite delivering that satisfying mix of textures—crispy crust, melted cheese, and tender beef chili. The dish holds well for 2-3 hours if covered loosely with foil, but it's best enjoyed fresh from the oven.
Pro Tips For Making Baked Beef Chili Relleno
- CHAR Poblano Peppers: Char those poblanos first—roast them whole over an open flame or under a broiler until blackened in spots. The smoky depth from the char is what turns a good chili relleno into something memorable, and peeling them afterward is easier than you’d think (just slide off the skin under running water).
- Sear the Beef Hard: Don’t rush the beef—break it into small crumbles and sear them in batches over medium-high heat until deeply browned. I used to skip this, and the filling always tasted flat; now I make sure every piece hits that crust. A splash of beer or broth at the end helps deglaze, but the sear is non-negotiable.
- Blanch the Onion: Slice the onion thin and blanch it in boiling water for 30 seconds before cooking. This softens it faster and keeps it from turning mushy later. I learned this the hard way after ending up with a watery filling—now I do this step while the poblanos char, and it saves time.
- Salt the Tomato Sauce: Season the canned tomato sauce with salt before mixing it into the filling—at least 1 teaspoon per can. The acidity in the sauce needs balancing, and adding salt later won’t cut through the flavors like it does upfront. Trust me, your taste buds will notice the difference.
Storing and reheating this dish
Fridge Storage Tips
Store your baked chili relleno in an airtight container for up to 3 days in the fridge. Let it cool completely before covering to prevent condensation, which can make the tortilla crust soggy. I like using glass Pyrex containers because they maintain crispness better than plastic. Reheat portions in the oven at 350°F for 10-12 minutes to restore that perfect crunch. 🥗
Freezer Prep
For longer storage, freeze the assembled dish (before baking) in a freezer-safe bag for up to 3 months. Thaw overnight in the fridge, then bake as directed. The tortilla crust won't be as crispy after freezing, but it still tastes amazing. For individual portions, wrap each serving tightly in parchment paper before freezing. 🧊
Reheating Methods
Oven reheating is best—place slices on a baking sheet at 375°F for 8-10 minutes to revive the crispy edges. For microwave reheating, cover with a damp paper towel and heat in 30-second intervals until warmed through. Add a splash of water or broth if the filling seems dry. The cheese might separate slightly, but a quick broil for 1-2 minutes fixes that. 🔥
Crispy Topping Hacks
If the tortilla crust loses its crunch after reheating, pop it under the broiler for 1-2 minutes until golden again. For extra crispiness, broil the dish for 3-4 minutes right after baking before storing. I also recommend keeping the stuffed peppers separate from the chili filling in the fridge—assemble just before baking for the freshest texture. ✨
Make-Ahead Chili
The chili filling can be made 2 days ahead and stored in the fridge. The poblano peppers should be charred and stuffed the day of baking. If prepping for a crowd, assemble the dish (without baking) and refrigerate for up to 12 hours before baking. This gives the flavors time to meld beautifully. 💡
Serving Suggestions
Serve with warm corn tortillas or Mexican rice to soak up any extra chili. For a garnish upgrade, add pickled red onions or avocado slices alongside the sour cream. The dish reheats best when served within 2 hours of baking, but the flavors improve overnight in the fridge. 🌯
Nutrition facts
Frequently asked questions
Can I substitute bell peppers for poblano peppers?
Yes, but you'll lose some authentic flavor. Bell peppers lack the smoky depth of charred poblanos. If substituting, add 1 tbsp smoked paprika to the chili filling and broil the bell peppers longer (8-10 minutes) to enhance their smokiness. The dish will still be delicious, just with a slightly different profile.
How do I prevent the tortilla crust from getting soggy?
Keep the stuffed tortillas separate from the chili filling until the final baking step. Use 1-inch borders when spreading filling on tortillas, and press cheese firmly to create a barrier. Bake the folded tortillas first (20 minutes) to crisp the edges before adding the final chili layer. This two-stage baking is key!
Can I make this dish ahead of time?
The chili filling can be made 2 days ahead and stored in the fridge. Stuff the peppers and assemble the dish (without baking) up to 12 hours before serving. For best results, bake from room temperature. The tortillas should be fried fresh the day of baking for optimal crispiness.
What's the best way to reheat leftovers?
Oven reheating preserves the crispy texture best. Place slices on a baking sheet at 375°F for 8-10 minutes. For microwave reheating, cover with a damp paper towel and heat in 30-second intervals. Add a splash of water if the filling seems dry. The cheese might separate slightly—fix this with a quick 1-2 minute broil.
Can I use ground turkey instead of beef?
Yes, but expect a slightly leaner result. Use 1.5 lb ground turkey and add 1 tbsp olive oil when browning to prevent dryness. For extra moisture, reduce the chicken broth to ½ cup. The dish will still be flavorful, just with a different texture profile that's lighter and slightly less rich.