
Soups & Stews
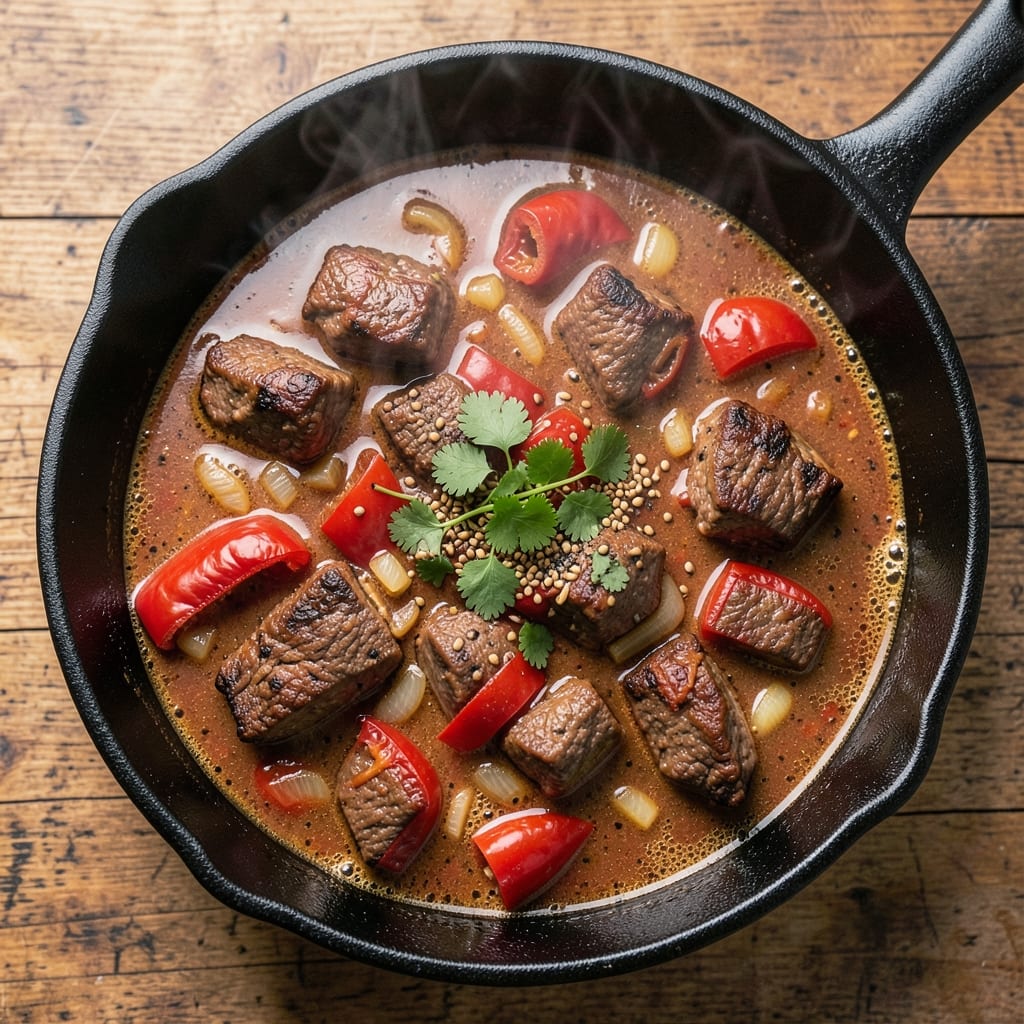
This BBQ beef chili recipe delivers the kind of deep, smoky heat that lingers long after the last bite—exactly what I crave when the weather turns crisp. 🔥 The secret lies in layering flavors: charred beef, slow-cooked spices, and a touch of sweetness that balances the fire. What makes this different is the way the BBQ-inspired rub develops during the long simmer, creating a complex depth that store-bought seasonings can't match.
Start with a proper meaty foundation—browning the beef first unlocks flavors you won't get any other way. I use chuck roast because it stays tender through hours of cooking while developing that rich, beefy taste. The spices toast in the fat, releasing their aromas before everything comes together in a simmering pot. This isn't just chili; it's a three-layered experience where smoky, sweet, and spicy flavors play off each other perfectly.
By the time it's done, you'll have chili so rich it practically melts in your mouth—with a crust of caramelized spices on top that adds texture to every spoonful. The slow cooking transforms tough meat into tender chunks, while the BBQ-inspired seasoning gives it that signature depth. Serve it with all the classic toppings: sour cream to cool the heat, cilantro for freshness, or tortilla chips for crunch.
This recipe works equally well on the stovetop or in a slow cooker, making it perfect for weeknight dinners or game day gatherings. The flavors only get better the next day, so double the batch if you can. Here's everything you need to bring that smoky, satisfying bowl of chili to your table.
Ingredients for bbq beef chili
Six ingredients for the base, plus spices that toast into smoky magic—this is your BBQ beef chili starter kit.
| Ingredient | Amount | Notes |
|---|---|---|
| Chuck Roast 🥩 | 3 lb | Cut into 1-inch cubes |
| Yellow Onion 🧅 | 1 whole | Chopped into 1/2-inch pieces |
| Bell Pepper 🌶️ | 1 whole | Any color, chopped |
| Garlic Cloves 🧄 | 6 cloves | Minced for deep flavor |
| Tomato Paste 🍅 | ½ cup | For rich, concentrated flavor |
| Beef Broth 💧 | 4 cups | Low-sodium preferred |
| BBQ Sauce 🍯 | 1 cup | Smoky, medium-sweet variety |
| Brown Sugar 🍚 | ¼ cup | Balances heat and sweetness |
| Chili Powder 🌶️ | 2 tbsp | Smoked or mild variety |
| Ground Cumin 🌿 | 1 tbsp | Toasted for deeper aroma |
| Paprika 🌶️ | 1 tbsp | Smoked for BBQ depth |
| Black Pepper 🌶️ | 1 tsp | Freshly ground preferred |
| Salt 🧂 | 1 ½ tsp | Adjust to taste |
| Cayenne Pepper 🔥 | ½ tsp | Adjust for heat preference |
| Olive Oil 🫒 | 2 tbsp | For searing beef |
The chuck roast is non-negotiable—it's the only cut that delivers that melt-in-your-mouth texture after hours of cooking. Costco or Walmart usually have it pre-cut, but if you're buying a whole roast, ask the butcher to cube it for you. Look for good marbling—those little white streaks mean more flavor. I always grab the biggest piece I can find because it's worth the extra time to sear it properly. That initial caramelization is what gives your chili its deep, meaty foundation. If you can't find chuck, stew meat is your next best bet, but it's pricier.
No smoked paprika? Regular paprika plus a pinch of liquid smoke works in a pinch (start with 1/4 tsp). Running low on BBQ sauce? Ketchup plus a dash of molasses mimics the sweetness, though it won't have that smoky backbone. The brown sugar can be swapped for maple syrup or honey if you're avoiding refined sugar—just reduce the amount by half since they're sweeter. For the broth, low-sodium is key—you'll be adding plenty of salt later. If you're using a slow cooker, you can skip the initial sear, but trust me, it's worth the 10 minutes on the stovetop for that crust of flavor.
This chili tastes even better the next day—honestly, the flavors meld into something magical after resting. Store leftovers in the fridge for up to 5 days, or freeze portions for 3 months. I always make a double batch because it disappears fast. For reheating, low and slow is best—just warm it gently on the stove or microwave in 30-second bursts. The spices lose their punch after freezing, so if you're storing long-term, add a pinch of cayenne and smoked paprika when you reheat to revive the depth.
Why You'll Love This Recipe
- Here’s what sold me: the way the slow-cooked chuck roast soaks up the BBQ spices and caramelized tomato paste, then meets the bright crunch of bell peppers. It’s rich but not heavy, with that perfect balance of heat and sweetness—like a hug in a bowl.
- One-Pot Magic: I swear by this—just chop the onion and bell pepper, dump everything in one pot, and walk away. That chuck roast practically melts into tender, saucy goodness while you stir in tomato paste and garlic for that deep, smoky base. No fancy techniques, no stress.
- Smoky Depth Bomb: Here’s what sold me: the way the slow-cooked chuck roast soaks up the BBQ spices and caramelized tomato paste, then meets the bright crunch of bell peppers. It’s rich but not heavy, with that perfect balance of heat and sweetness—like a hug in a bowl.
- Meal Prep MVP: Between us, this chili tastes better the next day. I make a double batch on Sundays, freeze half, and pull it out for lazy nights or tailgates. The flavors meld even more overnight, and reheating takes two minutes—just add a splash of water.
Step-by-step instructions for BBQ beef chili
Here's how to build rich, smoky layers of flavor that make this chili unforgettable.
🔥 Step 1: Sear the Chuck Roast for Deep Flavor
Heat a large Dutch oven over medium-high heat and add the 2 tbsp olive oil. Working in batches, add the 3 lb chuck roast cut into 1-inch cubes and sear for 3-4 minutes per side until deeply browned. This step creates the Maillard reaction that builds complex, meaty depth.
Don't crowd the pan—work in batches if needed. You're looking for deep golden brown crusts on each piece. Once all the beef is browned, transfer it to a plate and set aside. The rendered fat in the pot will become the flavor base for your chili.
👨🍳 Step 2: Build the Flavor Base with Aromatics
In the same Dutch oven, add the 1 whole yellow onion chopped into ½-inch pieces, 1 whole bell pepper chopped, and 6 cloves garlic minced. Cook for 5-6 minutes until the onions soften and the peppers begin to caramelize slightly.
Here's where it gets good—stir in the 2 tbsp chili powder, 1 tbsp ground cumin, 1 tbsp paprika, 1 tsp black pepper, 1.5 tsp salt, and 0.5 tsp cayenne pepper. Toast the spices for 30 seconds until fragrant—this wakes up their flavors and removes any raw taste. You'll smell that smoky, earthy aroma filling your kitchen.
🍳 Step 3: Layer the Sauces for Complexity
Pour in the 0.5 cup tomato paste and stir to combine with the spices. Cook for 1 minute until it darkens slightly. Then add the 1 cup BBQ sauce and 0.25 cup brown sugar, stirring to create a glossy, sticky mixture that coats all the spices.
This is where the three-layered flavor comes together: the smoky BBQ sauce, the sweet brown sugar, and the deep, concentrated tomato paste. Let it simmer for 2 minutes until it thickens slightly and becomes aromatic. You're building the flavor foundation that will carry through the entire chili.
🥘 Step 4: Simmer the Chili to Perfection
Return the seared beef to the pot along with the 4 cups beef broth. Bring to a boil, then reduce heat to low and cover partially. Let it simmer for 2.5-3 hours until the beef is fork-tender and falling apart easily.
I know it's tempting to check constantly, but resist the urge to peek. The chili needs this undisturbed time to develop its rich, smoky depth. After about 2 hours, check the consistency—if it's too thick, add a splash of water or broth. The chili should coat the back of a spoon but still be saucy enough to spoon over rice or cornbread.
⏰ Step 5: Rest and Adjust Seasoning
Once the beef is tender, let the chili rest for 15-20 minutes off the heat. This resting period allows all the flavors to meld together and the spices to bloom fully. Taste and adjust seasoning—you might need more salt or a touch of cayenne to balance the sweetness and smokiness.
Serve warm with toppings like shredded cheese, sour cream, or chopped green onions. The chili will continue to deepen in flavor as it sits, so it actually tastes better the next day. Store leftovers in the refrigerator for up to 5 days or freeze for 3 months—this chili freezes beautifully.
Pro Tips For Making Bbq Beef Chili
- Sear the Chuck Roast: Ditch the slow start—get that chuck roast screaming hot in a dry skillet for 3-4 minutes per side before adding anything. I learned this the hard way: skipping the sear means flavor that’s more suggested than there. The crust locks in juices and turns the whole pot into a flavor bomb.
- Char the Onions Low: After dicing, cook the yellow onion on medium-low heat until the edges turn dark brown and sticky—about 10 minutes. High heat caramelizes too fast, leaving them bitter. This is where the sweetness actually matters, so don’t rush it (yes, even if you’re impatient like me).
- Skip the Raw Garlic: Mince the garlic cloves first, then toss them into the pot with the onions while they’re still cooking. Raw garlic burns instantly and tastes like medicine. Cooked garlic? That’s the stuff that makes your chili sing—nutty, mellow, and impossible to ignore.
- Deglaze with Beer (or Broth): After browning the meat, hit the pot with ½ cup of beer (or beef broth) and scrape every last bit of crust from the bottom. That’s where the flavor lives, and skipping it means missing out on the richest part of the dish. Do it while the pot’s still hot—cold liquid just sits there.
Dietary considerations for this recipe
Gluten-Free Adaptation
This chili is naturally gluten-free, but watch the ingredients carefully. Use gluten-free BBQ sauce—brands like Sweet Baby Ray's Gluten-Free or Stubb's work perfectly. Double-check your beef broth label, as many contain wheat. For extra safety, I toast my spices in a dry skillet first to eliminate any cross-contamination risk from shared spice containers. 🌾
Dairy-Free Options
Skip the sour cream topping and use coconut yogurt or dairy-free sour cream instead. For the chili itself, no changes are needed—it's already dairy-free. I like adding a spoonful of nutritional yeast for a cheesy flavor without the dairy. This works especially well for those with lactose intolerance or vegan diets.
Lower-Carb Version
Swap the brown sugar for monk fruit sweetener or erythritol to cut carbs without sacrificing sweetness. Use cauliflower rice instead of regular rice as a side. For extra protein, add crumbled turkey sausage or ground turkey along with the beef. This keeps the dish rich and satisfying while reducing carbs significantly.
Spice-Free Adjustments
For a milder heat level, reduce the cayenne to ¼ tsp or omit it entirely. Replace the chili powder with 2 tbsp smoked paprika and 1 tbsp mild adobo seasoning for depth without heat. The BBQ sauce already provides smokiness, so you won't miss the spice. This version works well for kids or sensitive stomachs while keeping the smoky, sweet profile intact. 🌶️
Allergen-Friendly Swaps
If nut allergies are a concern, avoid nutritional yeast toppings. For soy-free versions, check your BBQ sauce—some contain soy-based thickeners. Annie's Organic and Primal Kitchen offer soy-free options. For a nut-free crunch, use toasted pumpkin seeds instead of chopped nuts on top. Always verify labels, as hidden allergens can lurk in unexpected places.
Protein Alternatives
For a vegetarian version, replace the beef with crumbled tempeh or extra-firm tofu (pressed and pan-fried). Use mushrooms for an umami boost. For a turkey option, swap in ground turkey—it cooks faster, so reduce simmering time to 1.5 hours. The spices and BBQ sauce will still create that signature depth, just with a leaner protein profile. 🥩
Nutrition facts
Frequently asked questions
Why does this chili taste better the next day?
The flavors develop and meld more fully after resting. The spices continue to bloom, the beef absorbs more liquid and becomes even more tender, and the smoky-sweet BBQ notes deepen. This is why I always recommend making a double batch—it's worth the wait!
Can I make this chili in a slow cooker?
Skip the initial sear (or do a quick pan sear first) and add everything to your slow cooker on low for 6-8 hours or high for 4-5 hours. The long cook time actually enhances the smoky flavors. Just stir in the BBQ sauce and brown sugar at the 1-hour mark to distribute them evenly.
What's the best way to reheat leftovers?
Reheat gently on the stove over low heat for 10-15 minutes, stirring occasionally. Microwave in 30-second bursts with stirring between each. Never reheat to a boil—this can make the chili too thin. Add a splash of beef broth if it gets too thick when reheating. The flavors actually improve after reheating!
How can I make this chili spicier?
Add 1 extra teaspoon of cayenne during cooking or stir in 1 tablespoon of hot sauce at the end. For built-in heat, swap ½ teaspoon of the black pepper for ½ teaspoon crushed red pepper flakes. Toast ½ teaspoon of chipotle powder with the other spices for a smoky, spicy depth that lingers.
What's the secret to the perfect chili texture?
The key is balancing liquid and simmering time. The chili should coat the back of a spoon but still be spoonable. If it's too thick, add ¼ cup broth or water during cooking. For extra richness, mash 1 clove of garlic into the bottom of the pot before adding the beef—this creates a flavorful crust that thickens naturally as it cooks.