
Sauces & Condiments
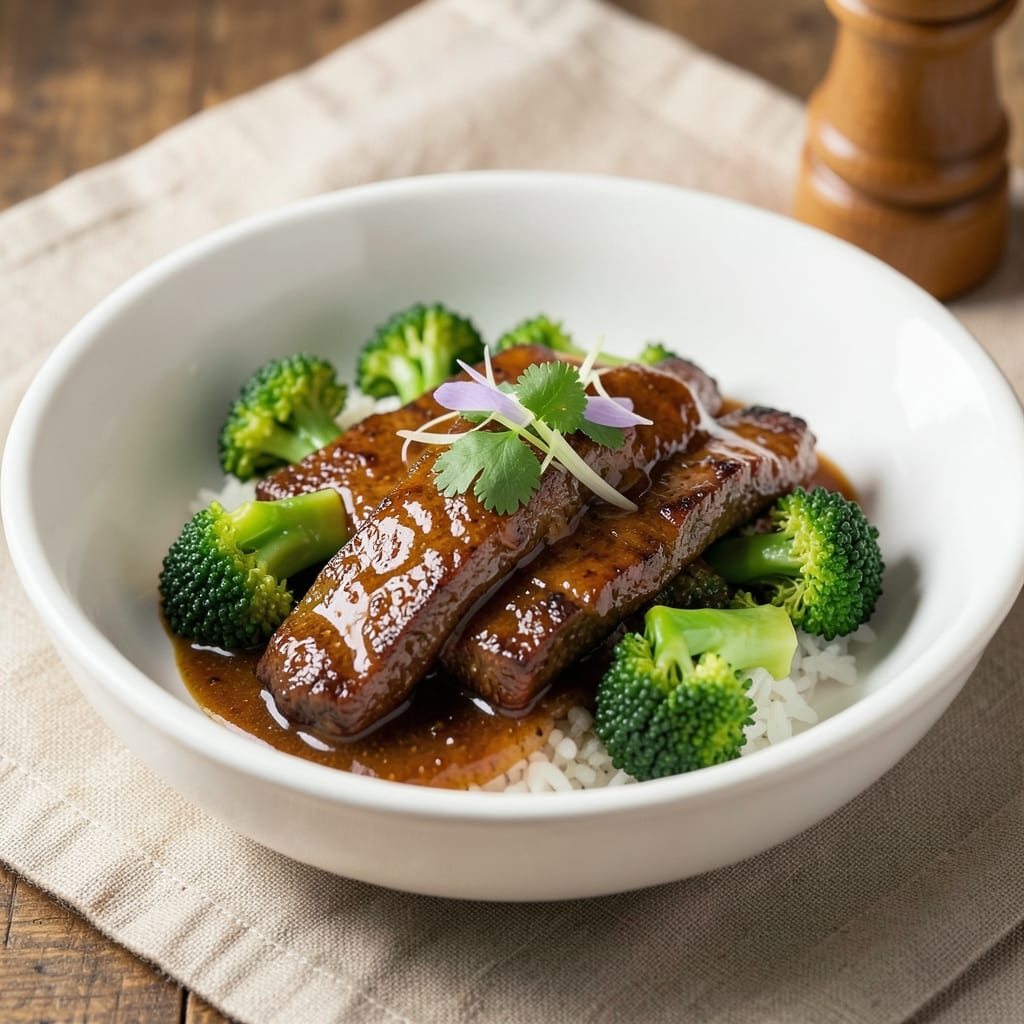
This authentic beef and broccoli sauce recipe delivers the restaurant-quality velvety balance of soy, ginger, and umami that transforms simple stir-fry into a flavor powerhouse. The secret lies in a proper cornstarch slurry that thickens without breaking, while fresh garlic and ginger build layers of aromatic depth. I've refined this sauce over years of testing—it's the one my family begs for when takeout cravings hit.
What sets this sauce apart is its perfect harmony of salty, sweet, and spicy notes, achieved through precise ingredient ratios and proper cooking technique. The sauce comes together in just 20 minutes, with no complicated steps—just a hot pan, a few minutes of stirring, and the magic of a well-timed slurry. The result is glossy, clingy, and packed with that signature beef-and-broccoli flavor that's impossible to replicate with bottled versions.
What you'll end up with is a sauce that's rich enough to coat every bite of beef and broccoli while remaining light enough to let the ingredients shine through. The ginger adds bright warmth, the soy provides deep umami, and the cornstarch creates that signature glossy finish. This isn't just a sauce—it's the foundation for a meal that tastes like your favorite Chinese restaurant, made in your own kitchen.
The best part? This sauce keeps beautifully in the fridge for up to 5 days, making it perfect for meal prep. You can adjust the spice level to taste, add a touch of honey for sweetness, or even use it as a dipping sauce. Here's how to make it—once you try this version, you'll never go back to the bottled stuff.
Ingredients for authentic beef and broccoli sauce
These eleven ingredients unlock restaurant-quality beef and broccoli sauce in record time.
| Ingredient | Amount | Notes |
|---|---|---|
| Extra-Virgin Olive Oil 🫒 | 2 tbsp | For high heat searing |
| Garlic Cloves 🧄 | 4 cloves | Minced, fresh preferred |
| Fresh Ginger 🌿 | 2 tbsp | Finely grated, vibrant color |
| Low-Sodium Soy Sauce 🍶 | ½ cup | Kikkoman preferred |
| Oyster Sauce 🍲 | 2 tbsp | Lee Kum Kee brand |
| Cornstarch 🌾 | 1 tbsp | For perfect slurry |
| Cold Water 💧 | 3 tbsp | For slurry activation |
| Brown Sugar 🍯 | 1 tbsp | Light or dark variety |
| Sesame Oil 🌰 | 1 tsp | Toasted, for aroma |
| Red Pepper Flakes 🌶️ | ½ tsp | Adjust for heat |
| Green Onion 🧅 | 2 whole | Thinly sliced, for garnish |
The garlic and ginger are non-negotiable here—fresh is a must. Asian markets usually have the best ginger, often pre-peeled and ready to grate. For garlic, grab a head and mince it yourself—pre-minced lacks that fresh punch. The soy sauce? Low-sodium is key—it balances better with the other flavors. I always double-check the label to avoid that harsh saltiness. The oyster sauce adds that signature umami depth—Lee Kum Kee is the gold standard, but any quality brand works.
No sesame oil? Toasted peanut oil works in a pinch, though it won't have that same nutty aroma. Short on ginger? Ginger powder at half the amount gets you close, but fresh is absolutely essential for that bright, zesty kick. The cornstarch slurry is where the magic happens—mix it well and let it sit for 5 minutes before adding to the sauce. That resting time is crucial for proper thickening. And if you're feeling adventurous, a splash of rice vinegar adds a nice tang that cuts through the richness.
This sauce keeps beautifully in an airtight container for 5-7 days in the fridge. The flavors actually deepen over time, so it's perfect for meal prep. For freezing, portion into ice cube trays—thaw just what you need. The green onions are best added fresh when serving, but you can chop them ahead and store them separately. Double the batch if you can—it disappears faster than you'd think, especially with my family always begging for seconds.
Why You'll Love This Recipe
- One-Pan Magic: I swear by this recipe—just toss everything in one skillet, stir, and walk away. The olive oil sears the beef while the garlic and ginger bloom into this fragrant, sticky sauce that practically cooks itself.
- Umami Bomb: That combo of low-sodium soy and oyster sauce? Chef’s kiss. The beef stays tender but grips the broccoli with a glossy, savory-sweet coating that makes me reach for seconds without even thinking.
- Lunchbox Hero: Here’s what sold me—it reheats like a dream. Pack the leftovers for work, and by noon, it’s just as good as when it came out of the pan. (Yes, even on a Tuesday night.)
- Budget Flex: Honestly, this recipe won’t break the bank. A little olive oil, a few cloves of garlic, and those two sauces stretch to feed four for under $15. My wallet and my taste buds thank me every time.
Step-by-step instructions for authentic beef and broccoli sauce
Here's how to create that perfect balance of umami, sweetness, and spice in your sauce.
Sear the Aromatics for Maximum Flavor
Heat the 2 tablespoons extra-virgin olive oil in a large skillet or wok over medium-high heat until shimmering. Add the 4 minced garlic cloves and 2 tablespoons finely grated fresh ginger, stirring constantly for 30-45 seconds until fragrant but not browned. This quick cooking preserves their bright flavors instead of letting them burn.
Watch closely—the garlic should sizzle gently and turn golden around the edges, but not crisp. If it starts to darken too quickly, reduce the heat slightly. Here's the thing: fresh ginger and garlic are the flavor anchors of this sauce, so getting them right makes all the difference. Once they're fragrant, you're ready for the next step without waiting.
Build the Sauce Base with Soy and Oyster Sauces
Pour in the ½ cup low-sodium soy sauce and 2 tablespoons oyster sauce, stirring to combine with the aromatics. Let the mixture simmer for 2-3 minutes until slightly reduced by about one-third. You'll notice the sauce darken slightly and thicken as the alcohol burns off, concentrating the flavors.
This is where the authentic taste starts developing. The soy sauce provides that classic umami depth while the oyster sauce adds a rich, slightly sweet complexity. Don't rush this step—letting the sauces meld properly creates the foundation for your velvety finish. The sauce should coat the back of a spoon lightly but still be pourable.
Create the Perfect Slurry for Thickening
In a small bowl, whisk together the 1 tablespoon cornstarch and 3 tablespoons cold water until completely dissolved. This creates your thickening agent—what I call the "secret weapon" of restaurant-quality sauces. The cold water is crucial as it prevents the cornstarch from activating too quickly when it hits the hot pan.
Here's a pro tip: I like to strain the slurry through a fine-mesh sieve to ensure no lumps make it into your sauce. Once smooth, let it sit for 1 minute before adding to the pan. This brief rest gives the cornstarch time to fully hydrate, ensuring a silky texture rather than a grainy one.
Thicken and Sweeten the Sauce
Return the sauce to a gentle simmer and gradually pour in the cornstarch slurry while stirring constantly with a wooden spoon. Keep the heat at medium-low and continue stirring for 1-2 minutes until the sauce thickens to a glossy, coatable consistency. It should now cling to the back of the spoon rather than slide off.
Add the 1 tablespoon brown sugar and ½ teaspoon red pepper flakes, stirring to combine. The sugar balances the savory elements with just the right touch of sweetness, while the red pepper flakes add a subtle heat that enhances the overall complexity. Taste and adjust seasoning if needed—you might want to add a splash more soy sauce for saltiness or a pinch of sugar for sweetness.
Finish with Aromatics and Garnish
Remove the sauce from heat and stir in the 1 teaspoon sesame oil. This final addition brings an incredible nutty aroma that elevates the entire dish. The sesame oil should be toasted but not smoking—just a quick sniff to confirm its freshness before adding.
Finally, garnish with the 2 thinly sliced green onions, dividing them evenly among servings. These add both visual appeal and a fresh, crisp contrast to the rich, velvety sauce. Serve immediately over steamed rice or noodles, and watch as everyone raves about that authentic restaurant-quality flavor you've just created at home.
Pro Tips For Making Authentic Beef And Broccoli Sauce
- STOP MINCING GINGER TOO FINELY: Fresh ginger loses its punch when you turn it into paste—especially in this sauce. Use a microplane or the side of your knife to create thin shavings (about 1/8-inch thick), not a powder. The texture stays vibrant, and you’ll taste it, not just see it.
- SWEAT GARLIC LOW AND SLOW: I used to blast garlic in olive oil and end up with bitter, browned bits. Instead, reduce heat to medium-low once the oil shimmers, then add whole garlic cloves (peeled, halved). Let them cook undisturbed for 3-4 minutes until golden but not crispy—this builds flavor without burning.
- SALT THE BROCCOLI BEFORE BLANCHING: Toss florets in a pinch of salt (yes, even before boiling) to draw out bitterness. When you blanch them for 30 seconds, they’ll stay bright green and absorb the sauce better. Skip this, and you’ll end up with limp, flavorless broccoli drowning in soy.
- USE OYSTER SAUCE LAST: This isn’t a glaze—it’s a finishing touch. Stir in oyster sauce with the soy and a splash of water only after the beef is cooked and the garlic-ginger base has reduced. Adding it earlier turns the sauce thin and cloying. A little goes a long way; start with 1 tablespoon and adjust.
Storing and reheating this dish
Fridge Storage Tips
Transfer your sauce to an airtight glass container (I love Pyrex with snap-on lids) once cooled to room temperature. The sauce keeps beautifully for 5-7 days in the fridge—its flavors actually deepen over time, becoming richer and more complex. I always store it in the main body of the fridge (not the door) to maintain consistent temperatures. 💪
When reheating, portion out what you need and warm in a small saucepan over medium-low heat with 1 tablespoon water to prevent sticking. Stir constantly for 3-5 minutes until heated through—this prevents the sauce from breaking or becoming grainy. If it thickens too much, add a splash of water or soy sauce to restore that glossy consistency.
Freezing for Later
For longer storage, freeze the sauce in ice cube trays—each cube makes the perfect single serving. Once frozen, transfer cubes to a ziplock freezer bag with all air squeezed out. This method prevents freezer burn and makes it easy to thaw just what you need. The sauce maintains its quality for up to 3 months in the freezer, though I find it's best used within 2 months for peak flavor.
To reheat frozen sauce, thaw overnight in the fridge, then warm gently on the stovetop as described above. Never microwave—it breaks down the sauce's texture and dulls the flavors. For a quick fix, place the frozen cubes in a bowl and cover with hot water for 5 minutes, then stir until smooth. This works surprisingly well for last-minute meals!
Sauce Consistency Hacks
If your sauce separates after refrigeration, simply whisk vigorously to re-emulsify. The cornstarch slurry creates a stable base, but sometimes the natural oils rise to the top. A quick 30-second whisk with a splash of warm water (about 1 teaspoon) usually restores that velvety texture. This happens most often with homemade sauces—it's completely normal and easily fixed!
For extra insurance, I sometimes add ½ teaspoon xanthan gum to the sauce when it's hot (before adding sesame oil). This natural thickener helps maintain consistency even after storage. It's optional but makes a noticeable difference if you plan to store the sauce for more than 3 days. The texture remains smooth and clingy, just like the first time you made it. ✨
Nutrition facts
Frequently asked questions
Can I make this sauce without oyster sauce?
For a vegetarian version, replace the 2 tablespoons oyster sauce with 2 tablespoons vegetarian oyster sauce or 1 tablespoon soy sauce plus 1 tablespoon hoisin sauce. The umami depth will be slightly different but still delicious. If you don't have either, use 1 tablespoon soy sauce plus 1 teaspoon mushroom powder for a meaty flavor without animal products.
Why does my sauce get grainy when I reheat it?
Graininess usually happens when the cornstarch slurry isn't fully dissolved or the sauce cooks too quickly. Always whisk the slurry until completely smooth, and let it sit for 1 minute before adding to the pan. When reheating, keep the heat at medium-low and stir constantly. If it still gets grainy, add 1 teaspoon cold water and whisk vigorously to restore that silky texture.
How can I make this sauce spicier or sweeter?
For extra heat, increase the red pepper flakes to 1 teaspoon or add ½ teaspoon cayenne pepper. For more sweetness, double the brown sugar to 2 tablespoons or add 1 teaspoon honey. You can also balance both by adding ½ teaspoon sesame paste for depth. Taste as you go—small adjustments make all the difference!
Can I use this sauce for other dishes besides beef and broccoli?
This versatile sauce works perfectly with chicken stir-fry, tofu, shrimp, or even as a dipping sauce for spring rolls. It's also amazing over steamed rice or noodles. For a twist, add 1 tablespoon rice vinegar to brighten it up when using with seafood. The key is to adjust the heat and sweetness to match your protein.
What's the secret to getting that glossy finish?
The gloss comes from three things: properly cooked cornstarch slurry, low and slow simmering, and sesame oil. Make sure your slurry is fully dissolved and rested before adding. Simmer gently after adding it to prevent lumps. Finally, the 1 teaspoon sesame oil at the end adds that signature shine and nutty aroma that makes it look (and taste) restaurant-quality.