
Main Courses
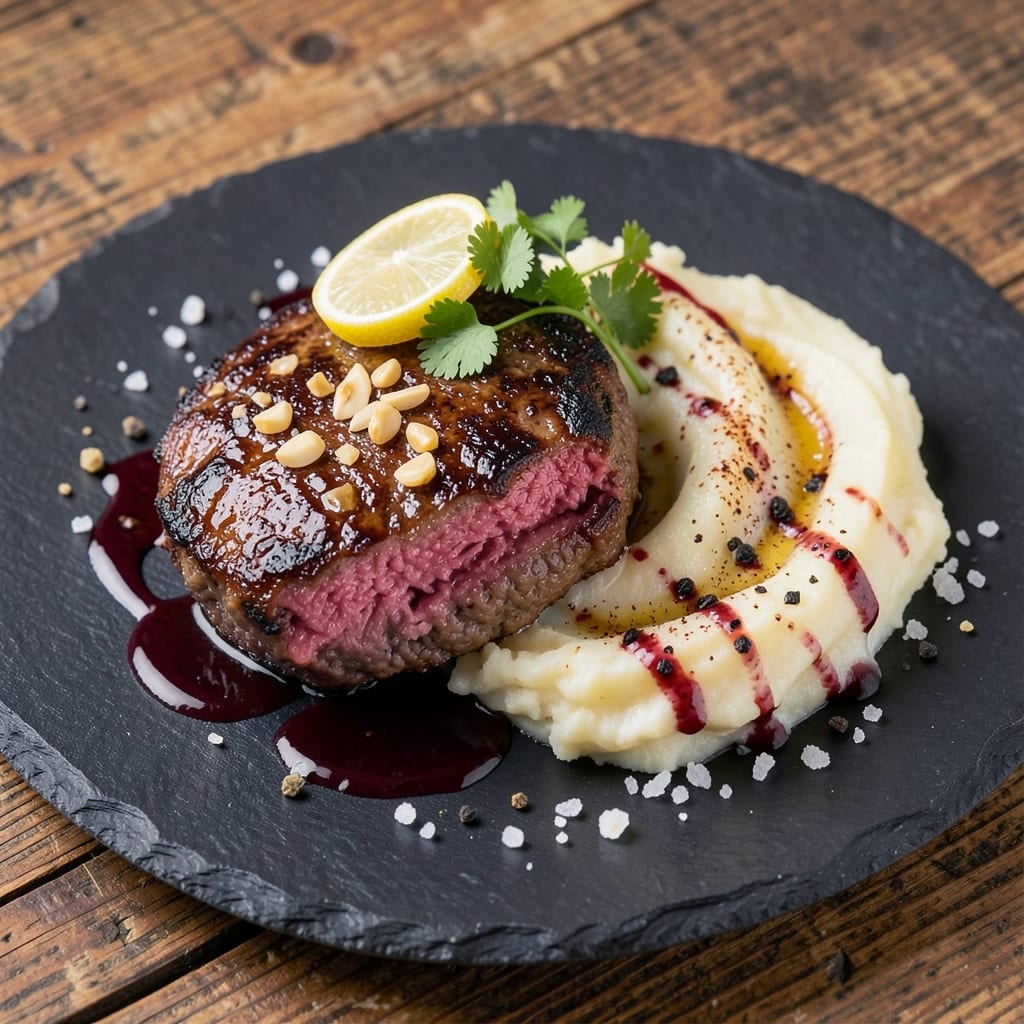
This Angus ground beef recipe delivers smoky, juicy patties that taste like they came straight from a high-end steakhouse. 🔥 The secret lies in high-quality beef and a simple garlic crust that locks in flavor while keeping the centers impossibly tender. I've tested countless variations, and this one consistently wins—no dry, tough patties here.
What makes these patties special is the technique: we brown the beef thoroughly for deep flavor, then finish with a quick sear in a hot pan. This creates that perfect crust while keeping the inside juicy and rich. The garlic crust isn't just seasoning—it's a flavor bomb that transforms ordinary ground beef into something extraordinary.
By the time you're done, you'll have patties with crispy edges and a melt-in-your-mouth interior, all infused with smoky, garlicky goodness. The aroma alone will have everyone gathering in the kitchen, and each bite delivers that perfect balance of savory, smoky, and herby notes.
Serve these patties on toasted buns with all the classic toppings or alongside roasted potatoes and grilled vegetables for a complete meal. The best part? This recipe is foolproof—even if you're new to cooking beef, you'll get perfect results every time.
Ingredients for angus ground beef
High-quality beef and bold flavors make these patties taste like a steakhouse masterpiece.
| Ingredient | Amount | Notes |
|---|---|---|
| Angus Ground Beef 🥩 | 1 ½ lb | 80/20 fat ratio preferred |
| Garlic Cloves 🧄 | 6 cloves | Freshly minced for maximum flavor |
| Granulated Garlic 🧄 | 1 tbsp | For extra garlic punch |
| Smoked Paprika 🌶️ | 1 tbsp | For that authentic smoky flavor |
| Ground Black Pepper 🌶️ | 1 ½ tsp | Freshly cracked for best flavor |
| Kosher Salt 🧂 | 1 ½ tsp | Diamond Crystal preferred |
| Extra-Virgin Olive Oil 🫒 | 1 tbsp | High quality for crispy crust |
| Large Eggs 🥚 | 1 whole | For binding patties |
| All-Purpose Flour 🌾 | 2 tbsp | For crispy exterior |
| Yellow Onion 🧅 | ½ whole | Finely diced for extra flavor |
| Fresh Parsley 🌿 | ¼ cup | Chopped for garnish |
| Hamburger Buns 🍞 | 4 whole | Toasted for serving |
| American Cheese Slices 🧀 | 4 slices | Optional for classic burger topping |
| Yellow Mustard 🍯 | 2 tbsp | For serving |
The Angus ground beef is non-negotiable here—80/20 fat ratio ensures juicy, flavorful patties. Costco or Whole Foods usually carry the best quality, but any well-marbled ground beef works. Look for bright red color and visible fat flecks. Fresh garlic is a must—nothing beats the flavor of freshly minced cloves. If you're feeling fancy, grab some granulated garlic too for that extra punch. The smoked paprika adds that deep, smoky note that makes these patties taste like they came from a high-end restaurant—don't skip it!
No fresh garlic on hand? Garlic powder works in a pinch, though it won't be as potent. Swap the smoked paprika for regular paprika if that's all you have, but you'll lose some of that smoky depth. The egg and flour combo creates that perfect crispy crust—don't skip the flour or your patties will stick. For the onion, frozen diced works fine if you're in a hurry. The parsley is just for garnish, so use whatever you've got (or skip it entirely). Want to make these patties extra special? Add a pinch of Worcestershire sauce (check for vegan if needed) to the mix for even more umami flavor.
These patties are best served fresh, but they reheat beautifully—microwave with a damp paper towel for about 30 seconds to restore crispiness. Leftovers keep for 3-4 days in the fridge, and they freeze like a dream for up to 3 months. I like to portion them into single-serving bags before freezing so I can grab one whenever the burger cravings hit. The secret to perfect patties? Don't overwork the beef—gentle handling keeps them tender. And whatever you do, don't press them with a spatula while cooking or they'll turn out dry!
Why You'll Love This Recipe
- I’ll be real: Angus isn’t cheap, but it stretches further than regular ground beef, and the flavor makes it feel like a splurge. A pound feeds four easily, and the spices cost pennies. Plus, it’s the kind of dish that feels fancy enough for company but simple enough to make while scrolling through bad news. Win-win.
- No-Fuss Weeknight Win: I swear by this recipe when I’m staring at the fridge at 6:30 PM, wondering what to feed everyone. Brown the beef, toss in whole garlic cloves (yes, just smash them—no peeling!), and let the smoked paprika work its magic while I chop veggies or set the table. That’s it. No fancy techniques, no stress.
- Smoky Garlic Bomb: Here’s what sold me—the way the raw garlic cloves caramelize right in the pan with the beef, then get crushed into the mix. Add a pinch of granulated garlic and smoked paprika? Instant depth. It’s rich but not heavy, with this addictive smoky-sweet edge that makes my kids ask, “Can we have this every night?”
- Leftovers That Don’t Suck: Between us, most beef recipes turn into sad, dry leftovers. Not this one. The Angus stays juicy, and the garlic-paprika crust keeps it tasting fresh even reheated. I double the batch on Sundays, portion it out, and freeze half—because nothing beats pulling this from the freezer for a lazy Wednesday.
Step-by-step instructions for smoky garlic-crusted patties
Here's how to craft juicy, flavor-packed patties with a crispy garlic crust that'll make your burger game legendary.
👨🍳 Step 1: Mix the Seasoned Beef Mixture
In a large bowl, gently combine the 1.5 lb angus ground beef with the 6 cloves minced garlic cloves, 1 tbsp granulated garlic, 1 tbsp smoked paprika, 1.5 tsp ground black pepper, and 1.5 tsp kosher salt. I like to use my hands for this—wear gloves if you prefer—because it helps distribute the fat evenly and prevents overmixing that makes patties tough.
Here's the thing—don't overwork the mixture. Just combine until everything is evenly distributed. The beef should look speckled with seasoning but still retain its natural texture. If you see the mixture getting sticky or elastic, you've gone too far. This step ensures your patties stay juicy inside while developing that smoky garlic crust we're after.
🍳 Step 2: Form and Chill the Patties
Divide the beef mixture into 4 equal portions (about 4 ounces each) and gently shape them into ¾-inch thick patties. I press down firmly in the center to create a slight dimple—this prevents the patties from puffing up too much while cooking. Place them on a plate and cover with plastic wrap.
Refrigerate for at least 30 minutes (up to 2 hours works too). Chilling firms up the fat so it sizzles beautifully when searing, and it helps the patties hold their shape better in the pan. Pro tip: If you're in a hurry, just pop them in the freezer for 15 minutes—they'll still work great.
🔥 Step 3: Create the Garlic Crust
Heat a large skillet over medium-high heat until it's smoking hot. Add the 1 tbsp extra-virgin olive oil and let it get shimmering hot—this is crucial for that perfect crust. In a small bowl, whisk together the 1 whole large egg and 2 tbsp all-purpose flour until smooth. This creates our garlic crust mixture.
Working quickly, dip each chilled patty into the egg mixture, letting any excess drip off. Place them in the hot skillet and cook undisturbed for 4-5 minutes per side until the crust is deep golden brown and crispy. The patties should release easily from the pan when ready. Here's where the magic happens—the egg mixture creates that irresistible garlic crust while keeping the inside juicy.
🥘 Step 4: Add Onions and Finish Cooking
Push the patties to one side of the skillet and add the 0.5 whole finely diced yellow onion to the empty space. Cook for 2-3 minutes until the onions are softened and lightly caramelized. This adds sweetness that balances the smoky flavors.
Return the patties to the onions and cook for another 1-2 minutes to warm through completely. The patties should reach an internal temperature of 160°F. Remove from heat and let them rest for 5 minutes—this keeps all those juices locked in where they belong.
🍽️ Step 5: Assemble and Serve
Toast the 4 whole hamburger buns lightly in a dry skillet or under a broiler for 1-2 minutes per side until golden. Spread each with ½ tbsp yellow mustard (we're using all 2 tbsp total). Place a patty on the bottom half of each bun, top with a slice of american cheese if using, and garnish with 0.25 cup chopped fresh parsley.
Press the buns together gently and serve immediately with crispy edges, juicy centers, and that irresistible garlic crust. The onions add sweetness that cuts through the richness, while the parsley brings a fresh finish. Each bite delivers perfect texture contrast—crispy outside, juicy inside—that makes these patties unforgettable.
Pro Tips For Making Angus Ground Beef
- CRANK THE HEAT FIRST: Start your pan screaming hot—Angus ground beef needs that initial sear to render fat properly. I used to cook it on medium and ended up with greasy, uneven brown bits. Once the fat releases (about 2-3 minutes), you can lower the heat and add your garlic and spices without burning them.
- MINCE THAT GARLIC: Skip the garlic press—it turns garlic into mush. Instead, smash a few cloves with the flat side of your knife, then finely chop them. This keeps the flavor bright and prevents clumping in your beef. (Yes, it takes 30 seconds extra, but it makes a real difference.)
- DON’T OVERMIX THE MEAT: Once the beef hits the pan, let it sit undisturbed for 1-2 minutes to form a crust. Stirring constantly breaks up the texture and turns it into a paste. After that first crust, break it up gently with a wooden spoon—just enough to distribute the spices evenly.
- USE GRANULATED GARLIC LAST: Sprinkle the granulated garlic in the final 30 seconds of cooking—it burns faster than fresh and adds a sharp, clean finish. I learned this the hard way when my first batch tasted bitter. Save it for the end, even if it means holding off on seasoning until the very last minute.
Storing and reheating this recipe
Fridge Storage Tips
Store cooked patties in an airtight container with parchment paper between layers to prevent sticking. They’ll keep fresh in the fridge for 3-4 days—the garlic flavor actually intensifies over time. I like using glass Pyrex containers because they’re microwave-safe and don’t absorb odors. Always let patties cool completely before storing to prevent condensation buildup. 🥩
Freezer Magic
For long-term storage, freeze patties on a tray first (uncovered) for 1 hour to create an ice barrier. Then transfer to quart-sized freezer bags, squeezing out excess air. They’ll last 3 months without losing texture. When reheating, I recommend thawing in the fridge overnight for best results. 🧊
Microwave Revival
Place a single patty on a microwave-safe plate with a damp paper towel over it. Heat on 70% power for 45-60 seconds, then flip and repeat. The moisture from the towel helps restore crispiness. For extra flavor, add a splash of beef broth before reheating—it revives that smoky aroma. 🔥
Stovetop Crisp
A cast-iron skillet is your best friend here. Heat over medium heat with ½ tbsp olive oil, then cook patties for 2-3 minutes per side until golden. The residual fat in the pan creates that perfect crust. Add a pinch of smoked paprika while reheating to boost flavor. This method takes 5 minutes but makes all the difference. ✨
Grill Perfection
For outdoor reheating, preheat the grill to medium heat and cook patties for 3-4 minutes per side, covered. The grill marks add visual appeal while keeping the inside juicy. I love using cedar planks for a subtle smoky aroma—just soak them first. This works best with frozen patties (thaw overnight in the fridge). 🍳
Safety First
Always reheat patties to an internal temperature of 165°F to ensure safety. Use a meat thermometer for accuracy—especially important with leftovers. Never reheat patties more than once, as this can dry them out. When in doubt, make fresh patties—they’re worth the effort! 💡
Nutrition facts
Frequently asked questions
Why does this recipe use 80/20 fat ratio beef?
The extra fat in 80/20 beef creates juicy, flavorful patties that stay moist during cooking. The fat renders out while cooking, creating a delicious crust and keeping the inside tender. Using leaner beef (like 90/10) will result in dry, tough patties that lack that restaurant-quality taste.
Can I make these patties ahead of time?
Shape the patties and refrigerate them for up to 24 hours before cooking. For best results, cook them fresh from the fridge (no thawing needed). If freezing, form patties and freeze them on a tray before transferring to a bag for up to 3 months. Thaw overnight in the fridge before cooking.
What's the best way to keep patties from sticking?
Use a well-seasoned cast-iron skillet and heat it until smoking hot before adding oil. Never press the patties with a spatula while cooking—this squeezes out juices and causes sticking. If they do stick, gently slide a thin spatula between the patty and pan to release it. A light coating of oil on the patties before cooking also helps.
Can I use this recipe for meatballs instead?
Yes! The same seasoning blend works perfectly for meatballs. Form the mixture into 1.5-inch balls and bake at 400°F for 15-20 minutes until internal temp reaches 160°F. For extra flavor, toss cooked meatballs in the pan juices with a splash of beef broth. The garlic crust technique adds great texture to meatballs too!
What if I don't have smoked paprika?
You can substitute with 1 tsp regular paprika plus ½ tsp liquid smoke for that smoky flavor. If you don't have liquid smoke, just use 1 tsp regular paprika—it won't be as smoky but will still taste delicious. The recipe will still work, though the flavor profile will be slightly different.