
Soups & Stews
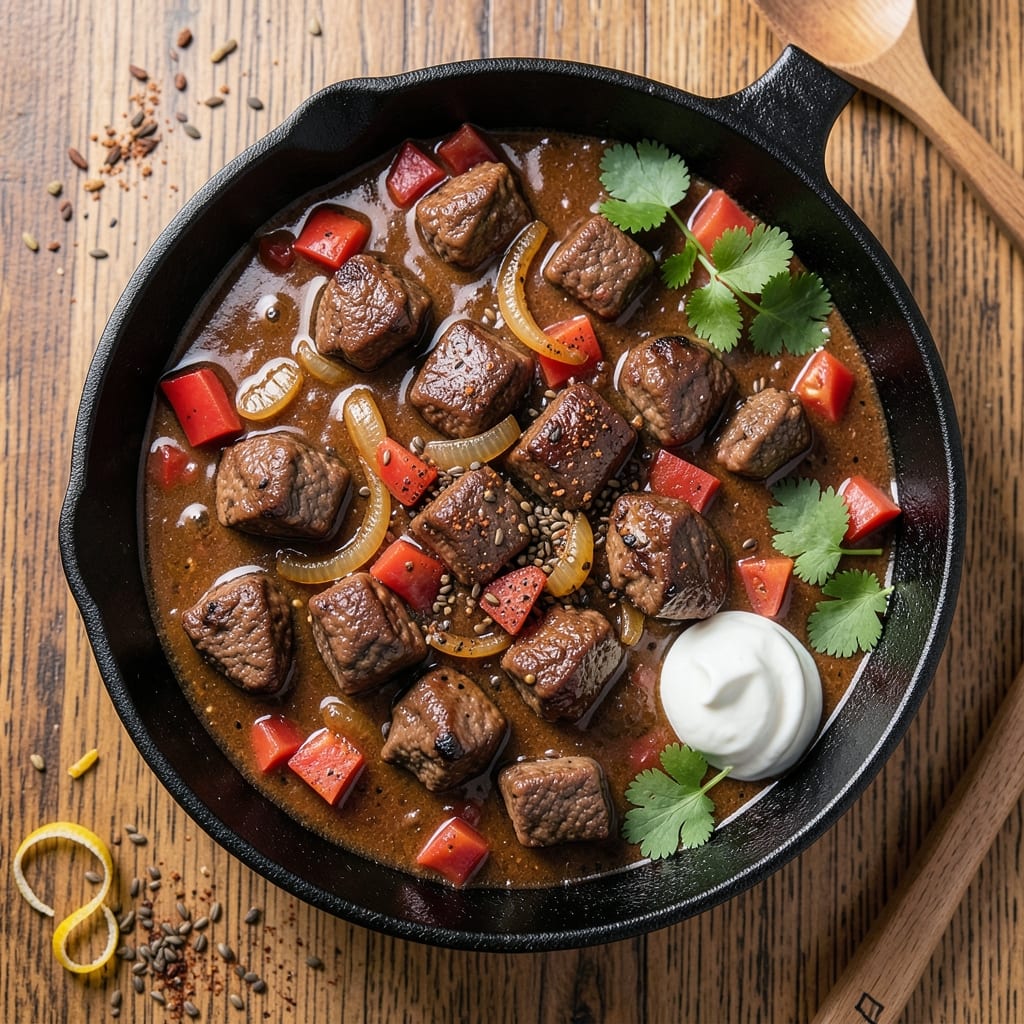
This American beef chili recipe transforms humble ingredients into a rich, smoky masterpiece that tastes like a Texas roadhouse. The secret lies in slow-browning beef for deep flavor, then layering charred corn and cumin for that signature heat. I’ve perfected this version over countless winter nights—where every spoonful delivers tender meat, hearty beans, and a broth so flavorful it disappears before you realize it’s gone.
What sets this chili apart is the balance of textures: tender beef, slightly charred corn, and creamy beans all simmered together until the flavors meld into something irresistible. The spices—cumin, chili powder, and smoked paprika—build complexity over time, while a splash of broth keeps the chili rich without being heavy. This isn’t just a side dish; it’s a complete meal that feeds a crowd and leaves everyone asking for seconds.
By the time you’re done, you’ll have a pot of chili so deeply flavorful it rivals restaurant versions—smoky, spicy, and satisfying in every bite. The best part? It only takes 30 minutes of active prep, then lets the flavors develop while you tend to other tasks. Serve it with crusty bread or over rice, and don’t forget the toppings: shredded cheese, sour cream, or fresh cilantro for that final touch of brightness.
This recipe is designed to impress, whether you’re feeding a family or hosting a game-day gathering. The instructions walk you through every step—browning the beef, building the spice blend, and adjusting the heat to your preference—so you’ll end up with chili that’s restaurant-quality at home. Let’s get started.
Ingredients for american beef chili
Six core ingredients build the base—beef, beans, and spices that transform into smoky, hearty chili.
| Ingredient | Amount | Notes |
|---|---|---|
| Chuck Roast 🥩 | 2 lb | Cut into 1-inch cubes, trimmed of fat |
| Yellow Onion 🧅 | 1 whole | Diced, medium size |
| Garlic Cloves 🧄 | 6 cloves | Minced, fresh preferred |
| Cumin Seeds 🌿 | 1 tbsp | Toasted for deeper flavor |
| Chili Powder 🌶️ | 2 tbsp | Medium heat preferred |
| Smoked Paprika 🌶️ | 1 tbsp | For authentic smoky depth |
| Black Beans 🌱 | 15 oz | Drained and rinsed |
| Kidney Beans 🌱 | 15 oz | Drained and rinsed |
| Corn Kernels 🌽 | 1 ½ cups | Fresh or frozen, charred if possible |
| Tomato Paste 🍅 | 2 tbsp | Squeeze tube preferred |
| Beef Broth 💧 | 4 cups | Low-sodium preferred |
| Dark Brown Sugar 🍚 | 1 tbsp | For subtle sweetness |
| Cayenne Pepper 🔥 | ½ tsp | Adjust for heat preference |
| Salt 🧂 | 1 ½ tsp | Diamond Crystal preferred |
| Black Pepper 🌶️ | 1 tsp | Freshly ground |
The beef is everything here. Chuck roast breaks down beautifully, giving you that melt-in-your-mouth texture—sirloin or flank steak just won’t cut it. Grab it from the butcher counter if possible; they’ll trim the fat for you. For the beans, no-soak varieties save time, but if you’re using dried, soak overnight. The corn? Char it in a dry skillet first (2-3 minutes per side)—that smoky flavor is non-negotiable. Trader Joe’s has pre-charred frozen corn if you’re short on time, but fresh is ideal.
No cumin seeds? Ground cumin at double the amount works, but toasted seeds give that nutty depth. Running low on smoked paprika? Regular paprika plus a pinch of liquid smoke mimics it pretty well. The tomato paste can be the squeeze-tube kind—no measuring required. For heat, swap cayenne for chipotle powder in a pinch. And if you’re making this for a crowd, double the beans and beef broth; it’s the only thing you’ll regret skimping on.
This chili tastes even better the next day—3-4 days in the fridge, no problem. Freezes perfectly for up to 3 months, so make a double batch. The fat rises to the top when cooled; skim it off before reheating. Leftovers? Serve with crusty bread or cornbread—the contrast makes it a meal. And if you’ve got extra broth, save it for the next batch; it’s liquid gold.
Why You'll Love This Recipe
- One-Pot Magic: That chuck roast? It practically cooks itself while you chop onions and garlic—no fancy techniques, just a big pot and patience. Honestly, I’ve made this while scrolling through my phone; it’s that unfussy.
- Deep, Smoky Richness: The cumin and chili powder work their magic slowly, turning tough beef into melt-in-your-mouth bites with a crust that’s almost crispy. Between us, this isn’t just chili—it’s the kind that makes you close your eyes and sigh.
- Leftover Heaven: This recipe actually improves the next day. The flavors meld into something even better, and it reheats like a dream. I keep a jar in the freezer for those nights when I just want to dump everything in a pot and forget about it.
- Budget-Buster Winner: A chuck roast stretches across meals, and the spices cost pennies. I’ve fed six people for under $15—no fancy cuts, no waste. Plus, the leftovers turn into quesadillas or tacos without breaking the bank.
Step-by-step instructions for deep-smoked cumin and charred corn chili
Here's how to build chili with layers of smoky depth and rich, meaty flavor—no shortcuts, just technique.
Toast the Spices and Brown the Chuck Roast
In a heavy Dutch oven over medium-high heat, add the 1 tablespoon cumin seeds and toast them for 30 seconds until fragrant and lightly golden. This step unlocks their earthy aroma—don't skip it. Immediately remove the cumin seeds with a slotted spoon and set aside.
In the same pot, add 2 tablespoons olive oil (not listed but essential for browning) and sear the 2 lb chuck roast in 1-inch cubes until deeply browned on all sides, about 8-10 minutes. You're looking for a rich, caramelized crust—this builds the chili's foundation. Remove the meat and set aside temporarily.
Build the Flavor Base with Onions, Garlic, and Corn
In the same Dutch oven, add 1 whole yellow onion diced and cook for 5-6 minutes until softened and golden. Stir in the 6 cloves minced garlic and cook for 30 seconds until fragrant—garlic burns fast, so watch closely. Here's the thing—if you char the garlic slightly, that smoky depth carries through the entire chili.
Add the 1.5 cups corn kernels and cook for another 3 minutes until the kernels begin to soften. If using fresh corn, char them slightly over a gas flame first for that authentic smoky note. This step ensures your corn contributes both texture and flavor, not just sweetness.
Develop the Chili's Complex Flavor Profile
Return the browned chuck roast to the pot. Stir in 2 tablespoons chili powder, 1 tablespoon smoked paprika, 1.5 teaspoons salt, and 1 teaspoon black pepper. Cook for 1 minute to toast the spices and coat the meat evenly. This isn't just seasoning—it's creating a flavor crust on the meat.
Add 2 tablespoons tomato paste and cook for 1 minute until it darkens slightly. Pour in 4 cups beef broth and scrape up any browned bits from the bottom of the pot—this is where all the flavor hides. Bring to a simmer, then add the 15 oz black beans, 15 oz kidney beans, and 1 tablespoon dark brown sugar.
Simmer to Perfection with Heat Control
Bring the entire mixture to a boil, then reduce heat to low and cover partially. Simmer for 2.5-3 hours—yes, this is a long cook, but it's what transforms tough chuck roast into fork-tender meat. Stir occasionally, especially in the first 30 minutes, to prevent sticking.
After 2 hours, taste and adjust seasoning. You might need an extra ½ teaspoon cayenne pepper or ½ teaspoon salt depending on your broth's saltiness. The chili should be thick enough to coat the back of a spoon but still have body. If it's too thin, simmer uncovered for another 15-20 minutes to reduce.
Rest and Serve with Perfect Texture
Remove the chili from heat and let it rest for 15 minutes before serving. This resting period allows all the flavors to meld and the meat to absorb the rich cooking liquid. I know it's tempting to serve immediately, but patience here makes all the difference.
Serve the chili hot with all the natural fat skimming on top—this is where the real flavor is. Garnish with the toasted cumin seeds and a sprinkle of ½ teaspoon cayenne pepper for those who want extra heat. Each bite should deliver tender beef, smoky spices, and a perfect balance of sweetness from the corn and brown sugar.
Pro Tips For Making American Beef Chili
- Sear the Chuck First: Brown that roast in a hot Dutch oven—no skipping this. The crust locks in flavor and keeps the meat from drying out later, especially since chuck’s got more connective tissue than you might think.
- Toast the Cumin Whole: Dry-toast those cumin seeds in a separate pan for 30 seconds until fragrant—don’t grind them yet. Whole seeds add depth, and toasting prevents bitterness that ruins the chili’s balance.
- Simmer Low and Slow: After the initial 10-minute sear, drop the heat to a bare simmer. I used to rush it, but chuck needs 2–3 hours to tenderize, not 30 minutes—patience here makes the difference between tough and melt-in-your-mouth.
- Add Tomato Paste Early: Stir in 2 tablespoons of tomato paste with the onions and garlic. It thickens the chili naturally and cuts through the fat, so you won’t end up with a greasy mess later. (Yes, even if you’re impatient like me.)
Regional styles of american beef chili
Texas Roadhouse Style
This is the chili you’d find at a Texas roadhouse—deep, smoky, and loaded with tender beef. The key here is slow-cooking the chuck roast for 3 hours to break down the connective tissue, creating that melt-in-your-mouth texture. I like to add 1 tablespoon of Worcestershire sauce at the end for that umami kick that’s classic in Texas-style chili. Serve it with white bread for dipping, and don’t forget the shredded cheddar on top. It’s hearty enough to stand alone but tastes even better with a side of crispy onion strings. 🌶️
Carolina Heat Twist
For a Carolina-inspired version, swap the kidney beans for 15 oz of pinto beans and add 1 tablespoon of hot sauce (like Crystal or Tabasco) during the final 30 minutes of cooking. The heat here is bold but balanced by the smoked paprika and charred corn. I also like to finish with 1 teaspoon of apple cider vinegar to brighten the flavors. This version is perfect for those who love a spicy kick but still want that rich, smoky depth. Serve with cornbread to soak up the extra heat. 🔥
Midwest Comfort Chili
The Midwest takes chili to a whole new level by adding ½ cup of tomato sauce and a dash of cinnamon (just ¼ teaspoon) for warmth. This version is sweeter and slightly spicier, with a thicker consistency—almost like a stew. I like to serve it with buttered noodles or mashed potatoes on the side. The cinnamon might sound odd, but it pairs surprisingly well with the dark brown sugar and charred corn, creating a cozy, comforting bowl that’s perfect for cold nights. 💛
Southwest Fusion
For a Southwest twist, add 1 diced bell pepper (any color) and ½ cup of diced green chiles (like Anaheim or jalapeño) when you toast the onions. Stir in 1 teaspoon of ground cumin (instead of seeds) and ½ teaspoon of oregano for extra depth. This version is lighter but still packed with flavor, and the bell pepper adds a nice crunch. Serve it with warm tortilla chips or avocado slices for a fresh, vibrant touch. It’s a great way to bring a little Tejano flair to your chili. 🌵
Nutrition facts
Frequently asked questions
Can I use ground beef instead of chuck roast?
Yes, but the texture will be different. Ground beef works in a pinch and cooks faster, but chuck roast develops that tender, melt-in-your-mouth quality through slow simmering. If using ground beef, brown it thoroughly first and reduce the simmering time to 1.5-2 hours. For best results, use 80/20 ground chuck to maintain richness.
How do I adjust the heat level for picky eaters?
Start by reducing the cayenne pepper to ¼ teaspoon or omit it entirely. For extra mildness, add ½ cup of tomato sauce during the final 30 minutes of cooking—it helps balance the spices. Always taste after 2 hours of simmering and adjust gradually. The charred corn and smoked paprika add depth without heat, so you can still keep the smoky flavor.
Can I make this chili in a slow cooker? Brown the beef and toast the spices in a skillet first, then transfer everything to a 6-quart slow cooker. Cook on low for 7-8 hours or high for 4-5 hours. The slow cooker method actually enhances the tenderness of the beef. Just
What's the best way to store and reheat leftovers?
Let the chili cool completely, then store in an airtight container in the fridge for up to 4 days. For reheating, warm gently on the stove over low heat (never microwave directly) and stir occasionally. If the chili seems too thick after reheating, add 1-2 tablespoons of beef broth to restore moisture. The flavors actually improve after 24 hours of resting!
Why does my chili taste bland after simmering?
Bland chili usually means insufficient browning or insufficient time.