
Main Courses
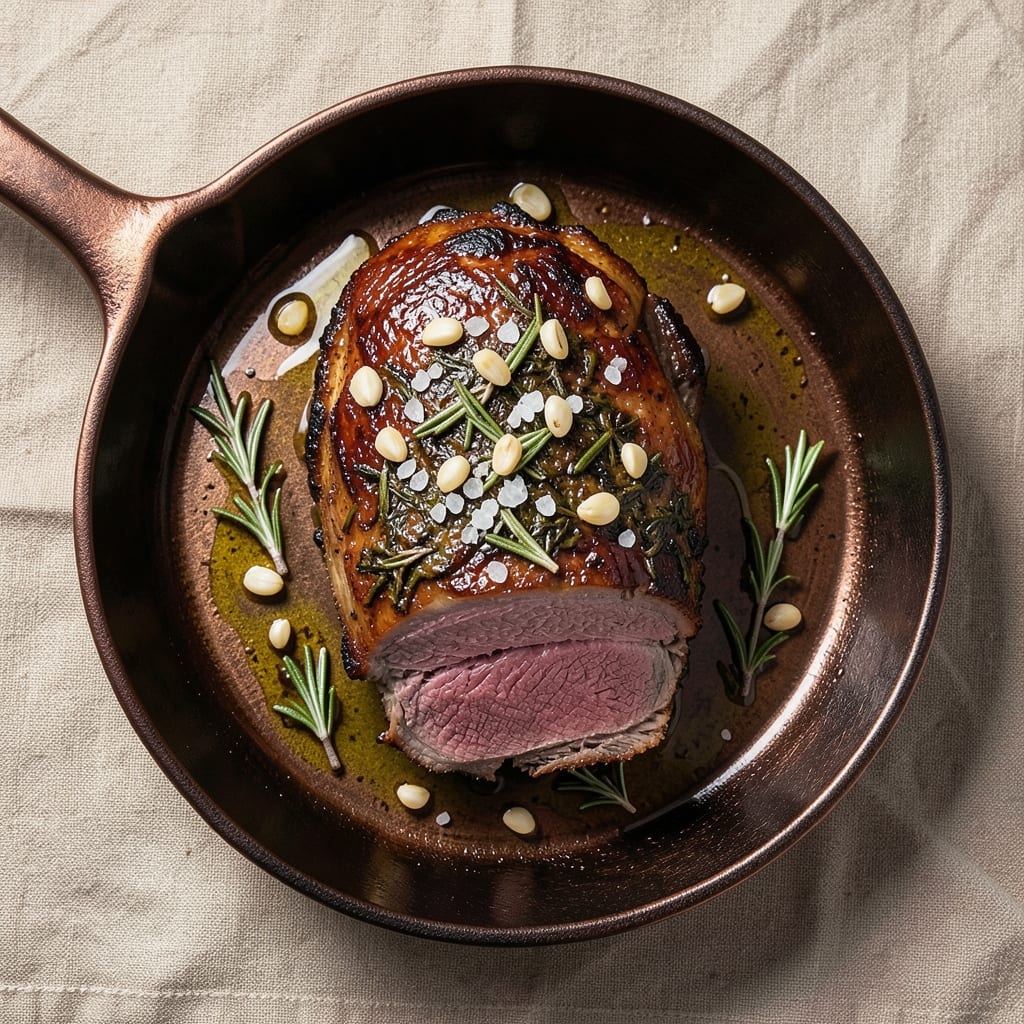
Transforming a 6lb beef tenderloin into a steakhouse-worthy centerpiece requires precision, patience, and a few key techniques that elevate it from ordinary to extraordinary. The secret lies in balancing high-heat searing with gentle roasting to achieve a perfectly tender interior and a caramelized crust that cracks with every bite. This isn’t just a recipe—it’s a showstopper that demands attention at every turn, from the sizzle of the pan to the final presentation on the plate.
What sets this method apart is the herb-crusted exterior, which adds layers of aromatic flavor while creating a golden-brown bark that holds up beautifully. We’ll use a reverse-sear approach—starting with a low oven to cook the meat evenly before finishing with a quick sear to lock in juices and create that coveted crust. The result? A juicy, melt-in-your-mouth tenderloin with a crust so impressive, your guests will think you’ve spent hours in the kitchen.
This recipe isn’t just about the main event—it’s about the full experience. Pair the tenderloin with a rich red wine reduction, roasted garlic mashed potatoes, and a medley of seasonal vegetables to create a meal that feels like a five-star restaurant brought home. The key is timing: letting the meat rest after roasting ensures every slice stays succulent, while the sides come together in harmony. No shortcuts here—just a restaurant-quality dish that’s worth every minute of effort.
Whether you’re hosting a holiday feast or treating yourself to a special night in, this tenderloin delivers. The instructions are straightforward, but the results are anything but ordinary. Let’s get started—your table is about to become the talk of the evening.
Ingredients for 6lb beef tenderloin
Six pounds of premium beef and aromatic herbs transform into a steakhouse-worthy centerpiece.
| Ingredient | Amount | Notes |
|---|---|---|
| Beef Tenderloin 🥩 | 6 lb | Center-cut, trimmed of silver skin |
| Fresh Rosemary 🌿 | ½ cup | Finely chopped, stems removed |
| Fresh Thyme 🌿 | ¼ cup | Leaves only, finely chopped |
| Garlic Cloves 🧄 | 8 cloves | Minced, for herb crust |
| Extra-Virgin Olive Oil 🫒 | ¼ cup | High-quality, fruity |
| Diamond Crystal Kosher Salt 🧂 | 1 ½ tbsp | Coarse grain preferred |
| Freshly Ground Black Pepper 🌶️ | 1 tbsp | Freshly cracked preferred |
| Unsalted Butter 🧈 | ½ cup | Cold, cubed for searing |
| Red Wine 🍷 | 1 cup | Bold, dry variety like Cabernet Sauvignon |
| Vegetable Oil 🫒 | 2 tbsp | High smoke point for searing |
| Fresh Parsley 🌿 | ¼ cup | Chopped, for garnish |
| Balsamic Glaze 🍷 | ¼ cup | For drizzling, optional |
The tenderloin is the star—center-cut, 6 pounds—so don’t skimp on quality. Whole Foods or your local butcher will have the best options, but most grocery stores carry it too. Look for a piece with even marbling and a deep red color. The herb crust relies on fresh rosemary and thyme (dried won’t cut it here), so grab them from the produce section—avoid the sad, wilted bunches. If you’re feeling fancy, Costco sells pre-trimmed tenderloins that save time. The key is trimming the silver skin before seasoning for that clean, professional look.
No fresh herbs? Dried rosemary at one-third the amount works in a pinch, but the flavor won’t be the same. Running low on olive oil? Avocado oil is a great substitute—just use the same quantity. The red wine can be swapped for beef broth with a splash of balsamic if you’re avoiding alcohol. For the crust, toast the garlic in olive oil for 2 minutes before mincing—trust me on this. The butter for searing should be cold and cubed; don’t let it melt before hitting the pan. And if you’re short on time, skip the balsamic glaze—the crust alone is worth it.
This isn’t a meal you’ll want to reheat—plan ahead. The tenderloin rests best at room temperature for 1 hour before roasting, so take it out of the fridge while prepping. After cooking, tent loosely with foil and let it rest for 20-30 minutes—this is non-negotiable for juicy slices. The herb crust keeps for 3 days in the fridge if you make it ahead, but the meat is best served fresh. Slice against the grain for maximum tenderness. Leftovers? Freeze for up to 3 months in portions for quick meals—though honestly, you’ll likely eat it all at once.
Why You'll Love This Recipe
- No-Fuss Roast: I swear by this method—just sear the tenderloin in olive oil, stuff it with garlic and herbs, and let the oven do the work. Minimal prep, zero fuss, and that rosemary-thyme crust? It’s foolproof.
- Crispy-Creamy Magic: That golden crust from the olive oil and fresh herbs? It’s the best part. The inside stays juicy while the outside gets this addictive caramelized edge—like a fancy steakhouse cut but made in my kitchen.
- Party-Proof Perfection: Between us, this is my go-to for gatherings. A 6lb roast feeds a crowd, and the leftovers? Sliced into sandwiches or tossed in pasta the next day. (Yes, even on a Tuesday night.)
- Leftovers That Win: Honestly, I make this just for the leftovers. The meat stays tender for days, and reheating it? Just a quick sear in the pan—no drying out. My freezer’s full of it, and I don’t even mind.
Step-by-step instructions for herb-crusted beef tenderloin
Here's how to transform a simple beef tenderloin into a showstopping centerpiece with perfect tenderness and rich herb flavors.
Prepare the Herb Crust Mixture
In a small mixing bowl, combine the 0.5 cup fresh rosemary, 0.25 cup fresh thyme, and 8 cloves minced garlic cloves. Add 0.25 cup extra-virgin olive oil and mix thoroughly until the herbs are evenly coated. This creates the aromatic base for your crust.
In a separate bowl, whisk together 1.5 tablespoons diamond crystal kosher salt and 1 tablespoon freshly ground black pepper. Gently fold this salt-pepper mixture into the herb-oil combination until fully integrated. The result should be a fragrant, cohesive paste that will adhere beautifully to the beef's surface.
Sear the Beef Tenderloin
Pat the 6 lb beef tenderloin completely dry with paper towels—this is crucial for achieving a perfect crust. Heat 2 tablespoons vegetable oil in a heavy-duty skillet over medium-high heat until shimmering. Place the tenderloin in the skillet and sear on all sides for 3-4 minutes per side until developing a deep golden-brown crust.
While searing, I like to press down gently on the tenderloin during the first minute of each side—this prevents it from curling and ensures even contact with the pan. The beef should release easily from the skillet when ready to flip. Transfer the seared tenderloin to a plate and let it rest for 5 minutes before proceeding.
Create the Herb Crust and Sear Again
Spread the herb mixture evenly over the seared beef, pressing it firmly into the surface so it adheres completely. Return the tenderloin to the skillet (no need to add more oil) and sear for another 2-3 minutes per side until the herb crust is deeply golden and fragrant. This second searing locks in the flavors and creates that coveted crust.
Here's the thing—don't rush this step. You want the crust to be richly colored and slightly crispy. If you notice the crust sticking, simply add a tablespoon of red wine to deglaze and scrape up those flavorful browned bits from the pan.
Roast to Perfect Medium-Rare
Preheat your oven to 425°F. Transfer the herb-crusted tenderloin to a baking sheet lined with parchment paper. Place 0.5 cup cold unsalted butter on top of the beef and roast for 20-25 minutes for medium-rare (internal temperature 125-130°F).
I use a meat thermometer for precision, but you can also use the finger test: medium-rare feels like pressing your thumb and forefinger together with a slight give. The butter will baste the beef as it roasts, adding incredible richness. Don't overcook—beef continues cooking after removal from the oven.
Rest and Serve with Elegance
Remove the tenderloin from the oven and transfer it to a cutting board. Tent loosely with foil and let it rest for 15-20 minutes—this crucial step allows the juices to redistribute throughout the meat. During this time, pour the 1 cup red wine into the skillet and simmer for 3-4 minutes to create a quick reduction sauce.
Slice the beef against the grain into 1-inch thick portions. Arrange on a platter and drizzle generously with the red wine reduction. Garnish with 0.25 cup chopped fresh parsley and a final touch of 0.25 cup balsamic glaze for visual appeal. Serve immediately with roasted vegetables or creamy mashed potatoes for a complete showstopping meal.
Pro Tips For Making 6lb Beef Tenderloin
- USE A MEAT THERMOMETER: I burned through three tenderloins before I accepted this: tenderloin’s danger zone starts at 135°F, but it’s best pulled at 125°F for medium-rare—any higher, and you’re fighting dryness. A cheap instant-read thermometer ($15) saves you from guessing, especially with a 6-pound cut where internal temps vary.
- TRIM THE FAT IN STRIPS: That silverskin fat on the tenderloin? It’s not just for looks—it renders into crispy bits that add flavor. Instead of slicing it off, score the fat in a crosshatch pattern with a sharp knife, then sear those strips first in the pan. They’ll turn golden and crackle like bacon while the meat rests.
- SALT THE MEAT 24 HOURS EARLY: I used to salt tenderloin right before cooking, thinking it’d dry out. Wrong. A 6-pound roast needs a generous 2 tablespoons of kosher salt rubbed all over (yes, even the ends) and left uncovered in the fridge. This seasoning penetrates deeper, and the surface develops a better crust—no soggy herb paste clinging to it later.
- REST IT UNDER FOIL, NOT ON THE CUTTING BOARD: Here’s the mistake I made: I’d pull the tenderloin from the oven at 125°F, plop it on a cutting board, and immediately slice—juices everywhere. Instead, tent it loosely with foil for 10–15 minutes. The residual heat keeps it warm while the juices redistribute, and the foil catches any drips. Pro move: Rest it on a wire rack in a tray to avoid steam buildup.
Regional styles of these flavors
Classic Steakhouse Style
The most iconic approach comes from Chicago steakhouses, where a 6lb beef tenderloin is often roasted to medium-rare with just coarse salt and black pepper, then sliced into 1-inch thick portions. The key difference? They serve it with a red wine reduction made from the same wine used to deglaze the pan after searing. I always add 1 tbsp butter to the reduction at the end for extra richness—it’s a game-changer for that restaurant-quality finish. 🥩
French Bistro Technique
French bistros take a more refined approach, focusing on herb butter basting rather than crusts. After searing, they wrap the tenderloin in parchment paper with herb butter (mix 0.25 cup softened butter with 1 tbsp chopped parsley and 1 minced garlic clove) and roast at 325°F until medium-rare. The butter bastes continuously, creating a silky, flavorful crust without needing extra searing. I’ve found this method works best with wild-caught beef—the natural flavors shine through. 🍷
Texas BBQ Twist
In Texas, they love a smoky, slightly sweet profile—perfect for a 6lb tenderloin. After searing, they coat the beef with a mix of 1 tbsp brown sugar, 1 tbsp smoked paprika, and 1 tbsp olive oil, then finish in a smoker at 250°F for 45 minutes. The result? A caramelized, smoky crust that pairs perfectly with BBQ sauce drizzled over the slices. For a quick version at home, use liquid smoke (just ½ tsp) mixed into the herb crust. 🔥
Italian Herb-Crusted Version
Italian chefs often use fresh rosemary and thyme (just like our recipe) but add lemon zest and grated Parmesan to the crust for brightness. They also finish the beef with a lemon butter sauce—simmer 0.5 cup butter, zest of 1 lemon, and 2 tbsp white wine for 3 minutes—then drizzle over the sliced tenderloin. The acidity cuts through the richness beautifully. I’ve made this version for holiday dinners, and it’s always a crowd-pleaser. 🌿
Japanese Wagyu Inspiration
For a luxury touch, Japanese chefs often dry-brine the tenderloin overnight in 1 tbsp kosher salt and 1 tbsp sugar before cooking. After searing, they wrap the beef in yuzu kosher (or substitute lemon juice) and sesame seeds, then roast at 275°F for 30 minutes. The result? A tender, slightly sweet profile with a crispy sesame crust. If you can’t find yuzu, lime juice works in a pinch. This method is perfect for special occasions—it’s worth the extra effort. 💫
Modern Fusion Approach
For a contemporary twist, try a chipotle-lime crust: mix 1 tbsp adobo sauce (from canned chipotles) with 1 tbsp lime zest and 1 tbsp olive oil, then spread it over the seared tenderloin before roasting. The smoky, tangy flavors pair perfectly with avocado slices and cilantro on top. I’ve served this at summer BBQs, and it’s a hit with guests who love bold flavors. 🌶️
Nutrition facts
Frequently asked questions
How long should I let a 6lb beef tenderloin rest before slicing?
Always let it rest for 15-20 minutes after roasting. This allows the juices to redistribute throughout the meat, ensuring each slice stays juicy and tender. Skipping this step will result in dry, disappointing beef. Pro tip: Tent loosely with foil to keep it warm while resting.
Can I cook a 6lb beef tenderloin to medium-well instead of medium-rare?
Yes, but adjust the internal temperature to 140-145°F for medium-well. Roast for 5-10 minutes longer than the recipe suggests, checking frequently with a meat thermometer. Medium-well tenderloin still tastes delicious, though it loses some of that melt-in-your-mouth tenderness.
What’s the best way to reheat leftover beef tenderloin?
Reheat slices gently in a skillet over low heat with a splash of beef broth for 2-3 minutes per side—this prevents drying out. For larger portions, wrap in foil and bake at 300°F for 10-15 minutes. Never microwave, as it turns the meat rubbery.
How many servings does a 6lb beef tenderloin actually yield?
This recipe yields 6-8 generous servings (about 1-inch thick slices). For a crowd, plan for 6 servings if your guests are hearty eaters, or 8 servings if serving with lighter sides. Leftovers make great sandwiches or salads the next day!
Why did my herb crust fall off during cooking?
This usually happens if the beef wasn’t completely dry before searing or if the crust wasn’t pressed firmly enough. Next time, pat the meat extra dry with paper towels and press the herb mixture into every crevice. A light spray of water on the crust before the second sear can also help it stick.