
Main Courses
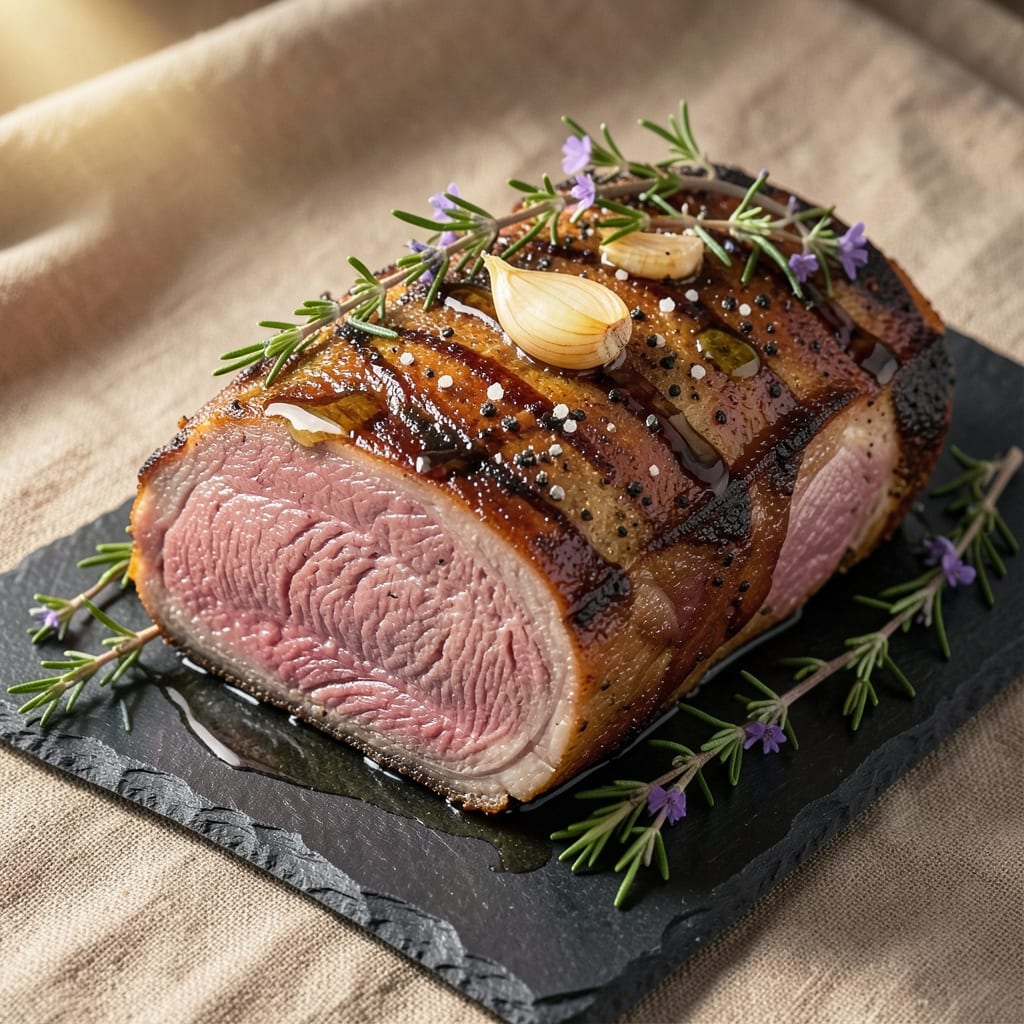
Mastering a 6 lb beef tenderloin roast transforms simple ingredients into a showstopping centerpiece—juicy pink centers with a caramelized crust that commands every plate. 🔥 The secret lies in precision: reverse-searing for even doneness while building that coveted crust, a technique that elevates home cooking to steakhouse standards. This isn't just a recipe; it's a confidence builder for hosting dinner parties or treating yourself to restaurant-quality results without the price tag.
What sets this method apart is the balance of science and simplicity. A dry brine enhances natural flavors while keeping the meat tender, and careful temperature control ensures that 125–130°F internal temperature delivers medium-rare perfection every time. The reverse sear—starting with a low oven and finishing with a high-heat sear—guarantees a crust so crisp it nearly shatters, while the interior remains silky and pink. No guesswork, no overcooked surprises.
By the final slice, you'll serve a roast so impressive it becomes the star of any meal—golden, glistening, and falling apart with just the right resistance. The technique is foolproof, the results undeniable, and the plating effortless: just rest, slice, and arrange with confidence. This is the kind of dish that makes guests ask for the recipe (and leaves them convinced you're a professional).
Pair with roasted garlic mashed potatoes or a bold red wine reduction to complete the experience. Here's how to achieve it—step by step, without compromise.
Ingredients for 6 lb beef tenderloin roast
Precision-crafted ingredients deliver steakhouse-quality beef tenderloin with flawless crust and pink perfection.
| Ingredient | Amount | Notes |
|---|---|---|
| Beef Tenderloin Roast 🥩 | 6 lb | Center-cut, trimmed of silver skin |
| Kosher Salt 🧂 | 2 tbsp | Diamond Crystal preferred, coarse grain |
| Freshly Ground Black Pepper 🌶️ | 1 ½ tbsp | Freshly cracked for maximum aroma |
| Extra-Virgin Olive Oil 🫒 | 2 tbsp | High-quality, fruity variety for basting |
| Garlic Cloves 🧄 | 6 cloves | Smashed, skin-on for infusion |
| Fresh Thyme Sprigs 🌿 | 4 whole | Stems removed, leaves intact |
| Fresh Rosemary Sprigs 🌿 | 2 whole | Needles only, finely chopped |
| Unsalted Butter 🧈 | ½ cup | Cold, cubed for crust formation |
| Yellow Onion 🧅 | 1 whole | Thinly sliced for garnish |
| Red Wine 🍷 | ½ cup | Bold Cabernet Sauvignon, reduced |
| Beef Bone Broth 💧 | ¼ cup | Homemade or high-quality store-bought |
| Fresh Parsley 🌿 | ¼ cup | Chopped, for final garnish |
The beef tenderloin is non-negotiable—center-cut with even grain ensures consistent doneness. Source from a trusted butcher or high-end grocery like Whole Foods or Dartmouth Farms, where they'll trim the silver skin for you. Look for rich marbling and vibrant color; avoid anything with grayish hues or excessive fat. The roast should weigh exactly 6 pounds before trimming. For the dry brine, Diamond Crystal kosher salt dissolves more easily than table salt, creating a better crust. If you can't find it, use Morton kosher salt but increase to 2.5 tbsp—it's finer.
No fresh herbs? Dried thyme and rosemary work at one-third the amount, but toast them first in a dry pan for 30 seconds to intensify flavor. Substitute the red wine with beef stock plus a splash of balsamic vinegar if needed—just reduce it to the same consistency. For the butter crust, European-style butter like Plugrá has higher fat content, making it ideal. Short on time? Use olive oil instead, but reduce to 1 tbsp and add 1 tbsp flour to the butter mixture. The garlic and onions can be prepped ahead—smashed cloves and sliced onions keep for 3 days in the fridge, sealed tightly.
The roast is best served immediately after resting, but leftovers reheat beautifully in a 325°F oven for 15 minutes, covered loosely with foil. Store in an airtight container for 3-4 days in the fridge, or freeze for up to 3 months by wrapping tightly in plastic and aluminum foil. For presentation, slice against the grain into 1-inch thick medallions. Garnish with the red wine reduction and parsley just before serving—this keeps everything vibrant. The crust loses crispness after 10 minutes, so plate directly from the pan if possible.
Why You'll Love This Recipe
- Here’s what sold me: this roast actually improves the second day. Cold slices in salads? Check. Reheated with a pat of butter? Chef’s kiss. And since it’s a big cut, you’ll have enough for lunches that don’t involve sad desk sandwiches.
- No-Fuss Prep: Honestly, this roast takes less effort than deciding what to watch on Netflix. Just a quick rub of olive oil, crushed garlic, and salt—no fancy marinades or hours of prep. The beef does all the work while you sip wine and pretend you’re not cooking.
- Crispy-Garlicky Magic: That first bite? Juicy center, perfectly seared crust, and garlic so infused it’ll make your kitchen smell like a Parisian bistro. Between us, the secret’s in letting the olive oil caramelize with the garlic cloves before the meat even hits the pan.
- Party-Proof Perfection: I’ve served this at holiday dinners, random Sunday brunches, and even a last-minute date night—it never disappoints. Slice it thick for steak-like slices, or shred it for tacos later. (Yes, even on a Tuesday night.)
Step-by-step instructions for reverse-seared beef tenderloin roast
Master this technique for a tenderloin with a crisp golden crust and perfect pink center every time.
🔥 Step 1: Prep and Season the Tenderloin
Remove the beef tenderloin roast from the refrigerator and let it sit at room temperature for 30 minutes to ensure even cooking. Pat it completely dry with paper towels—this is critical for creating that coveted crust. I press firmly in all directions, especially around the crevices, to remove any moisture that might prevent proper browning.
In a small bowl, combine the 2 tbsp kosher salt and 1.5 tbsp freshly ground black pepper. Rub this mixture all over the tenderloin, pressing it into the surface so it adheres well. The salt will penetrate the meat during the low-temperature cook, while the pepper adds aromatic depth. Let the seasoned tenderloin rest uncovered on a wire rack set over a baking sheet for 15 minutes before cooking.
🔥 Step 2: Low-Temperature Roast to Medium Rare
Preheat your oven to 275°F. Place the seasoned tenderloin on a rack in a roasting pan, fat-side up. This gentle temperature allows the meat to cook slowly and evenly, reaching 120°F internally without drying out. Roast for 30-35 minutes per pound, which for our 6 lb roast means about 3 hours total.
Here's the thing—I check the internal temperature using a meat thermometer inserted into the thickest part of the roast. When it hits 120°F (medium rare), it's time to move to the next step. The meat should feel firm but still spring back slightly when pressed with your finger. If it's not there yet, continue roasting in 15-minute increments.
🍳 Step 3: Build the Reverse-Seared Crust
While the tenderloin rests, prepare your searing station. Heat a large oven-safe skillet over high heat until it's screaming hot. Add the 2 tbsp extra-virgin olive oil and let it shimmer for 1 minute. Place the roast in the skillet, fat-side down first, and let it sear undisturbed for 4-5 minutes until a deep golden crust forms.
Flip the roast and add the 6 smashed garlic cloves, 4 thyme sprigs, and 2 rosemary sprigs to the pan. Pour in the 0.5 cup red wine and let it bubble away for 1 minute to deglaze the pan. Then add the 0.5 cup cold cubed butter—it will foam and sizzle dramatically, creating a luxurious sauce that coats the roast.
🔥 Step 4: Finish in the Broiler for Maximum Crust
Transfer the skillet to a preheated broiler set to high heat. Broil for 3-5 minutes, watching closely, until the crust reaches a deep mahogany color. The butter should be fully melted and the aromatics should be fragrant and caramelized. This final step creates that signature crust while keeping the interior perfectly pink.
Remove the roast from the broiler and let it rest on a cutting board for 10-15 minutes. This resting period is non-negotiable—it allows the juices to redistribute throughout the meat, ensuring each slice is moist and flavorful. During this time, strain the pan juices into a small saucepan and reduce with the 0.25 cup beef bone broth until slightly thickened.
🍽️ Step 5: Slice and Serve with Pan Sauce
Using a sharp carving knife, slice the tenderloin against the grain into 1-inch thick slices. The meat should be perfectly pink in the center with a crisp, golden-brown crust. Arrange the slices on a warm platter and drizzle generously with the reduced pan sauce.
Garnish with the sliced yellow onion and 0.25 cup chopped fresh parsley for a pop of color and freshness. Serve immediately with your choice of sides—roasted vegetables, mashed potatoes, or a simple green salad. The contrast between the crisp crust and tender interior makes every bite unforgettable.
Pro Tips For Making 6 Lb Beef Tenderloin Roast
- USE A MEAT THERMOMETER: Skip guessing—this is the only way to nail a 6 lb tenderloin. Aim for 125°F internal temp (medium-rare) and pull it early; it’ll rise to 130°F while resting. I learned this the hard way after slicing into a dry roast because I trusted the "15 minutes per pound" rule. ---
- SALT THE NIGHT BEFORE: Tenderloin absorbs salt better when given time. Coat the roast in kosher salt and refrigerate uncovered for 12–24 hours—yes, even if you’re impatient like me. The crust will be deeper, and the seasoning will penetrate evenly. ---
- SEAR IN BATCHES: A 6 lb roast won’t fit in a single hot pan without crowding. Sear one side at a time in olive oil over high heat, then flip and repeat. Skipping this step means missing that flavorful crust, and no one wants a bland center. ---
- REST UNDER FOIL: Tent the roast with foil and let it sit for 20–30 minutes before slicing—this keeps it juicy. I used to rush this, and the slices would dry out by the time they hit the plate. (Your future self will thank you.)
Regional styles of these flavors
Classic American Style
The American approach to beef tenderloin focuses on bold flavors and a perfect medium-rare finish. I love using a dry brine with kosher salt and freshly cracked black pepper, then reverse-searing for that signature crust. For an extra touch, I add smashed garlic cloves and rosemary sprigs during the final sear—this creates a fragrant crust that guests will rave about. Serve with roasted garlic mashed potatoes and a red wine reduction to complement the rich beef. 🥩
French Bistro Technique
In French bistros, beef tenderloin is often prepared with a duxelles—a finely chopped mixture of mushrooms, shallots, and herbs. For a French-inspired version, sauté ½ cup finely chopped mushrooms and 2 shallots in butter before adding the roast to the pan. Deglaze with ½ cup white wine instead of red, then finish with a béchamel sauce drizzled over the slices. Garnish with chopped chives and a sprinkle of Parmesan cheese for an elegant touch. 🍷
Italian Herb-Crusted Version
For an Italian twist, I coat the tenderloin with a mix of fresh rosemary, thyme, and oregano before reverse-searing. After the initial roast, I add ½ cup breadcrumbs mixed with grated Parmesan cheese and lemon zest to the pan for the final crust. The result is a crispy, herby exterior with a juicy pink center. Pair with creamy polenta and a sun-dried tomato sauce for a hearty meal. 🌿
Texas BBQ Style
In Texas, beef tenderloin is often smoked and served with bold, tangy sauces. For a BBQ-inspired version, smoke the roast at 225°F for 4-5 hours before reverse-searing. Brush the finished tenderloin with a smoky tomato-based sauce (mix ½ cup ketchup, 2 tbsp smoked paprika, and 1 tbsp brown sugar). Serve with cornbread and collard greens for a Southern-inspired feast. 🔥
Japanese Wagyu-Inspired
For a luxurious twist, marinate the tenderloin in a blend of soy sauce, mirin, and grated ginger for 4-6 hours before cooking. After reverse-searing, drizzle with a yuzu kosho (Japanese citrus chili paste) glaze for a bright, umami-rich finish. Garnish with microgreens and serve with steamed jasmine rice and miso-glazed eggplant. This version is perfect for a special occasion. 🌸
Nutrition facts
Frequently asked questions
Why should I use a meat thermometer for this recipe?
Because guessing temperatures leads to overcooked beef tenderloin! A meat thermometer ensures your center hits 120°F for medium-rare perfection. The reverse sear method relies on precise internal temps to maintain juiciness while building that golden crust. Without it, you risk drying out this delicate cut.
Can I cook this in a conventional oven instead of reverse-searing?
Yes, but you'll sacrifice that restaurant-quality crust. For traditional roasting, cook at 375°F for 20-25 minutes per pound (about 2.5 hours for 6 lbs), then broil for 5 minutes to brown. The interior will still be tender, but the exterior won't be as crispy or flavorful as the reverse sear method.
How do I fix if my tenderloin is overcooked?
Unfortunately, you can't undo overcooked beef, but you can salvage it! Slice thinly against the grain and serve with rich sauces (like the red wine reduction) or creamy mashed potatoes. For future attempts, always use a thermometer and remove the roast 5°F below your target temp—it carries over as it rests.
What's the best way to store leftovers?
Slice the tenderloin and store in an airtight container for 3-4 days in the fridge, or freeze for up to 3 months. For reheating, warm in a 325°F oven for 15 minutes covered loosely with foil. The crust may lose some crispness, so it's best enjoyed fresh or used in sandwiches and salads.
Can I substitute a smaller tenderloin?
Just adjust the cooking time. For a 4 lb roast, reduce time to 2 hours at 275°F, then sear as directed. Keep all other steps identical—the reverse sear method works perfectly for smaller cuts too. The key is maintaining the same internal temperature before finishing with high heat.