
Main Courses
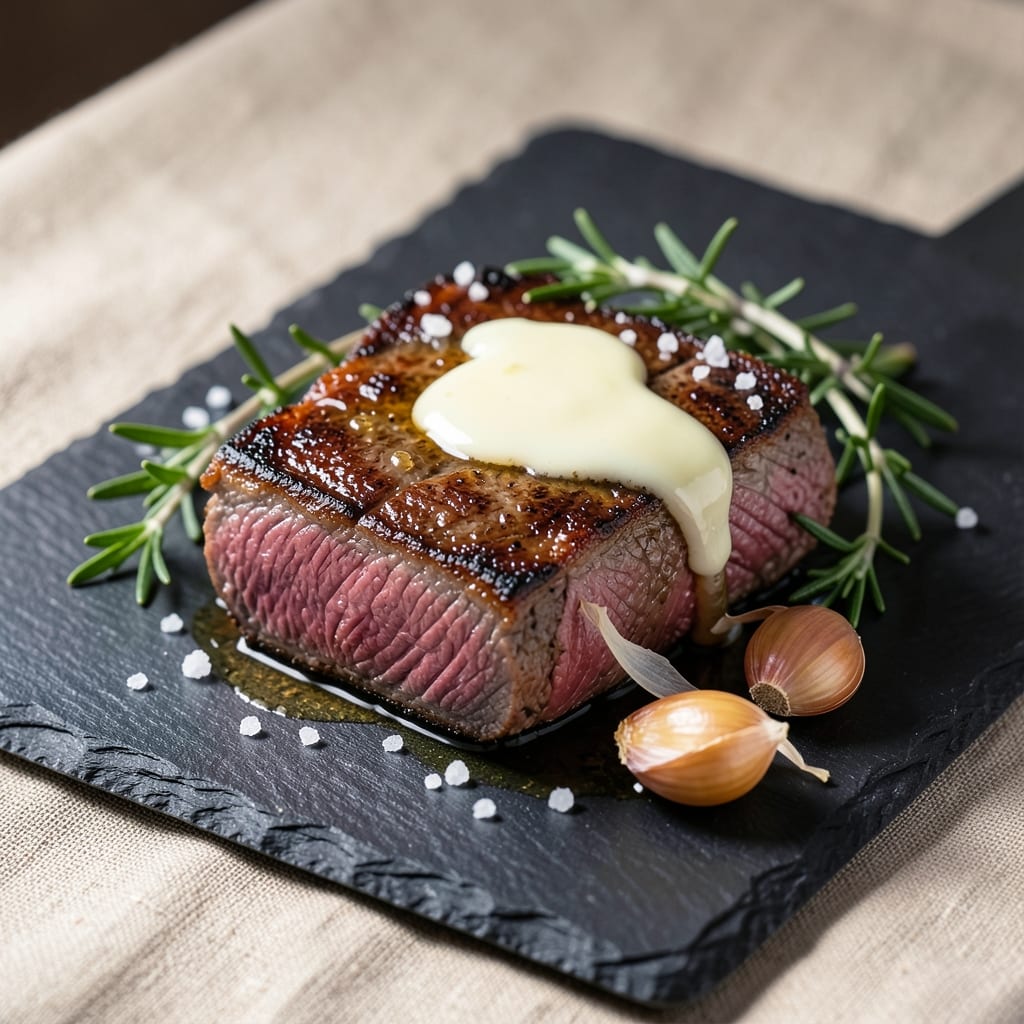
This dry aged beef recipe transforms an already luxurious cut into a masterpiece of texture and flavor—think crispy, umami-rich crust giving way to a melt-in-your-mouth center. I’ve spent years perfecting the technique, and the difference between properly cooked dry-aged beef and overdone steak is night and day. The secret lies in precise temperature control and a gentle sear that locks in those deep, nutty flavors while keeping the interior tender.
What makes this recipe special is the balance: high heat for the crust, then a slow finish to ensure the beef reaches the perfect internal temperature without overcooking. We’re talking 125–130°F for medium-rare, where every bite delivers that buttery tenderness with a hint of earthy depth. The crust develops a caramelized richness that’s impossible to resist, and the resting time—10–15 minutes—is non-negotiable for even distribution of juices.
Pair this with a bold red wine reduction or a simple side of roasted root vegetables to let the beef shine. The presentation matters too: slice against the grain for maximum tenderness, and garnish with fresh thyme or a sprinkle of flaky salt. This isn’t just dinner—it’s an experience that turns a weeknight into something special.
Ready in about 30 minutes of active time (plus resting), this recipe proves you don’t need a fancy restaurant to enjoy steakhouse-quality results. The key is patience and precision—two things that always pay off in the end.
Ingredients for dry aged beef
Precision-crafted ingredients for restaurant-quality dry-aged beef with perfect crust and tender core.
| Ingredient | Amount | Notes |
|---|---|---|
| Dry Aged Beef Ribeye 🥩 | 2 lb | 2-inch thick cut, bone-in preferred |
| Kosher Salt 🧂 | 1 ½ tbsp | Diamond Crystal preferred for flakiness |
| Freshly Ground Black Pepper 🌶️ | 1 tbsp | Coarse grind for texture |
| Unsalted Butter 🧈 | 4 tbsp | European-style, 82% fat content |
| Garlic Cloves 🧄 | 8 cloves | Smash flat for maximum flavor |
| Fresh Thyme Sprigs 🌿 | 4 whole | Leaves only, stems removed |
| Extra-Virgin Olive Oil 🫒 | 2 tbsp | High smoke point preferred |
| Flaky Sea Salt 🧂 | 1 tbsp | Maldon or Jacobsen preferred |
| Red Wine 🍷 | ½ cup | Bold Cabernet Sauvignon, room temp |
| Beef Tallow 🧈 | 2 tbsp | For high-heat searing |
| Fresh Rosemary 🌿 | 2 sprigs | Needles only, finely chopped |
| Yellow Onion 🧅 | 1 whole | Thinly sliced, caramelized |
| Balsamic Vinegar 🍶 | 1 tbsp | Aged 10+ years for depth |
The beef is non-negotiable—dry-aged ribeye with visible marbling and a deep mahogany crust. Butcher shops or specialty grocers like Whole Foods carry the best cuts; look for pieces aged 21-45 days for optimal umami development. The thickness matters too—2-inch cuts ensure even cooking without overcooking the center. If you can't find dry-aged, wet-aged beef with extra marbling works in a pinch, but the flavor won't be identical. For the butter, European-style brands like Plugrá have higher fat content, which is crucial for that perfect crust.
No flaky sea salt? Diamond Crystal kosher salt works at double the amount, though texture won't be identical. Substituting red wine? Beef stock reduced by half carries similar depth, though it lacks the acidity. Fresh herbs can be swapped—dried thyme at one-quarter the amount works, but fresh thyme's aroma is irreplaceable. The beef tallow can be omitted if you're avoiding animal fats, but avocado oil won't provide the same caramelization. For the onion, caramelize it thoroughly—this adds sweetness that balances the beef's richness. The balsamic vinegar should be aged; regular balsamic glaze lacks the complexity.
The beef should rest at room temperature for 1 hour before cooking—this ensures even doneness. Store any unused butter in the fridge for up to 3 months, while the fresh herbs keep for 5-7 days wrapped in damp paper towels. The dry-aged beef itself will keep in the fridge for 3-4 days after purchase, though it's best cooked immediately. For leftovers, slice thinly against the grain and reheat in a skillet with a splash of water to maintain moisture. Portion the cooked beef into airtight containers for up to 3 days of fridge storage.
Why You'll Love This Recipe
- Here’s the secret: it’s fancy enough for date night but takes less time than ordering takeout. (Yes, even on a Tuesday night.)
- Two-Ingredient Magic: I swear by this—just salt, pepper, and that buttery garlic sear. The dry-aged ribeye does most of the work; I just let it shine.
- Weeknight Luxury: Here’s the secret: it’s fancy enough for date night but takes less time than ordering takeout. (Yes, even on a Tuesday night.)
- Leftovers That Don’t Suck: Cold slices the next day? Still rich and tender. I wrap them in parchment, reheat in foil—no sad, dry meat here.
Step-by-step instructions for dry-aged beef ribeye with umami crust
Mastering this technique transforms simple ingredients into a restaurant-worthy steak.
Prepare the Dry-Aged Ribeye for Maximum Flavor Development
Remove the dry-aged beef ribeye from the refrigerator and let it sit at room temperature for 45-60 minutes. This crucial step ensures even cooking throughout the 2-inch thick cut. While it rests, pat the surface completely dry with paper towels—moisture is the enemy of a perfect crust. I press firmly in circular motions to remove every trace of surface moisture, which helps create that coveted umami crust.
Generously season both sides with 1.5 tablespoons kosher salt and 1 tablespoon freshly ground black pepper, pressing the seasoning into the meat. The coarse texture of Diamond Crystal kosher salt creates better adhesion and a more pronounced flavor. Let the seasoned steak rest uncovered on a wire rack for another 15 minutes—this allows the salt to penetrate slightly and the surface to dry further, setting the stage for that deep crust.
Create the Umami Butter Compound for Crust and Moisture
In a small bowl, combine 4 tablespoons unsalted butter, 2 tablespoons beef tallow, 2 tablespoons extra-virgin olive oil, 1 tablespoon flaky sea salt, 8 smashed garlic cloves, and 2 sprigs finely chopped fresh rosemary. The beef tallow adds an extra layer of richness that prevents the butter from burning at high heat, while the olive oil helps emulsify the mixture. I like to use a mortar and pestle for the garlic to maximize surface area and flavor extraction.
Spread this umami butter compound evenly over both sides of the seasoned ribeye, pressing gently to ensure full coverage. The butter should melt slightly from the warmth of the meat, creating a sticky surface that will caramelize beautifully during searing. Place the prepared steak back on the wire rack and let it rest for another 10 minutes before cooking—this final rest ensures the butter adheres perfectly.
Develop the Umami Crust Through Controlled Searing
Heat a heavy cast-iron skillet over medium-high heat until it's screaming hot—you should see a slight wisp of smoke when you flick a drop of water onto the surface. Add the ribeye and sear for 4-5 minutes per side, pressing down gently with a metal spatula during the first minute of each side. This prevents curling and ensures even contact with the pan. The butter compound should bubble vigorously and form a dark, caramelized crust with crackling edges.
When the crust reaches a deep mahogany color and the internal temperature reaches 120°F (measured with a meat thermometer), it's time to baste. Carefully pour 0.5 cup bold Cabernet Sauvignon around the edges of the pan, then spoon the wine over the steak repeatedly for 2 minutes. The alcohol will evaporate quickly, leaving behind concentrated wine flavors that penetrate the meat. This basting technique adds another layer of umami complexity to the crust.
Complete the Cook and Build the Umami Pan Sauce
Transfer the steak to a wire rack set over a baking sheet and place it in a 375°F oven. Cook for 8-10 minutes until the internal temperature reaches 130°F for medium-rare. The residual heat in the pan will continue cooking the steak slightly as you work on the sauce, so don't be tempted to rush this step.
Return the skillet to the stovetop over medium heat and add 1 thinly sliced yellow onion. Cook for 5-6 minutes until the onions are deeply caramelized and golden brown. Deglaze the pan with 1 tablespoon aged balsamic vinegar, scraping up all the browned bits from the bottom. Add 4 thyme sprigs and let them infuse for 30 seconds. The result should be a rich, velvety sauce with layers of umami from the wine, balsamic, and caramelized onions.
Rest and Serve for Optimal Texture
Remove the steak from the oven and let it rest on the wire rack for 10-15 minutes before slicing. This resting period is absolutely critical—it allows the juices to redistribute throughout the meat, preventing them from pooling and running out when you cut. The crust should remain intact during this time, maintaining its beautiful caramelized texture.
Slice the ribeye against the grain into ½-inch thick portions and serve immediately with the umami pan sauce spooned over the top. Each bite should deliver a perfect balance of tender, buttery beef with a deep umami crust that carries notes of garlic, rosemary, and caramelized wine. The sauce should coat the meat beautifully, tying all the flavors together in every forkful.
Pro Tips For Making Dry Aged Beef
- Sear Over High Heat: Dry aged ribeye needs aggression—get your pan screaming hot (medium-high to high) before adding the beef. I used to hover around medium, and the crust never formed properly. Once it’s in the pan, resist the urge to move it; let that butter pool and sizzle for 2-3 minutes per side, or you’ll lose the golden crust that makes this cut sing. ---
- Salt the Night Before: Dry aged beef is already seasoned, but a light coat of kosher salt (about 1 teaspoon per pound) the evening before lets it penetrate just enough to enhance the crust without overpowering. I learned this the hard way—salting right before cooking makes the crust taste like a salt lick instead of a delicate balance. ---
- Don’t Overcrowd the Pan: If you’re cooking more than one steak, work in batches—even if it means an extra minute in the pan. Crowding steams the beef instead of searing it, and you’ll end up with sad, gray edges. Trust me, your steaks (and your patience) will thank you. ---
- Butter the Garlic Last: Add the garlic cloves to the pan after the steak is searing—about the last 30 seconds. This keeps them from burning into oblivion while still infusing the butter with flavor. Toss the steak in that garlic butter right off the heat; it’ll coat every bite like a luxurious blanket. (Yes, even if you’re impatient like me.)
Flavor customization for this recipe
Bold Spice Blends
For a smoky kick, mix 1 tbsp smoked paprika with ½ tsp cayenne and 1 tsp ground cumin into the umami butter compound. The smoky depth complements dry-aged beef’s natural umami, while cayenne adds subtle heat. I’ve found that Penzeys brand spices work best—they’re consistently flavorful. Apply this blend after searing, letting it caramelize into the crust for a complex finish. 🌶️
Herb-Infused Finishes
Swap fresh thyme for fresh sage or rosemary in the butter compound—both add earthy notes that pair beautifully with dry-aged beef. For a brighter twist, try fresh tarragon or chives in the final sauce. I once used 1 tbsp chopped tarragon with the balsamic vinegar, and it added a subtle anise-like brightness that elevated the dish. Garnish with extra herbs before serving for a pop of color and freshness.
Sweet & Tangy Contrasts
Balance the richness with a honey-balsamic glaze—mix 1 tbsp aged balsamic vinegar with 1 tsp honey and brush it over the steak during the final 2 minutes of oven cooking. The sweetness cuts through the beef’s intensity while enhancing the crust’s caramelization. For a tangy twist, add 1 tsp Dijon mustard to the sauce—it adds a subtle sharpness that brightens every bite.
Umami Boosters
Elevate the flavor with 1 tbsp soy sauce or 1 tsp fish sauce in the pan sauce—both add deep umami without overpowering. I’ve also experimented with ½ cup beef broth instead of wine for basting, which intensifies the meaty notes. For a vegetarian-friendly touch, add 1 tsp mushroom powder to the butter compound—it mimics the earthy depth of dry-aged beef beautifully.
Global Flavor Twists
Transform this recipe into a Korean-inspired dish by adding 1 tbsp gochujang and 1 tsp sesame oil to the butter compound. For an Italian twist, use ½ cup dry white wine instead of red and add 2 tbsp sun-dried tomato paste to the sauce. I once made a Mexican-style version with 1 tbsp chipotle powder and ½ tsp cinnamon—the smoky-sweet combo was unexpected but delicious.
Heat Level Control
Adjust spice levels by adding ½ tsp red pepper flakes for mild heat or 1 tsp crushed chili flakes for a fiercer kick. For a smoky heat, sprinkle ½ tsp chipotle powder over the crust before serving. I’ve found that Mad Dog 357 hot sauce** (a few drops) adds a tangy heat that pairs perfectly with the beef’s richness. Always taste as you go—dry-aged beef is flavorful enough to handle bold spices without overpowering it.
Nutrition facts
Frequently asked questions
What's the difference between dry-aged and wet-aged beef?
Dry-aged beef develops its rich, nutty flavor through exposure to air in a controlled environment for 21-45 days, while wet-aged beef is vacuum-sealed for 2-4 weeks. The dry-aging process concentrates flavors through moisture loss, creating that signature mahogany crust and deeper umami taste. Wet-aged beef stays more tender but lacks the complex, earthy notes of dry-aged. For this recipe, dry-aged ribeye delivers unmatched depth that wet-aged simply can't match.
Can I substitute dry-aged beef with regular beef?
You can use wet-aged ribeye with extra marbling as a substitute, but the flavor won't be identical. Dry-aged beef's natural umami comes from enzymatic breakdown during aging. For best results, look for beef aged 30+ days or use a dry-aged flavor enhancer like 1 tsp mushroom powder mixed into the butter compound. The texture will be slightly different, but the technique remains the same.
How do I know when the beef is perfectly cooked?
Use a meat thermometer for precision: 125°F for rare, 130°F for medium-rare (ideal for this recipe), and 140°F for medium. The crust should be deep mahogany with crackling edges. Press the beef gently—it should feel firm but still yield slightly. Never rely on time alone; every oven and pan varies. For dry-aged beef, the 10-15 minute rest is crucial to let juices redistribute.
What's the best way to store leftover dry-aged beef?
Slice thinly against the grain and store in airtight containers for up to 3 days in the fridge. Reheat gently in a skillet with a splash of water to maintain moisture. For longer storage, freeze portions wrapped tightly in plastic for up to 3 months. Thaw overnight in the fridge—never at room temperature. Dry-aged beef loses some texture when reheated, so enjoy leftovers within 2 days for best quality.
Why does my crust keep breaking when I slice?
This usually happens from overcooking or not resting long enough. The crust needs time to set during the 10-15 minute rest