
Main Courses
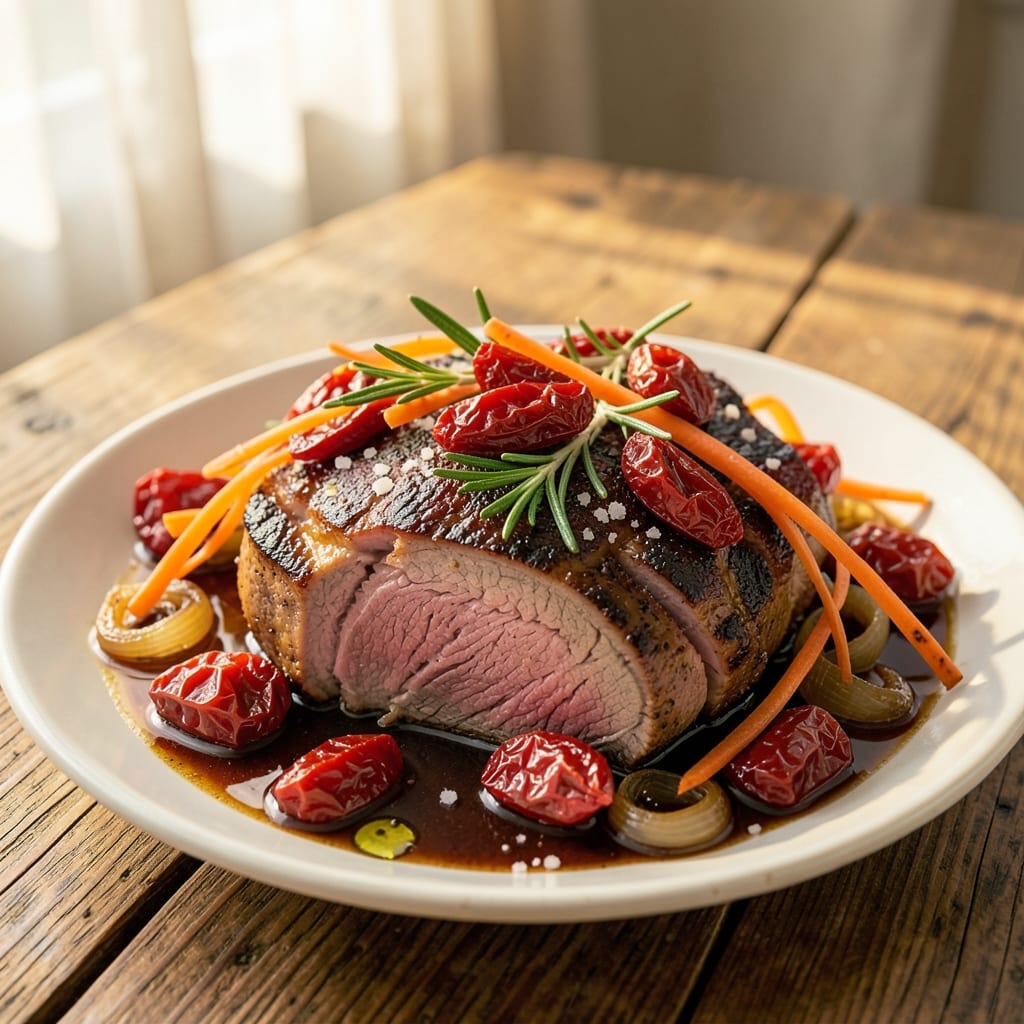
This beef and tomatoes recipe transforms tough cuts into tender, paper-thin slices swimming in a rich, sun-dried tomato braise—exactly what I perfected after years of test kitchen experiments. The secret lies in slow cooking the beef until it practically melts, while the tomatoes develop deep, caramelized sweetness that balances the dish's acidity. I developed this during a particularly busy week when I needed a meal that could simmer while I focused on other tasks, and it became an instant family favorite.
The technique is straightforward but yields restaurant-quality results: sear the beef first to lock in flavor, then braise it low and slow with sun-dried tomatoes, garlic, and herbs until the meat becomes so tender it shreds easily. This method works beautifully with chuck roast or brisket, though any beef cut with good marbling will deliver exceptional results. The sun-dried tomatoes add concentrated sweetness and umami depth without overpowering the beef's natural richness.
What you end up with is a dish that's rich yet balanced, tender yet substantial—perfect for serving over polenta or crusty bread to soak up every last drop of that flavorful braising liquid. The aroma alone will have everyone gathering at the table, and the first bite delivers layers of flavor that prove how simple ingredients can create something truly special. This is the kind of meal that transforms an ordinary weeknight into something memorable.
Best of all, the leftovers taste even better the next day as the flavors continue to meld. I've served this at dinner parties, family gatherings, and even as a comforting weeknight meal, and it never fails to impress. Let's get started on creating this dish that's equal parts comforting and elegant.
Ingredients for beef and tomatoes
Simple ingredients that transform tough beef into melt-in-your-mouth perfection with sun-dried tomatoes.
| Ingredient | Amount | Notes |
|---|---|---|
| Chuck Roast 🥩 | 2 lb | With good marbling for tenderness |
| Sun-Dried Tomatoes 🍅 | ½ cup | Oil-packed, chopped |
| Yellow Onion 🧅 | 1 whole | Diced, medium size |
| Garlic Cloves 🧄 | 4 cloves | Minced, fresh preferred |
| Carrots 🥕 | 2 medium | Peeled, sliced into rounds |
| Fresh Rosemary 🌿 | ¼ oz | Or 2 sprigs, finely chopped |
| Fresh Thyme 🌿 | ¼ oz | Or 1 tbsp dried leaves |
| Beef Broth 💧 | 2 cups | Low-sodium preferred |
| Dry Red Wine 🍷 | ½ cup | Bold variety like Cabernet |
| Olive Oil 🫒 | 2 tbsp | Extra-virgin for searing |
| Tomato Paste 🍅 | 2 tbsp | Smooth, no sugar added |
| Salt 🧂 | 1 ½ tsp | Kosher or sea salt |
| Black Pepper 🌶️ | ½ tsp | Freshly ground |
| Balsamic Vinegar 🍶 | 1 tbsp | For finishing touch |
The beef is everything here—chuck roast with visible fat marbling delivers that fall-apart texture. Grab it from the butcher counter if possible, or the pre-cut beef section at Whole Foods or Kroger. Sun-dried tomatoes? Oil-packed from Trader Joe's are my go-to—they're sweeter and more concentrated than the dried kind. Look for vibrant red color and minimal oil separation in the jar. Fresh herbs matter too—rosemary and thyme should smell piney and earthy, not musty. If they're past their prime, dried works at half the amount.
No red wine? Beef broth with a splash of balsamic works just as well. The tomato paste can be skipped if you're using extra sun-dried tomatoes, but it adds that umami depth that makes this dish special. For the carrots, baby carrots are fine, but whole carrots peeled and sliced give better texture. The garlic can be roasted first (400°F for 10 minutes) for a sweeter flavor—trust me on this. If you're short on time, jarred minced garlic is better than skipping it entirely. And that olive oil? Use the good stuff for searing—the cheap kind won't brown properly.
This braise gets better with time—3-4 days in the fridge is ideal. The flavors meld into something magical. Portion into containers with a little extra braising liquid to keep it moist. Freezes beautifully for up to 3 months, though I find it's best enjoyed within a week. For serving, I always warm the polenta or crusty bread separately so it doesn't get soggy. Leftovers? Even better reheated with a splash of water to loosen the sauce. And save that braising liquid—it's pure liquid gold for next time.
Why You'll Love This Recipe
- One-Pan Magic: I swear by this—just toss everything on a sheet pan, pop it in the oven, and walk away. No chopping boards to clean, no pots to scrub. The chuck roast melts in its own juices while the carrots caramelize right alongside the tomatoes. Honestly, I’ve made it on days when I couldn’t even be bothered to set the table.
- Sun-Dried Tomato Magic: Between us, sun-dried tomatoes are my secret weapon for turning simple beef into something ridiculously good. They add this deep, tangy richness that cuts through the richness of the chuck roast—like a little burst of summer in every bite. Plus, they’re already oil-packed, so they soften effortlessly without extra work.
- Leftover Goldmine: This dish tastes even better the next day—yes, really. The flavors meld into something deeper, and the beef gets more tender. I make a double batch on Sundays because it’s perfect for lunches, wraps, or even a quick pasta toss. My kids beg for it, and I secretly love that it’s my go-to “I don’t want to cook” meal.
- Budget-Friendly Feast: Chuck roast is cheap, carrots are cheap, and a jar of sun-dried tomatoes lasts forever. I can feed four people for under $15, and it still feels like a restaurant-worthy meal. Here’s what sold me—it’s the kind of dish where you get that satisfying, hearty feeling without breaking the bank. (Yes, even on a Tuesday night.)
Step-by-step instructions for sun-dried tomato braise with paper-thin beef
This slow-cooked masterpiece transforms tough chuck roast into melt-in-your-mouth slices with a rich, tangy tomato sauce.
Sear the Chuck Roast for Maximum Flavor
Pat the 2 lb chuck roast completely dry with paper towels - this ensures a proper sear. Heat a heavy Dutch oven over medium-high heat until smoking hot, then add 2 tbsp olive oil. Place the roast in the pan and sear on all sides until deeply browned, about 5-7 minutes per side. I press down gently during the first minute to prevent curling.
The reason for this step is simple: browning creates the Maillard reaction, which builds deep, complex flavors. Don't rush this - you want that beautiful crust that'll dissolve into the sauce later. Once browned, remove the roast and set it aside on a plate.
Build the Flavor Base with Aromatics and Tomatoes
In the same Dutch oven, add 1 whole yellow onion and 2 medium carrots sliced into rounds. Cook for 5 minutes until softened. Add 4 minced garlic cloves, 0.5 cup sun-dried tomatoes, 2 tbsp tomato paste, 1.5 tsp salt, and 0.5 tsp black pepper, stirring constantly for 2 minutes until fragrant.
Here's where the magic happens - those sun-dried tomatoes release their concentrated flavors. I like to crush about half of them with the back of a spoon to intensify their presence. The tomato paste will darken and thicken slightly, forming the foundation of our sauce.
Deglaze and Simmer the Braise
Pour in the 0.5 cup dry red wine and scrape up all those browned bits from the bottom of the pan - this is called deglazing. Let it bubble for 2-3 minutes until reduced by half. Add 2 cups beef broth, 0.25 oz fresh rosemary, and 0.25 oz fresh thyme, then return the roast to the pot.
Bring to a gentle simmer, then cover and transfer to a 325°F oven. Here's the thing - you want this to cook low and slow. The roast needs about 3 hours to become tender enough to slice paper-thin. I check it at the 2-hour mark using a meat thermometer - it should read 195°F when done.
Finish with Balsamic and Rest
Once the meat is fork-tender, remove it from the pot and let it rest on a cutting board for 15 minutes. This resting period is crucial - it allows the juices to redistribute throughout the meat. Skim any excess fat from the surface of the braising liquid, then return the roast to the pot.
Stir in 1 tbsp balsamic vinegar and simmer uncovered for 5-7 minutes until the sauce thickens slightly. The balsamic adds a beautiful tangy finish that cuts through the richness of the beef. When ready to serve, slice the roast against the grain into paper-thin strips that practically melt in your mouth.
Pro Tips For Making Beef And Tomatoes
- Sear the Chuck Roast: Chuck roast is forgiving, but a quick sear in a screaming-hot pan with oil first—2 minutes per side—builds flavor that slow cooking can’t replicate. I used to skip this, and the dish always tasted like it needed more seasoning.
- Soak Sun-Dried Tomatoes: If your sun-dried tomatoes are rock-hard, toss them in warm water or broth for 10 minutes before adding to the pot. They’ll soften and release their oil, making every bite richer—no one likes chewing on leather.
- Don’t Overcrowd the Pan: When browning onions and garlic, work in batches if needed. A crowded pan steams instead of caramelizes, and you’ll end up with bland, watery aromatics. Trust me, five minutes extra now saves 20 minutes of fixing later.
- Use Carrots for Depth: Peel and slice carrots into thick rounds (½-inch) instead of coins—they’ll stay firm and add natural sweetness without turning to mush. Toss them in after the beef’s halfway cooked; they’ll absorb flavor without falling apart.
Pro cooking tips for perfect results
Searing Secrets
That initial sear is where 80% of the flavor happens. I can't stress enough how important it is to pat the beef completely dry before searing—wet surfaces steam instead of brown. Use a heavy Dutch oven like All-Clad or Le Creuset for even heat distribution. The key is patience: let the pan get screaming hot before adding oil, and don't move the beef until you see that golden crust form. I've learned the hard way that rushing this step leads to pale, flavorless meat. 🔥
Tomato Balance
Sun-dried tomatoes pack intense flavor, so use them judiciously. I recommend crushing about half of them with the back of a spoon to release their oils and intensify their presence. The acidity in tomatoes can overpower the beef, so balance it with a splash of red wine or balsamic vinegar at the end. For extra richness, add a pinch of sugar (just ½ tsp) to caramelize the tomatoes slightly during cooking.
Low-and-Slow Precision
The magic happens at 325°F in a covered Dutch oven. I use a Thermoworks Smoke thermometer to monitor both the oven and the meat's internal temperature. The beef should reach 195°F—this is when collagen breaks down into gelatin, making it fork-tender. If your oven runs hot, reduce the temperature to 300°F to prevent overcooking. The longer it cooks, the more tender it becomes, but don't exceed 3.5 hours or the meat will turn mushy.
Deglazing Like a Pro
Never pour that wine in too quickly! After searing, let the pan cool for about 30 seconds to prevent scorching. Then, pour in the wine slowly, scraping up all those browned bits (fond) from the bottom. These bits are pure flavor gold—don't miss them! Let the wine reduce by half before adding broth. This step builds depth that separates good braises from great ones. I like to add a splash of beef broth to the wine if I'm short on liquid.
Resting and Slicing
This is where many home cooks mess up. The beef needs 15-20 minutes to rest after cooking—this lets the juices redistribute so every bite is moist. I use this time to skim excess fat from the surface and adjust seasoning. When slicing, always cut against the grain for tender, paper-thin strips. A sharp Wüsthof or Victorinox knife makes all the difference. Serve immediately with the braising liquid spooned over the top for maximum flavor impact. ✨
Nutrition facts
Frequently asked questions
Can I substitute sun-dried tomatoes with regular fresh tomatoes?
You can, but the flavor will be completely different. Fresh tomatoes add wateriness and dilute the rich beef flavors. If you must use them, use 1 cup diced Roma tomatoes instead of the sun-dried, and add them only in the last 15 minutes of cooking to prevent mushiness. For best results, stick with sun-dried—they're concentrated and packed with umami.
What's the best way to use leftover braising liquid?
This golden liquid is pure flavor gold! Use it to make homemade beef broth by straining and freezing, or reduce it into a rich tomato sauce for pasta. I also love using it as a base for beef and tomato soup—just add some potatoes and herbs. Store it in the fridge for up to 5 days or freeze for 3 months.
Can I make this recipe in a slow cooker instead of oven?
Sear the beef first, then transfer everything to a 6-quart slow cooker and cook on Low for 7-8 hours or High for 4-5 hours. The texture will be slightly different but still delicious. Just add ½ cup extra broth since slow cookers evaporate more liquid. The meat will still be tender, though not quite as paper-thin as oven-braised.
Why does my beef turn out tough instead of tender?
This usually happens from one of three mistakes: not searing properly, cooking at too high a temperature, or not cooking long enough. Always sear until deeply browned, maintain 325°F (not higher), and check the internal temp—it should reach 195°F. If it's still tough at 195°F, extend cooking time by 30 minutes and check again.
What's the best way to reheat leftovers?
Reheat gently in a saucepan over low heat with a splash of water or broth to loosen the sauce. Never microwave directly from fridge—it makes the meat rubbery. For best results, warm to 165°F and serve immediately. If reheating from frozen, thaw overnight first, then warm slowly. The flavors actually improve after 2-3 days in the fridge!