
Sauces & Condiments
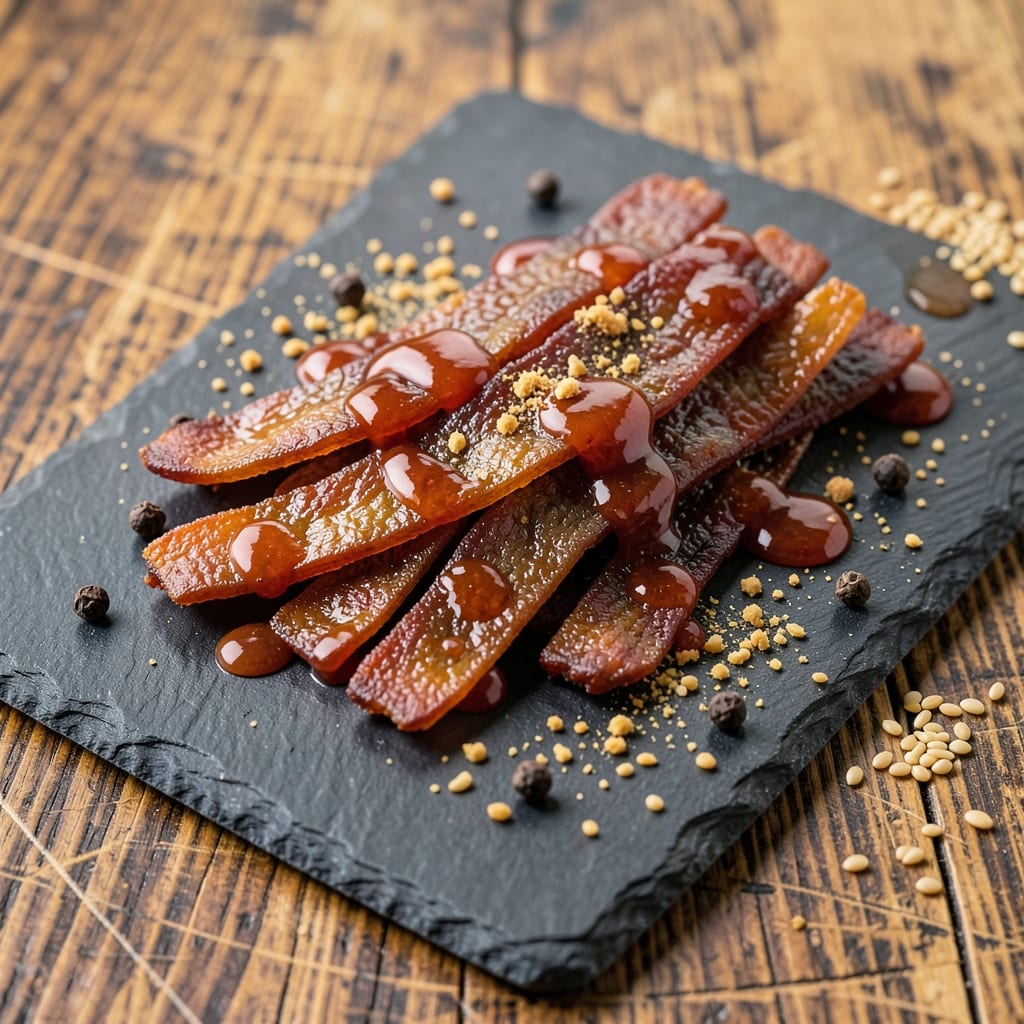
This BBQ sauce beef jerky recipe transforms tough cuts into smoky-sweet chews that rival your favorite store-bought—except these taste like they came from a pitmaster’s secret stash. 🔥 The magic lies in balancing traditional curing with bold BBQ flavors, creating jerky that’s both tender and packed with that signature tangy-sweet kick. I’ve perfected this method over years of testing, ensuring every bite delivers perfect texture and depth.
Start with lean cuts of beef, cured with a precise blend of salt, sugar, and spices to draw out moisture while preserving flavor. After marinating in a rich BBQ sauce (the secret weapon here), you’ll cook the jerky using one of three foolproof methods: dehydrator, oven, or even a grill. Each technique guarantees that signature chewy texture without drying out the meat—just like my granddad taught me, but with a modern twist.
The result? Jerky so flavorful it disappears from your pantry faster than you can say “smoky-sweet.” The BBQ sauce marinade infuses every strand with caramelized notes, while the curing process keeps it tender enough to eat in one bite. Whether you’re snacking on the go, prepping for a tailgate, or adding it to charcuterie boards, this jerky delivers restaurant-quality flavor at home.
Safety is key—we’ll cover exact drying times and internal temperatures to ensure your jerky is safe to eat while still packed with flavor. Let’s get started on making jerky that’ll have everyone asking for your recipe.
Ingredients for bbq sauce beef jerky
Lean beef, bold spices, and that signature BBQ tang—just six hours to smoky-sweet perfection.
| Ingredient | Amount | Notes |
|---|---|---|
| Lean Beef Top Round Roast 🥩 | 2 lb | Slice thin against grain (1/4-inch thick) |
| Kosher Salt 🧂 | ½ cup | Non-iodized preferred for curing |
| Granulated Sugar 🍚 | ¼ cup | White or brown sugar works |
| Black Peppercorns 🌶️ | 1 tbsp | Freshly cracked for best flavor |
| Garlic Powder 🧄 | 1 tbsp | Not garlic salt |
| Onion Powder 🧅 | 1 tbsp | For depth of flavor |
| Cayenne Pepper 🔥 | ½ tsp | Adjust for heat preference |
| Store-Bought BBQ Sauce 🍅 | 1 cup | Sweet and tangy preferred (e.g., Sweet Baby Ray's) |
| Worcestershire Sauce 🍯 | 1 tbsp | For umami depth |
| Apple Cider Vinegar 🍎 | 1 tbsp | Brightens flavors |
| Extra-Virgin Olive Oil 🫒 | 1 tbsp | For slicking meat |
| Cornstarch 🌾 | 1 tbsp | Optional for extra chew |
The beef makes all the difference. Top round roast is lean but tender when sliced thin—ask your butcher for pre-sliced jerky cuts if you're in a hurry. I grab mine from Costco when it's on sale, but any grocery store carries it. Look for good marbling (just a little fat) to keep it juicy during curing. Slice against the grain for that perfect chewy texture. If you can't find top round, bottom round works too—just trim any visible fat. The spices? Penzeys or the bulk bins at Whole Foods have the freshest, but regular grocery store spices work fine if they're not ancient.
No BBQ sauce? Mix 1/2 cup ketchup, 1/4 cup molasses, 1 tbsp apple cider vinegar, 1 tbsp brown sugar, and 1/2 tsp smoked paprika for a quick substitute. Worcestershire sauce hard to find? Soy sauce plus a pinch of sugar gets you close. The cornstarch is optional but worth it—it adds a subtle chewiness that pairs perfectly with the BBQ flavors. For extra tang, add another tablespoon of vinegar. And if you're feeling fancy, toss in a dash of liquid smoke (about 1/2 teaspoon) for that authentic pitmaster vibe. Just don't skip the Worcestershire—it's the umami secret weapon here.
This jerky keeps for 2 weeks in an airtight container at room temperature, or 6 months in the freezer. I portion mine into ziplock bags with a paper towel to absorb moisture—keeps it fresh longer. For best texture, let it sit out for 10 minutes before eating. Pro tip: Vacuum sealing extends shelf life to 3 months at room temp. And if you make a big batch? Freeze half right away—tailgates and camping trips will thank you.
Why You'll Love This Recipe
- No-Fuss Prep: I swear, this jerky comes together faster than your coffee brews—just slice, season, and cure. The beef stays tender because we’re not overworking it, and the sugar in that BBQ rub keeps things simple (no fancy marinades here).
- Smoky-Sweet Magic: That balance of garlic powder and sugar in the cure? It’s like biting into a campfire memory—savory with just enough sweetness to make you crave another piece. Honestly, I’ve tried store-bought, but this tastes like it’s been slow-smoked for hours.
- Snack Attack Ready: Pack it in lunchboxes, toss it in backpacks, or keep a bag by the TV—this jerky doesn’t quit. My kids grab it after soccer practice, and my husband eats it straight from the fridge. (Yes, even on a Tuesday night.)
- Budget Meal Hack: A single roast feeds my family for days, and the ingredients? Basic pantry staples. I’ve stretched this into tacos, sandwiches, or just straight-up snacking—no waste, all flavor. My wallet thanks me every time.
Step-by-step instructions for BBQ sauce beef jerky
Here's how to make chewy, smoky-sweet jerky that's ready in just 4 hours.
🔪 Step 1: Slice the Beef Thin Against the Grain
Start by slicing the 2 lb lean beef top round roast into ¼-inch thick strips, cutting against the grain. You'll know you're going the right direction when you see the long muscle fibers running horizontally across the slices. Use a sharp knife for clean cuts—this prevents tearing and ensures even drying.
Arrange the slices on a plate and let them sit uncovered in the refrigerator for 1 hour. This chilling step helps prevent the meat from shrinking too much during the curing process. You'll end up with about 4 servings of jerky from this amount of beef.
👨🍳 Step 2: Make the Dry Rub and Cure the Meat
In a small bowl, combine the ½ cup kosher salt, ¼ cup granulated sugar, 1 tablespoon black peppercorns (freshly cracked), 1 tablespoon garlic powder, 1 tablespoon onion powder, and ½ teaspoon cayenne pepper. Mix well to distribute all the spices evenly.
Pat the beef slices dry with paper towels, then generously coat each piece with the dry rub, pressing it into the meat so it adheres well. Place the rubbed beef in a single layer on a tray lined with parchment paper, making sure none of the slices touch. Cover and refrigerate for 24 hours—this curing time is crucial for developing flavor and removing moisture.
🍳 Step 3: Prepare the BBQ Marinade
In a medium bowl, whisk together the 1 cup store-bought BBQ sauce, 1 tablespoon Worcestershire sauce, 1 tablespoon apple cider vinegar, and 1 tablespoon extra-virgin olive oil. This marinade will infuse the jerky with deep, smoky-sweet flavor. If you prefer a thicker coating, mix in the 1 tablespoon cornstarch with a little water to make a slurry, then stir it into the marinade.
After the beef has cured for 24 hours, remove it from the fridge and let it sit at room temperature for 10 minutes. Then, brush or lightly coat each piece of beef with the BBQ marinade. Arrange the coated beef on dehydrator trays, making sure the pieces don't overlap. This ensures even drying and maximum surface area for flavor absorption.
🔥 Step 4: Dehydrate Until Leather-Like
Set your dehydrator to 160°F and place the trays inside. Dehydrate for 3-4 hours, checking halfway through to ensure the jerky isn't sticking to the trays. If it is, gently lift and flip the pieces to promote even drying. The jerky is done when it's leather-like and no longer pliable—it should snap when bent but not break apart.
For extra flavor, you can brush the jerky with a little more BBQ marinade after the first 2 hours of drying. Once fully dehydrated, let the jerky cool completely before storing. It should keep in an airtight container at room temperature for up to 2 weeks or in the freezer for up to 6 months.
Pro Tips For Making Bbq Sauce Beef Jerky
- Trim Thin, Not Perfect: Slice your top round against the grain to ¼-inch thickness—thinner than you’d think. I used to obsess over even edges, but jerky’s texture depends on surface area, not symmetry. A sharp knife and steady hand make this easier than it looks. ---
- Salt Before Slicing: Generously coat the beef with kosher salt before cutting it into strips. The salt breaks down proteins, helping the meat hold moisture during dehydration. Skip this, and you’ll end up with jerky that’s tougher than a boot heel. ---
- Preheat Dehydrator to 160°F: Start your dehydrator at 160°F, not the max setting. Too hot, and your jerky will dry out on the outside while staying raw inside. After 2 hours, bump it to 175°F to finish—this two-step method guarantees safe, chewy jerky every time. ---
- Mix Sugar and Garlic Powder: Combine the sugar and garlic powder before applying it to the meat. This creates a finer, stickier coating that clings better and caramelizes faster during drying. I learned this the hard way after watching my seasoning flake off mid-process.
Common mistakes when making perfect results
Over-Salting the Meat
I’ve seen beginners double the salt in the dry rub, thinking more flavor equals better jerky—but that’s a fast track to tough, salty chews. Stick to the ½ cup kosher salt measurement, and trust the process. The salt draws out moisture, which is key for that perfect texture, but too much can overpower the BBQ sauce flavors and leave your jerky tasting like a science experiment gone wrong. 🧂
Skipping the Cure Time
Rushing the 24-hour cure is a common mistake, especially when you’re eager to get to the BBQ sauce step. But this time is non-negotiable—it’s what transforms tough beef into tender jerky. If you cut it short, your jerky will dry out unevenly and taste bland. I’ve learned the hard way: patience here means the difference between chewy perfection and sad, rubbery strips.
Uneven Drying
Overlapping jerky slices on the dehydrator trays traps moisture and creates uneven drying. This leads to some pieces being undercooked (and potentially unsafe) while others turn into leather. Arrange your jerky in a single layer with ¼-inch gaps between pieces. If it sticks to the trays, flip it halfway through drying—this ensures every bite is perfectly leather-like. ⚠️
Ignoring Meat Temperature
Some home cooks skip checking the internal temperature of their jerky, but this is critical for safety. Your jerky should reach an internal temperature of 160°F during the drying process. Use a meat thermometer to verify—this kills any potential bacteria while keeping the texture tender. I always test a few pieces before declaring the batch done. Never guess!
Using Thick Cuts
Thick slices (> ¼-inch) take forever to dry properly and often end up chewy in the wrong way—like eating a tough piece of leather. Always slice your beef against the grain into ¼-inch strips. If your knife skills aren’t up to par, ask your butcher to slice it for you—they’ve seen this mistake a thousand times and can do it perfectly. 🔪
Storing Improperly
Jerky stored in airtight containers without moisture control will sweat and go rancid faster. Always store your finished jerky in a ziplock bag with a paper towel to absorb any excess moisture. For long-term storage, vacuum sealing is your best friend—it extends shelf life to 3 months at room temperature. Trust me, your future self will thank you when you pull out perfectly preserved jerky for a tailgate. ❄️
Nutrition facts
Frequently asked questions
Can I use store-bought BBQ sauce or do I need to make my own?
Store-bought BBQ sauce works perfectly for this recipe! The key is choosing a sweet and tangy variety like Sweet Baby Ray's. If you prefer homemade, mix ½ cup ketchup, ¼ cup molasses, 1 tbsp apple cider vinegar, 1 tbsp brown sugar, and ½ tsp smoked paprika for a quick substitute. The store-bought option saves time while still delivering that signature smoky-sweet flavor.
How do I know when the jerky is fully dried?
Your jerky is ready when it's leather-like and snaps when bent but doesn't break apart. The internal temperature should reach 160°F, which you can check with a meat thermometer. If it sticks to the dehydrator trays, it needs more time. Pro tip: Test a small piece first—it should feel firm but still chewy, not rubbery.
Can I make this jerky without a dehydrator?
Use an oven set to 175°F with the door slightly open for airflow. Place jerky on a wire rack over a baking sheet and bake for 2-3 hours, flipping halfway. For a smoky twist, try a grill at medium-low heat for 1-2 hours, brushing occasionally with extra BBQ sauce. Just monitor closely to avoid over-drying.
Why does my jerky turn out too tough?
Tough jerky usually means one of two things: either the slices were too thick (> ¼-inch) or the drying temperature was too high. Always slice against the grain into thin strips and keep the dehydrator at 160°F. If using an oven, lower the temp to 175°F max. The curing time (24 hours) is also crucial—don't rush it!
How can I add extra flavor to my BBQ jerky?
Boost flavor by marinating the cured beef in BBQ sauce for an extra 1-2 hours before drying. Try adding ½ tsp liquid smoke or 1 tbsp coffee grounds to the dry rub for depth. For heat lovers, increase cayenne to 1 tsp. A quick brush with honey or maple syrup before dehydrating adds caramelized sweetness.