
Main Courses
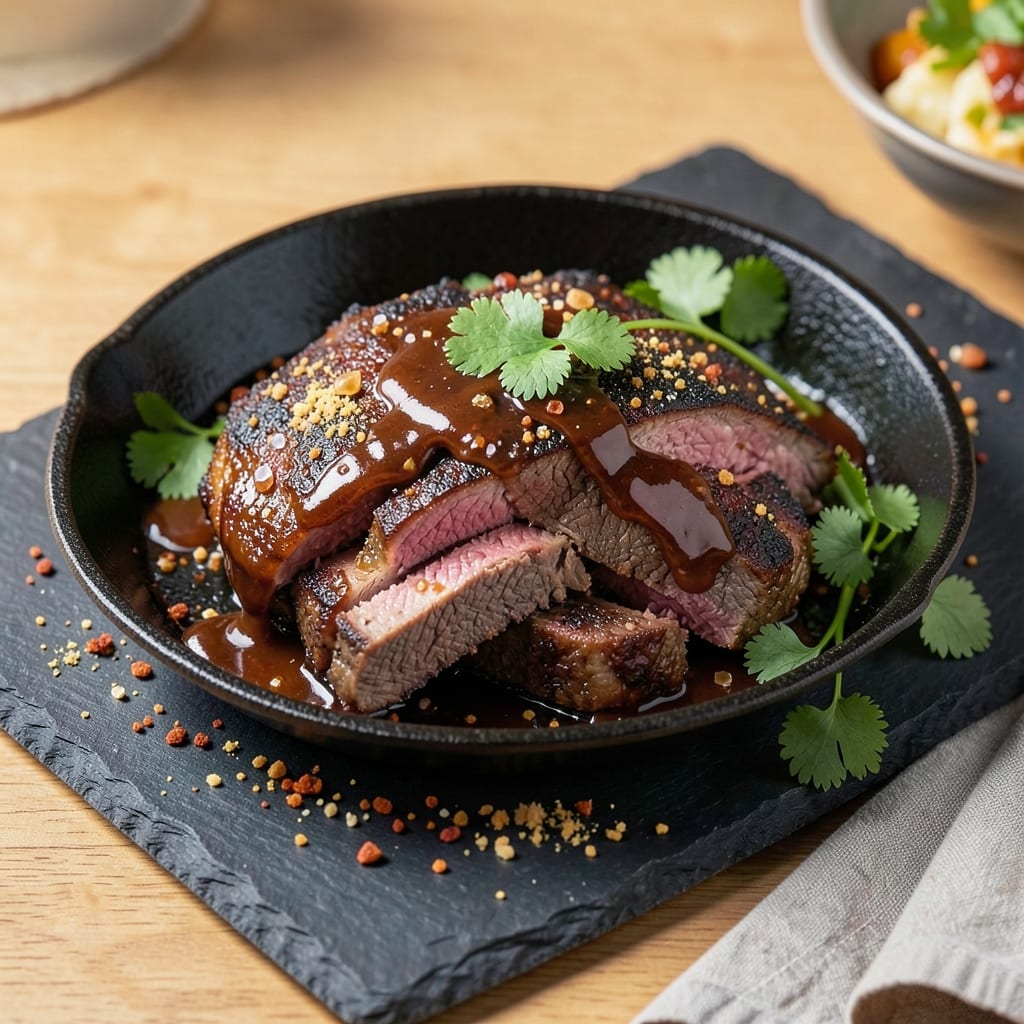
Pressure cooker BBQ beef transforms tough cuts into melt-in-your-mouth perfection in under an hour—a technique I perfected after years of slow-smoking ribs. The secret lies in controlled pressure and a well-balanced rub that develops deep flavor while breaking down connective tissue. As a pitmaster trained in French technique, I've adapted this method to deliver restaurant-quality tenderness without hours in front of the grill.
This recipe starts with a dry rub of smoked paprika, brown sugar, and garlic powder—simple ingredients that create a flavorful crust while the pressure cooker does the heavy lifting. The key is cooking at high pressure for 45 minutes, then allowing the meat to rest for 15 minutes before slicing. This resting period ensures juices redistribute, guaranteeing each bite is succulent and flavorful.
What you'll end up with is beef so tender it practically falls apart at the touch, coated in a sticky-sweet glaze that balances smoky, caramelized notes. The pressure cooker method preserves moisture while developing rich, complex flavors—something traditional slow cooking can't always achieve in the same timeframe.
Serve this on sandwiches, tacos, or over mashed potatoes for a meal that feels like a backyard cookout, even on busy weeknights. The technique works equally well with chuck roast or brisket, making it versatile for any BBQ menu. Let's get started!
Ingredients for bbq beef in pressure cooker
Quality cuts and precise seasoning transform tough beef into melt-in-your-mouth perfection under pressure.
| Ingredient | Amount | Notes |
|---|---|---|
| Chuck Roast 🥩 | 2 lb | Tough cut for maximum tenderness |
| Smoked Paprika 🌶️ | 2 tbsp | For authentic BBQ smokiness |
| Brown Sugar 🍯 | 2 tbsp | Caramelizes for sweet glaze |
| Garlic Powder 🧄 | 1 tbsp | Enhances depth of flavor |
| Ground Black Pepper 🌶️ | 1 tbsp | Freshly ground for sharpness |
| Kosher Salt 🧂 | 1 ½ tsp | Diamond Crystal preferred |
| Apple Cider Vinegar 🍎 | ¼ cup | Balances sweetness |
| Yellow Onion 🧅 | 1 whole | Chopped for aromatics |
| Garlic Cloves 🧄 | 4 cloves | Minced for intense flavor |
| Beef Broth 💧 | 1 cup | Low-sodium preferred |
| Olive Oil 🫒 | 1 tbsp | For searing meat |
| Fresh Thyme 🌿 | 2 sprigs | Or 1 tsp dried thyme |
| Bay Leaves 🌿 | 2 whole | For herbal depth |
The chuck roast is non-negotiable here—its connective tissue breaks down beautifully under pressure, creating that signature fall-apart texture. Look for cuts with good marbling at Whole Foods or your local butcher shop, where they'll often trim it to your preferred size. If you're using a pre-cut roast, pat it dry thoroughly before seasoning to ensure the rub adheres properly. For maximum flavor development, let the seasoned meat sit at room temperature for about 30 minutes before pressure cooking. The smoked paprika should be a rich, deep color—Penzeys or McCormick brands deliver consistent quality, but avoid anything with a bitter aftertaste. The brown sugar should be light, not dark, for a proper caramelized glaze without overpowering bitterness.
No smoked paprika? A blend of regular paprika and a pinch of liquid smoke works in a pinch, though it won't be identical. Substituting maple syrup for brown sugar (equal parts) maintains the sweetness while adding subtle earthy notes. The apple cider vinegar can be swapped for balsamic vinegar, though it'll add a slightly different depth. If you're short on fresh thyme, dried thyme at one-third the amount suffices, but the fresh herb's aroma is worth the effort. For the beef broth, low-sodium versions prevent over-salting, and homemade stock adds unmatched richness. The olive oil should be extra-virgin—its fruity notes complement the smoky flavors beautifully.
This dish reheats exceptionally well—3-4 days in the fridge, 3 months frozen—making it ideal for meal prep. Store leftovers in an airtight container with any residual juices to maintain moisture. For serving, slice against the grain for maximum tenderness. The meat continues to develop flavor as it rests, so 15 minutes off-pressure before slicing is crucial. Portion into individual containers for easy lunches—each bite will be as tender as the first. The rub ingredients can be pre-mixed and stored in an airtight container for up to 2 weeks, though freshly ground spices always yield superior results.
Why You'll Love This Recipe
- Pressure-Cooker Magic: I swear by this—dump the chuck roast, sprinkle the spices, and walk away. No babysitting, no oven thermostat drama. The pressure cooker does all the work while I’m scrolling through my phone or folding laundry.
- Smoky-Sweet Perfection: That smoky paprika and brown sugar caramelizing into the beef? It’s like a slow-cooked brisket but with half the effort. The garlic powder gives it a subtle kick that makes it taste like you slaved over it for hours.
- Leftovers That Don’t Suck: Between us, most beef recipes leave you with sad, dry leftovers. Not this one. The meat stays tender, the sauce clings, and I’ve reheated slices for breakfast sandwiches—yes, really—without judgment.
- Budget Feast for Crowds: A chuck roast stretches to feed six, and the spices cost pennies. It’s the kind of dish where I can impress my book club or feed my family without breaking the bank. Plus, the pressure cooker means less energy wasted than an oven. Win-win.
Step-by-step instructions for pressure cooker BBQ beef
Master this technique and you'll transform tough chuck roast into melt-in-your-mouth beef every time.
Prepare the Chuck Roast for Maximum Flavor
Pat the 2 lb chuck roast dry with paper towels, removing any surface moisture. This step is crucial—wet meat creates steam instead of that perfect sear we're after. Place the roast on a cutting board and make a crosshatch pattern of deep slashes about ¼ inch apart on all sides. These cuts allow the marinade to penetrate deeply and help break down the tough fibers during cooking.
In a small bowl, whisk together 2 tbsp smoked paprika, 2 tbsp brown sugar, 1 tbsp garlic powder, 1 tbsp ground black pepper, and 1.5 tsp kosher salt. Rub this mixture all over the roast, pressing firmly so it adheres to the slashed surfaces. Let the seasoned roast sit at room temperature for 15 minutes while you prepare the aromatics. This resting period ensures even cooking and helps the seasoning cling.
Sear the Roast for Deep Flavor
Heat a large skillet over medium-high heat until hot. Add 1 tbsp olive oil and swirl to coat the bottom. Place the seasoned chuck roast in the skillet and sear for 3-4 minutes per side until it develops a deep brown crust. Don't move it around—let it develop that flavorful crust undisturbed. This step creates the foundation for our rich BBQ flavor.
While the roast sears, chop the 1 whole yellow onion into ½-inch chunks and mince the 4 cloves garlic. Add these to the skillet with the seared roast and cook for an additional 2 minutes, stirring occasionally. The onions should soften slightly but not brown. Transfer the roast and aromatics to your pressure cooker insert.
Build the Pressure Cooker Sauce
Pour 0.25 cup apple cider vinegar and 1 cup beef broth into the pressure cooker insert, scraping up any browned bits from the bottom of the skillet. Add the 2 sprigs fresh thyme and 2 whole bay leaves. Place the seared roast on top of the aromatics, ensuring it's fully submerged in the liquid. This liquid will become the flavorful base for our BBQ sauce.
Secure the lid on your pressure cooker and set the valve to "sealing." Cook on high pressure for 60 minutes. The pressure cooker's high heat and pressure work together to break down the collagen in the tough chuck roast, transforming it into tender, fork-tender beef. Real talk: Don't skip this cooking time—it's what makes this dish work.
Shred and Finish the BBQ Beef
Once the cooking cycle completes, allow the pressure to release naturally for 10 minutes, then quick-release any remaining pressure. Carefully remove the lid, being cautious of the hot steam. Using two forks, shred the chuck roast directly in the pressure cooker. The meat should pull apart easily with minimal resistance—this is your signal that it's perfectly tender.
Return the shredded beef to the pressure cooker along with any accumulated juices. Stir well to combine. Taste and adjust seasoning if needed, adding a pinch more salt or a splash of apple cider vinegar if the flavor needs balancing. The result should be a rich, smoky BBQ beef with a perfect balance of sweetness and tang. Serve immediately over mashed potatoes, with crusty bread, or as a filling for tacos.
Rest and Serve for Optimal Texture
Transfer the shredded beef to a serving dish and let it rest for 5 minutes before serving. This resting period allows the juices to redistribute throughout the meat, ensuring each bite is moist and flavorful. The beef should be so tender it nearly falls apart at the touch, with a beautiful dark brown color from the caramelized sugars in our rub.
Here's the thing—this technique works for any tough cut of beef. The pressure cooker does most of the work, but the searing and proper seasoning make all the difference. Don't be tempted to rush the cooking time; patience here guarantees that melt-in-your-mouth texture we're after. Serve with your favorite BBQ sides and enjoy the fruits of your labor.
Pro Tips For Making Bbq Beef In Pressure Cooker
- SEAR THE ROAST FIRST: That dark crust isn’t just for looks—it traps flavor. Hit your chuck roast with a hot skillet or grill pan until it’s deep brown on all sides before dumping it in the pressure cooker. I used to skip this, and the final sauce always tasted flat. Two minutes max, but it makes a real difference.
- DON’T SKIP THE BROWN SUGAR CARAMEL: The moment the pressure cooker heats up, sprinkle that brown sugar directly on the roast—let it melt and stick before adding liquid. I learned this the hard way when I added everything at once, and the sugar just dissolved into the sauce instead of creating that sticky, glossy crust. Give it 30 seconds to work its magic.
- WATCH THE GARLIC POWDER: Too much garlic powder turns your BBQ beef into a seasoning bomb. Start with 1 teaspoon per pound of meat, then taste the raw mix before sealing the lid. I’ve ruined batches by doubling it “just to be sure,” and the dish ended up tasting like a spice aisle explosion. Less is more—you can always add a pinch later.
- USE HALF THE LIQUID: Pressure cookers don’t need much liquid to build pressure, and too much dilutes the smoky-sweet flavor. Stick to 1 cup of broth or water—just enough to coat the bottom—then add the rest of your BBQ sauce after pressure cooking. The meat will stay tender, and the sauce won’t turn into a watery glaze. Trust me, it works.
Make-ahead tips for bbq beef in pressure cooker
Prep Ahead for Efficiency
Save time by prepping your rub and aromatics the night before. Mix the dry rub (smoked paprika, brown sugar, garlic powder, black pepper, and salt) in a small bowl and store it in an airtight container. Chop the onion and mince the garlic in advance, storing them separately in the fridge. This way, you'll only need to sear the meat and assemble everything in the pressure cooker on the day you cook. Trust me, this small step makes a big difference on busy weeknights. 💡
Freezing for Future Meals
This BBQ beef freezes beautifully for up to 3 months, making it perfect for meal prep. After shredding, let the beef cool completely, then portion it into airtight containers with any accumulated juices. Label with the date and freeze. When ready to eat, thaw overnight in the fridge, then reheat in the pressure cooker with ½ cup beef broth on high pressure for 5 minutes—no microwave required! The texture stays just as tender. ❄️
Resting the Meat Properly
Don't skip the 15-minute rest after pressure cooking—this is where the magic happens. The meat continues to cook slightly off-heat, and the juices redistribute for maximum tenderness. I like to tent the pressure cooker with foil during this time to keep everything warm. For even better results, transfer the shredded beef to a warm serving dish and let it rest there for another 5 minutes before serving. Patience here ensures every bite is juicy and flavorful. 💪
Make-Ahead Sauce Base
Prep the sauce base ahead of time by combining the apple cider vinegar, beef broth, thyme, and bay leaves in a jar. Store it in the fridge for up to 3 days before cooking. When ready, simply heat it in the pressure cooker with the seared meat. This shortcut saves you from last-minute prep while keeping all the rich, smoky flavors intact. Plus, the aromatics infuse longer, deepening the flavor profile. 🌶️
Portioning for Easy Serving
After shredding, portion the beef into individual containers while it's still warm. This keeps the meat tender and makes it easy to grab for sandwiches or tacos later. Store leftovers in the fridge for 4 days or freeze for 3 months. The meat reheats beautifully—just add a splash of beef broth or water to prevent drying out. I often prep extra for lunches, and it's always a crowd-pleaser. 🍽️
Herb and Spice Refresh
If you're storing the beef for more than a few days, keep the fresh thyme and bay leaves separate until cooking. These herbs add brightness to the dish, but their flavor fades over time. Add them fresh when reheating or serving to maintain that vibrant, aromatic touch. For extra depth, toss in a few sprigs of rosemary or sage when reheating—it adds a lovely herbal note. 🌿
Nutrition facts
Frequently asked questions
Can I use brisket instead of chuck roast in this recipe? Brisket works beautifully with a few adjustments. Since brisket has more connective tissue, increase the cooking time to 90 minutes on high pressure. The result will be even more tender, fork-tender beef with that signature BBQ texture. Just
Why does my pressure cooker beef turn out tough?
Tough results usually come from skipping the sear or rushing the cooking time. Always sear the meat first to develop flavor, and never reduce the 60-minute cooking time—this is what breaks down the collagen. Also,
Can I make this recipe in an Instant Pot?
Yes! This recipe works perfectly in an Instant Pot. Follow the same steps, but use the high pressure setting for 60 minutes (or 90 minutes for brisket). The Instant Pot's rapid pressure release feature makes it even more convenient. Just be sure to use natural pressure release for 10 minutes first to maintain tenderness.
How do I adjust the sweetness level in the BBQ sauce?
If you prefer less sweetness, reduce the brown sugar to 1 tbsp or substitute with 1 tbsp maple syrup. For more sweetness, increase to 3 tbsp brown sugar or add 1 tbsp honey after cooking. Taste as you go—this recipe is highly customizable to your preference!
What's the best way to reheat leftover BBQ beef?
Reheat leftovers in the pressure cooker with ½ cup beef broth on high pressure for 5 minutes for perfect tenderness. Alternatively, warm in a skillet over low heat with a splash of broth to prevent drying. Never microwave—it creates rubbery texture. The pressure cooker method preserves all that juicy goodness!