
Main Courses
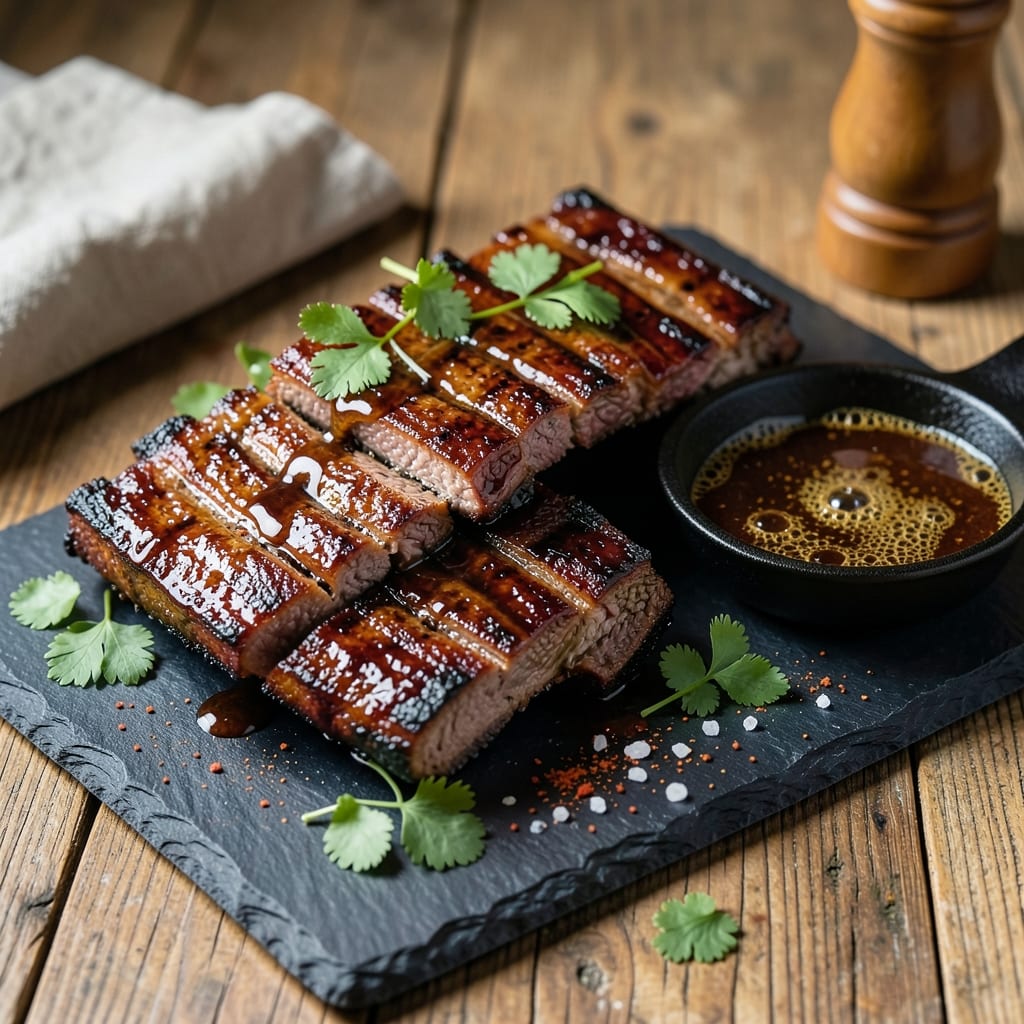
This BBQ beef flanken ribs recipe delivers that perfect balance of smoky-spiced crust and juicy pink centers—exactly what makes ribs legendary. 🔥 I developed this method after years of experimenting with French technique and pitmaster traditions, and it never fails to impress. The secret lies in the slow cook, which transforms tough cuts into melt-in-your-mouth perfection while keeping that signature bark intact.
The process starts with a dry rub that builds deep, aromatic layers—think smoked paprika, brown sugar, and a touch of cayenne for heat. Then, we let the ribs cook low and slow at 225°F for hours, basting with a tangy BBQ sauce that caramelizes into a sticky, flavorful glaze. This isn’t just about flavor; it’s about texture—the crispy exterior gives way to tender, juicy meat that falls apart at the slightest touch.
What you’ll end up with is a dish that’s rich, smoky, and packed with that satisfying contrast of textures. The ribs are tender enough to cut with a fork but hold together when sliced, making them perfect for serving with classic sides like creamy coleslaw or buttery cornbread. The aroma alone will have everyone gathered around the table before the ribs even hit the platter.
Whether you’re grilling outdoors or using your oven for a braise, this method ensures restaurant-quality results at home. The beauty of this recipe is its adaptability—you can adjust the cooking time based on your preferred doneness, and the leftovers reheat beautifully for sandwiches the next day. Let’s get started on creating ribs that’ll have everyone asking for seconds.
Ingredients for bbq beef flanken ribs
Smoky, sweet, and packed with juicy beef flavor—this is your ultimate rib game-changer.
| Ingredient | Amount | Notes |
|---|---|---|
| Beef Flanken Ribs 🥩 | 2 lb | Bone-in, about 1-inch thick |
| Smoked Paprika 🌶️ | 2 tbsp | For deep smoky flavor |
| Brown Sugar 🍚 | 2 tbsp | Lightly packed for caramelization |
| Ground Black Pepper 🌶️ | 1 tbsp | Freshly cracked for intensity |
| Cayenne Pepper 🔥 | ½ tsp | Adjust for heat preference |
| Garlic Powder 🧄 | 1 tbsp | For aromatic depth |
| Onion Powder 🧅 | 1 tbsp | Sweet, not salty |
| Kosher Salt 🧂 | 1 tbsp | Diamond Crystal preferred |
| Olive Oil 🫒 | 2 tbsp | For fat to help rub stick |
| BBQ Sauce 🍅 | 1 cup | Kansas City style preferred |
| Yellow Onion 🧅 | 1 whole | Thinly sliced for caramelizing |
| Fresh Thyme 🌿 | 2 sprigs | Or 1 tsp dried thyme |
| Apple Cider Vinegar 🍏 | 1 tbsp | For tangy balance |
| Honey 🍯 | 1 tbsp | For sauce sweetness |
The beef cut matters most here. Look for flanken ribs—they're leaner than baby back but pack incredible flavor. Costco and Whole Foods usually carry them, but if you can't find them, beef short ribs work too. The ribs should be about 1-inch thick, not too thick or they won't cook through evenly. For the best results, buy them fresh and use within 2 days—frozen ribs lose that signature tenderness. If you're buying in bulk, ask the butcher to trim any excess fat, but leave a thin layer for flavor.
No smoked paprika? Regular paprika plus a pinch of liquid smoke gets you close. The brown sugar is non-negotiable for that caramelized bark—don't skip it. For the BBQ sauce, Kansas City style (like Stubb's or Bull's-Eye) has the perfect balance of sweet and tangy. If you're using a different brand, taste it first—some sauces are way too sweet. The onion should be yellow, not red or white, for that perfect caramelization. And if you're short on fresh thyme, dried works at one-third the amount, but fresh is definitely better.
These ribs reheat like a dream—just warm them in a skillet with a splash of sauce. Keeps for 4 days in the fridge or 3 months frozen. I always make a double batch because the leftovers are perfect for sandwiches the next day. Store them wrapped in foil in the fridge, and freeze any extras in airtight containers. The sauce can be made ahead too—just reheat and thin with a splash of water if needed.
Why You'll Love This Recipe
- One-Pan Magic: I swear by this recipe because it’s that easy—just slather the ribs with a mix of smoked paprika, brown sugar, and cayenne, then let the oven do the work. No flipping, no fussing, and zero cleanup beyond one pan.
- Sweet-Smoky Bang: That caramelized crust from the brown sugar? It’s dangerously good—crunchy on the outside, tender inside, with just enough heat from the cayenne to keep things interesting. The smoked paprika ties it all together like a cozy hug.
- Game-Day Go-To: Between us, this is my secret weapon for tailgates or lazy Sundays. It feeds a crowd, reheats like a champ, and even my picky uncle (who hates BBQ) asks for seconds. (Yes, even on a Tuesday night.)
- Budget Beef Boost: Flanken ribs are lean but mighty—this recipe stretches them into something hearty and satisfying without breaking the bank. Plus, leftovers? They’re even better the next day, cold or reheated. Honestly, it’s my go-to for meal prep.
Step-by-step instructions for smoky-spiced flanken ribs
Here's how to transform tough flanken ribs into melt-in-your-mouth, smoky perfection.
👨🍳 Step 1: Create the Perfect Rub
In a medium bowl, combine the 2 tbsp smoked paprika, 2 tbsp brown sugar, 1 tbsp ground black pepper, 0.5 tsp cayenne pepper, 1 tbsp garlic powder, 1 tbsp onion powder, and 1 tbsp kosher salt. Mix thoroughly until the spices are evenly distributed and the sugar crystals dissolve slightly.
This blend is where all the magic starts—the smoky paprika gives depth, brown sugar creates caramelization, and the cayenne adds just the right kick. I like to press this mixture firmly into the ribs so it sticks well. The key here is even coverage—don't skip any spots, especially the thickest parts of the meat.
🔥 Step 2: Sear and Smoke the Ribs
Preheat your grill or smoker to 375°F. Pat the 2 lb beef flanken ribs dry with paper towels (this ensures a better crust), then rub them generously with the 2 tbsp olive oil to help the spice rub adhere. Place the ribs on the grill, fat-side up, and sear for 5-7 minutes until they develop a deep golden-brown crust.
Here's the thing—this initial sear locks in juices and creates that irresistible bark. If you notice the ribs starting to smoke too heavily before browning, lower the heat slightly. After searing, move the ribs to indirect heat or the cooler side of the grill. Smoke for 1.5-2 hours, turning occasionally, until the internal temperature reaches 195°F and the meat becomes fork-tender.
🍳 Step 3: Caramelize the Onions and Build the Sauce
While the ribs smoke, thinly slice the 1 whole yellow onion into even strips. Heat a skillet over medium heat and add the onions with 2 sprigs fresh thyme. Cook for 10-12 minutes until the onions are soft and golden brown, stirring occasionally. Remove the thyme sprigs before they burn.
In a separate bowl, whisk together the 1 cup BBQ sauce, 1 tbsp apple cider vinegar, and 1 tbsp honey. Taste and adjust seasoning if needed—this sauce should balance sweet, tangy, and smoky flavors. The onions will add depth to the sauce, so don't skip this step. The caramelized onions should be sticky and sweet, almost jam-like, which will make the sauce even richer.
🥘 Step 4: Glaze and Finish
Once the ribs reach 195°F, brush them generously with the onion mixture, then spoon the BBQ sauce mixture evenly over the top. Return the ribs to the grill (or transfer to a baking dish if using an oven) and cook for another 10-15 minutes, basting occasionally, until the sauce caramelizes and forms a glossy glaze. The ribs should be sticky and shiny, with a deep mahogany color.
This is the moment that matters: the glaze should coat the ribs completely, creating a sweet-savory crust that contrasts perfectly with the tender meat underneath. If the sauce thickens too much, add a splash of water or apple cider vinegar to loosen it. The ribs are done when they're fork-tender and the sauce is glossy and sticky.
⏰ Step 5: Rest and Serve
Transfer the ribs to a cutting board and let them rest for 10-15 minutes before slicing. This resting period allows the juices to redistribute, ensuring every bite is juicy and flavorful. I know it's tempting to dive in immediately, but trust me—this step makes all the difference.
Slice the ribs against the grain into ¼-inch thick pieces. Serve with extra BBQ sauce on the side and a side of grilled vegetables or crusty bread. The contrast of the smoky, caramelized crust with the tender, juicy meat is what makes these ribs unforgettable. Enjoy them while they're still warm for the best experience!
Pro Tips For Making Bbq Beef Flanken Ribs
- Trim the Fat First: Slash the thick fat cap off the flanken ribs before seasoning—it’s the only way to get even cooking and that perfect crust. I learned this the hard way after one batch turned out greasy and uneven; now I use a sharp knife and work quickly to avoid tearing the meat. ---
- Dry the Meat Overnight: Pat the ribs dry with paper towels, then refrigerate uncovered for 6–12 hours. Sounds weird, but it works: the surface dries out just enough for the smoked paprika and brown sugar to stick like glue instead of sliding off. (Yes, even if you’re impatient like me.) ---
- Skip the Crowding: Resist the urge to pile ribs too close together in the pan—give them space to sear, not steam. I used to overcrowd, and the result was soggy edges and uneven browning. Start with a single layer, and if you’re short on space, work in batches. ---
- Rest Before Slicing: Give the ribs a solid 5–10 minutes under foil after cooking before cutting—this keeps them from falling apart when sliced. I know, I know, but trust the process: the juices redistribute, and the meat stays tender. (Your future self will thank you.)
Pro cooking tips for this recipe
Smoke Temperature Secrets
I can’t stress enough how critical 225°F is for these ribs—any hotter and you’ll end up with dry, tough meat. Use a meat thermometer (I swear by the ThermoWorks Smoke) to monitor both the smoker and internal temp. If your smoker runs hot, add soaked wood chips or move to indirect heat. The goal is slow and steady—think of it like a French confit, where low heat melts collagen into juicy goodness. 🌡️
Rub Adherence Hacks
That dry rub won’t stick if the ribs are wet—pat them thoroughly with paper towels before applying. For extra grip, mix the rub with 1 tbsp olive oil to create a paste. Press it into every crevice, especially the bone side, where flavor often gets neglected. Pro tip: Let the ribs sit at room temp for 30 minutes before cooking to ensure even cooking. This is where the magic of the Maillard reaction really kicks in.
Bark vs. Burn
Watch those ribs like a hawk during the first 20 minutes—that’s when they’re most vulnerable to burning. If the rub starts smoking before browning, lower the heat or move to a cooler part of the grill. For a deeper bark, I sometimes sprinkle the ribs with a little more brown sugar halfway through cooking. The key is patience: let that crust develop naturally without rushing it. Trust the process, and you’ll get that perfect balance of crispy and tender. 🔥
Sauce Timing Tricks
Don’t slap that BBQ sauce on too early—wait until the ribs hit 195°F internal temp so the sauce can cling to tender meat instead of steaming off. For extra richness, I mix in 2 tbsp caramelized onion jam (just cook onions until jammy) into the sauce. Brush it on in the last 15 minutes of cooking, then let it caramelize under the heat. The result? A glossy, sticky glaze that’s irresistible. 🍯
Resting Like a Pro
Skipping the rest is the fastest way to dry ribs—juices need time to redistribute. Tent them loosely with foil and let them sit for 10-15 minutes before slicing. I like to use a meat thermometer to check the temp again—it should hold steady or even rise 5-10°F during resting. This step is non-negotiable; it’s what turns good ribs into showstopping ones. 💫
Equipment Upgrades
No fancy smoker? No problem. Use a cast-iron skillet on the stovetop or oven for a stovetop version—just keep the heat low and add wood chips. For a smoky flavor without a smoker, try liquid smoke (½ tsp in the rub) or a smoked paprika boost**. A digital thermometer is non-negotiable—it’s the only way to guarantee perfect doneness every time. Invest in one, and you’ll never second-guess your ribs again. ⚡
Nutrition facts
Frequently asked questions
Can I substitute beef short ribs for flanken ribs in this recipe?
Yes, but expect slightly different results! Flanken ribs are leaner and cook faster than short ribs, which have more fat and connective tissue. For short ribs, increase cooking time by 30-45 minutes and monitor internal temp closely—aim for 203°F for maximum tenderness. The bark will be thicker, but the meat will be even more succulent.
What's the best wood for smoking these ribs?
Hickory or cherry wood creates that classic BBQ flavor, but fruitwoods like apple or peach add subtle sweetness. Avoid pine—it can taste bitter. For indoor cooking, use wood chips in a smoker box or wrap them in foil with holes punched in. If you're using a gas grill, soak wood chips for 30 minutes before adding them.
How do I fix ribs that are too dry?
Don't panic! If your ribs are dry, slice them thinly against the grain and serve immediately with extra BBQ sauce or a creamy side like mashed potatoes. For reheating, wrap slices in foil with a splash of broth or sauce, then warm in a 300°F oven for 10 minutes. The sauce helps restore moisture while keeping them tender. Prevention is key—never cook past 203°F internal temp.
Can I make this recipe in an oven instead of a grill?
Preheat your oven to 275°F and place ribs on a rack in a roasting pan. Add a water pan for moisture, then follow the same smoking steps (just without the smoke). Cook for 3-4 hours, checking temp every 30 minutes. For bark, broil for 3-5 minutes at the end. The oven method works great for indoor cooking, especially in cooler weather.
What sides pair best with these ribs?
Classic BBQ sides like creamy coleslaw, buttery cornbread, and grilled corn on the cob complement perfectly. For something lighter, try a fresh green salad with tangy vinaigrette or roasted sweet potatoes. The smoky-sweet ribs also pair well with pickled vegetables like jalapeños or red onions—the acidity cuts through the richness beautifully.