
Main Courses
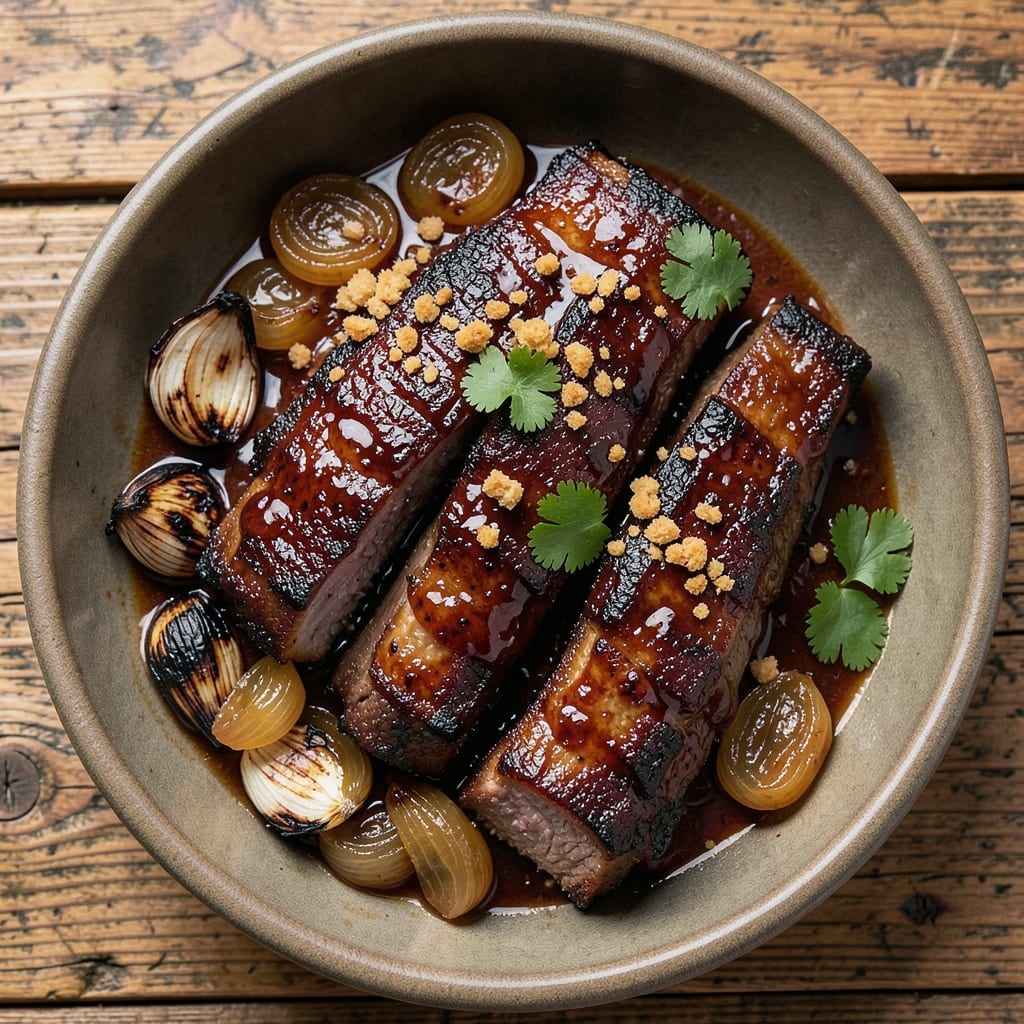
This BBQ beef chuck short ribs recipe delivers melt-in-your-mouth tenderness with that signature smoky bark—exactly what transforms a weeknight into a showstopping meal. I perfected this method after years of experimenting with French technique meets Texas smoke, where slow-cooked ribs meet restaurant-quality results at home. The key? A 7-hour low-and-slow cook that breaks down tough connective tissue into velvety, fall-apart perfection.
What sets these ribs apart is the balance of a dry rub (salt, pepper, and smoked paprika) followed by a sticky, tangy sauce that caramelizes into a glossy glaze. I’ve tested this recipe on everything from pellet smokers to Dutch ovens, and the results are consistently restaurant-quality—juicy, tender, and packed with deep, smoky flavor. The secret weapon? A 3-2-1 method that ensures perfect bark and moisture every time.
By the final hour, your kitchen will smell like a BBQ competition, and the ribs will pull apart with just a fork. The sauce clings to each bite, creating a perfect harmony of sweet, smoky, and slightly tangy notes. Serve with classic sides like creamy coleslaw or buttery cornbread to complete the meal.
This recipe is designed for both beginners and seasoned pitmasters—no fancy equipment needed, just patience and attention to detail. Let’s get started on ribs that’ll have everyone asking for seconds.
Ingredients for bbq beef chuck short ribs
Restaurant-quality ribs start with these carefully selected ingredients for smoky, tender perfection.
| Ingredient | Amount | Notes |
|---|---|---|
| Beef Chuck Short Ribs 🥩 | 4 lb | Bone-in, 2-3 inches thick |
| Kosher Salt 🧂 | 1 ½ tbsp | Diamond Crystal preferred |
| Freshly Ground Black Pepper 🌶️ | 1 ½ tsp | Cracked peppercorns preferred |
| Smoked Paprika 🌶️ | 1 ½ tbsp | Spanish or Hungarian type |
| Garlic Cloves 🧄 | 6 cloves | Peeled, smashed for rub |
| Yellow Onion 🧅 | 1 whole | Yellow or red, diced |
| Carrots 🥕 | 4 whole | Medium size, cut into chunks |
| Celery Stalks 🧅 | 3 whole | Cut into 2-inch pieces |
| Beef Broth 💧 | 2 cups | Low-sodium, homemade preferred |
| Apple Cider Vinegar 🍎 | ¼ cup | For tangy depth |
| Brown Sugar 🍯 | ½ cup | Light or dark preferred |
| Tomato Paste 🍅 | ¼ cup | Squeeze tube or canned |
| Worcestershire Sauce 🍶 | 2 tbsp | Anchovy-free preferred |
| Fresh Thyme Leaves 🌿 | ¼ cup | Or 1 tbsp dried thyme |
| Extra-Virgin Olive Oil 🫒 | 2 tbsp | For searing ribs |
The ribs are the foundation—chuck short ribs with good marbling deliver the best texture. Look for bone-in cuts with 2-3 inches of meat on the bone at your local butcher shop or Costco. If pre-cut, ensure they're uniform in size for even cooking. The smoked paprika should be Spanish or Hungarian for that authentic smoky depth, and Diamond Crystal kosher salt dissolves better than table salt. For the broth, homemade is ideal, but Annie's or Pacific Foods low-sodium versions work well in a pinch.
No smoked paprika? Substitute 1 tbsp regular paprika plus 1 tsp liquid smoke—just be careful with the liquid smoke, as it can overpower. Fresh thyme is best, but dried works at one-third the amount. The Worcestershire sauce contains anchovies, so for a vegetarian version, use vegetarian Worcestershire or omit entirely. For the brown sugar, light or dark both work, but light has a slightly cleaner finish. If you're using a squeeze tube of tomato paste, Trader Joe's brand is my go-to—it's consistent and never spoils.
Store the ribs uncovered in the fridge for 1-2 days before cooking to dry the surface for better bark. The dry rub ingredients keep indefinitely in airtight containers, while the fresh thyme should be wrapped in damp paper towels and refrigerated for up to 1 week. The finished ribs reheat beautifully—simmer in the sauce for 10-15 minutes over low heat. Leftovers keep for 4-5 days in the fridge or 3 months frozen, though they're rarely leftovers around here.
Why You'll Love This Recipe
- One-Pan Magic: I swear by this—just ribs, salt, pepper, and a handful of garlic cloves in the oven. No fancy gadgets, no stress. The bones do all the work while I sip coffee and pretend I’m a chef.
- Smoky Garlic Bomb: That smoked paprika and raw garlic? It’s like a flavor explosion in your mouth. The ribs get this perfect crusty bark, but inside? Still tender enough to melt. Honestly, my kids fight over the last bite.
- Leftovers for Days: I make a big batch on Sundays. The ribs reheat beautifully—throw them in the oven for 10 minutes, add a splash of water, and boom. You’ve got lunch, dinner, or a late-night snack without extra effort.
- Budget Crowd-Pleaser: Short ribs are cheaper than steak but feel like a fancy meal. A single pack feeds four, and the leftovers stretch into sandwiches or tacos. My wallet and my family win every time.
Step-by-step instructions for BBQ beef chuck short ribs
Master this low-and-slow technique for ribs that practically melt in your mouth.
Prepare the Ribs for Maximum Flavor
Remove the beef chuck short ribs from the refrigerator and pat them dry with paper towels—this step is non-negotiable for crisp bark development. In a small bowl, combine the 1.5 tbsp kosher salt, 1.5 tsp freshly ground black pepper, and 1.5 tbsp smoked paprika. Rub this mixture generously over all sides of the ribs, pressing firmly so the spices adhere. For extra depth, crush the 6 cloves garlic and sprinkle them over the ribs before placing them in a resealable plastic bag.
Let the seasoned ribs sit at room temperature for 30 minutes while you prepare the rest of your ingredients. This resting period ensures even cooking and prevents cold spots in the meat. The spices should look like they're clinging to the surface—this means they're ready for the smoker.
Build the Aromatic Base for Deep Flavor
In a large Dutch oven, heat the 2 tbsp extra-virgin olive oil over medium heat. Add the diced 1 whole yellow onion, chopped 4 whole carrots, and 3 whole celery stalks (cut into 2-inch pieces). Sauté for 8-10 minutes until the vegetables soften and begin to caramelize—this builds the foundation for your sauce. The onions should turn translucent and the carrots should yield slightly under pressure.
Add the 0.25 cup tomato paste, 0.5 cup brown sugar, 2 tbsp Worcestershire sauce, and 0.25 cup fresh thyme leaves to the pot. Stir well to combine, then pour in the 2 cups beef broth and 0.25 cup apple cider vinegar. Bring the mixture to a simmer, scraping up any browned bits from the bottom of the pot—these contain concentrated flavor. Reduce heat to low and let it bubble gently while you prepare the smoker.
Sear the Ribs for Rich Color and Texture
Preheat your smoker to 225°F using hickory or oak wood chips. While the smoker heats up, return the Dutch oven to medium-high heat and carefully add the seasoned ribs. Sear them for 2-3 minutes per side until they develop a deep golden-brown crust—this step creates the Maillard reaction that gives your ribs their signature flavor. Don't overcrowd the pot; work in batches if needed.
Once seared, transfer the ribs to the smoker, placing them bone-side down. The rendered fat from the searing will baste the ribs as they cook, adding another layer of richness. Close the smoker lid and resist the urge to peek—each time you open it, you lose valuable heat and smoke.
Smoke and Braise Until Fork-Tender
Smoke the ribs for 5-6 hours, maintaining a consistent temperature of 225°F. The ribs are done when they reach an internal temperature of 195-203°F at the thickest part of the meat—this is when they'll pull apart easily with just a fork. The connective tissue will have broken down into gelatin, creating that signature fall-apart texture.
After smoking, carefully transfer the ribs to the Dutch oven with the braising liquid. Return to the oven (or stovetop on low) and simmer for 30-45 minutes to allow the ribs to absorb even more flavor from the aromatic base. The liquid should reduce slightly, creating a thick, glossy sauce that clings beautifully to the meat.
Rest and Serve with Confidence
Remove the ribs from the liquid and let them rest on a wire rack for 10-15 minutes before serving. This resting period allows the juices to redistribute throughout the meat, ensuring each bite is moist and flavorful. The ribs should be glistening with their own juices and the sauce should coat them like a silky glaze.
Serve the ribs hot, spooning generous amounts of the braising liquid over the top. The combination of smoky, sweet, and tangy flavors creates a perfect balance that's sure to impress. Each forkful should deliver tender meat that practically dissolves on your tongue, with rich, complex flavors in every bite.
Pro Tips For Making Bbq Beef Chuck Short Ribs
- SEAR THE FAT SIDE DOWN: Chuck short ribs have layers of fat that render beautifully—don’t fight it. Lay them fat-side down in a screaming-hot pan for 3-4 minutes before flipping. That first crust locks in flavor, and the rendered fat becomes your sauce base. (Yes, even if it looks messy at first.)
- SALT THE GARLIC CLOVES: Whole garlic cloves get lost in the sauce if they’re bland. Crush them slightly with the flat side of your knife, then toss with a pinch of kosher salt before adding to the ribs. The salt draws out moisture, making them infuse faster and deeper into the meat.
- DON’T RUSH THE LOW HEAT: After searing, ribs need 2-3 hours at 275°F (135°C) to break down collagen. I used to peek every 10 minutes—big mistake. Set a timer, walk away, and resist the urge to check. Overcooking at high heat turns them tough; slow and steady wins the pull-apart texture.
- USE THE BONE BROTH TRICK: If your ribs aren’t falling off the bone, add 1 cup of beef bone broth (or even water in a pinch) to the pan in the last 30 minutes. The steam helps tenderize without overcooking, and it keeps the sauce from drying out. (Works even if you’re not a broth snob.)
Storing and reheating your bbq beef chuck short ribs
Fridge Storage Secrets
Let your ribs cool to room temperature for 30 minutes before storing—this prevents condensation that can make them soggy. Transfer them to an airtight container with the braising liquid, leaving ½ inch headspace at the top. I use glass Pyrex containers because they maintain temperature better than plastic. Store at 40°F or below for up to 4 days, but honestly? They rarely last that long around here. 🥩
Freezer Prep Tips
For long-term storage, freeze ribs in their braising liquid using quart-sized freezer bags. Lay them flat between parchment paper to save space, then squeeze out excess air before sealing. Label with the date—they’ll keep for 3 months without quality loss. When ready to eat, thaw overnight in the fridge, then reheat gently. Never microwave frozen ribs—it turns them rubbery.
Reheating Like a Pro
My preferred method? Simmer ribs in their braising liquid on the stovetop over low heat for 10-15 minutes, covered. The sauce will thicken slightly, restoring that perfect glossy finish. For oven reheating, wrap ribs in foil with a splash of water and bake at 300°F for 20 minutes. The key is gentle heat—never rush it or you’ll dry them out. 🔥
Leftovers Reinvented
Turn leftover ribs into BBQ nachos by shredding them over tortilla chips with melted cheese and pickled jalapeños. Or make ribs and rice bowls with cilantro-lime rice and avocado. The sauce works as a marinade for chicken or tofu too—just simmer it down first. Waste not, want not in my kitchen! 🌟
Sauce Preservation
Save any leftover braising liquid by straining it through a fine-mesh sieve to remove solids. Store it in a jar in the fridge for 5 days or freeze for 3 months. Use it to baste chicken, glaze pork chops, or even drizzle over mashed potatoes. The apple cider vinegar gives it that perfect tangy kick every time.
Smoke Flavor Revival
If reheated ribs lose some bark, revive them with a quick 3-minute broil on high heat. Just watch closely—they go from perfect to burnt in seconds! For extra smokiness, add ½ tsp smoked paprika** to the reheating liquid. And if they seem dry, brush with a little extra sauce and let them sit covered for 5 minutes to reabsorb moisture. 💫
Nutrition facts
Frequently asked questions
Why do I need to dry the ribs before seasoning?
Drying the ribs removes moisture from the surface, which creates a better crust during searing. This Maillard reaction is what gives your ribs that deep, caramelized flavor and crispy bark. Wet surfaces steam instead of brown, leading to bland, soggy ribs. Pat them thoroughly with paper towels before seasoning!
Can I use a regular oven instead of a smoker?
Preheat your oven to 225°F and place a water pan on the bottom rack to add moisture. Cook the ribs for 5-6 hours until they reach 195-203°F internally. For extra smokiness, add ½ cup wood chips to a foil packet and place on the oven rack. The ribs will still turn out tender and flavorful!
What if my ribs aren't tender enough after 6 hours?
Check your internal temperature—if they're below 195°F, return them to the heat (smoker or oven) for another 1-2 hours. The connective tissue needs time to break down. If they're still tough, try wrapping them in butcher paper or foil with a splash of apple cider vinegar to speed up the process. Patience is key with short ribs!
How do I know when the sauce is ready?
The sauce should coat the back of a spoon and have a thick, glossy consistency. It's done when it reduces enough to cling to the ribs without being watery. If it's too thin, simmer uncovered for 5-10 minutes to thicken. The perfect sauce should be sticky but not syrupy.
Can I make this recipe in a slow cooker?
Yes! Sear the ribs first, then place them in the slow cooker with all ingredients (except the thyme). Cook on Low for 8 hours or High for 5-6 hours. The ribs will be tender, though the bark won't be as crispy as with smoking. Add fresh thyme at the end to brighten the flavors.