
Main Courses
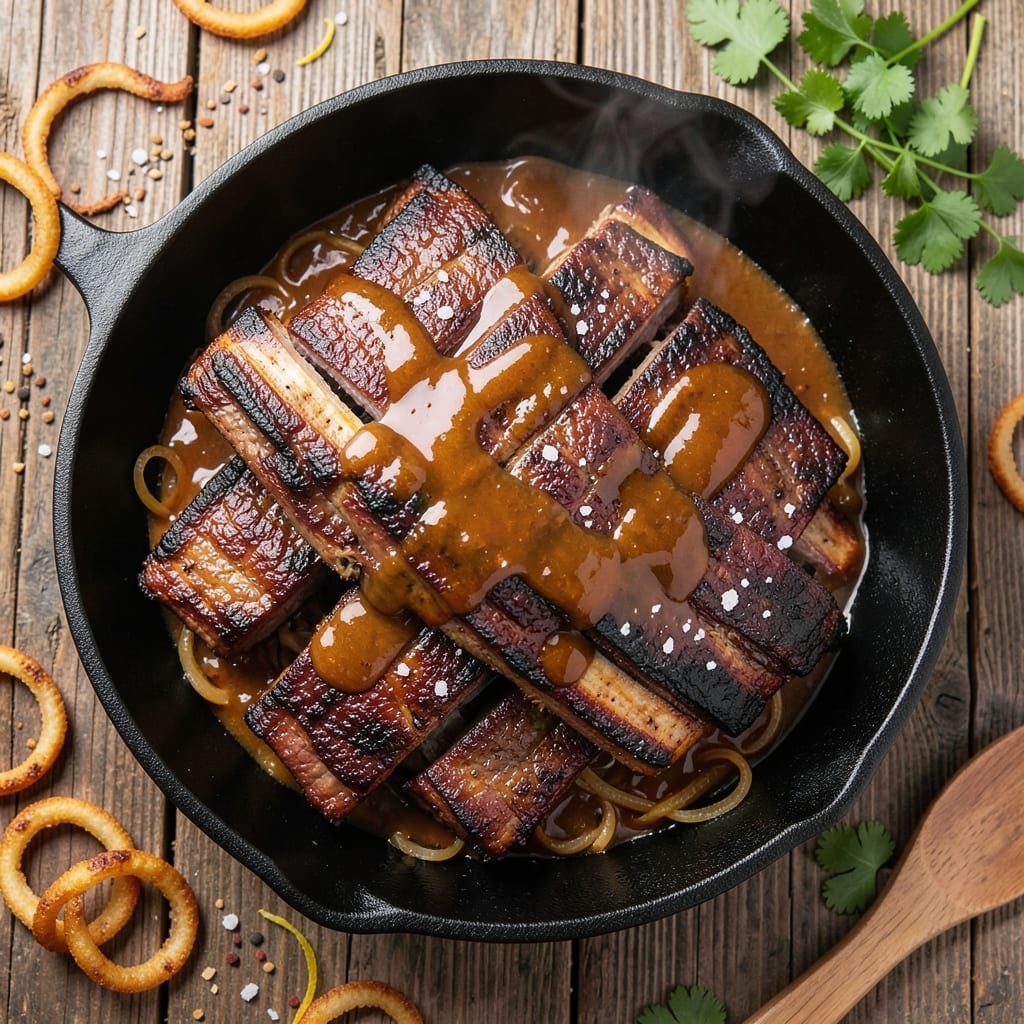
This BBQ beef back rib recipe delivers the kind of smoky, tender meat that turns casual dinners into legendary cookouts. I’ve spent years perfecting the balance between crispy bark and fall-off-the-bone tenderness, and this method—whether you’re using a smoker, grill, or oven—never fails. The secret lies in patience and technique, not just time.
What sets these ribs apart is the 3-2-1 method, a classic pitmaster technique that guarantees juicy meat with a deep, caramelized crust. Start with a dry rub that clings to the meat, then slow-cook until the collagen breaks down, creating that irresistible pull-apart texture. Even if you don’t have a smoker, the oven can deliver restaurant-quality results with just a little attention to temperature control.
By the time you’re done, you’ll have ribs that are juicy inside with a crackling, dark bark on the outside—every bite packed with smoky flavor and tender meat. The key is letting them rest before slicing, which keeps all that delicious juice where it belongs: inside the ribs. Serve with classic sides like tangy coleslaw or smoky baked beans to complete the meal.
This recipe works whether you’re feeding a crowd or treating yourself to a solo feast. The method is foolproof, and the results are always impressive. Let’s get started on ribs that’ll have everyone asking for seconds.
Ingredients for bbq beef back rib
Four pounds of beef ribs plus a handful of pantry staples transform into legendary smoky, tender meat.
| Ingredient | Amount | Notes |
|---|---|---|
| Beef Back Ribs 🥩 | 4 lb | Bone-in, meaty cuts preferred |
| Yellow Mustard 🍯 | ¼ cup | For sticky base application |
| Brown Sugar 🍚 | ½ cup | Packed, light or dark |
| Smoked Paprika 🌶️ | 2 tbsp | For deep smoky flavor |
| Chili Powder 🌶️ | 1 tbsp | Medium heat preferred |
| Garlic Powder 🧄 | 1 tbsp | Freshly ground preferred |
| Onion Powder 🧅 | 1 tbsp | For balanced flavor |
| Ground Black Pepper 🌶️ | 1 tbsp | Freshly cracked preferred |
| Kosher Salt 🧂 | 1 tbsp | Diamond Crystal preferred |
| Apple Cider Vinegar 🍎 | ¼ cup | For tangy balance |
| Water 💧 | ½ cup | For mop liquid |
| BBQ Sauce 🍅 | ½ cup | Store-bought or homemade |
| Aluminum Foil 📄 | 1 sheet | Heavy-duty preferred |
The ribs are the star—look for meaty, bone-in back ribs with good marbling. Costco or local butchers usually carry them pre-cut, but if buying whole, ask for the meaty back section. Freshness matters: the meat should be bright red with visible fat. For the dry rub, Penzeys or bulk bins at natural grocery stores offer the freshest spices, but the regular supermarket aisle works too. Just check the 'best by' date—old spices lose their punch.
No smoked paprika? Regular paprika plus a pinch of liquid smoke works in a pinch. The brown sugar can be swapped for coconut sugar at a 1:1 ratio. For the mop liquid, if you're short on apple cider vinegar, white vinegar or lemon juice will do. The BBQ sauce is flexible—Sweet Baby Ray's is a crowd-pleaser, but any sauce with a balance of sweet and tang works. Pro tip: Toast your spices in a dry pan for 30 seconds before mixing—they'll develop deeper flavor (worth the extra minute).
Ribs keep best in the fridge for 3-4 days if wrapped tightly in foil. For longer storage, freeze them up to 3 months—wrap each rack separately to prevent freezer burn. Let them rest for 15-20 minutes after cooking before slicing; this keeps all that juicy goodness inside. The dry rub? Store it in an airtight container for up to 2 weeks—it's perfect for future grilling sessions.
Why You'll Love This Recipe
- I’ll be real: you’ll make this twice in one week because the ribs reheat like a dream. The meat stays juicy, the sauce clings, and you can toss them in wraps, salads, or just eat them straight from the fridge. Budget-friendly? Absolutely. Worth it? Even more so.
- One-Pan Magic: I swear by this recipe because it’s that simple—just ribs, a quick dry rub of brown sugar and smoked paprika, and a slather of yellow mustard for that tangy stick. No basting, no fuss, just set it in the oven and let the magic happen.
- Sweet-Spicy Crunch: Between us, that combo of brown sugar and chili powder on the ribs? It’s pure satisfaction. The sugar caramelizes into a glossy crust while the paprika adds a smoky warmth—every bite has this perfect balance of sweet heat that makes you reach for another.
- Tailgate or Tuesday: Honestly, this recipe works everywhere. Grill it for summer BBQs, slow-cook it for game day, or throw it in the oven when you’re too tired to care. The ribs stay tender no matter how you cook them, and the mustard glaze? Always a crowd-pleaser.
Step-by-step instructions for BBQ beef back ribs
Transform tough cuts into melt-in-your-mouth ribs with this precise 3-hour method.
Prepare the Ribs with Dry Rub
Remove the beef back ribs from the refrigerator and let them sit at room temperature for 30 minutes to ensure even cooking. In a small bowl, combine the 2 tablespoons smoked paprika, 1 tablespoon chili powder, 1 tablespoon garlic powder, 1 tablespoon onion powder, 1 tablespoon ground black pepper, and 1 tablespoon kosher salt. Mix thoroughly to create a uniform dry rub.
Pat the ribs completely dry with paper towels—this step is critical for developing that coveted smoky bark. Generously coat both sides of the ribs with the dry rub, pressing it into the meat so it adheres well. Let the rubbed ribs rest uncovered on a wire rack for 15 minutes before cooking. This allows the rub to penetrate and intensify flavor.
Create the Mustard Base and Assemble for Oven Cooking
Preheat your oven to 275°F. In a small bowl, mix the 0.25 cup yellow mustard with the 0.5 cup brown sugar until smooth. This sticky mixture will form the foundation for your bark and help lock in moisture. Spread this mixture evenly over the rubbed ribs, coating them completely.
Place the ribs meaty-side up on a sheet of heavy-duty aluminum foil. In a separate small bowl, combine the 0.25 cup apple cider vinegar and 0.5 cup water to create a mop liquid. This will be used to keep the ribs moist during the long cook. Fold the foil edges up to create a sealed packet, leaving room for the ribs to expand slightly.
Cook Low and Slow for Maximum Tenderness
Place the foil-wrapped ribs on a baking sheet and transfer to the preheated oven. Cook for 2.5 hours at 275°F, maintaining this temperature throughout. Every 45 minutes, carefully open the foil packet and spoon about 2 tablespoons of the mop liquid over the ribs. This prevents drying and enhances the bark formation.
After 2.5 hours, remove the ribs from the oven and carefully unfold the foil. Increase the oven temperature to 325°F. Spread the 0.5 cup BBQ sauce evenly over the ribs, focusing on the meaty portions. Return the ribs to the oven, uncovered, and cook for an additional 30-45 minutes until the internal temperature reaches 195°F and the bark is deep mahogany in color.
Rest and Serve for Perfect Texture
Once the ribs reach 195°F and develop a glossy, dark bark, remove them from the oven and let them rest for 15-20 minutes before serving. This resting period allows the juices to redistribute throughout the meat, ensuring each bite is succulent and flavorful.
Use two forks to carefully separate the ribs into individual bones. The meat should pull away cleanly, revealing tender, juicy pieces with a perfect balance of smoky, sweet, and tangy flavors. Serve immediately with extra BBQ sauce on the side for dipping or drizzle over the ribs for added moisture.
Pro Tips For Making Bbq Beef Back Rib
- Trim the Fat First: I learned this the hard way—skipping the fat trim on beef back ribs means a greasy sauce and uneven cooking. Use kitchen shears to snip off the thick silver skin and any excess fat before seasoning; it’ll crisp up better and let the rub stick.
- Brown Sugar Early: My grandmother swore by this, and she was right: mix the brown sugar into your dry rub before applying it to the ribs. Wet sugar burns fast, so combining it with the spices first ensures an even coat and prevents a bitter, charred mess when you sear.
- Skip the Crowding: After burning three batches, I finally figured out: don’t stack ribs on the grill or in the oven. Give them space—at least an inch between racks—so heat circulates and they don’t steam. Crowding turns tender meat into soggy disappointment.
- Rest Before Saucing: I was skeptical until I tried it: let the ribs rest under foil for 15 minutes after pulling them off the heat. This locks in juices so they don’t turn to water when you slap on the mustard-brown sugar glaze. Trust the process—your ribs will thank you.
Common mistakes when making this recipe
Skipping the Rest
This is the biggest rookie mistake I see—skipping the 15-20 minute rest after cooking. I’ve watched people slice into ribs fresh out of the oven, only to be met with a gush of juices and sad, dry meat. That resting time lets the muscle fibers relax and redistribute juices back into the meat. Trust me, the wait is worth it for ribs that fall apart at the touch. 💪
Uneven Temperature
Fluctuating oven temperatures are the enemy of perfect ribs. If your oven runs 275°F or hotter than set, your ribs will dry out before they get tender. Invest in an oven thermometer—I swear by the Thermoworks Oven Thermometer—to monitor the actual temperature. Keep the door cracked just a smidge if your oven runs hot. Consistency is key for that perfect bark and tender meat.
Overlooking the Mustard Base
The mustard-brown sugar paste isn’t just flavor—it’s a game-changer for bark formation. If you skip it, you’ll miss out on that deep, caramelized crust. Spread it evenly and generously over the ribs before the slow cook. Pro tip: Use Dijon mustard if you want extra tang, but yellow mustard works perfectly fine too. Don’t rush this step—it’s what makes your ribs look (and taste) restaurant-worthy. 🌟
Not Mopping Enough
Many cooks forget to mop their ribs during the cook, leading to dry, tough meat. Every 45 minutes, open that foil packet and spoon 2 tablespoons of your mop liquid over the ribs. This keeps them moist and helps build that glossy bark. If you’re short on time, at least do it once midway through the cook—it makes a noticeable difference. 💧
Using the Wrong Cut
Not all ribs are created equal! Beef back ribs are your best bet for this recipe, but some folks accidentally grab beef spare ribs (which are leaner and tougher). Look for meaty, bone-in back ribs with good marbling. If you’re unsure, ask your butcher—they’ll point you in the right direction. Using the wrong cut means extra work and less tender meat, and nobody wants that. 🥩
Ignoring the Bark
The dark, glossy bark isn’t just for show—it’s packed with flavor! If your ribs aren’t developing a deep mahogany color, you might be cooking too cool or not basting enough with BBQ sauce in the final stage. Once you hit 325°F for the last 30-45 minutes, keep an eye on them. A little extra sauce and a watchful eye will give you that perfect bark every time. 🔥
Nutrition facts
Frequently asked questions
Can I make these ribs in a smoker instead of the oven?
For a smoker, maintain 225-250°F for 4-5 hours until tender, then wrap in foil with apple cider vinegar and cook another 1-2 hours until 195°F. The key is patience—smoked ribs develop bark differently than oven-cooked ones. Use hickory or applewood for classic flavor.
How do I know when the ribs are done?
Use a meat thermometer to check the internal temperature—195°F is perfect for tender, pull-apart ribs. The meat should also separate easily with two forks. Look for a deep mahogany bark, but don't rely on color alone. The 3-2-1 method guarantees doneness when done right.
Can I use this recipe for pork back ribs instead?
Yes, but adjust the cook time! Pork back ribs cook faster—aim for 2.5 hours at 275°F (instead of 3 hours) and check for 195°F internal temp. The dry rub and bark technique works the same, but pork ribs are leaner, so watch closely to avoid drying out.
What's the best way to store leftover ribs?
Wrap tightly in foil and refrigerate for 3-4 days or freeze for up to 3 months. Reheat in a 300°F oven for 10-15 minutes until warmed through. For best texture, reheat just until hot—overheating makes ribs tough. Store in airtight containers to preserve flavor.
Why do my ribs turn out dry?
Most likely, you skipped the mopping or cooked too hot. The 275°F slow cook is critical—any hotter and the meat dries out before tenderizing. Also, never skip the 15-minute rest before slicing. If using a smoker, wrap ribs in foil after 2 hours to trap moisture.