
Main Courses
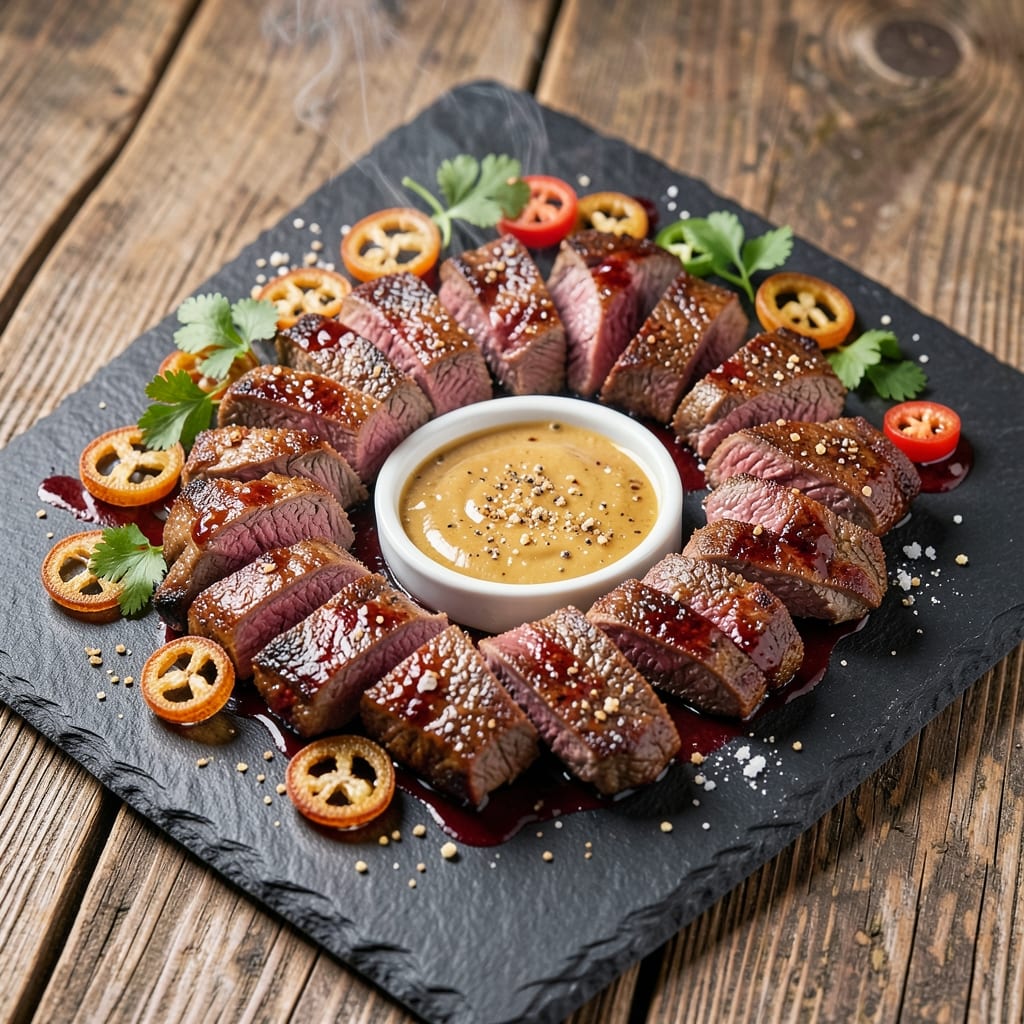
Barbecue beef strips deliver that perfect balance of smoky crunch and juicy pink centers—exactly what transforms a weeknight dinner into a backyard cookout experience. I remember the first time I nailed this technique at a local competition, where the judges couldn't resist the contrast of crispy edges and tender meat. The secret lies in a precise dry rub blend and controlled heat, whether you're using charcoal, wood, or even a high-heat grill pan.
This recipe starts with a simple yet bold dry rub featuring smoked paprika, brown sugar, and a touch of cayenne for heat—no marinades needed. The strips cook in just 15 minutes on a hot grill, giving you that signature bark without drying out the meat. What makes this method foolproof is the high-heat approach: sear first, then finish with indirect heat to keep the centers juicy while the edges develop that irresistible crunch.
By the time you're done, you'll have perfectly seasoned beef strips with a deep, smoky flavor and a texture that's crisp on the outside, tender on the inside. The rub clings to the meat, creating a flavorful crust that holds up even when sliced. Serve them on buns with pickles and onions for a classic sandwich, or pile them high on a platter for game day—either way, they're guaranteed to disappear fast.
Whether you're grilling over hickory or finishing in the oven, this technique adapts to your setup while delivering restaurant-quality results. The key is patience and temperature control, and I'll walk you through every step to ensure you get that perfect balance every time. Let's get cooking!
Ingredients for barbecue beef strips
Nine simple ingredients for smoky, crispy beef strips with juicy pink centers—perfect for any grill or pan.
| Ingredient | Amount | Notes |
|---|---|---|
| Flank Steak 🥩 | 1 ½ lb | Cut into 1-inch strips |
| Smoked Paprika 🌶️ | 2 tbsp | For deep smoky flavor |
| Brown Sugar 🍚 | 1 tbsp | Light or dark variety |
| Ground Black Pepper 🌶️ | 1 tsp | Freshly ground preferred |
| Cayenne Pepper 🔥 | ½ tsp | Adjust for heat preference |
| Garlic Powder 🧄 | 1 tsp | Not garlic salt |
| Onion Powder 🧅 | 1 tsp | For savory depth |
| Kosher Salt 🧂 | 1 tsp | Diamond Crystal preferred |
| Olive Oil 🫒 | 2 tbsp | High smoke point |
| Yellow Onion 🧅 | 1 whole | Thinly sliced for garnish |
| Dill Pickles 🥒 | 4 whole | Sliced for sandwiches |
| Hickory Wood Chips 🌳 | 1 package | For smoky flavor (optional) |
The flank steak is your star here—look for one with good marbling for juiciness. Costco or Whole Foods usually have great cuts, but any butcher will do. Cutting the steak into 1-inch strips (against the grain) ensures that signature tender bite. If you can't find hickory wood chips, mesquite or applewood work too. Just don't skip the smoke—it's what makes these strips taste like a backyard cookout. Freshly ground pepper and Diamond Crystal kosher salt make all the difference in the dry rub, so skip the pre-ground stuff if you can.
No smoked paprika? Regular paprika plus a pinch of liquid smoke gets you close. Running short on brown sugar? White sugar at the same amount works in a pinch, but you'll lose that caramelized depth. The olive oil is non-negotiable—high smoke point is key here, so avoid extra-virgin if you're searing. For the pickles, any brand works—just make sure they're tangy, not sweet. And if you're making these for sandwiches, grab some soft brioche buns from the bakery section—they hold up better to the juices.
Cook these ASAP after seasoning—the rub clings best when fresh. Store the dry rub in an airtight container for up to 2 weeks if you make extra. The cooked strips reheat beautifully—2 minutes in a hot pan or 10 seconds in the microwave brings them back to life. I always make a double batch because they disappear fast—game day, potlucks, or just because. Keep any leftovers in the fridge for 3 days or freeze for 3 months in a sealed bag.
Why You'll Love This Recipe
- Five-Ingredient Magic: The mix of smoked paprika and cayenne gives these strips a smoky kick without fuss. Honestly, I swear by this combo—it’s the kind of flavor that makes you want to eat straight from the pan.
- Sheet Pan Ready: Slice the flank steak thin, toss it with the spices, and throw it on one pan. Twenty minutes later, you’ve got dinner. Not the prettiest, but the taste makes up for it every time.
- Tailgate or Tuesday: These strips disappear at game days, but they’re just as good in lunches or over rice. I’ll be real: my kids ask for them even when I’m not hosting anything.
- Budget-Friendly Power: Flank steak stretches far, and the spices cost pennies. Between us, this is my go-to when I need to feed a crowd without breaking the bank. Leftovers? They’re the best kind.
Step-by-step instructions for smoky dry-rub beef strips
Here's how to transform tough flank steak into tender, smoky beef strips with perfect bark every time.
Prepare the Flank Steak for Maximum Tenderness
Start by cutting the 1.5 lb flank steak into 1-inch strips against the grain. This is crucial—cutting across the muscle fibers ensures each bite will be tender. Lay the strips in a single layer on a plate and let them sit at room temperature for 30 minutes. This step prevents cold meat from cooking unevenly and ensures a perfect sear.
While the meat rests, combine the 2 tbsp smoked paprika, 1 tbsp brown sugar, 1 tsp garlic powder, 1 tsp onion powder, 1 tsp ground black pepper, 0.5 tsp cayenne pepper, and 1 tsp kosher salt in a small bowl. Mix thoroughly—this dry rub will create that signature smoky bark while keeping the inside juicy. I like to use my fingers to break up any clumps, ensuring even distribution.
Coat the Beef and Rest for Flavor Penetration
Pat the beef strips dry with paper towels—this helps the rub stick better and promotes crispier bark. Generously coat each strip with the dry rub, pressing it into the meat so it adheres well. Place the coated strips on a wire rack set over a baking sheet (this prevents steaming) and refrigerate for at least 1 hour, or up to 4 hours for deeper flavor penetration.
Here's the thing—don't skip this resting time. The longer the rub sits on the meat, the more flavor it develops. If you're short on time, even 30 minutes in the fridge will help. Just be sure to bring the meat back to room temperature before cooking to ensure even doneness.
Smoke the Beef Strips to Juicy Perfection
Preheat your smoker to 225°F using the hickory wood chips for that classic BBQ flavor. Once the smoker reaches temperature, add the beef strips in a single layer, leaving space between them for even smoke circulation. Smoke for 1.5 to 2 hours, or until the internal temperature reaches 135°F and the strips are fork-tender but still slightly pink in the center.
Here's where it gets tricky: resist the urge to peek or flip the strips. Every time you open the smoker, you lose heat and moisture. Instead, trust the thermometer and let the smoker do its work. The strips should develop a beautiful dark bark on the outside while staying juicy inside—this is the magic of low-and-slow smoking.
Sear for Extra Crunch and Serve
Heat 2 tbsp olive oil in a large skillet over high heat until it shimmers. Add the smoked beef strips and sear for 2-3 minutes per side until they develop a deep golden-brown crust. This final sear adds an extra layer of flavor and texture—don't skip it!
Transfer the beef strips to a serving platter and garnish with thinly sliced yellow onion and sliced dill pickles for a tangy contrast. Serve immediately while still hot, pairing with crusty bread or your favorite BBQ sides. The strips should be tender enough to pull apart with a fork but still hold their shape, with a smoky, slightly sweet bark that's irresistible.
Rest and Slice for Maximum Juiciness (Optional but Recommended)
If you have time, let the beef strips rest for 5-10 minutes before serving. This allows the juices to redistribute, ensuring every bite is moist and flavorful. While they rest, tent loosely with foil to keep them warm. This step is especially important if you're serving the strips in sandwiches or bowls where the juices can escape.
Slice the strips against the grain if desired, but I find they're delicious as-is for easy finger-food style serving. The combination of smoky rub, tender meat, and tangy pickles makes these beef strips a crowd-pleaser—perfect for game day, BBQ parties, or a quick weeknight dinner.
Pro Tips For Making Barbecue Beef Strips
- Slice Against the Grain: Flank steak’s fibers run long—cutting perpendicular to them makes each bite tender, not chewy. Grab your knife and angle those slices diagonally; you’ll notice the difference immediately.
- Marinate Overnight (No Excuses): I used to rush this and wondered why my strips tasted flat. Toss the flank steak in a mix of smoked paprika, brown sugar, black pepper, and cayenne, then let it sit 12+ hours. The sugar caramelizes, the spices cling, and the meat stays juicy—trust the wait.
- Sear First, Then Grill: Skip the direct grill heat until the meat hits the pan. Sear flank steak in a screaming-hot skillet for 2 minutes per side first—this locks in flavor and prevents drying out later. Then finish on the grill for that smoky crust.
- Balance the Heat: Too much cayenne upfront? Taste your rub before applying. Brown sugar burns easily—keep it mild until the end. A pinch of cayenne in the marinade and a sprinkle on top after cooking gives heat without overpowering the smoky-sweet base.
Storing and reheating your leftovers
Refrigerator Storage
Your perfectly smoked beef strips will keep in the fridge for 3 days if stored properly. Transfer them to an airtight container or resealable plastic bag, removing as much air as possible to prevent drying. I like using quart-sized Ziploc bags because they're stackable and easy to grab for quick meals. Let the strips cool completely before storing to avoid condensation that can make them soggy. 🥩
Freezer Storage
For longer storage, freeze the beef strips for up to 3 months without losing much flavor or texture. Arrange them in a single layer on a tray first to prevent sticking, then transfer to a freezer-safe bag with all air squeezed out. Label with the date—they reheat beautifully straight from frozen. I've even prepped these for game day parties and kept them in the freezer until serving day. ❄️
Reheating on the Grill
My favorite method is reheating on the grill—it brings back that smoky bark while keeping the inside juicy. Heat your grill to medium-high (375°F) and place the strips on the grates. Cook for 3-4 minutes per side until heated through. Add a splash of apple cider vinegar to the grill grates for extra moisture if needed. This works best with strips that haven't been frozen. 🔥
Skillet Reheating
For a quick fix, use a skillet with 1 tbsp olive oil over medium heat. Add the strips and cook for 2-3 minutes per side until warmed through. I like to add 1 tsp beef broth to the pan to prevent sticking and keep things moist. This method works well for both refrigerated and frozen strips—just add an extra minute if coming from frozen. 💡
Oven Method
Preheat your oven to 350°F and place the beef strips on a wire rack over a baking sheet. This prevents steaming and helps maintain that crispy texture. Bake for 8-10 minutes until heated through. For extra flavor, drizzle with 1 tbsp BBQ sauce before baking. This is my go-to method when I'm serving a crowd and need to reheat multiple batches. 🌡️
Microwave Shortcut
When I'm in a real hurry, I use the microwave for a 30-second burst on high power. Place the strips on a microwave-safe plate with a damp paper towel over them to retain moisture. Stir halfway through for even heating. While not as crispy as other methods, it's perfect for quick lunches or when you're short on time. Just be prepared for slightly softer edges. ⏰
Nutrition facts
Frequently asked questions
Can I use flank steak substitutes for these beef strips?
Yes! Flank steak is ideal, but skirt steak or sirloin work just as well. The key is cutting against the grain for tenderness. Avoid tougher cuts like chuck—they won't break down properly. For extra-lean options, try top round but increase the rub time to 2 hours for deeper flavor.
How do I get the perfect smoky flavor without a smoker?
No smoker? No problem! Use hickory or mesquite wood chips in your grill or even a stovetop grill pan. For stovetop, place soaked wood chips on foil and set them under the pan. Or try a smoked salt substitute—mix 1 tsp smoked paprika + 1 tsp kosher salt for every 1 tbsp of regular rub. The oven method with a wood chip pan also works well.
Why are my beef strips tough instead of tender?
Tough strips usually mean one of two things: cutting with the grain (not against) or overcooking. Always cut perpendicular to muscle fibers, and pull them off the heat when they hit 135°F internal temp. For extra tenderness, marinate in 1 tbsp olive oil + 1 tbsp vinegar for 30 minutes before applying the rub. The high-heat sear should only take 2-3 minutes per side.
What's the best way to serve these beef strips?
These strips shine in BBQ sandwiches with soft buns, or as a taco filling with lime and cilantro. For a gourmet touch, serve on crusty bread with caramelized onions and blue cheese dressing. They also make great appetizers—skewer with cherry tomatoes and mozzarella for a smoky caprese salad. The tangy pickles in the recipe balance the richness perfectly.
Can I make this recipe in a slow cooker?
Not ideal for perfect bark, but you can adapt! Cook on high for 2 hours with 1 cup beef broth in the bottom of the slow cooker (to prevent drying). After cooking, sear in a hot skillet for 2 minutes per side to recreate that crispy crust. The meat will be more tender but less smoky—best for tacos or shredded applications rather than crispy strips.