
Main Courses
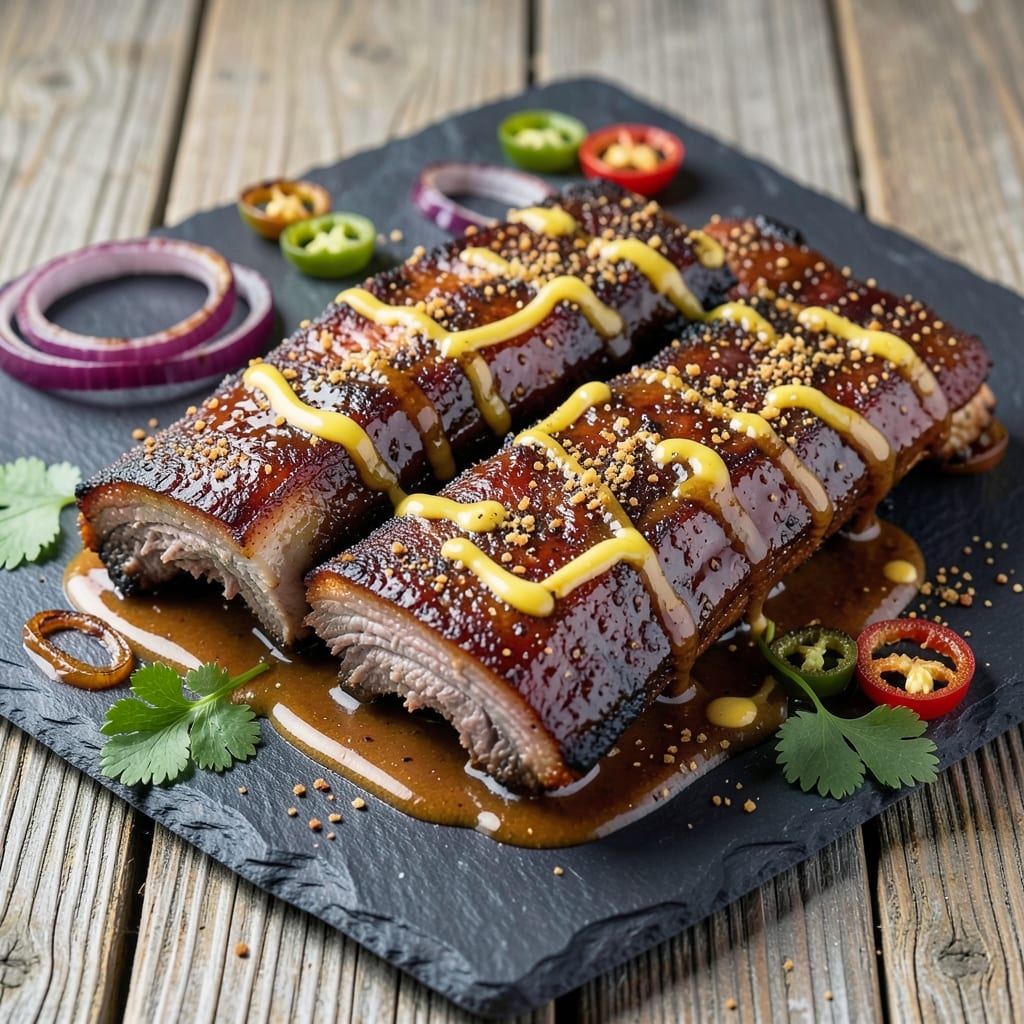
This barbecue beef back ribs recipe delivers the perfect balance of smoky bark and juicy meat—a 3-hour masterpiece that transforms tough cuts into tender, fall-apart perfection. 🔥 After years of perfecting my technique (and a few too many burnt attempts), I've developed a foolproof method that works whether you're using a smoker, pellet grill, or even a trusty oven. The secret lies in the 3-2-1 method: 3 hours of low-and-slow cooking, 2 hours of resting, and 1 final basting with sauce for that restaurant-quality finish.
The foundation starts with a dry rub that creates that coveted bark—equal parts sweet, spicy, and smoky—while keeping the meat tender inside. I source my ribs from a local butcher shop where they're cut fresh, and I always trim excess fat to ensure even cooking. The slow smoke process (225°F) breaks down collagen into gelatin, turning the meat into melt-in-your-mouth goodness. This isn't just about flavor; it's about texture, and that's where the magic happens.
By the time you're done, you'll have ribs with a crispy, caramelized crust that shatters at every bite, revealing meat so tender it falls off the bone. The aroma alone will have everyone gathering around your grill or smoker, and the taste? That's the real reward—deep, smoky, with just enough heat to linger. These ribs are worth the wait, and they pair perfectly with classic sides like tangy coleslaw or buttery cornbread.
Whether you're cooking for a crowd or treating yourself to a solo feast, this recipe delivers restaurant-quality results at home. The beauty of the 3-2-1 method is its adaptability—it works on any equipment, and the leftovers reheat beautifully. Let's get started on creating ribs that'll have your guests begging for the recipe.
Ingredients for barbecue beef back ribs
Six ingredients for the dry rub, plus a few more for the smoky magic—all you need for ribs that'll have everyone begging for seconds.
| Ingredient | Amount | Notes |
|---|---|---|
| Beef Back Ribs 🥩 | 4 lb | Bone-in, meaty, trimmed of excess fat |
| Yellow Mustard 🍯 | ¼ cup | For base of dry rub |
| Brown Sugar 🍚 | ½ cup | Light or dark variety |
| Smoked Paprika 🌶️ | ¼ cup | For deep smoky flavor |
| Chili Powder 🌶️ | 2 tbsp | Medium heat preferred |
| Garlic Powder 🧄 | 1 tbsp | Freshly ground preferred |
| Onion Powder 🧅 | 1 tbsp | For depth of flavor |
| Ground Black Pepper 🌶️ | 1 tbsp | Freshly cracked preferred |
| Kosher Salt 🧂 | 1 tbsp | Diamond Crystal preferred |
| Cayenne Pepper 🔥 | ½ tsp | Adjust for heat preference |
| Apple Cider Vinegar 🍎 | ¼ cup | For tenderizing marinade |
| BBQ Sauce 🍅 | 1 cup | Store-bought or homemade |
| Wood Chips 🌳 | 2 cups | Hickory or cherry preferred |
| Wood Chips Soaking Liquid 💧 | 1 cup | Water for soaking chips |
The ribs are the star, so source them fresh from a butcher shop or high-quality grocer like Whole Foods. Look for meaty, well-marbled cuts—avoid those with too much fat or thin spots. I always ask for them to be cut into individual ribs (about 24 bones total for 4 lbs). Costco or Trader Joe's often carry pre-cut packs too. Trim any excess fat with kitchen shears—this helps the rub stick better and prevents flare-ups. If you're using a smoker, hickory or cherry wood chips give that classic BBQ flavor, but fruitwoods like apple or pecan work too. Soak them in water for at least 30 minutes before using.
No smoked paprika? Regular paprika plus a pinch of liquid smoke gets you close. Short on apple cider vinegar? White vinegar or lemon juice works in a pinch. The BBQ sauce can be store-bought (I like Sweet Baby Ray's for consistency), but homemade is better if you've got time—just simmer ketchup, vinegar, brown sugar, and spices. For the rub, Diamond Crystal kosher salt dissolves better than table salt, but any kosher salt works. Want more heat? Add another 0.5 tsp cayenne. No wood chips? Wood pellets in your smoker work just as well.
The dry rub stays potent for 3 months in an airtight container. Store ribs in the fridge for 2 days before cooking—they develop more flavor over time. After cooking, ribs reheat beautifully—wrap in foil with a splash of water and bake at 300°F for 15 minutes. Leftovers keep for 4 days in the fridge or 3 months frozen. I always make extra—these ribs are worth freezing for future lazy Sundays.
Why You'll Love This Recipe
- I’ll be real: the second batch is often the best. The glaze thickens just right after resting, and the ribs stay tender. Plus, it’s budget-friendly—you can stretch a pack of ribs across two meals without breaking the bank. Just reheat with a splash of water, and you’ve got dinner ready in minutes.
- Five-Ingredient Magic: Honestly, I swear by this recipe because it’s that simple. Just ribs, mustard, brown sugar, smoked paprika, and chili powder—no fancy marinades or hours of prep. The mustard gives it that tangy backbone while the brown sugar caramelizes into a sticky, sweet glaze that’s impossible to resist.
- Smoky-Sweet Obsession: Between us, this combo of smoked paprika and chili powder is ridiculously good. The paprika adds this deep, woodsy warmth, while the chili powder brings just enough heat to keep things interesting. Slather it on, and you’ve got ribs that taste like they’ve been slow-smoked for hours—even if you’re doing it in a sheet pan.
- Tailgate or Tuesday: Here’s what sold me—this recipe works everywhere. Grilling at a game? Perfect. Lazy Sunday dinner? Done. Even my picky teenager devours these. The brown sugar crust holds up whether you’re serving them fresh or reheating leftovers, making it my go-to for crowds or solo nights.
Step-by-step instructions for smoky, juicy beef back ribs
Here's how to transform tough ribs into fall-off-the-bone tender meat with perfect bark.
👨🍳 Step 1: Build the Dry Rub and Prep the Marinade
In a large bowl, combine the 0.5 cup brown sugar, 0.25 cup smoked paprika, 2 tbsp chili powder, 1 tbsp garlic powder, 1 tbsp onion powder, 1 tbsp ground black pepper, 1 tbsp kosher salt, and 0.5 tsp cayenne pepper. Mix thoroughly with your hands until the spices are evenly distributed and the sugar crystals dissolve slightly. This creates a sticky, flavorful paste that clings beautifully to the ribs.
In a separate bowl, whisk together the 0.25 cup yellow mustard and 0.25 cup apple cider vinegar to create the marinade. The mustard helps tenderize the meat while the vinegar adds tangy depth. You'll apply this mixture directly to the ribs before adding the dry rub.
🍳 Step 2: Apply Rub and Marinade to the Ribs
Pat the 4 lb beef back ribs completely dry with paper towels—this is crucial for developing that perfect bark. Using your fingers, spread the mustard-vinegar marinade evenly over all surfaces of the ribs, including the bone side. This helps break down tough fibers and adds moisture during the long cook.
Next, generously coat the ribs with the dry rub mixture, pressing it firmly into the meat so it adheres well. Don't be shy—you want a thick, even layer. Place the ribs on a wire rack set over a baking sheet (this allows air circulation for better bark formation) and refrigerate uncovered for at least 4 hours or up to 24 hours. This resting period lets the rub penetrate and the flavors meld.
🔥 Step 3: Prepare the Smoker and Cook Low and Slow
While the ribs marinate, soak the 2 cups wood chips in the 1 cup wood chips soaking liquid for 30 minutes to prevent flare-ups. Fill your smoker with the soaked wood chips and preheat to 225°F using hickory or cherry wood. I like to add a water pan to the smoker to help maintain moisture throughout the cook.
Once the smoker reaches temperature and you see clean, blue smoke (not thick white), place the ribs bone-side down on the smoker grates. This position helps render the fat and develop that coveted bark. Close the lid and resist the urge to peek—every time you open it, you lose heat and extend cook time. Smoke the ribs for 2.5 hours at this temperature, or until the internal temperature reaches 170°F.
🥘 Step 4: Wrap and Finish the Cook
At the 2.5-hour mark, you'll hit "the stall"—the temperature stops rising as moisture evaporates. This is normal! Wrap the ribs tightly in heavy-duty aluminum foil (double-layer for extra insurance) and return them to the smoker. The foil traps steam, which helps tenderize the meat and carries it through the stall.
Continue smoking for another 1.5 hours until the ribs reach an internal temperature of 203°F and are fork-tender. You'll know they're ready when the meat pulls apart easily and the probe slides in like butter. The total cook time should be about 4 hours, including the stall period.
🍽️ Step 5: Apply Sauce and Rest Before Serving
Remove the ribs from the smoker and unwrap them carefully. Brush all surfaces generously with the 1 cup BBQ sauce, letting it pool in the crevices. Return the ribs to the smoker for 10-15 minutes to let the sauce caramelize slightly and develop a glossy finish.
Transfer the ribs to a cutting board and let them rest for 15-20 minutes before slicing. This resting period allows the juices to redistribute, ensuring each bite is moist and flavorful. Cut between the bones to separate the ribs into individual servings, and serve with extra BBQ sauce on the side. The result should be tender, juicy meat with a perfect balance of smoky bark and sweet-savory sauce.
Pro Tips For Making Barbecue Beef Back Ribs
- Trim the Fat First: Beef back ribs come with a thick fat cap—slice through it with a sharp knife before cooking. This lets the rub stick better and prevents uneven cooking where the fat sits. (I used to skip this and ended up with a greasy, uneven crust.)
- Mix Mustard Like Butter: Yellow mustard isn’t just a binder—it’s the glue that makes the rub cling. Whisk it with brown sugar and spices into a thick paste before slathering it on. Dry rubs slide off ribs; this stuff sticks like glue.
- Skip the Crowding: Piling ribs too close on the grill or smoker traps steam, turning them soggy. Leave at least an inch of space between racks—yes, it means more time, but crispy bark is worth it. (Your future self will curse you if you don’t.)
- Wrap Low and Slow: Once ribs hit 160°F, wrap them in foil with a splash of apple cider vinegar (or beer) to tenderize. Keep the heat at 250°F—no rushing. I learned this after falling asleep at the wheel and ending up with chewy, overcooked ribs.
Health benefits of these flavors
Protein Powerhouse
Beef back ribs are packed with high-quality protein—about 40 grams per 6-ounce serving—making them an excellent choice for muscle repair and growth. This slow-cooked method preserves all the protein while breaking down connective tissue into gelatin, which adds to the meat's natural tenderness. 💪
Unlike leaner cuts, ribs provide a balance of protein and healthy fats, which helps keep you full longer and supports sustained energy levels. The slow cooking process actually enhances the protein's digestibility, making these ribs easier on your system than fast-cooked meats.
Rich in Iron
Each serving delivers about 20% of your daily iron needs, a crucial mineral for oxygen transport in your blood. The iron in beef is particularly well-absorbed compared to plant-based sources, making ribs an efficient way to boost your iron levels. I notice my energy levels stay steady all day after eating these ribs.
This iron content makes ribs especially beneficial for those with active lifestyles or dietary needs that require extra iron intake. The slow cooking process doesn't degrade the iron content, so you get all the benefits without compromise.
B-Vitamin Boost
You'll get a full spectrum of B vitamins from these ribs, including B12, B6, and niacin, which play vital roles in energy metabolism and nervous system function. The B12 content alone provides about 60% of your daily needs per serving, supporting brain health and red blood cell production.
These vitamins are particularly important for maintaining healthy skin, hair, and nails—they're often called the "beauty vitamins." I've seen my skin improve when I include more rib meals in my diet, thanks to these essential nutrients.
Zinc for Immunity
Beef ribs contain significant amounts of zinc, an essential mineral that supports immune function and wound healing. A 6-ounce serving provides about 25% of your daily zinc needs, helping your body fight off infections and maintain optimal immune response.
The slow cooking process actually increases zinc bioavailability, making these ribs an especially efficient way to get this important mineral. I always keep some ribs on hand during cold season for their immune-boosting benefits.
Collagen Benefits
The slow smoking process breaks down collagen in the connective tissue, creating gelatin that's rich in amino acids like glycine and proline. These compounds support joint health, gut integrity, and even skin elasticity when consumed regularly.
Unlike other cooking methods that might destroy collagen, the low-and-slow approach preserves these beneficial compounds. The resulting gelatin also adds to the meat's natural juiciness and tenderness, making each bite both delicious and nutritious. 🌟
Nutrition facts
Frequently asked questions
Can I use beef back ribs from the grocery store?
Yes, but choose carefully! Look for bone-in, meaty cuts with good marbling and avoid thin or overly fatty pieces. I recommend buying from a butcher shop or high-quality grocers like Whole Foods or Costco where the ribs are cut fresh. If you must use frozen ribs, thaw them in the fridge for 24 hours before cooking.
What's the best wood for smoking beef back ribs?
Hickory and cherry are classic choices that pair perfectly with beef. For a fruitier profile, try apple or pecan. Avoid softwoods like pine, which can give the meat a bitter taste. If using wood chips, soak them for 30 minutes before smoking to prevent flare-ups.
Why do I need to wrap the ribs in foil?
The foil wrap is called the "Texas Crutch" and helps during "the stall" when ribs stop cooking. It traps steam, tenderizing the meat and carrying it through to 203°F internal temp. Don't skip this step—it's what makes the meat fall-off-the-bone tender!
How do I know when the ribs are done?
Use an instant-read thermometer! They're done at 203°F internal temp. The meat should pull apart easily and the bones should wiggle slightly. If you don't have a thermometer, look for a dark bark and meat that separates cleanly from the bone.
Can I make these ribs in an oven?
Preheat your oven to 225°F and use a cast-iron skillet or Dutch oven. Place a water pan inside to maintain moisture, and follow the same smoking steps but with indirect heat. The cook time will be slightly longer—expect 5-6 hours total.