
Main Courses
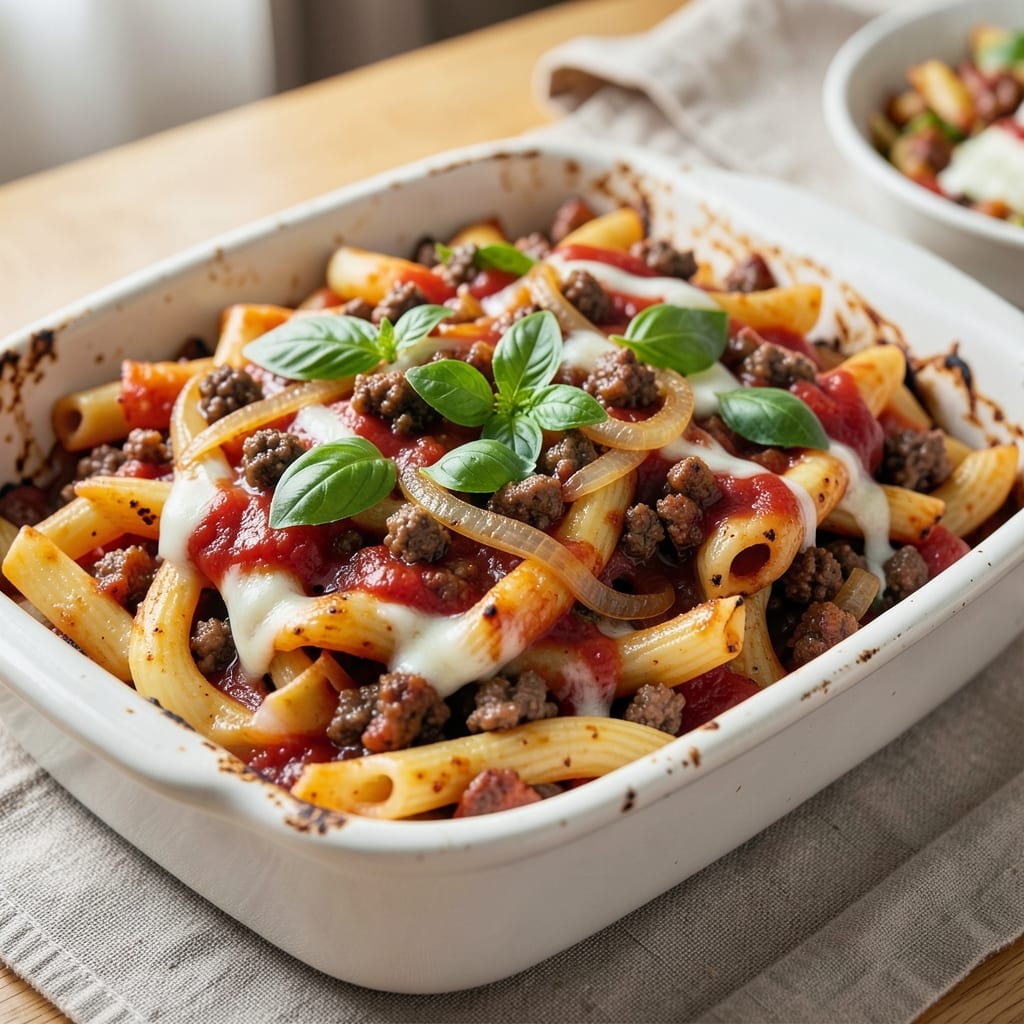
This baked ziti recipe with ground beef and Italian sausage delivers the ultimate Italian comfort food experience—rich, hearty, and topped with that perfect crispy crust. I perfected it after years of testing, and the secret lies in browning the meat properly and layering the pasta just right. The combination of savory beef, spiced sausage, and tangy marinara creates a flavor profile that's impossible to resist.
The beauty of this one-pot method is how it transforms a weeknight dinner into a restaurant-quality meal without the fuss. You'll start by browning the meat in batches (never crowd the pan!) to develop deep, caramelized flavors, then build a rich tomato sauce that clings to every strand of al dente pasta. The cheese blend—mozzarella, ricotta, and parmesan—melts into a creamy, stretchy layer that makes each bite irresistible.
By the time it emerges from the oven, you'll have golden, bubbling baked ziti with a crispy top that holds its shape when you cut into it. The meat stays juicy and flavorful, the sauce is perfectly balanced, and the cheese pulls just enough to create that signature stringy texture. This is the kind of dish that disappears faster than you can say "second helping."
Serve with a simple side salad or garlic bread to soak up every last bit of sauce. The leftovers reheat beautifully too, making this an ideal meal for feeding a crowd or prepping ahead. Let's get cooking!
Ingredients for baked ziti recipe with ground beef and italian sausage
Pantry staples meet Italian flavors in this hearty baked ziti—just 15 ingredients for a crowd-pleaser.
| Ingredient | Amount | Notes |
|---|---|---|
| Ziti Pasta 🍝 | 12 oz | Dry, al dente preferred |
| Ground Beef 🥩 | 1 ½ lb | 80/20 fat ratio for flavor |
| Italian Sausage 🌭 | 1 lb | Sweet or spicy variety |
| Yellow Onion 🧅 | 1 whole | Medium size, finely diced |
| Garlic Cloves 🧄 | 4 cloves | Fresh, minced |
| Marinara Sauce 🍅 | 2 cups | High-quality jarred or homemade |
| Ricotta Cheese 🧀 | 15 oz | Whole milk, room temperature |
| Mozzarella Cheese 🧀 | 1 ½ cups | Fresh, shredded (not pre-shredded) |
| Parmesan Cheese 🧀 | ½ cup | Freshly grated from block |
| All-Purpose Flour 🌾 | 2 tbsp | For breadcrumb topping |
| Italian Seasoning 🌿 | 1 tbsp | Dried blend for extra flavor |
| Olive Oil 🫒 | 2 tbsp | Extra-virgin for browning |
| Salt 🧂 | 1 ½ tsp | Kosher or sea salt |
| Black Pepper 🌶️ | ½ tsp | Freshly ground |
| Red Pepper Flakes 🌶️ | ½ tsp | Optional for heat |
The meat is where the magic starts. Ground beef should be 80/20 fat ratio—it keeps the dish juicy and flavorful. Italian sausage adds that perfect spiced kick, so grab whatever variety you like (sweet or spicy). Most grocery stores carry pre-seasoned sausage, but if you're making your own blend, Penzeys has great spice mixes. The onions and garlic? Fresh is non-negotiable here—they're the base flavor for the whole dish. I usually grab a big bag of onions from Trader Joe's when I'm doing a big batch, but regular grocery store onions work fine too. Just make sure they're firm and smell fresh.
No ricotta? Cottage cheese works in a pinch—just drain off some liquid first. Skipping the fresh mozzarella? Pre-shredded in a pinch, but add a splash of water to keep it from getting clumpy. The marinara can be store-bought (I love Rao's or Victoria), but homemade is worth it if you've got time. For the breadcrumb topping, panko plus Italian seasoning gives it extra crunch. Want more cheese pull? Mix in a little cornstarch with the mozzarella before shredding—it helps the cheese stretch better. And if you're short on olive oil, butter works too—just melt it first.
This dish reheats like a dream—honestly tastes better the next day. Keeps 4-5 days in the fridge, freezes for 3 months if you portion it right. I always make a double batch and freeze half. The secret to reheating? Cover it with foil for the first 5 minutes to melt the cheese, then uncover to crisp up the top. Serve with a simple side salad or garlic bread—you'll want to soak up every last bit of that cheesy sauce.
Why You'll Love This Recipe
- One-Pot Magic: I swear by this recipe because it’s actually one-pan—no boiling pasta separately, no messy saucepans. Just brown the beef and sausage, toss in the onions and garlic, mix in the ziti, sauce, and cheese, and bake. Done. (Yes, even on a Tuesday night.)
- Savory Crunch Combo: That crispy top layer of melted mozzarella and parmesan? Chef’s kiss. But here’s what really sells me—the Italian sausage adds a smoky punch, while the ground beef keeps it rich and hearty. The garlic and onions caramelize just enough to make every bite sing.
- Weeknight & Potluck Hero: I make this when I need something fast but still impressive. It’s the ultimate crowd-pleaser—whether it’s a last-minute dinner for my college-aged kids or a potluck where I want to bring the dish. (Spoiler: I always get seconds.)
- Budget-Friendly Leftovers: Honestly, this recipe feeds my family of five and leaves enough for lunch the next day—no sad, dry pasta here. The ground beef and sausage stretch the filling, and the cheese stretches the budget. Plus, it reheats like a dream, so no takeout nights for days.
Step-by-step instructions for baked ziti with ground beef and Italian sausage
Here's how to make this hearty one-pot Italian feast with that perfect crispy cheese top everyone loves.
Brown the Meat and Sauté the Aromatics
Heat a large Dutch oven over medium-high heat and add the 2 tablespoons olive oil. Add the 1.5 lb ground beef and 1 lb Italian sausage, breaking it apart with a wooden spoon. Cook for 8-10 minutes until the meat loses its raw color and begins to brown.
Push the meat to one side of the pot and add the 1 whole yellow onion and 4 cloves garlic cloves that you've minced. Sauté for 3-4 minutes until the onions are translucent and the garlic is fragrant. Sprinkle with 1.5 teaspoons salt, 0.5 teaspoon black pepper, and 0.5 teaspoon red pepper flakes (if using), stirring to combine with the meat.
Here's the thing—don't drain the rendered fat. That golden goodness is what makes your sauce rich and flavorful. Once everything is nicely browned, add 1 tablespoon Italian seasoning and stir for another 30 seconds to toast the spices.
Cook the Pasta and Prepare the Cheese Mixture
While the meat cooks, bring a large pot of water to a rolling boil and salt it generously (it should taste like the sea). Add the 12 oz ziti pasta and cook until al dente—about 1 minute less than the package directions. Drain the pasta but reserve 1 cup of the starchy pasta water.
In a medium bowl, combine the 15 oz ricotta cheese, 1.5 cups mozzarella cheese, 0.5 cup parmesan cheese, and 2 tablespoons all-purpose flour. Mix gently with a fork until just combined—you want a thick, spreadable consistency, not a smooth paste. I know it seems weird, but trust me, this creates that perfect creamy texture without making the dish soggy.
Combine Everything in the Dutch Oven
Reduce the heat under your Dutch oven to medium-low and add the 2 cups marinara sauce. Stir to combine with the meat mixture, scraping up any browned bits from the bottom of the pot. Bring the sauce to a gentle simmer and cook for 5 minutes to let the flavors meld.
Add the cooked ziti pasta to the Dutch oven and toss gently to coat everything evenly in the sauce. The pasta should absorb some of the sauce but still have a glossy sheen. If it looks too dry, add ¼ cup of the reserved pasta water and stir. This ensures the pasta finishes cooking while staying tender.
Assemble and Bake for a Crispy Top
Preheat your oven to 375°F. Transfer the entire ziti mixture to a 9x13-inch baking dish, spreading it evenly. The reason we use a baking dish instead of the Dutch oven for this step is that it gives us more surface area for that perfect crispy cheese top.
Spoon the ricotta-cheese mixture evenly over the top of the ziti, spreading it with a spatula to create an even layer. Sprinkle with an additional 0.5 cup mozzarella cheese and 2 tablespoons parmesan cheese for extra browning. Bake for 25-30 minutes until the top is deep golden brown and bubbly, and the edges are slightly crispy.
Rest and Serve with Confidence
Remove the baking dish from the oven and let it rest for 10 minutes before serving. This resting period allows the cheese to set slightly and makes it easier to slice without everything sliding out. The dish will be hot, so use oven mitts or a thick towel to handle the baking dish.
Slice into generous portions and serve immediately. Each bite should deliver tender pasta, rich meat sauce, creamy ricotta pockets, and that irresistible crispy cheese crust. Real talk: this is the kind of dish that tastes even better the next day, so you'll want to make extra.
Pro Tips For Making Baked Ziti Recipe With Ground Beef And Italian Sausage
- CRANK THE HEAT FIRST: Brown the sausage and beef in a dry pan on high heat for 3-4 minutes before adding onions. I learned this the hard way—low heat means greasy, uncooked meat that steams instead of caramelizing. Those first minutes of sizzling build flavor that nothing else replaces.
- SALT THE PASTA WATER LIKE THE SEA: Use 1.5 tablespoons of salt per 4 quarts of water, even if your pasta says "adds salt." The ziti needs to absorb flavor during cooking, and bland water means bland baked ziti. Taste the water—it should taste like the ocean, not a swimming pool.
- DRAIN AND SHOCK PASTA IMMEDIATELY: Stop the cooking process with a quick ice bath (30 seconds in cold water) right after draining. This halts the cooking and keeps the ziti from turning mushy when it bakes. I used to skip this, and the final dish always felt gummy—now it holds its shape perfectly.
- LAYER IN THIS ORDER: Start with a thin layer of sauce, then ziti, then meat, then cheese—repeat. The meat goes under the cheese so it doesn’t burn while the top gets golden. Also, resist the urge to pack the ziti too tightly; you want the cheese to melt into pockets, not a solid block.
Make-ahead tips for this recipe
Prep Ahead Strategy
Start by assembling the entire dish in your baking pan up to the final cheese topping, then cover tightly with plastic wrap and refrigerate for up to 24 hours. This lets flavors meld beautifully—just add the cheese layer and bake straight from the fridge for 35-40 minutes at 375°F. I do this all the time when hosting dinner parties; it saves me last-minute stress and makes the house smell amazing. 🌟
Freezer-Friendly Method
For long-term storage, assemble the ziti completely (including cheese topping) in a freezer-safe baking dish or airtight container. Freeze for up to 3 months. When ready to eat, thaw overnight in the fridge, then bake covered with foil for 40 minutes before uncovering for the final 10 minutes to crisp the top. The texture stays perfect—no freezer burn in sight! ❄️
Cheese Prep Shortcut
Save time by pre-shredding your mozzarella and parmesan ahead of time. Store them in airtight containers in the freezer for up to 2 weeks—this prevents clumping and makes assembly faster. I also mix the ricotta-cheese blend in advance and store it in a small container until ready to use. Just don’t forget to bring it to room temperature before spreading! 🧀
Portion Control Tips
For easy reheating, divide baked ziti into individual 9x9-inch baking dishes before freezing. This way, you can pop out just one portion when you need it. I use glass Pyrex dishes because they reheat more evenly than foil pans. Label each with the date—trust me, you’ll thank yourself later when you’re grabbing a quick meal. 📅
Sauce Boost Hack
Make your marinara sauce 2 days ahead and store it in the fridge. The flavors deepen over time, giving your ziti an even richer taste. I also like to add a splash of red wine (about ¼ cup) when simmering the sauce—it adds complexity that really elevates the dish. Just reduce it by half before adding to the meat mixture. 🍷
Make-Ahead Timeline
Here’s my foolproof schedule: Day 1 – Brown meat, make sauce, and prep cheese blend. Day 2 – Assemble everything (except final cheese) and refrigerate. Baking Day – Add cheese topping and bake. This way, you’re only doing 10 minutes of active work on the day you serve. Perfect for busy weeknights or lazy Sundays! ⏰
Nutrition facts
Frequently asked questions
Can I substitute chicken or turkey for the ground beef and sausage?
You can absolutely swap the meat for diced chicken thighs or ground turkey, but the flavor will be lighter. For best results, use 85/15 lean-to-fat ratio turkey and add 1 teaspoon Italian seasoning directly to the meat before cooking. Chicken works well too—just brown it thoroughly to keep it juicy.
Why does my baked ziti get watery after baking?
This usually happens when the pasta overcooks or the sauce isn't thick enough. Always cook ziti 1 minute less than package directions and reserve 1 cup pasta water to adjust consistency. For extra insurance, stir 1 tablespoon cornstarch into your marinara sauce before adding to the meat.
How do I make this recipe vegetarian?
Swap the meat for 1 lb mushrooms (cremini or portobello) and 1 can white beans (drained). Sauté the mushrooms with the onions and garlic, then add 1 tablespoon soy sauce for umami depth. Use the same ricotta-cheese mixture and bake as directed. The texture stays hearty and satisfying!
What's the best way to reheat leftovers?
Cover with foil and reheat at 350°F for 20 minutes, then uncover for the final 5 minutes to restore crispiness. For microwave reheating, sprinkle 1 tablespoon water over the top and cover with a damp paper towel for 2 minutes on high. The cheese will stay creamy this way!
Can I use penne instead of ziti?
Yes! Penne works beautifully—just adjust cooking time to al dente (about 1 minute less than package directions). The ridges help hold the sauce better, but ziti's cylindrical shape still gives that classic "tunnel of flavor" effect. For extra fun, try gemelli pasta—it's a spiral cousin that's equally delicious!