
Soups & Stews
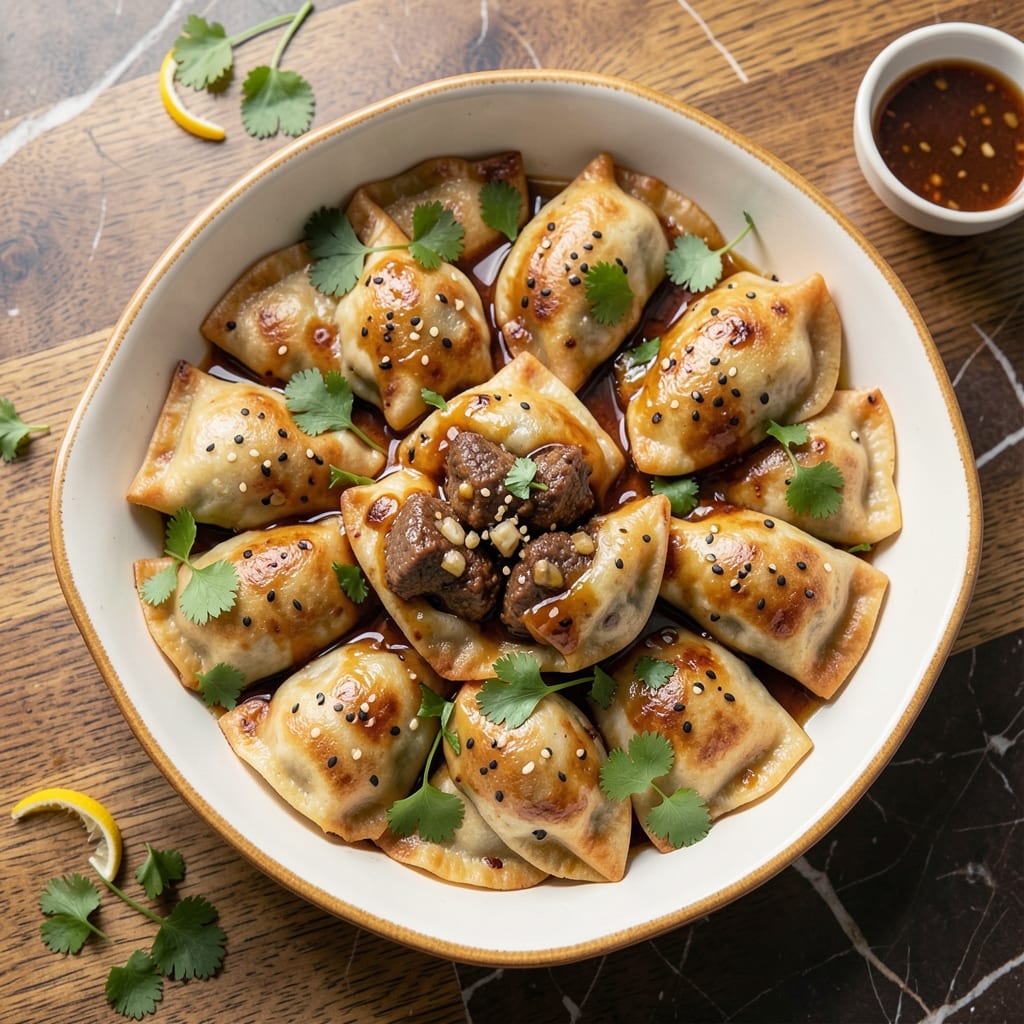
This baked beef wonton recipe transforms classic wontons into golden, crispy bites with tender beef filling—no frying required. The secret lies in a delicate balance of dough thinness and baking time, creating that coveted crunch without sacrificing the silky texture inside. I perfected this method after years of experimenting with traditional pan-frying, and the results are just as satisfying—if not more impressive—when served at gatherings.
The beauty of baking these wontons is their versatility: they hold their shape beautifully, making them perfect for appetizers, soups, or even a hearty main dish when paired with a rich broth. The dough comes together in just 15 minutes, while the beef filling—seasoned with ginger, garlic, and soy—adds layers of umami that keep everyone reaching for seconds. Unlike deep-frying, this method ensures crispy edges without the mess or grease, making it ideal for weeknight dinners or potlucks.
What you’ll achieve is a platter of crispy, golden-brown wontons that shatter slightly when bitten, revealing tender beef and fragrant aromatics inside. The baking technique locks in flavor while creating that restaurant-quality texture at home. Serve them with a tangy dipping sauce or nestle them into a warm broth for a comforting bowl of wonton soup.
This recipe scales effortlessly—whether you’re feeding a crowd or prepping for meal prep. The key is patience during baking; a few minutes longer in the oven ensures that perfect crunch. Once mastered, you’ll never go back to frying. Let’s get started!
Ingredients for baked beef wonton
Golden crusts, tender beef filling, and no deep-frying mess—just 15 ingredients for perfect baked wontons.
| Ingredient | Amount | Notes |
|---|---|---|
| Ground Beef (Chuck Roast) 🥩 | 1 lb | 80/20 fat ratio preferred |
| Wonton Wrappers 🍜 | 16 pieces | Square or round, store-bought |
| All-Purpose Flour 🌾 | 1 cup | For dough reinforcement |
| Cold Water 💧 | ½ cup | Chilled for dough elasticity |
| Sesame Oil 🫒 | 1 tbsp | Toasted for aroma |
| Soy Sauce (Low-Sodium) 🍶 | 2 tbsp | Kikkoman preferred |
| Oyster Sauce 🍶 | 1 tbsp | Lee Kum Kee brand |
| Ginger (Fresh) 🧄 | 1 tbsp | Grated, not powdered |
| Garlic Cloves 🧄 | 3 cloves | Minced, not pressed |
| Green Onions 🧅 | 2 whole | White and green parts |
| Cornstarch 🌾 | 1 tbsp | For crispy texture |
| Eggs 🥚 | 1 whole | Beaten for brushing |
| Vegetable Oil 🫒 | 2 tbsp | For brushing dough |
| Salt 🧂 | ½ tsp | Diamond Crystal preferred |
| Black Pepper 🌶️ | ¼ tsp | Freshly ground |
The beef is non-negotiable here—chuck roast with its 80/20 fat ratio gives the filling that melt-in-your-mouth texture. Costco or Walmart usually carry pre-ground chuck at a good price, but if you're buying whole, ask the butcher to grind it fresh. For the wrappers, Martini brand is my go-to—they hold their shape better when baked. If you're making a big batch, Trader Joe's sells them in bulk packs. The key is to keep them covered in a damp towel until ready to use, or they dry out fast. Fresh ginger and garlic make all the difference—Asian markets often have better quality than grocery stores, but the regular produce section works in a pinch.
No sesame oil? Toasted peanut oil works in a bind, though it won't have that same nutty aroma. Short on oyster sauce? Double the soy sauce and add 1 tsp sugar for depth. The wrappers can be substituted with spring roll wrappers, but they're slightly thicker and may need an extra minute in the oven. For a vegetarian version, swap the beef for finely chopped mushrooms and tofu. The cornstarch is crucial—it creates that crispy exterior. If you're out, a mix of flour and baking powder can work, but the texture won't be quite the same. And if you're making these ahead, freeze the uncooked wontons on a tray first before transferring to a bag—they'll hold their shape better after baking.
These keep surprisingly well—3 days in the fridge if stored in an airtight container. Reheat at 375°F for 8-10 minutes until crispy again. For meal prep, I like to bake half the batch and freeze them—just thaw overnight in the fridge before reheating. The filling reheats beautifully, but the wrappers can get soggy if microwaved, so always use the oven. If you're serving with broth, make it ahead and keep it warm on the stove—chicken or vegetable stock works perfectly. The leftovers make amazing wonton soup the next day, so I always double the broth when I'm cooking.
Why You'll Love This Recipe
- No-Fuss Filling: I swear by chuck roast here—it’s cheaper than lean ground beef but stays juicy when baked. The flour-and-water paste seals in flavor while keeping the wrappers from sticking, so no frying mess.
- Umami Bomb: That sesame oil hit? Chef’s kiss. It turns the beef into something rich and savory without needing fancy sauces. The crispy edges on the wontons add texture that makes every bite feel special.
- Weeknight to Party: Same recipe works for lazy Tuesdays or impressing guests—just adjust the plating. Serve with soy dipping sauce for a quick meal, or arrange them fancy on a platter for company. Honestly, I’ve done both.
- Budget Leftovers Win: A pound of beef and a box of wrappers stretch across three meals. Bake extras, freeze them, and reheat straight from the oven—no soggy wrappers, just warm, satisfying bites. My wallet thanks me.
Step-by-step instructions for baked beef wonton cups
Here's the method for creating golden, crispy wonton cups with tender beef filling and rich broth.
Prepare the Beef Filling
In a large bowl, combine the 1 lb ground beef (chuck roast) with the 2 tbsp soy sauce (low-sodium), 1 tbsp oyster sauce, 1 tbsp grated ginger (fresh), 3 minced garlic cloves, 0.5 tsp salt, and 0.25 tsp black pepper. Mix gently with your hands until just combined—overworking will make the filling tough.
Transfer the mixture to a skillet over medium-high heat and cook for 5-6 minutes, breaking it apart with a wooden spoon until it loses its raw color but remains slightly undercooked. This ensures the filling stays juicy when baked. Drain any excess fat and let the beef cool for 5 minutes before proceeding.
Make the Wonton Dough
In a separate bowl, whisk together the 1 cup all-purpose flour and 1 tbsp cornstarch. Gradually add the 0.5 cup cold water while stirring with chopsticks until a smooth dough forms. Knead lightly for 1 minute until it comes together—it should be slightly tacky but not sticky.
Wrap the dough in plastic wrap and let it rest for 15 minutes at room temperature. This resting period relaxes the gluten, making the wrappers more pliable. Divide the dough into 16 equal pieces (about 1 ounce each) and roll each into a thin circle using a rolling pin or your hands.
Assemble the Wonton Cups
Lightly brush a 16-cup muffin tin with 1 tbsp vegetable oil to prevent sticking. Place one wonton wrapper in each cup and press gently into the bottom and sides. Fill each wrapper with 1-2 tablespoons of the beef mixture, leaving about ½ inch space at the top. Fold the edges inward to create a sealed cup shape.
Brush the folded edges with the 1 whole beaten egg and sprinkle lightly with 1 tbsp cornstarch—this creates a golden, crispy finish. Repeat until all wrappers are filled and sealed. Cover the muffin tin with plastic wrap and refrigerate for 15 minutes to firm up the dough before baking.
Bake for Crispy Edges and Silky Filling
Preheat your oven to 375°F. Bake the wonton cups for 20-25 minutes until the edges are deep golden brown and the filling is heated through. You'll know they're done when the wrappers are crispy to the touch and the filling reaches an internal temperature of 160°F.
For extra richness, drizzle each cup with 1 tsp sesame oil while still hot. Garnish with sliced green onions (white and green parts) for color and freshness. Serve immediately with a side of soy sauce (low-sodium) for dipping to enhance the savory flavors.
Pro Tips For Making Baked Beef Wonton
- CHILL THE WRAPPERS: Pull wonton wrappers from the fridge right before sealing—frozen or even cold ones won’t stick properly, and you’ll end up with gooey, uneven edges. I learned this the hard way when my first batch turned into a sad, half-flattened mess. Keep them on a floured tray until use, and work fast once they’re out.
- SEAR THE BEEF FIRST: Brown the ground chuck in a skillet before mixing with other ingredients—it deepens the flavor and prevents dry wontons. After breaking up the meat, drain excess fat (but leave 1 tablespoon—it adds richness) and let it cool slightly before stuffing. This isn’t the prettiest method, but it’s the tastiest.
- DON’T OVERFILL THEM: Use 1 teaspoon of filling per wonton, max. Overstuffing makes them burst during baking, leaving you with a sticky, uneven mess. Press the edges firmly but gently—no need to seal them like dumplings. If the filling leaks, you’ve gone too far.
- BRUSH WITH SESAME OIL: Drizzle a light coat of sesame oil over the assembled wontons before baking—it adds nutty aroma and a subtle sheen. Skip the heavy brushing (it’ll pool), but don’t skimp: a few drops per tray make a real difference. Bake at 400°F (200°C) until golden, about 15–18 minutes. (Yes, even if you’re impatient like me.)
Pro cooking tips for this recipe
Dough Perfection
The secret to crispy baked wontons starts with the dough—keep it thin and even for even cooking. Roll each piece to about ⅛-inch thickness using a rolling pin or your hands pressed with a glass. If the dough cracks while rolling, gently press it back together with damp fingers. I find Martini brand wrappers hold their shape best when baked, but if you're making dough from scratch, let it rest for 30 minutes after kneading for maximum elasticity. 🌟
Filling Texture
Undercooking the beef filling is key—it should be slightly pink when you remove it from the pan. This ensures it stays juicy during baking. For extra flavor, I like to add 1 tsp toasted sesame oil to the filling before assembling. If your filling feels too dry after cooking, mix in 1 tsp cold water to restore moisture. The filling should be cool before assembling to prevent steam from weakening the dough. ✨
Baking Temperature
Bake at 375°F for that perfect golden crust, but don’t overcrowd the muffin tin—leave ½-inch space between cups for even air circulation. If your oven runs hot, reduce to 350°F and check at 20 minutes. For extra crispiness, broil for 1-2 minutes at the end, watching closely to avoid burning. I always rotate the pan halfway through baking for even browning. 🔥
Egg Wash Trick
The beaten egg wash is non-negotiable for that restaurant-style shine. For an even glossier finish, whisk the egg with 1 tsp water before brushing. If you're short on time, a light spray of oil works in a pinch, though it won’t be as golden. Brush the egg wash just before baking—if it dries too much, the wontons may not crisp properly. 💫
Broth Pairing
For a complete dish, simmer 4 cups chicken or vegetable broth with 1 tbsp soy sauce and 1 tsp grated ginger while the wontons bake. The aroma alone will make your kitchen smell amazing. Serve the wontons in warm broth for a comforting soup, or arrange them on a platter with extra green onions for a crisp appetizer. 🍜
Make-Ahead Hack
Assemble the wontons up to 24 hours ahead and refrigerate uncovered on a tray—this prevents sogginess. Bake straight from the fridge, adding 2-3 extra minutes to the cooking time. For freezing, bake the wontons first, then store in an airtight container for up to 1 month. Reheat at 350°F for 5-7 minutes until crispy again. 💡
Nutrition facts
Frequently asked questions
Can I use store-bought wonton wrappers instead of homemade dough? Store-bought wonton wrappers work perfectly for this recipe. They save time and ensure consistent thickness, which is key for even baking. Just
How do I prevent the wontons from sticking to the muffin tin?
Lightly brush the tin with vegetable oil before placing the wrappers, and make sure each wrapper is pressed gently into the corners. For extra insurance, you can also dust the bottom of each cup with a tiny pinch of cornstarch. Avoid overcrowding—leave at least ½-inch space between wontons for proper air circulation during baking.
Can I bake these wontons in an air fryer instead of the oven?
Yes! For an air fryer, preheat to 375°F and cook in batches for 8-10 minutes, shaking the basket halfway. The air fryer creates a crispier exterior faster than the oven, but you may need to adjust the time based on your specific model. Just be careful not to overcrowd—leave space between wontons for even cooking.
Why did my wontons turn out soggy instead of crispy?
Soggy wontons usually happen from one of three issues: overfilling (leave ½-inch space at the top), underbaking (check at 20 minutes and extend if needed), or not using the egg wash. The egg wash creates a barrier that locks in crispiness—always brush it on right before baking. If they're still soft, broil for 1-2 minutes at the end for extra crunch.
What's the best way to reheat leftover baked wontons?
Reheat at 350°F for 5-7 minutes until crispy again. Place them on a baking sheet to avoid sogginess, and cover loosely with foil if needed. For a quick fix, you can also air fry at 375°F for 3-4 minutes**. Never microwave—it'll make them rubbery. The key is restoring that crispy exterior while keeping the filling warm.