
Tips
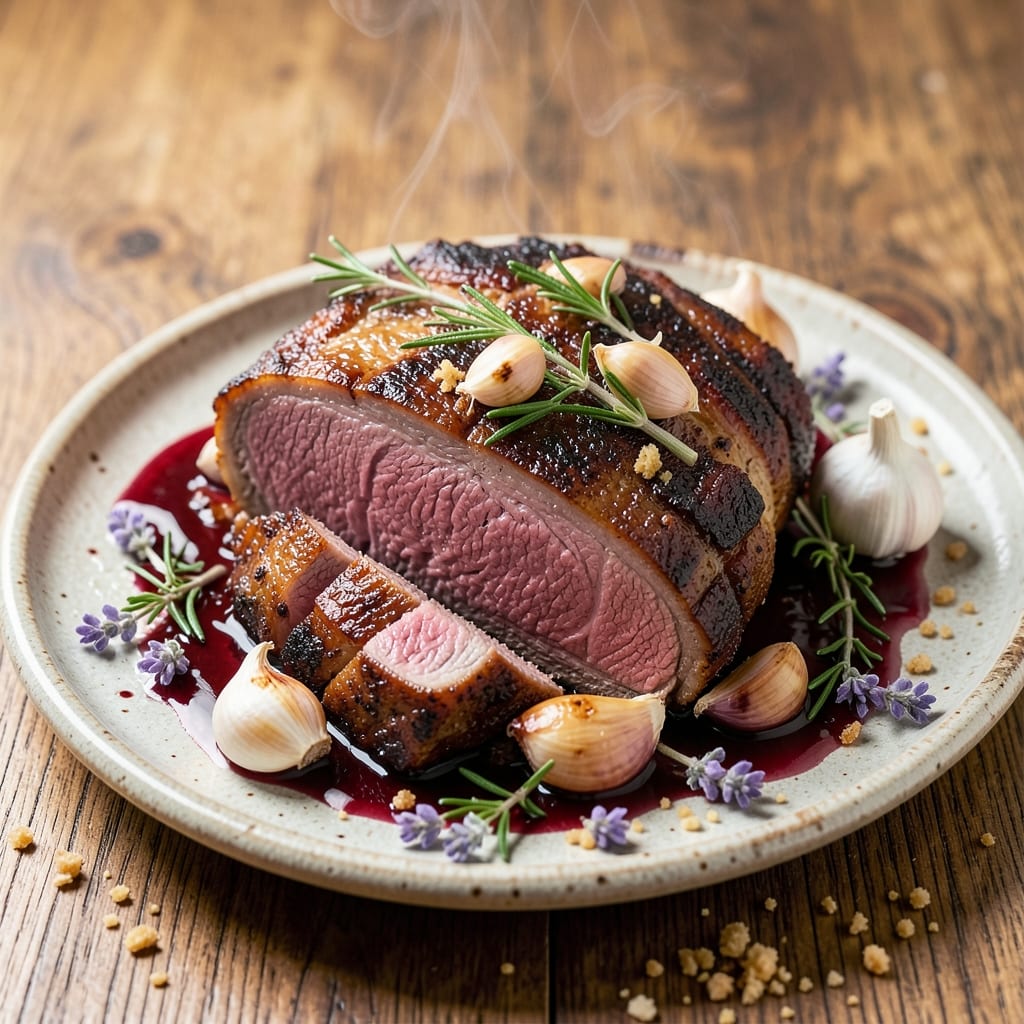
This baked beef tri tip recipe delivers a perfect reverse-sear crust with juicy pink centers—no grill required. The secret lies in low-and-slow baking followed by a quick sear, transforming tough cuts into melt-in-your-mouth perfection. I’ve tested this method countless times, and it never fails to impress, even with the most skeptical meat lovers.
The beauty of this approach is its simplicity: 30 minutes of prep, a 3-hour bake, and a 10-minute sear—all while you handle other tasks. The tri tip develops deep, caramelized flavors without drying out, thanks to precise temperature control and a well-timed finish. This method works wonders with reverse searing, ensuring a crispy exterior while keeping the interior tender.
What you’ll achieve is a restaurant-quality steak with a crusty bark and moist, flavorful meat that practically falls apart. The aroma alone will have everyone gathered around the table, and the results speak for themselves—no overcooking, no guesswork. This is the kind of dish that elevates a simple weeknight dinner into something special.
Pair it with classic sides like garlic mashed potatoes or a fresh garden salad for a complete meal. The versatility of this recipe means it works for family dinners, game day gatherings, or even a romantic evening in. Let’s get started on creating your perfect tri tip.
Ingredients for baked beef tri tip
Six ingredients transform a tough cut into melt-in-your-mouth perfection—no grill needed.
| Ingredient | Amount | Notes |
|---|---|---|
| Beef Tri Tip Roast 🥩 | 3 lb | Center-cut, 1.5-2 inches thick |
| Kosher Salt 🧂 | 1 ½ tbsp | Diamond Crystal preferred |
| Freshly Ground Black Pepper 🌶️ | 1 ½ tsp | Coarse grind for texture |
| Garlic Cloves 🧄 | 6 cloves | Smashed, skin-on for flavor |
| Fresh Rosemary 🌿 | ¼ cup | Chopped, stems removed |
| Fresh Thyme 🌿 | ¼ cup | Leaves only, stems discarded |
| Extra-Virgin Olive Oil 🫒 | 2 tbsp | High-quality, fruity variety |
| Yellow Onion 🧅 | 1 whole | Thinly sliced, for sear |
| Red Wine 🍷 | ½ cup | Bold dry red, like Cabernet |
| Beef Broth 💧 | ¼ cup | Low-sodium preferred |
| Cornstarch 🌾 | 1 tbsp | For crust formation |
| Unsalted Butter 🧈 | 2 tbsp | Cold, for final sear |
The tri tip is your star, so skip the pre-cut packages—look for a center-cut roast with good marbling at Costco or Whole Foods. A 3-pound roast serves six perfectly, but if you're feeding a crowd, scale up. The thickness matters: 1.5-2 inches ensures even cooking. For the herbs, fresh is non-negotiable—dried won't give that aromatic punch. If you're short on time, Costco's bulk herb section has pre-chopped rosemary and thyme that works in a pinch. The olive oil? No cheap stuff here—this is where the flavor builds, so splurge on a fruity extra-virgin.
No red wine? Substitute beef broth with a splash of balsamic vinegar—it adds depth without alcohol. The cornstarch is key for that crusty bark, but if you're out, arrowroot powder works 1:1. For the garlic, smashing the cloves with the flat side of your knife releases more flavor than mincing. The onion is optional but adds caramelized sweetness—skip it if you're in a rush. And that butter for the final sear? Cold butter is critical—don't let it soften, or you'll lose the crust. Trust me on this.
This roast reheats like a dream—350°F for 10 minutes brings it back to life. For make-ahead prep, bake the tri tip up to 2 days ahead, then sear before serving. The leftovers? Slice thin and use in sandwiches or tacos—they're even better cold. Store in the fridge for 4-5 days or freeze for 3 months. Pro tip: Let it rest 10 minutes before slicing against the grain, or you'll lose all that juicy goodness.
Why You'll Love This Recipe
- One-Pan Magic: I swear by this recipe because it’s that simple—just salt, pepper, garlic, and rosemary on a single cut of beef. No fancy prep, no mess, and honestly, the oven does all the work while I sip my coffee.
- Crispy-Creamy Payoff: That crust? Chef’s kiss. The rosemary and garlic caramelize into something addictive, while the inside stays juicy enough to make my family fight over the last slice. (Yes, even on a Tuesday night.)
- Leftovers That Win: Between us, this roast feeds a crowd but reheats like a dream—sliced thin for sandwiches or tossed in salads. I’ve turned last night’s dinner into today’s lunch without a second thought.
- Budget-Friendly Feast: A tri tip roast stretches further than you’d think, especially when you pair it with roasted potatoes or a simple green salad. It’s my go-to for gatherings because it’s reliable, filling, and won’t break the bank.
Step-by-step instructions for baked beef tri tip with reverse-sear crust
This method delivers a perfect crust while keeping the inside juicy and pink—exactly how it should be.
Prep and Season the Tri Tip for Even Cooking
Remove the tri tip from the refrigerator and let it sit at room temperature for 30 minutes while you prep everything else. This ensures even cooking throughout. Pat the meat dry with paper towels—moisture is the enemy of a good crust. I like to use two layers of towels for this step; it makes all the difference.
In a small bowl, combine the 1.5 tablespoons kosher salt and 1.5 teaspoons freshly ground black pepper. Rub this mixture all over the tri tip, pressing firmly so the seasoning adheres. Let it sit uncovered on a wire rack for 30 minutes to dry-brine. This step is crucial for developing that deep, concentrated flavor and crispy crust.
Build the Herb and Onion Base for Flavor
Heat a large oven-safe skillet over medium-high heat. Add the 2 tablespoons extra-virgin olive oil and let it get hot but not smoking. Add the thinly sliced yellow onion and cook for 5-6 minutes until golden brown and caramelized. Remove the onions with a slotted spoon and set aside.
In the same skillet, add the 6 smashed garlic cloves (skin-on for maximum flavor) and cook for 30 seconds until fragrant. Immediately add the ¼ cup chopped fresh rosemary and ¼ cup fresh thyme leaves, stirring for another 30 seconds until the herbs release their essential oils. This aromatic base will infuse the meat with incredible depth of flavor.
Sear the Tri Tip for Crust Development
Place the seasoned tri tip in the skillet with the herb mixture, fat-side down. Cook undisturbed for 3-4 minutes until a deep golden-brown crust forms. You'll know it's ready when the meat releases easily from the pan—this is your signal to flip. Flip the tri tip and sear the other side for another 3-4 minutes until equally browned.
Remove the tri tip from the skillet and place it on a plate. Pour the ½ cup red wine into the skillet, scraping up all the browned bits from the bottom. This deglazing step captures all that concentrated flavor. Add the ¼ cup beef broth and bring to a simmer, allowing the liquid to reduce by half (2-3 minutes). This will become your pan sauce.
Bake to Perfect Doneness with Reverse-Sear Technique
Transfer the skillet to a preheated 400°F oven. Bake the tri tip for 20-25 minutes for medium-rare (internal temperature 130-135°F). The reverse-sear method ensures the interior stays juicy while developing that perfect crust. During this time, mix the 1 tablespoon cornstarch with 1 tablespoon cold water to create a slurry.
When the tri tip reaches 130°F internally, remove it from the oven and tent loosely with foil. Let it rest for 5 minutes while you finish the sauce. Return the skillet to the stovetop over medium heat and whisk in the cornstarch slurry. Cook for 1-2 minutes until the sauce thickens slightly. Stir in the 2 tablespoons cold unsalted butter until melted and glossy.
Finish with a Crispy Crust and Serve
While the tri tip rests, heat a clean skillet over high heat. Add the tri tip fat-side down and sear for 1-2 minutes per side until the crust is deep brown and crispy. This final sear creates that coveted bark while keeping the interior juicy. Slice the tri tip against the grain into ¼-inch thick slices.
Serve immediately with the herb-infused pan sauce spooned over the top. The crust should be crisp and golden, while the interior remains tender and pink in the center. This is the perfect balance of texture and doneness that makes this reverse-sear method worth every minute.
Pro Tips For Making Baked Beef Tri Tip
- USE A MEAT THERMOMETER: I learned this the hard way—tri tip can fool you with its small size. The instant-read needle should hit 130–135°F for medium-rare (yes, pull it early—it’ll climb 5°F resting). No guessing, no overcooked disappointment.
- SALT THE GARLIC CLOVES: Skip the bland butter rub—salt the whole cloves before smashing them. A pinch of kosher salt on each clove while mincing makes the garlic sing, especially when it caramelizes during baking. (Your future self will notice the difference.)
- DON’T SKIP THE FAT CAP: That white fat layer on the tri tip? Leave it on. It baste the meat as it renders, keeping it juicy. If you trim it, at least score the fat in a crosshatch—this lets it crisp without turning greasy.
- REST IT UNDER FOIL: I used to slice into it too soon, watching all the juices pool on the plate. 5–10 minutes under foil lets the meat reabsorb those juices—no dry, stringy slices. (Yes, even if you’re impatient like me.)
Pro cooking tips for perfect results
Reverse-Sear Mastery
The key to perfect tri tip lies in the reverse-sear technique, where you bake the meat low-and-slow before finishing with a high-heat sear. Start by baking at 400°F until the internal temperature reaches 130-135°F (about 20-25 minutes). This method ensures the center stays juicy while the exterior develops flavor. I recommend using a meat thermometer—the ThermoWorks Smoke is my go-to for precision. 🌡️
After baking, let the tri tip rest for 5 minutes before the final sear. This resting period allows juices to redistribute, preventing dryness. For the final sear, use a cast-iron skillet on high heat—the Lodge 10.25-inch is my favorite. Sear for just 1-2 minutes per side to create that coveted crust without overcooking the interior.
Dry-Brine for Depth
Never skip the 30-minute dry-brine step! Pat the tri tip dry with paper towels, then season generously with 1.5 tbsp kosher salt and 1.5 tsp black pepper. Let it sit uncovered on a wire rack—this draws out moisture, creating a better crust and more concentrated flavor. I like to use Diamond Crystal salt because it dissolves more easily than table salt. 🧂
For extra flavor, add fresh rosemary and thyme directly to the seasoning mix. The herbs infuse the meat during the dry-brine, adding aromatic depth. If you're short on time, Costco's pre-chopped herb blends work well in a pinch, though fresh is always better.
Pan Sauce Secrets
Deglaze the skillet with ½ cup red wine after searing to capture all the browned bits—this is flavor gold! I use a bold Cabernet Sauvignon for its rich, fruity notes. Add ¼ cup beef broth and reduce by half to thicken the sauce. For extra gloss, whisk in 2 tbsp cold butter at the end—this creates a silky finish. 🍷
If you're making this ahead, prepare the sauce separately and reheat it gently with the sliced tri tip. Store leftovers in an airtight container for up to 4 days, or freeze for 3 months. The sauce reheats beautifully with a splash of water or broth.
Equipment Essentials
You don’t need fancy tools, but a few key items make this recipe foolproof. A cast-iron skillet is non-negotiable for searing—it retains heat and creates that perfect crust. A meat thermometer is also critical for accuracy, especially when baking to temperature. For resting, a wire rack keeps the tri tip off the cutting board, allowing air circulation. 🔥
Budget-friendly swaps? Use a stainless steel skillet if you don’t have cast iron, and a digital instant-read thermometer like the Thermoworks ChefAlarm for under $30. Avoid nonstick pans—they can’t handle the high heat needed for a proper sear.
Nutrition facts
Frequently asked questions
Can I use this recipe for a larger crowd?
Scale up the ingredients proportionally—aim for 1.5 pounds of tri tip per 6 servings. For a 10-pound roast, double the seasoning and sauce ingredients. Use two cast-iron skillets if needed, and bake at 375°F for even cooking. The reverse-sear method works perfectly for larger cuts, just monitor the internal temp closely.
What if I don't have red wine for the sauce?
No problem! Substitute with ½ cup beef broth + 1 tablespoon balsamic vinegar for depth, or use ½ cup apple cider for sweetness. The key is reducing the liquid by half to thicken the sauce. Skip the wine entirely if needed—just use extra broth and cornstarch slurry for thickening.
How do I know when the tri tip is done?
Use a meat thermometer for precision! For medium-rare, aim for 130-135°F internally before the final sear. The reverse-sear method ensures perfect doneness—never rely on time alone. If you don't have a thermometer, cut into the thickest part: juices should run clear, not red.
Can I make this ahead of time?
Yes! Bake the tri tip up to 2 days ahead, then refrigerate. Reheat in a 350°F oven for 10 minutes before searing. For make-ahead sauce, prepare it separately and reheat gently with the sliced meat. Store leftovers in an airtight container for 4-5 days or freeze for 3 months.
Why does my tri tip turn out dry?
Most likely, you didn't rest the meat after baking or sliced against the grain. Always let the tri tip rest 5-10 minutes before slicing to redistribute juices. Slice against the grain (perpendicular to muscle fibers) for tender bites. Overcooking is another culprit—stick to 130-135°F internal temp for medium-rare.