
Main Courses
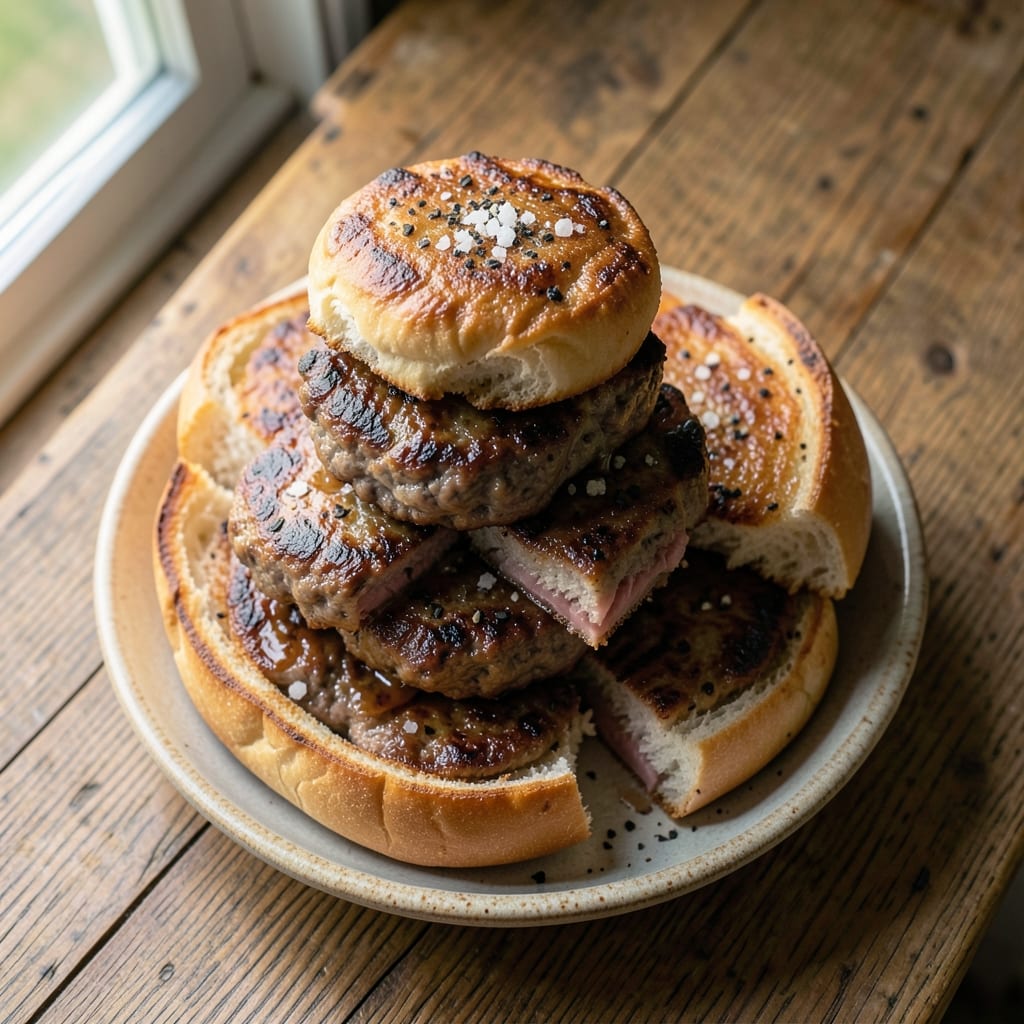
This baked beef sliders recipe delivers restaurant-quality mini burgers with crispy edges and juicy centers—no grill required. The secret lies in properly portioning ground beef into small patties and baking them to perfection, ensuring every bite stays tender while developing that coveted crust. I've perfected this technique after years of testing, and the results are consistently foolproof.
What sets these sliders apart is the balance of seasoning and cooking method. A simple blend of salt, pepper, and garlic powder enhances the beef's natural flavor without overpowering it, while the baking process locks in moisture for that melt-in-your-mouth texture. The patties cook evenly in just 12-15 minutes, making this an ideal solution for weeknight dinners or game day gatherings.
By the time you serve these sliders, you'll have perfectly formed mini burgers with golden-brown crusts and juicy interiors that practically fall apart at the touch of a toothpick. The crispy exterior contrasts beautifully with the tender meat, creating a satisfying bite every time. These sliders are versatile enough to serve on soft buns with classic toppings or as a main course with sides.
Whether you're feeding a crowd or treating yourself to a casual meal, this recipe delivers consistent results with minimal effort. The beauty of baking these sliders is that they require no special equipment—just a baking sheet and your oven. Let's get started on creating these delicious mini burgers that everyone will love.
Ingredients for baked beef sliders
Twelve simple ingredients for restaurant-style sliders—no grill needed.
| Ingredient | Amount | Notes |
|---|---|---|
| Ground Beef 🥩 | 2 lb | 80/20 fat ratio preferred |
| Kosher Salt 🧂 | 1 ½ tsp | Diamond Crystal preferred |
| Ground Black Pepper 🌶️ | 1 tsp | Freshly cracked preferred |
| Garlic Powder 🧄 | 1 tsp | Freshly ground preferred |
| All-Purpose Flour 🌾 | 1 tbsp | For dredging patties |
| Hamburger Buns 🍞 | 12 whole | Soft, potato-style preferred |
| Butter 🧈 | 2 tbsp | Unsalted, melted |
| Yellow Onion 🧅 | 1 whole | Thinly sliced for toppings |
| Pickles 🥒 | ½ cup | Sliced dill pickles |
| American Cheese Slices 🧀 | 12 slices | Thin-cut preferred |
| Mayonnaise 🥫 | ¼ cup | For optional spread |
| Ketchup 🍅 | ¼ cup | For optional spread |
| Vegetable Oil 🫒 | 1 tbsp | For greasing pan |
The beef is everything here. 80/20 fat ratio keeps those patties juicy while developing crispy edges—leaner cuts dry out fast. I grab mine from the butcher counter when possible, but the pre-packaged stuff at Walmart or Kroger works fine. The secret's in portioning: 2 oz per patty (about 1 tbsp of ground beef per slider) gives you perfect mini burgers. Use a kitchen scale for accuracy—eyeballing leads to inconsistent sizes. For the seasoning, Diamond Crystal kosher salt
No kosher salt? Table salt at half the amount works in a pinch, but taste as you go. Short on garlic powder? Fresh garlic minced at double the amount adds real depth. The flour isn't just for dredging—it helps create that crispy crust when baked. If you're feeling fancy, mix in 1/4 tsp smoked paprika with the flour for extra flavor. For the buns, potato-style stays soft longer than regular buns. Toast them lightly before serving if you're worried about sogginess. The pickles can be any kind you like—kosher dills are my favorite, but sweet or bread-and-butter work too. And if you're making these ahead, keep the patties and toppings separate until serving so the buns don't get soggy. These sliders reheat beautifully—5 minutes at 350°F if you're warming them up. I like to prep everything ahead: shape the patties, slice the onions, and arrange toppings in little bowls. The patties can be shaped 2 hours ahead and stored on a tray in the fridge. For the cheese, thin-cut American melts perfectly, but provolone or cheddar work too. Store any leftovers in a sealed container for 3 days in the fridge. The buns stay fresh for 1 week if wrapped tightly, and the ground beef can be refrigerated for 2 days before forming patties. Freeze uncooked patties for 3 months—they bake straight from frozen, just add 2-3 minutes to the time.
Why You'll Love This Recipe
- No-Fuss Prep: I’ll be real—this recipe is basically hands-off once the meat hits the pan. Just mix the ground beef with garlic powder, salt, and pepper, shape into patties, dredge in flour, and bake. No flipping, no greasy stove mess, and zero fuss.
- Umami Bomb: That crispy flour crust meets juicy, seasoned beef with every bite—it’s like a little flavor explosion. The garlic powder adds warmth, while the kosher salt cuts through the richness perfectly. Honestly, it’s the kind of taste that makes you want to skip dinner and just eat sliders all night.
- Game for Any Day: Sliders are my secret weapon for game days, potlucks, or even lazy Sundays. Double the batch, freeze half, and you’ve got a ready-to-bake meal for next week. (Yes, even on a Tuesday night.)
- Budget Meal, Big Payoff: Ground beef is affordable, and a pound stretches far when you’re making sliders. Plus, the flour adds just enough texture to feel special without breaking the bank. Leftovers? Toss them in a sandwich or reheat with a sprinkle of garlic powder for a quick bite.
Step-by-step instructions for baked beef sliders
Here's how to make sliders with perfect texture—crispy edges and juicy centers every time.
Prepare the Beef Mixture
In a large bowl, combine the 2 lb ground beef with 1.5 tsp kosher salt, 1 tsp ground black pepper, and 1 tsp garlic powder. Use your hands to gently mix everything until just combined—don't overwork it or the sliders will be dense. The mixture should hold together when pressed but still look slightly uneven.
Next, sprinkle the 1 tbsp all-purpose flour over the beef and mix again until evenly distributed. The flour helps bind the patties and creates that golden crust. For best results, use your hands—this ensures even distribution and prevents dry spots in the final sliders.
Shape and Prep the Patties
Divide the beef mixture into 12 equal portions (about 2 ounces each). Gently roll each portion into a ball, then flatten into 1-inch thick patties using your palms. I press down firmly but not too hard—you want them to hold their shape when baking without becoming too dense.
Here's the trick: make a small dimple in the center of each patty with your thumb. This prevents the sliders from puffing up too much during baking and ensures they cook evenly. Arrange the patties on a parchment-lined baking sheet, leaving about ½ inch between each one for even browning.
Bake to Juicy Perfection
Preheat your oven to 400°F and lightly grease a baking sheet with 1 tbsp vegetable oil (or use a silicone mat). Once the oven reaches temperature, place the patties on the prepared sheet. Bake for 12-15 minutes, flipping once halfway through, until the edges are deep golden brown and the internal temperature reaches 160°F when checked with a meat thermometer.
Don't skip the flip—this ensures both sides develop that crispy crust. If you notice the tops browning too quickly, tent the pan loosely with foil for the last 2-3 minutes of baking. The sliders are done when they're firm to the touch but still juicy inside.
Assemble the Sliders
While the sliders rest for 5 minutes (this keeps them juicy), melt the 2 tbsp butter in a small saucepan over low heat. Once melted, stir in the 0.5 cup pickles and 1 whole yellow onion (thinly sliced) to warm them through. Keep warm until ready to use.
Lightly toast the 12 whole hamburger buns in the same oven for 2-3 minutes until just warm. Spread each bun with a thin layer of 0.25 cup mayonnaise and 0.25 cup ketchup (divided evenly). Place a slider on each bottom bun, top with a slice of American cheese, and add a spoonful of the pickle-onion mixture. Finish with the top bun and serve immediately.
Pro Tips For Making Baked Beef Sliders
- USE A MEAT THERMOMETER: I learned this the hard way—baking sliders to a guess leaves you with either dry, overcooked patties or sad, underdone centers. Aim for 160°F internal temp (yes, even for sliders—smaller cuts cook faster than you’d think).
- DON’T SKIP THE REST: After shaping your patties, let them sit 5–10 minutes uncovered on a wire rack before baking. This prevents steam from turning them into dense, sad hockey pucks—especially crucial when using lean ground beef.
- SALT THE FLOUR MIX: Mix your garlic powder, black pepper, and at least 1 tsp kosher salt per cup of flour before coating the beef. Dry seasoning sticks better than sprinkling salt on raw meat, and you’ll avoid flavor clumping in the pan.
- FLATTEN TO ½-INCH THICKNESS: I used to eyeball slider thickness, but consistent ½-inch patties bake evenly without overcrowding. Use your palm as a guide—press firmly but don’t squish. (Yes, even if it looks unruly—it’ll crisp up.)
Common mistakes when making this recipe
Overworking the Beef
I can't stress this enough—overmixing the beef is the #1 mistake that turns sliders into dense, rubbery bricks. When you combine the ingredients, use your hands to gently mix just until the seasoning is evenly distributed. The beef should hold together when pressed but still look slightly uneven. If you overwork it, the gluten develops too much, squeezing out moisture and creating tough sliders. 💪
Uneven Patty Sizes
Consistency is key with sliders! I've seen people eyeball portions, leading to some patties being too big (overcooked) and others too small (undercooked). Use a kitchen scale to portion 2 ounces per patty—this ensures even cooking and perfect bite-sized sliders. If you must eyeball, use a 1-tablespoon scoop of ground beef per slider as your guide.
Skipping the Dimple
That tiny thumb dimple in the center of each patty isn't just for show—it prevents sliders from puffing up too much during baking. Without it, you'll end up with unevenly cooked patties where the center stays raw while the edges overcook. This simple trick helps heat circulate more evenly for perfect doneness every time.
Overcrowding the Pan
Nothing ruins crispy edges like overcrowding the baking sheet. When patties are too close together, they steam instead of brown. Leave at least ½ inch of space between each patty for proper air circulation. If needed, bake in two batches—your sliders will thank you with that beautiful golden crust. 🔥
Ignoring Rest Time
Freshly baked sliders need 5 minutes of rest before serving. This crucial step allows juices to redistribute throughout the meat. If you cut into them immediately, all that delicious moisture will escape, leaving you with dry sliders. Trust me, this 5-minute pause makes all the difference in texture.
Wrong Temperature Check
Using visual cues alone to determine doneness leads to overcooked or undercooked sliders. Always check the internal temperature with a meat thermometer—160°F is perfect for ground beef. Visual cues vary by oven, but the thermometer gives you consistent, foolproof results every time. No more guessing games! ⚡
Nutrition facts
Frequently asked questions
Can I make these sliders ahead of time?
Shape the patties and store them on a tray in the fridge for up to 2 hours before baking. For even better results, freeze uncooked patties for 3 months—they bake straight from frozen, just add 2-3 extra minutes. Keep toppings separate until serving to prevent soggy buns.
What if I don't have a meat thermometer?
No problem! For visual cues, look for deep golden brown edges and a firm center that springs back when pressed. The sliders should feel warm through but still slightly soft in the middle. Bake for 12-15 minutes total, flipping halfway, and they'll be perfect without a thermometer.
Can I use lean ground beef instead of 80/20?
While you can, the fat content is key for juicy sliders. Lean beef (90/10 or higher) will make them drier. If you must use it, add 1 extra tablespoon of butter to the beef mixture to compensate. For best results, stick with 80/20 fat ratio—it keeps those sliders tender and flavorful.
How do I keep the buns from getting soggy?
Toast the buns lightly for 2-3 minutes before assembling, or keep them separate until the last moment. For extra insurance, spread a thin layer of mayonnaise or mustard on the inside of the buns right before adding the slider. This creates a moisture barrier that keeps the buns crispy.
Can I bake these sliders from frozen?
Yes! Place frozen patties on a greased baking sheet and bake at 400°F for 16-18 minutes, flipping halfway. The extra time accounts for the cold start. For even cooking, space them ½ inch apart and tent with foil if the tops brown too quickly.