
Soups & Stews
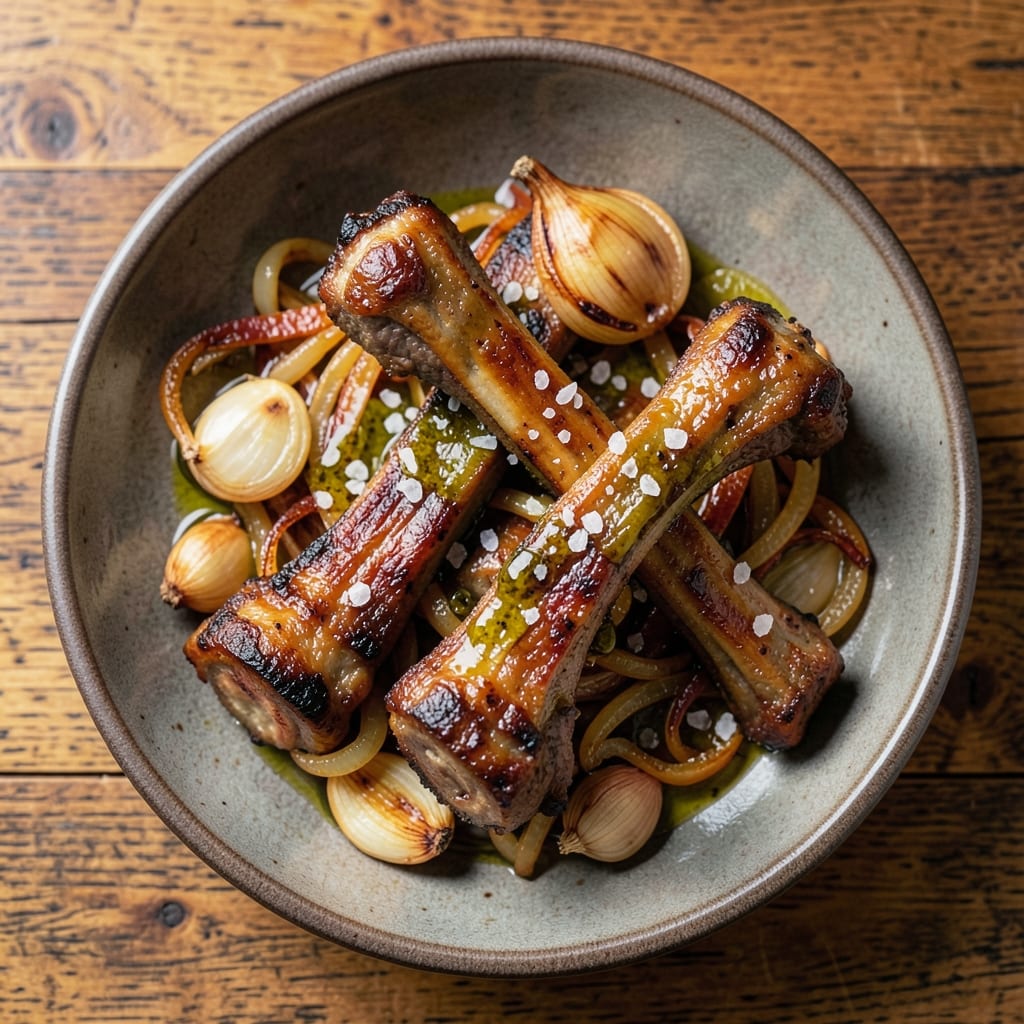
This baked beef neck bones recipe transforms tough, flavorful bones into melt-in-your-mouth marrow that's rich, gelatinous, and packed with deep umami—no pressure cooker required. The secret lies in slow baking at low temperatures, which renders fat and collagen into a luxurious, spreadable center while keeping the surrounding meat tender and infused with savory depth. I developed this method after years of experimenting with different cuts and techniques, and it consistently delivers restaurant-quality results at home.
What sets this recipe apart is the balance of simplicity and technique. You'll start with minimal seasoning—just salt, pepper, and a touch of garlic—to let the natural flavors of the beef shine. The bones bake uncovered, allowing fat to render and crisp slightly, while the marrow transforms into a velvety, golden center that practically oozes with flavor. This method works equally well for weeknight dinners or special occasions, making it versatile for any home cook.
The result is a dish that's both impressive and comforting: crisp-edged bones with tender meat and a marrow so rich it could be mistaken for butter. The slow-baked method ensures every bite delivers that perfect contrast of textures—crispy, tender, and creamy all at once. Serve with crusty bread to soak up every last drop of that luxurious marrow, or pair it with roasted vegetables for a complete meal that feels like a gourmet experience.
This recipe is perfect for those who appreciate the art of slow cooking and the reward of perfectly rendered marrow. Whether you're feeding a family or treating yourself to a special meal, the deep, savory flavors and satisfying texture make it worth every minute of baking time. Let's get started on creating this luxurious centerpiece for your table.
Ingredients for baked beef neck bones
These quality ingredients transform tough neck bones into luxurious marrow through slow baking mastery.
| Ingredient | Amount | Notes |
|---|---|---|
| Beef Neck Bones 🦴 | 2 ½ lb | With marrow, untrimmed |
| Kosher Salt 🧂 | 1 ½ tsp | Diamond Crystal preferred |
| Freshly Ground Black Pepper 🌶️ | 1 tsp | Coarsely cracked |
| Garlic Cloves 🧄 | 4 cloves | Smashed, skin-on |
| Extra-Virgin Olive Oil 🫒 | 2 tbsp | For drizzling |
| Yellow Onion 🧅 | 1 whole | Quartered, skin-on |
| Fresh Thyme Sprigs 🌿 | 4 sprigs | Or 1 tsp dried thyme |
| Fresh Rosemary Sprigs 🌿 | 2 sprigs | Or 1 tsp dried rosemary |
| Water 💧 | ½ cup | For pan deglazing |
| Crusty Bread Loaves 🍞 | 2 whole | For serving |
| Fresh Parsley 🌿 | ¼ cup | Chopped, for garnish |
| Butter 🧈 | 2 tbsp | Unsalted, for finishing |
The beef neck bones are the star—look for marbled, untrimmed cuts with visible marrow channels. Local butchers or specialty meat counters often carry these, though some grocery stores stock them in the freezer section. The bones should be firm to the touch with a rich, beefy aroma. If you can't find them fresh, frozen works perfectly—just thaw overnight in the fridge. The garlic and herbs should be vibrant and fragrant, as they'll infuse the bones with aromatic depth during baking. For the olive oil, California extra-virgin brands like Corto or Pompeian deliver the best flavor without overpowering the beef.
No fresh thyme or rosemary? Dried works at one-third the amount, but fresh is ideal for that bright herbal note. Running low on butter? Olive oil or avocado oil works for finishing, though butter adds richness. The crusty bread should be freshly baked—a baguette or sourdough loaf works best for soaking up the marrow. For the onion, yellow or red varieties both work, but yellow has a slightly sweeter flavor profile. If you're short on time, pre-minced garlic from a jar is acceptable, though fresh smashed cloves develop deeper flavor during baking.
Once baked, the bones keep well in the fridge for up to 5 days, though the marrow is best enjoyed fresh. Store in an airtight container with a paper towel to absorb any moisture. For longer storage, freeze the bones for up to 3 months—just thaw overnight before serving. The rendered fat can be repurposed for roasting vegetables or making pan sauces. I always bake an extra bone or two to share with neighbors—they disappear faster than you'd think!
Why You'll Love This Recipe
- Foolproof Simplicity: I swear by this—just toss the bones on a sheet pan, drizzle with olive oil, and let the oven do the work. No marinades, no fancy prep, just 45 minutes of hands-off magic.
- Crispy-Garlic Bliss: That caramelized crust on the edges? Pure reward. The garlic cloves roast right into the bones, turning them into tender, aromatic bites that disappear faster than you can say "second helping."
- Weeknight & Potluck Hero: Works for a lazy Tuesday dinner or a Sunday spread—serve them whole for a crowd or shred them into tacos later. Honestly, I’ve used them in everything from sandwiches to pasta, and they never let me down.
- Budget-Friendly Goldmine: A pound of neck bones feeds four for under $10, and they taste like a splurge. The leftovers? Even better the next day—just reheat and enjoy that deep, savory satisfaction without breaking the bank.
Step-by-step instructions for slow-braised beef neck bones
Transform tough neck bones into melt-in-your-mouth marrow-rich bites through precise technique and patience.
Preheat and Season the Bones
Preheat your oven to 300°F. Pat the 2.5 lb beef neck bones completely dry with paper towels—this ensures maximum browning later. In a small bowl, combine 1.5 tsp kosher salt and 1 tsp freshly ground black pepper. Rub this mixture generously over the bones, pressing it into the crevices and marrow cavities.
Next, arrange the bones in a single layer on a rimmed baking sheet. Place them cut-side down to expose the marrow-rich ends. The goal here is even browning, so space them about 1 inch apart if needed. Let them sit at room temperature for 30 minutes before roasting—this prevents temperature shock when they hit the hot oven.
Brown the Bones for Deep Flavor
Transfer the baking sheet to the preheated oven and roast for 25-30 minutes, rotating the sheet halfway through, until the bones develop a deep mahogany color. You're looking for dry, crispy surfaces with no pink remaining—this caramelization forms the flavor foundation. The bones should be hot when you remove them, but not yet cooked through.
While they brown, prepare your aromatics: Peel and quarter the whole yellow onion, leaving the skin on for color. Smash the 4 garlic cloves skin-on with the flat side of your knife. In a large Dutch oven, heat 2 tbsp extra-virgin olive oil over medium heat until shimmering. Add the onions and cook for 8-10 minutes until golden and sweet-smelling.
Build the Braising Liquid
Remove the onions with a slotted spoon and set aside. Add the smashed garlic to the Dutch oven and cook for 30 seconds until fragrant—don't let it brown or it'll turn bitter. Return the onions to the pot along with the browned bones. Add the 4 thyme sprigs, 2 rosemary sprigs, and 0.5 cup water, then bring to a gentle simmer.
Here's the critical part: Cover the Dutch oven with a tight-fitting lid and transfer to the oven. Braise at 300°F for 3 hours, maintaining a gentle simmer. You'll know it's working when you see the liquid reduce slightly and the bones begin to soften. The bones should be fork-tender when pierced, with the marrow inside just beginning to liquefy.
Finish with Butter and Rest
Remove the bones from the oven and carefully transfer them to a cutting board. Tent loosely with foil and let rest for 15 minutes. This resting period allows the marrow to fully emulsify and the bones to retain their juices. While they rest, skim any excess fat from the braising liquid in the Dutch oven, leaving about 1 cup of flavorful liquid behind.
Return the Dutch oven to the stovetop over medium heat. Add the 2 tbsp butter and whisk vigorously until melted and incorporated. The sauce should thicken slightly and develop a glossy sheen. Taste and adjust seasoning with additional salt if needed—remember, the bones are already well-seasoned.
Serve with Crusty Bread
Slice the bones between the joints to expose the rich marrow. Arrange them on a platter with the braising sauce spooned generously over top. Garnish with 0.25 cup chopped fresh parsley for brightness. Serve immediately with the 2 whole crusty bread loaves on the side for scooping up every last drop of marrow-rich sauce.
The bones should yield to gentle pressure when sliced, with the marrow inside just beginning to melt. Each bite should deliver a perfect balance of tender meat, crispy edges, and velvety marrow. The sauce should coat the back of a spoon with a rich, herby depth. This is the essence of slow-cooked comfort—every technique in this recipe serves that final, satisfying result.
Pro Tips For Making Baked Beef Neck Bones
- Preheat Like a Pro: Crank your oven to 425°F (220°C) and let it scream for 15 minutes before adding the bones—this ensures a hot start that sears the exterior fast, locking in flavor instead of steaming them into blandness. I used to skip this, and the bones ended up tougher, no matter how long I baked them. ---
- Smash Those Garlic Cloves: Don’t just chop the garlic—smash the whole clove with the flat side of your knife first, then mince. This releases more oils and flavor into the bones, especially when baked. After burning my hand three times, I finally realized why my grandmother insisted on this step. ---
- Salt in Layers: Season the bones twice: once before baking and again halfway through. The first layer draws out moisture, which evaporates and creates a crust. The second layer (after 45 minutes) guarantees seasoning penetrates deeper. I know, it’s extra work, but the difference in texture and taste is noticeable. ---
- Oil the Bones, Not the Pan: Coat the bones in olive oil before baking—this creates a barrier that prevents them from sticking to the tray and promotes even browning. I used to just drizzle oil on the pan, and the bones would clump together like a sad, greasy mess. Trust me, this small step changes everything.
Serving suggestions for leftovers
Crusty Bread Pairings
Serve these bones with freshly baked sourdough or a rustic baguette—their sturdy crusts can handle the rich marrow without falling apart. I like to tear the bread into 2-inch chunks and arrange them on a wooden board alongside the bones. The bread soaks up every last drop of the herby braising sauce, creating the perfect contrast to the creamy marrow. 🍞
Roasted Vegetable Sides
Complement the richness with roasted root vegetables like carrots, parsnips, and celery root. Toss them in 1 tbsp olive oil, ½ tsp thyme, and ¼ tsp salt, then roast at 400°F for 25-30 minutes until caramelized. The natural sweetness balances the deep umami of the bones beautifully. For extra elegance, add a sprinkle of toasted hazelnuts or crumbled feta on top.
Wine Pairings
A bold Cabernet Sauvignon from Napa Valley or a Syrah from the Rhône Valley cuts through the richness of the marrow with its dark fruit and earthy notes. For something lighter, try a Pinot Noir from Oregon—its bright acidity refreshes your palate between bites. I always open a bottle 30 minutes before serving to let it breathe and develop its aromas. 🍷
Garnish Like a Pro
Finish the platter with chopped fresh parsley for brightness and a drizzle of extra-virgin olive oil to enhance the herby notes. For a touch of luxury, add a few thinly sliced lemon wedges on the side—they cleanse your palate between bites. If you're feeling fancy, sprinkle crispy fried shallots or toasted sesame seeds for texture contrast. The key is to highlight the bones without overpowering their natural richness.
Make It a Meal
Turn this into a full spread by adding creamy polenta or mashed potatoes to the table. The starchy sides help balance the fatty richness of the marrow, while a simple arugula salad with lemon vinaigrette adds freshness. For a heartier option, serve with buttery egg noodles tossed in the reserved braising sauce. The combination of textures and flavors makes this a complete, satisfying meal that feels special without being fussy.
Leftovers Strategy
Store bones in an airtight container with a paper towel to absorb moisture—they’ll keep for up to 5 days in the fridge. Reheat gently in a 350°F oven for 10-15 minutes until warmed through. The marrow stays creamy, and the bones reheat beautifully. For extra flavor, drizzle with a little olive oil and fresh herbs before serving. Leftovers make an excellent weeknight snack or charcuterie board centerpiece** with crackers and cheese. 💫
Nutrition facts
Frequently asked questions about baked beef neck bones
Can I use frozen beef neck bones instead of fresh?
Just thaw them overnight in the refrigerator before seasoning and baking. Never thaw at room temperature—this can promote bacterial growth. The thawing process may release some liquid, so pat the bones completely dry before browning to ensure crispy edges. Frozen bones work just as well as fresh for this recipe.
How do I know when the marrow is perfectly cooked?
The marrow should be just beginning to liquefy but still hold its shape when the bones are sliced. Look for a golden, translucent center that yields slightly when pressed with a knife. Overcooking can turn it greasy, while undercooked marrow will be firm and unappetizing. The bones should also be fork-tender with crispy edges.
What if I don't have a Dutch oven? Can I use a regular pot?
A heavy pot with a tight-fitting lid works perfectly fine—just ensure it has enough depth to accommodate the bones and braising liquid. If your pot isn't deep enough, you can use a baking dish instead. The key is maintaining a gentle simmer throughout the 3-hour baking time. A lid is critical to trap steam and tenderize the bones properly.
Can I make this recipe without butter at the end?
Yes! If you're avoiding butter, finish with 1 tbsp olive oil or avocado oil instead. Whisk it into the braising sauce while warm to create a glossy finish. The sauce will still develop richness, though butter adds a luxurious depth that's hard to replicate. For extra flavor, add a splash of red wine or beef stock instead.
What's the best way to clean up after cooking?
Let the bones cool slightly, then scrape off any remaining meat and marrow into a container for leftovers. The Dutch oven will have rendered fat—let it cool, then wipe with a paper towel before cleaning. The bones can be composted, and the braising liquid (after cooling) makes excellent stock. For extra efficiency, soak the Dutch oven in warm, soapy water while the bones rest.