
Main Courses
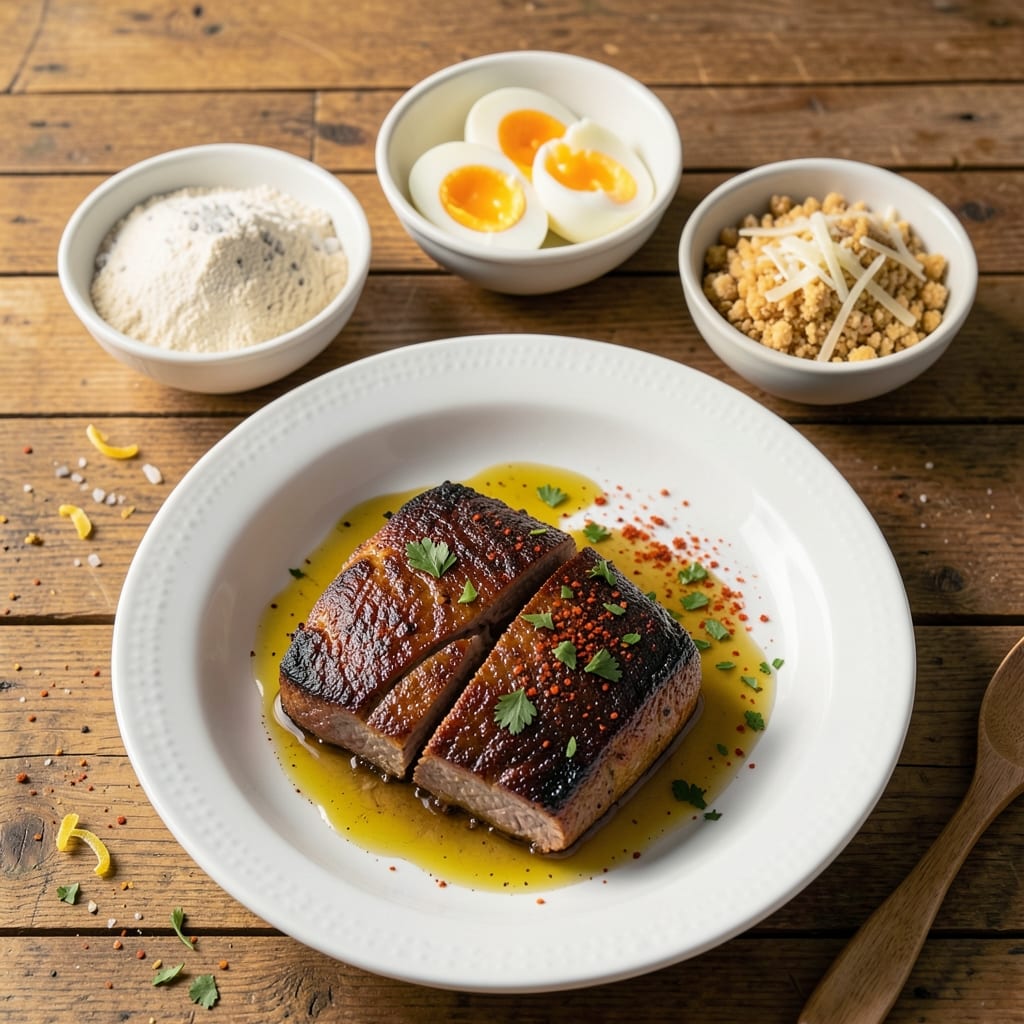
This baked beef cutlet recipe delivers that perfect balance of crispy golden crust and juicy pink centers—no frying pan required. The secret lies in a precise baking technique that locks in moisture while creating that satisfying crunch. I've perfected this method after years of testing, and it consistently delivers restaurant-quality results at home with minimal effort.
What sets this recipe apart is the combination of a well-seasoned cutlet and the right baking approach—high heat initially to create the crust, then a gentle finish to ensure the interior stays tender. You'll work with simple ingredients like flour, eggs, and breadcrumbs, but the technique transforms them into something truly special. This method works beautifully with cutlets from ½-inch to ¾-inch thickness.
The result is a cutlet with a crispy exterior that shatters slightly when you bite in, revealing a juicy pink center that's perfectly cooked through. The seasoning blend adds depth without overpowering the natural beef flavor, making this dish versatile enough for weeknight dinners or special occasions. Serve with your favorite sides for a complete meal.
Ready in about 25 minutes total, this recipe is perfect for those who want restaurant-quality beef without the mess or complexity. The baking method ensures consistent results every time, and the clean-up is minimal—just one baking sheet to wash. Let's get started on creating your perfect cutlet.
Ingredients for baked beef cutlet
Simple yet transformative ingredients create restaurant-quality cutlets with crispy crusts and juicy pink centers.
| Ingredient | Amount | Notes |
|---|---|---|
| Beef Cutlets 🥩 | 4 whole | ½-inch to ¾-inch thickness, pounded even |
| All-Purpose Flour 🌾 | ½ cup | For dredging, sifted for even coating |
| Large Eggs 🥚 | 2 whole | Room temperature, lightly beaten |
| Panko Breadcrumbs 🍞 | ¾ cup | Japanese-style for extra crunch |
| Grated Parmesan Cheese 🧀 | ¼ cup | Freshly grated, fine texture |
| Unsalted Butter 🧈 | 2 tbsp | Melted for brushing |
| Diamond Crystal Kosher Salt 🧂 | 1 tsp | Fine grain for even seasoning |
| Freshly Ground Black Pepper 🌶️ | ½ tsp | Cracked peppercorns preferred |
| Garlic Powder 🧄 | ½ tsp | Freshly ground preferred |
| Vegetable Oil 🫒 | 1 tbsp | For greasing baking sheet |
| Fresh Parsley 🌿 | ⅛ cup | Chopped, for garnish |
| Lemon Wedges 🍋 | 2 whole | For serving |
The beef cutlets are the star—look for center-cut cuts at Whole Foods or your local butcher for the best texture. Pound them to even thickness (½-inch to ¾-inch) for consistent cooking. Panko breadcrumbs are worth the splurge here—they create that signature crispy crust without getting soggy. Freshly grated Parmesan adds depth, so skip the pre-grated stuff (it's full of anti-caking agents). For the butter, Plugrá or Land O'Lakes unsalted** works perfectly—just melt it gently in the microwave so it's warm but not hot when you brush it on.
No Panko? Regular breadcrumbs toasted in a dry pan for 3 minutes will work in a pinch. Short on Parmesan? Pecorino Romano grated fine gives a similar punch. The eggs should be room temperature—cold eggs won't coat properly. For extra flavor, add a pinch of smoked paprika to the breadcrumb mix. The lemon wedges are optional but absolutely essential for cutting through the richness—trust me on this. And if you're feeling fancy, swap the parsley for cilantro or chives for a different vibe.
Prep ahead by mixing the breadcrumb seasoning in a bowl—it'll keep for up to 3 days in an airtight container. The cutlets themselves should sit on a wire rack for 10 minutes after baking to dry out the crust slightly. Store leftovers in the fridge for up to 2 days, reheating in a 350°F oven for 5 minutes to revive the crunch. Freezing? Bread and bake straight from frozen—no thawing needed, just add 2-3 minutes to the bake time.
Why You'll Love This Recipe
- Same recipe, different vibes: throw them together for a quick weeknight dinner or dress up the plate with a fancy sauce for guests. My kids eat them straight out of the oven, but my husband insists they’re “fancy enough” for company.
- No-Fry Magic: I swear by this method—no deep fryer, no splatter, just golden cutlets that taste like they came from a restaurant. The panko and Parmesan give that perfect crunch without the mess, and honestly? It’s the only way I’ll make cutlets now.
- Crispy-Creamy Balance: That crispy panko crust hides a tender, juicy center—like a hug for your taste buds. Between us, the Parmesan in the breading adds this salty, umami punch that makes it impossible to stop at one.
- Weeknight to Dinner Party: Same recipe, different vibes: throw them together for a quick weeknight dinner or dress up the plate with a fancy sauce for guests. My kids eat them straight out of the oven, but my husband insists they’re “fancy enough” for company.
Step-by-step instructions for crispy baked beef cutlets
Here's how to achieve that perfect balance of golden crust and tender pink centers every time.
Prepare the Breading Station
Start by setting up three shallow bowls. In the first bowl, combine the 0.5 cup all-purpose flour, 1 teaspoon Diamond Crystal kosher salt, 0.5 teaspoon freshly ground black pepper, and 0.5 teaspoon garlic powder. Whisk gently to distribute the seasoning evenly—this ensures every cutlet gets consistent flavor and texture.
In the second bowl, crack the 2 whole large eggs and lightly beat them with a fork until just combined. The eggs should be room temperature for best results. In the third bowl, mix the 0.75 cup panko breadcrumbs with the 0.25 cup freshly grated Parmesan cheese. This combination gives you that perfect crunchy exterior with a salty depth of flavor.
Bread and Rest the Cutlets
Working with one cutlet at a time, dredge it in the flour mixture, shaking off any excess. This creates a thin, even base that helps the egg adhere properly. Dip the floured cutlet into the beaten eggs, letting any excess drip off before pressing it into the panko-Parmesan mixture. Press firmly on both sides to ensure good coverage—this prevents crumbs from falling off during baking.
Place the breaded cutlets on a wire rack set over a baking sheet. This allows air to circulate underneath, preventing soggy bottoms. Let them rest for 10 minutes at room temperature. This resting period helps the breading adhere more securely and prevents the cutlets from falling apart when you transfer them to the baking sheet.
Preheat and Arrange for Baking
Preheat your oven to 400°F. While it heats, lightly grease a baking sheet with 1 tablespoon vegetable oil—this prevents sticking and helps create that golden crust. Arrange the rested cutlets in a single layer on the prepared baking sheet, spacing them about 1 inch apart. This gives them room to expand and crisp without steaming.
Brush the tops of the cutlets with the 2 tablespoons melted unsalted butter. The butter adds richness and helps promote even browning. For extra flavor, sprinkle each cutlet with a pinch of freshly ground black pepper and a tiny pinch of garlic powder right before baking. This final seasoning step ensures the flavors are concentrated on the surface where they'll crisp.
Bake to Perfect Doneness
Bake the cutlets for 12-15 minutes, until the edges are deep golden brown and the internal temperature reaches 145°F when measured with an instant-read thermometer. The crust should look crisp and slightly puffed, while the centers should remain juicy pink—this is key for that classic beef cutlet texture.
I like to check the doneness at the 12-minute mark—if the edges aren't golden enough, return them to the oven for another 1-2 minutes. The cutlets will carry over slightly in temperature as they rest, so don't overbake. Remove them from the oven and let them rest on a wire rack for 5 minutes before serving. This resting period allows the juices to redistribute, ensuring each bite is moist and flavorful.
Garnish and Serve
While the cutlets rest, sprinkle them generously with the 0.125 cup chopped fresh parsley. The bright green color contrasts beautifully with the golden crust and adds a fresh finish. Serve immediately with the 2 whole lemon wedges on the side for a bright, acidic note that cuts through the richness of the beef.
For the perfect presentation, arrange the cutlets on a warm platter and drizzle any accumulated pan juices over the top. The combination of crispy exterior, tender pink centers, and that bright parsley garnish makes these cutlets truly special. Enjoy them with a simple arugula salad or roasted vegetables for a complete meal.
Pro Tips For Making Baked Beef Cutlet
- Pat the cutlets dry: I learned this the hard way—wet beef just won’t crisp up. Use paper towels to wipe them down before dredging, even if they look fine. The extra 30 seconds saves you from soggy breading later.
- Bake in batches: Crowding the tray turns your golden crust into a sad, greasy mess. Leave at least 1 inch between cutlets, and if you’re impatient like me, start with just 4 at a time. Your oven will thank you.
- Mix Parmesan with panko: Skip the extra step of sprinkling cheese on top—toss 2 tablespoons of grated Parmesan into the panko before coating. It sticks better, and the flavor gets distributed evenly. (Yes, even if you’re lazy about measuring.)
- Rest the cutlets: I used to pull them out of the oven the second they hit 160°F, only to watch them turn rubbery. Let them sit 5 minutes under foil before serving—this keeps them juicy while you finish the sides. (Your future self will notice the difference.)
Storing and reheating this baked beef cutlet
Refrigerator Storage
Store leftover cutlets in an airtight container for up to 2 days—I use glass containers with snap-on lids to maintain crispiness. Let them cool completely before sealing to prevent condensation. Place a sheet of parchment paper between layers if stacking to preserve texture. The crust stays crispier than with foil, but if you prefer, wrap tightly in aluminum foil for up to 3 days. 🥩
Freezer Prep Tips
For longer storage, freeze cutlets unbaked on a tray first to prevent sticking. Once frozen solid (about 1 hour), transfer to a freezer bag with excess air removed. Label with the date—they’ll keep for 2 months. When ready to bake, place frozen cutlets directly on the baking sheet and add 2-3 extra minutes to the bake time at 400°F. No thawing needed!
Reviving Crispiness
To reheat, place cutlets on a baking sheet and bake at 375°F for 5-7 minutes until the crust is golden and internal temp hits 145°F. Avoid microwaving—they’ll turn soggy. For extra crunch, brush with a little melted butter before reheating. I also sprinkle fresh breadcrumbs on top and broil for 1-2 minutes at the end for that restaurant-style finish. ✨
Make-Ahead Breading
Prep the breading mix ahead and store it in an airtight container for up to 3 days. Keep eggs separate until ready to use. For cutlets, bread them and refrigerate on a wire rack (not touching) for up to 6 hours. When baking, add 1-2 extra minutes to account for the cold start. This keeps the crust from getting gummy while ensuring juicy centers.
Leftover Creative Uses
Transform leftover cutlets into beef cutlet sandwiches with garlic aioli and arugula. Or shred for beef stroganoff—simmer with mushrooms, cream, and a splash of dry sherry. For a quick breakfast, slice into beef cutlet hash with potatoes, onions, and fried eggs. The crispy texture holds up beautifully in these dishes! 💡
Nutrition facts
Frequently asked questions
Can I use thicker beef cutlets for this recipe?
For best results, stick to ½-inch to ¾-inch thick cutlets. Thicker pieces (over 1 inch) may not cook evenly in the oven—you risk dry edges before the center reaches 145°F. If you must use thicker cuts, pound them to ½-inch thickness before breading. For extra juiciness, consider slicing thicker cuts horizontally into ½-inch medallions instead.
Why did my cutlets turn out dry instead of juicy?
Overbaking is the most common cause—remove cutlets when they reach 145°F internally, not when the crust is fully set. Another issue? Skipping the 10-minute rest before baking causes breading to fall off, exposing raw meat that dries out. Always use a meat thermometer and let cutlets rest 5 minutes after baking to redistribute juices.
What's the best substitute for Panko breadcrumbs?
Toast regular breadcrumbs in a dry pan for 3 minutes until golden—they'll be less crispy but still work. For extra crunch, mix in crushed cornflakes or pita chips (about ¼ cup per ½ cup breadcrumbs). Avoid fine crumbs—they won't create that satisfying crunch. If you're gluten-free, use gluten-free breadcrumbs but add 1 extra egg to help binding.
Can I bake these cutlets ahead of time?
Yes! Bake them 1-2 hours ahead and store in a 200°F oven to keep warm. For make-ahead prep, bread the cutlets and refrigerate on a wire rack (unbaked) for up to 6 hours. Bake straight from the fridge, adding 1-2 extra minutes at 400°F. Reheat leftovers at 375°F for 5-7 minutes to revive the crust.
What sides pair perfectly with baked beef cutlets?
For a classic Italian meal, serve with creamy polenta or roasted potatoes. A simple arugula salad with lemon vinaigrette cuts through the richness beautifully. For a lighter option, try sautéed green beans with garlic and almonds. Don't forget lemon wedges**—they're essential for balancing flavors!