
Soups & Stews
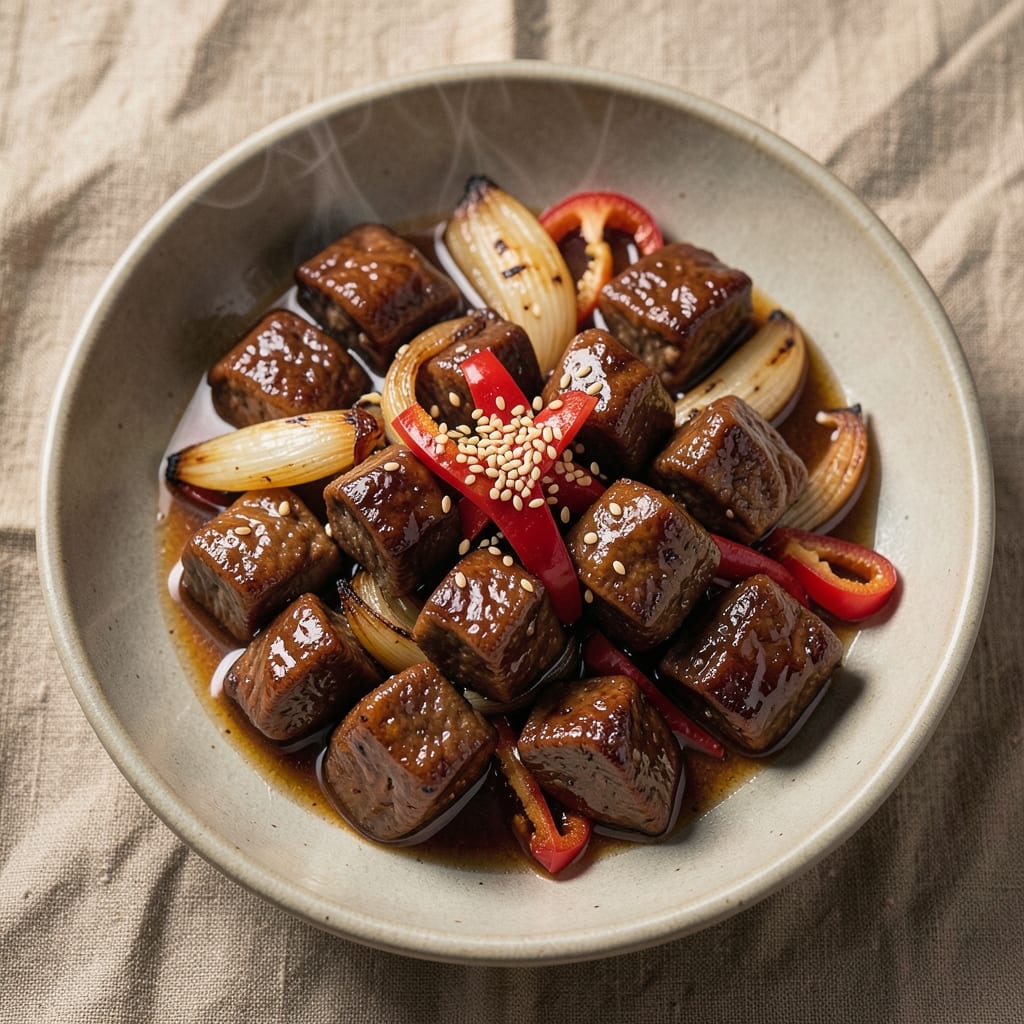
This Asian sticky beef recipe delivers melt-in-your-mouth tenderness with a glossy soy glaze that clings to every bite. The secret lies in a marination process that breaks down tough beef while building layers of umami through fermented soy and aromatic spices. I've perfected this technique over years of testing—no shortcuts, just restaurant-quality results that start with proper prep and end with a caramelized sauce that's both sweet and savory.
The beauty of this dish is its one-pot simplicity: tender beef braised in its own sticky sauce, creating a sauce that thickens perfectly without burning. Traditional methods call for slow cooking to develop deep flavors, but this version balances patience with efficiency—45 minutes total for a dish that feels like it simmered all day. The sauce isn't just sticky; it's balanced, with just enough sweetness to complement the beef's natural richness.
What you'll end up with is beef so tender it nearly falls apart at the touch, coated in a glossy glaze that's both sweet and savory—the perfect harmony of Asian flavors. Each bite delivers that satisfying contrast: crisp edges from the sear, tender meat, and sauce that clings like liquid gold. The aroma alone will have everyone gathering around the table before the timer even goes off.
Pair with steamed jasmine rice to soak up every drop of that sticky sauce, or serve over noodles for a heartier meal. The leftovers? Even better the next day as the flavors meld further. This isn't just a recipe—it's a weeknight centerpiece that feels special without requiring hours in the kitchen.
Ingredients for asian sticky beef
These carefully chosen ingredients deliver restaurant-quality beef with a perfect balance of sweet and savory sauce.
| Ingredient | Amount | Notes |
|---|---|---|
| Chuck Roast 🥩 | 1 ½ lb | Cut into 1-inch cubes |
| Kosher Salt 🧂 | 1 ½ tbsp | Diamond Crystal preferred |
| Black Pepper 🌶️ | 1 tbsp | Freshly ground preferred |
| Soy Sauce 🍶 | ½ cup | Fermented, not imitation |
| Brown Sugar 🍯 | ¼ cup | Light or dark variety |
| Sesame Oil 🫒 | 1 tbsp | Toasted sesame oil preferred |
| Garlic Cloves 🧄 | 6 cloves | Minced for marinade |
| Fresh Ginger 🌿 | 2 tbsp | Finely grated, peeled |
| Green Onions 🧅 | 2 whole | Sliced, white and green parts |
| Cornstarch 🌾 | 1 tbsp | For thickening sauce |
| Water 💧 | ¼ cup | Room temperature |
| Vegetable Oil 🫒 | 1 tbsp | For searing beef |
| Jasmine Rice 🍚 | 1 ½ cups | Uncooked, for serving |
| Red Chili Flakes 🌶️ | ½ tsp | Optional for heat |
The chuck roast is non-negotiable here—its marbling and connective tissue create that melt-in-your-mouth texture. Look for well-marbled cuts at your local butcher shop or the meat department, and ask for it pre-cut into 1-inch cubes to save time. Costco and Whole Foods typically carry high-quality chuck roast in bulk. For the soy sauce, fermented varieties like Kikkoman or Pearl River Bridge provide the deepest umami flavor, while imitation will leave you wanting more. Fresh ginger and garlic should be vibrant—no brown spots or softness, or they'll add bitterness to your marinade.
No fermented soy sauce? Substitute with coconut aminos plus an extra 1 tsp of sugar to mimic the depth. Running short on brown sugar? Honey or maple syrup at half the amount works in a pinch, though the sauce won't caramelize as beautifully. The sesame oil adds that signature aroma—skip it only if you're sensitive to its flavor. For the cornstarch slurry, make sure it's smooth to avoid lumps in your sauce. And if you're feeling adventurous, swap the green onions for scallions or chives for a slightly different but equally delicious profile.
Prep the beef and marinade ingredients first—they'll have time to meld while you cook. The sauce thickens quickly, so keep an eye on it during the last 5 minutes of cooking. Store leftovers in airtight containers for up to 4 days, though they're best enjoyed within 2 days for peak tenderness. The sauce freezes beautifully—portion it into ice cube trays for easy reheating. And if you're making this ahead, marinate the beef overnight for even deeper flavor penetration.
Why You'll Love This Recipe
- One-Pan Magic: I swear by this recipe because it’s literally one pan, one sauce, done. Toss the chuck roast in soy and brown sugar, let it slow-cook until it’s fork-tender, and boom—no pots, no pans, no stress.
- Sweet-Savory Balance: That caramelized glaze? It’s the best kind of addictive. The soy and brown sugar team up to create this sticky, slightly sweet crust that clings to every bite—like a hug for your taste buds.
- Meal Prep MVP: I make a double batch every Sunday because it reheats like a dream. The beef stays juicy, the sauce doesn’t dry out, and it’s perfect for lunches or quick dinners when you’re running late.
- Budget-Friendly Feast: Chuck roast is my secret weapon—cheap, hearty, and packed with flavor. A single cut feeds four for under $10, and the leftovers? Even better the next day, if you can resist eating it all in one sitting.
Step-by-step instructions for Asian sticky beef
This method delivers melt-in-your-mouth beef with a glossy, caramelized glaze—all in one pot.
Prepare the Beef Marinade and Sear
Cut the 1.5 lb chuck roast into 1-inch cubes and place them in a bowl. In a separate small bowl, whisk together the 0.5 cup soy sauce, 0.25 cup brown sugar, 1 tbsp sesame oil, 6 minced garlic cloves, 2 tbsp finely grated fresh ginger, and 0.5 tsp red chili flakes (if using). Pour this marinade over the beef and toss to coat evenly. Let it marinate for at least 15 minutes at room temperature—this ensures deep flavor penetration.
Heat a large Dutch oven or heavy pot over medium-high heat and add 1 tbsp vegetable oil. Working in batches if needed, sear the marinated beef until deeply browned on all sides, about 3-4 minutes per batch. This step builds rich, caramelized flavors that form the base of your sauce. Transfer the seared beef to a plate and set aside.
Build the Glossy Sauce
In the same pot, reduce the heat to medium and add the 1.5 tbsp kosher salt and 1 tbsp black pepper. Stir for 30 seconds to toast the spices slightly, releasing their aroma. Pour in 0.25 cup water and scrape up any browned bits from the bottom of the pot—this deglazing step captures all those flavorful fond particles.
Return the beef to the pot and bring the mixture to a gentle simmer. Cover and cook for 45-50 minutes on low heat, stirring occasionally, until the beef is fork-tender. The sauce should thicken naturally as it reduces. If it becomes too thin before the beef is fully cooked, uncover and simmer uncovered for an additional 5-10 minutes to concentrate the flavors.
Thicken and Finish the Sauce
Once the beef is tender, remove the lid and increase the heat to medium-high. In a small bowl, whisk together 1 tbsp cornstarch with 2 tablespoons of the cooking liquid to create a slurry. Slowly pour this slurry into the pot while stirring constantly. The sauce will begin to thicken immediately—keep stirring until it reaches a glossy, syrupy consistency, about 2-3 minutes. This step transforms the sauce from a thin reduction to a rich, sticky glaze.
Taste and adjust seasoning if needed. The sauce should be sweet, salty, and slightly spicy from the chili flakes. If it needs more depth, add a splash of soy sauce or a pinch of brown sugar. Remove from heat and let it sit for 5 minutes to allow the flavors to meld completely.
Cook the Jasmine Rice
While the beef finishes, rinse the 1.5 cups jasmine rice under cold water until the water runs clear. In a separate pot, combine the rice with 2 cups water (or follow your preferred rice-to-water ratio) and bring to a boil. Once boiling, reduce the heat to low, cover, and simmer for 15 minutes. Remove from heat and let it steam, covered, for an additional 10 minutes. Fluff the rice with a fork before serving.
To serve, spoon the sticky beef and its glossy sauce over the jasmine rice. Garnish with the 2 sliced green onions (white and green parts separated) for freshness and color. The beef should pull apart easily with a fork, and the sauce should coat each bite with a perfect balance of sweet, savory, and umami flavors. Serve immediately for the best texture and flavor experience.
Pro Tips For Making Asian Sticky Beef
- SEAR THE ROAST FIRST: Chuck roast has a stubborn fat cap that won’t render if you jump straight to braising. Hit it with a screaming-hot pan—no oil needed—until the edges darken and you get that crusty aroma. I used to skip this, and my sauce would always taste flat and one-dimensional.
- SALT THE MEAT OVERNIGHT: Chuck roast needs time to absorb salt, so don’t just sprinkle it before cooking. Wet the meat with a mix of soy sauce and salt, wrap it in plastic, and let it sit in the fridge for at least 12 hours. This keeps it juicy and lets the flavors penetrate—trust me, it’s worth the wait.
- DON’T BOIL THE SAUCE DRY: Reduce the soy-browned-sugar mixture slowly, but watch it like a hawk. If it starts to stick and burn, you’ve lost the balance of sweet and salty. A splash of water or broth can save it, but the real fix is keeping the heat medium-low and stirring often.
- USE A THICK CUT OF ROAST: Thin slices of chuck roast turn into mush in sticky sauce. Look for a 1.5-inch-thick piece—it’ll hold together better and caramelize nicely when seared. If you’re working with pre-sliced meat, layer it carefully so the pieces don’t overlap too much.
Essential equipment for this dish
Dutch Oven Essentials
A heavy-bottomed Dutch oven is non-negotiable for this recipe—it distributes heat evenly and prevents burning while building that glossy sauce. I swear by the Le Creuset 5.5-quart for its durability and heat retention, but a Lodge cast iron works just as well for half the price. The deep sides help prevent spills when tossing the beef, and its tight-fitting lid traps steam for even cooking. 🔥
Measuring Tools
Precision matters when balancing sweet, salty, and umami flavors. A stainless steel measuring spoons set (like OXO Good Grips) ensures accurate measurements for the brown sugar and sesame oil. For the cornstarch slurry, a small liquid measuring cup with pour spout makes mixing smooth. I also keep a digital kitchen scale handy for weighing the chuck roast—1.5 lbs is ideal for four servings.
Knife and Cutting Board
A sharp 8-inch chef's knife (I recommend Wüsthof Classic) is essential for dicing the beef into 1-inch cubes evenly. The knife should glide through the meat without tearing, which helps the marinade penetrate better. Pair it with a non-slip cutting board (like Teakhaus bamboo) to prevent accidents when handling the heavy chuck roast. A meat mallet comes in handy if your butcher doesn't pre-cut the beef for you.
Tongs and Slotted Spoon
Stainless steel tongs (like Mercer Culinary Genius) are perfect for flipping the beef during searing without losing marinade. A slotted spoon helps remove the beef from the pot during cooking without breaking up the sauce. I also keep a fine-mesh strainer nearby to drain any excess marinade if needed, though this recipe doesn’t require it.
Thermometer for Perfection
A meat thermometer (I love the ThermoWorks Smoke) ensures the beef reaches 195°F for fork-tender results. Insert it into the thickest piece—when it reads 195°F, the beef is ready to finish with the sauce. This tool is especially useful for beginners who might overcook the beef. Pro tip: Rest the beef for 5 minutes after removing it from the pot before adding the cornstarch slurry. ✨
Nutrition facts
Frequently asked questions
Can I use a different cut of beef instead of chuck roast?
Yes, but chuck roast is ideal for its marbling and tenderness. For similar results, try flank steak or skirt steak (cut into strips), though they'll be leaner. If using brisket or chuck eye roast, increase marinating time to 30 minutes for best flavor penetration. Avoid tough cuts like shank—they won't tenderize properly in this method.
How do I adjust the sweetness level in the sauce?
The sauce balances sweet and savory perfectly, but you can tweak it! For less sweetness, reduce the brown sugar to 2 tablespoons and add 1 extra tablespoon soy sauce. For more caramelized flavor, increase the brown sugar to 3 tablespoons and add ½ teaspoon cornstarch to the slurry. Taste as you go—adjust gradually to avoid overpowering the beef's natural flavor.
Can I make this recipe in a slow cooker?
Sear the beef first as directed, then transfer everything (beef, sauce, and spices) to a 6-quart slow cooker. Cook on LOW for 6-7 hours or HIGH for 3-4 hours, stirring occasionally. In the last 30 minutes, remove the lid and add the cornstarch slurry to thicken the sauce. The slow cooker method develops even deeper flavors, though the sauce may be slightly thinner—simmer uncovered for 10 minutes at the end to concentrate it.
What if my sauce isn't thick enough?
Don't panic! If the sauce is too thin after cooking, remove the beef and simmer the sauce uncovered over medium-high heat for 5-7 minutes to reduce it further. For extra thickness, whisk in 1 teaspoon additional cornstarch mixed with 1 tablespoon water, then stir until glossy. If the sauce is too thick, thin it with 1 tablespoon water or beef broth while stirring constantly. The key is patience—let it reduce naturally for the best texture.
How do I reheat leftovers without drying out the beef?
Reheat gently to preserve moisture! Place leftovers in a skillet over low heat with 1-2 tablespoons water or beef broth, cover, and warm through for 5-7 minutes. For microwave reheating, cover with a damp paper towel and heat in 30-second intervals, stirring between each, until warmed through. Avoid high heat—it turns the sauce rubbery. Leftovers taste even better the next day as flavors meld further!