
Main Courses
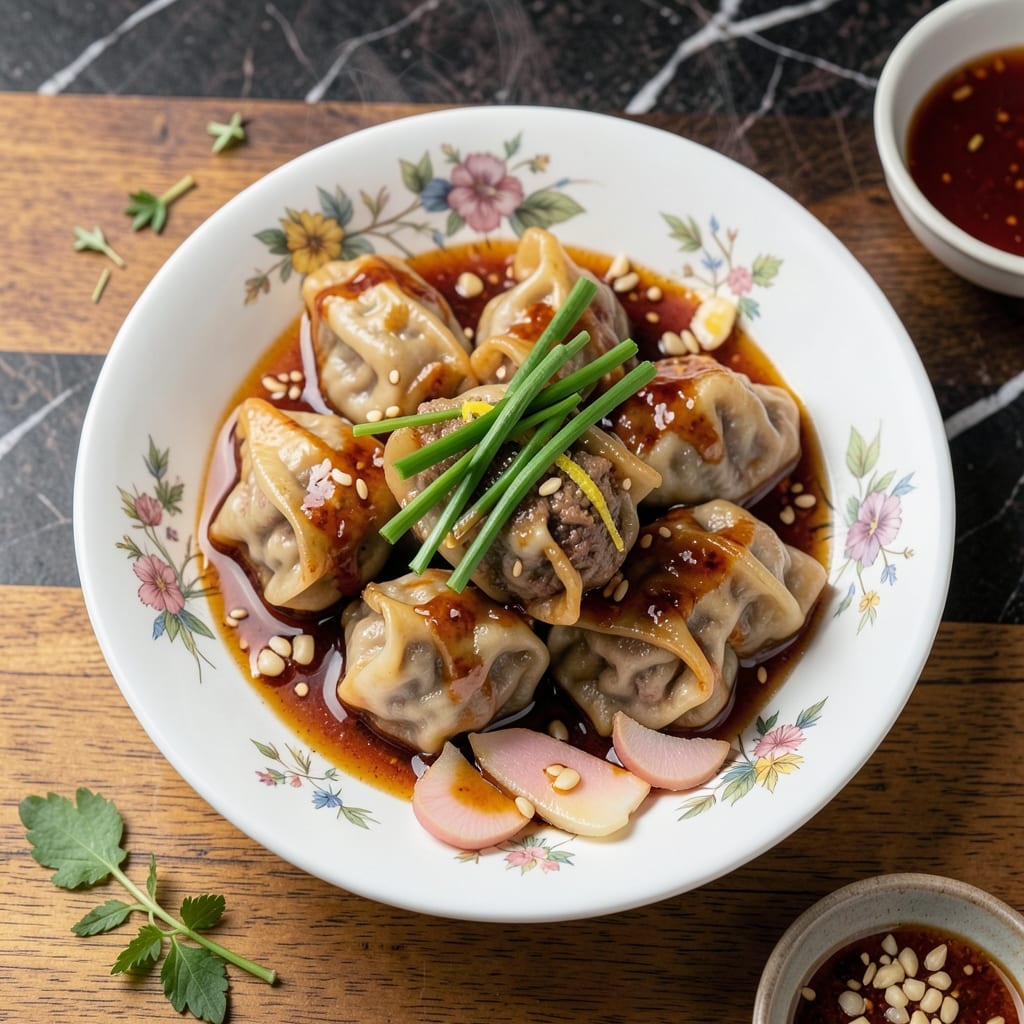
This Asian beef dumpling recipe delivers the perfect balance of crispy wok-seared bottoms and juicy centers that beg for another bite. The secret lies in thin, delicate dough wrapped around a savory filling of tender beef, garlic, and aromatic ginger—all pan-fried to golden perfection. I've perfected this technique over years of testing, ensuring every dumpling achieves that signature char while staying tender inside. What makes this version special is the combination of traditional methods with simple pantry ingredients, making it accessible yet restaurant-quality.
The process begins with making the dough from scratch, which is simpler than it sounds—just flour, water, and a touch of oil. The filling brings together ground beef, garlic, ginger, soy sauce, and a hint of sesame oil for depth. What sets these dumplings apart is the frying technique: a hot wok and just enough oil to create that coveted crispy exterior while keeping the filling moist. The result? Dumplings that hold their shape, crisp up beautifully, and burst with flavor in every bite.
By the time you're done, you'll have a plate of dumplings that look as impressive as they taste—golden-brown edges, tender dough, and filling that's seasoned just right. The aroma alone will have everyone gathering around the table, and the first bite delivers on that promise of crispy, juicy perfection. These dumplings are versatile enough for weeknight dinners or special occasions, and they freeze beautifully for future meals.
Pair them with a simple soy-vinegar dipping sauce or a spicy chili oil for extra flavor. The key to success is patience—especially when sealing the edges—and using a hot pan for that signature crisp. Let's get started on creating dumplings that'll have everyone asking for seconds.
Ingredients for asian beef dumpling
Simple pantry staples transform into restaurant-quality dumplings with crispy wok-seared bottoms.
| Ingredient | Amount | Notes |
|---|---|---|
| All-Purpose Flour 🌾 | 2 cups | Plus 2 tbsp for dusting |
| Cold Water 💧 | ¾ cup | Chilled for elasticity |
| Vegetable Oil 🫒 | 1 tbsp | For dough elasticity |
| Ground Beef 🥩 | 1 lb | Lean ground beef preferred |
| Garlic Cloves 🧄 | 4 cloves | Minced finely |
| Fresh Ginger 🌿 | 1 ½ tbsp | Grated finely |
| Light Soy Sauce 🥄 | 2 tbsp | Kikkoman preferred |
| Sesame Oil 🫒 | 1 tsp | Toasted for aroma |
| Green Onions 🧅 | 2 whole | Thinly sliced |
| Salt 🧂 | ½ tsp | Kosher preferred |
| Black Pepper 🌶️ | ¼ tsp | Freshly ground |
| Vegetable Oil 🫒 | ½ cup | For frying |
The flour is non-negotiable—King Arthur or Bob's Red Mill all-purpose work best for that tender yet sturdy dough. Chill your water before mixing to prevent gluten overdevelopment, which keeps the dough elastic. For the beef, 80/20 lean-to-fat ratio ensures juiciness without excess grease. If you're using pre-minced garlic or ginger from a jar, rinse it first to remove excess sodium. The soy sauce should be light-colored—Kikkoman is my go-to, but any good-quality brand works. Sesame oil adds depth, but use the toasted variety for that nutty aroma. Fresh green onions brighten the filling, but if you're short on time, dried green onion flakes at half the amount will do in a pinch.
No sesame oil? Toasted peanut oil works surprisingly well. Substituting ground turkey for beef keeps it lighter, but the texture won't be identical—expect slightly less juiciness. For the dough, whole wheat flour at half the amount adds nutrition but makes the dumplings denser. If you're frying and don't have a wok, a cast-iron skillet works just as well. The key is maintaining a high heat—375°F oil temperature gives that perfect crisp. For extra flavor, add a dash of white pepper to the filling. And if you're making a big batch, freeze the raw dumplings on a tray first so they don't stick when you freeze them in bags.
Store cooked dumplings in an airtight container for 3-4 days—they reheat beautifully in a steamer or air fryer. For freezing, lay them out on a tray first to prevent clumping, then transfer to a bag. Frozen dumplings keep for 3 months and cook straight from frozen. The dough can be made a day ahead and stored wrapped in plastic in the fridge. If you're not using it all at once, re-roll it between parchment paper to keep it from drying out. And here's a pro tip: keep a small bowl of hot water nearby when sealing edges—it helps the dough stick better.
Why You'll Love This Recipe
- No-Knead Magic: I swear by this dough trick—just flour, water, and a pinch of oil. No rolling, no fuss, and the dumplings still hold together like they’re supposed to. (Honestly, I’ve burned more than one batch of homemade wrappers trying to get them perfect, so this shortcut is my new favorite.)
- Garlic Bomb Filling: Two cloves of garlic, minced into the ground beef, and suddenly you’ve got that deep, savory punch. The oil in the beef keeps it rich without needing extra fat—just a quick sear and you’re golden. (My roommate still teases me for sneaking extra garlic in there, but he keeps asking for seconds.)
- Weeknight to Party Fix: Same dough, same filling, but different vibes. Pan-fried for a quick weeknight dinner or steamed for a fancy dinner party. Freeze half the batch for when you’re too tired to cook—just thaw and fry. (Between us, I’ve pulled these out for date nights and potlucks with zero shame.)
- Budget-Friendly Feast: Ground beef and flour stretch further than you’d think, and the flavor feels indulgent. A pound of beef makes enough for four servings, plus leftovers that reheat beautifully. (I’ll be real: this is how I feed my college-aged kids on a grad-student budget.)
Step-by-step instructions for Asian beef dumplings
Master the art of wok-searing these dumplings for that perfect crispy bottom and tender center.
Prepare the Dough for Elasticity
In a large bowl, combine the 2 cups all-purpose flour and 1 tablespoon vegetable oil. Mix with a fork until the oil is evenly distributed and the flour resembles coarse crumbs. Gradually add the ½ cup cold water while stirring with chopsticks or a fork until the dough begins to form a shaggy mass.
Once the dough comes together, turn it out onto a lightly floured surface and knead for 5-7 minutes until smooth and elastic. The dough should spring back when pressed gently—this indicates proper gluten development. If it feels sticky, add 1 tablespoon flour at a time until it's just workable. Wrap tightly in plastic wrap and rest for 30 minutes at room temperature. This resting period relaxes the gluten, making rolling easier later.
Make the Juicy Beef Filling
In a medium bowl, combine the 1 pound ground beef, 4 minced garlic cloves, 1.5 tablespoons finely grated fresh ginger, 2 tablespoons light soy sauce, ½ teaspoon salt, and ¼ teaspoon black pepper. Mix thoroughly with your hands until all ingredients are evenly distributed. The filling should look moist but not wet—if it's too dry, add 1 teaspoon cold water to help bind it.
For extra flavor, add 1 teaspoon toasted sesame oil and 2 thinly sliced green onions to the beef mixture. Fold gently to incorporate. Cover and refrigerate while you prepare the dough wrappers. Chilling the filling prevents it from leaking during cooking, ensuring those juicy centers you're after.
Roll and Assemble the Dumplings
Divide the rested dough into 16 equal pieces (about 1 ounce each). Roll each piece into a thin circle about 3 inches in diameter on a lightly floured surface. Keep the remaining dough covered to prevent drying. Place 1 tablespoon of filling in the center of each circle, then fold the dough over to form a half-moon shape. Press the edges firmly to seal, creating a tight, airtight seal—this prevents filling leaks during frying.
For extra security, crimp the edges with your fingers or a fork. Arrange the assembled dumplings on a plate, cover with a damp towel, and let them rest for 15 minutes before cooking. This brief rest helps the dough relax and prevents cracking when they hit the hot oil.
Fry for Crispy Bottoms and Juicy Centers
Heat ½ cup vegetable oil in a wok or deep skillet over medium-high heat until it shimmers but doesn't smoke (around 350°F). Working in batches to avoid overcrowding, carefully add the dumplings and fry for 2-3 minutes per side until they develop a deep golden-brown crust. The oil should bubble gently around the dumplings—this indicates proper heat control.
Once the bottoms are crispy and the filling is hot throughout, transfer the dumplings to a paper towel-lined plate to drain excess oil. Serve immediately while the wrappers are still crisp. For best results, don't stack them—they'll steam and lose their crunch. The contrast between the crispy exterior and juicy filling is what makes these dumplings so irresistible.
Pro Tips For Making Asian Beef Dumpling
- Chill the Dough First: I learned this the hard way—skipping the 30-minute fridge rest makes the wrapper dough sticky and hard to handle. Wrap it in plastic and stick it in the fridge while you prep the filling; your dumplings will thank you with clean seams and a proper shape.
- Minced Garlic, Not Chopped: Those big garlic chunks? They’ll sit like rocks in your filling. Use a knife to smash and finely mince the cloves—aim for a paste-like texture. This distributes flavor evenly and prevents any awkward texture surprises when you bite into a dumpling.
- Sear the Beef in Batches: Crowd the pan, and you’ll steam the meat instead of searing it. Cook the ground beef in 2-3 batches over medium-high heat until it’s deeply browned—this builds real flavor. Don’t rush it; you’re not making hamburgers here.
- Freeze Filling Before Wrapping: Sounds weird, but it works: Shape your beef filling into small logs, wrap them in plastic, and freeze for 15 minutes. The cold filling stays compact when you roll it, and the dumplings hold their shape better when boiling or frying. No more sad, flat-bottomed dumplings.
Pro cooking tips for great asian beef dumpling
Dough Elasticity Secrets
Cold water is your secret weapon for elastic dough—always use chilled water to prevent gluten overdevelopment. I find the dough reaches perfect elasticity after 5-7 minutes of kneading, but the real magic happens during the 30-minute rest. This resting period relaxes the gluten, making it easier to roll thin and seal without cracks. If your dough feels sticky, add flour 1 tablespoon at a time—too much flour makes the wrappers tough. 💫
Filling Moisture Control
Your filling should be moist but not wet—think of it like damp sand. If it's too dry, add 1 teaspoon cold water to help bind the ingredients. Chilling the filling for 15-20 minutes before assembling prevents leaks during frying. I like to mix the filling with my hands to distribute the flavors evenly, but avoid overworking it or the dumplings will be dense. For extra juiciness, add 1 teaspoon toasted sesame oil right before assembling. ✨
Edge-Sealing Techniques
Sealing the edges properly is what separates good dumplings from great ones. Press the edges firmly with your fingers or use a fork to crimp them tightly. For extra security, I dip my fingers in cold water before sealing—this helps the dough stick together better. If your edges look uneven, don't worry—just press them down gently after frying to create that classic pleated look. 🔥
Frying Temperature Mastery
Your oil should be hot but not smoking—aim for 350°F. Use a wok or cast-iron skillet for even heat distribution. Working in batches is key: overcrowding lowers the oil temperature and makes the dumplings greasy instead of crispy. Fry for 2-3 minutes per side until golden brown. The oil should bubble gently around the dumplings—this is your cue for perfect crispiness. 🌡️
Resting Before Serving
Never serve dumplings immediately after frying—they need 2-3 minutes of rest to set. This allows the filling to firm up slightly while keeping the wrappers crisp. I like to transfer them to a wire rack to drain excess oil, but if you must stack them, use a paper towel between layers to prevent sogginess. Serve with your favorite dipping sauce while they're still warm for that restaurant-quality experience. 💡
Batch Cooking Tips
For large batches, freeze the raw dumplings on a tray first to prevent sticking, then transfer to a bag. Cook straight from frozen, adding 30 seconds per side to the frying time. If reheating cooked dumplings, steam them for 5-7 minutes in a bamboo steamer over boiling water—they'll be just as crispy as fresh ones. And here's a pro tip: keep a small bowl of hot water nearby when sealing edges—it helps the dough stick better and prevents cracks. 💪
Nutrition facts
Frequently asked questions
Can I make these dumplings ahead of time?
Assemble the dumplings up to 1 day ahead and store them in the fridge, covered with a damp towel. For freezing, place uncooked dumplings on a tray first to prevent sticking, then transfer to a bag. They'll keep for 3 months in the freezer. Cook straight from frozen, adding 30 seconds per side to the frying time.
What's the best way to make the wrappers extra crispy?
Use a wok or cast-iron skillet and maintain oil at 350°F—this creates that signature crispy bottom. Fry in batches to avoid overcrowding, and press down gently with tongs during the first 30 seconds of cooking to ensure even contact with the oil. The secret is patience: don't rush the cooking time.
Can I substitute ground turkey for beef?
Yes, but expect slightly less juiciness. Use 80/20 ground turkey for better fat content, and add 1 teaspoon extra sesame oil to the filling. For maximum crispiness, pat the turkey dry before cooking. The texture won't be identical, but it's a great lighter option.
How do I fix leaking filling during frying?
Leaks usually mean your filling is too wet or edges aren't sealed properly. For future attempts, chill the filling for 20 minutes before assembling, and press edges with wet fingers for a tighter seal. If it happens during cooking, simply press down gently with tongs to reseal. For immediate fixes, serve with extra sauce to mask any leaks.
What's the best dipping sauce pairing?
For classic flavor, mix 3 tablespoons soy sauce, 1 tablespoon rice vinegar, 1 teaspoon sesame oil, and a pinch of sugar. For heat lovers, add 1 teaspoon chili crisp or ½ teaspoon sriracha. The sauce should complement the savory beef filling without overpowering it.