
Main Courses
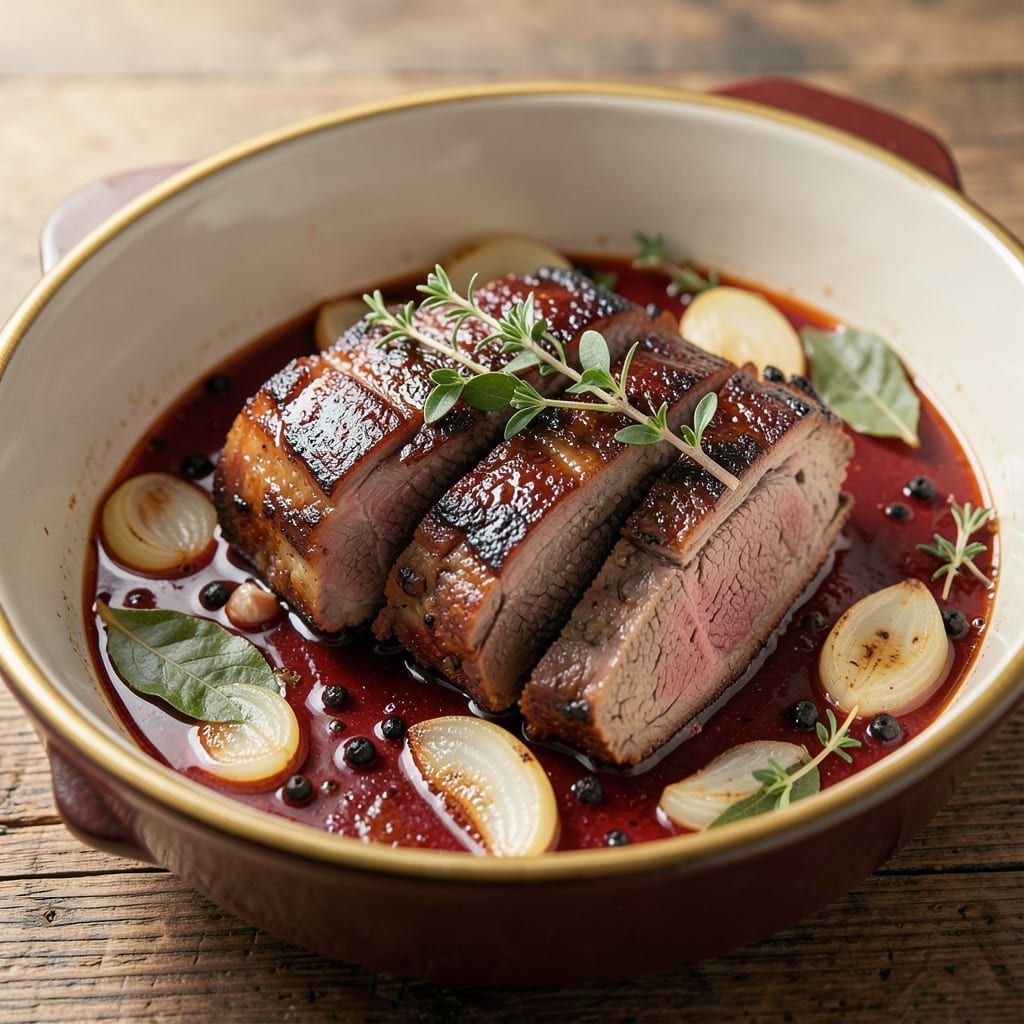
This apple cider braised beef shoulder recipe transforms tough cuts into melt-in-your-mouth perfection through slow simmering and aromatic spices. 🔥 The key lies in balancing apple cider's sweetness with savory herbs and caramelized onions, creating a rich sauce that tenderizes the meat while infusing deep flavor. What starts as a simple prep becomes a restaurant-worthy centerpiece after hours of gentle cooking.
The beauty of this method is its foolproof nature—no fancy techniques required, just patience and attention to timing. As the beef breaks down in the cider, it absorbs layers of complexity from thyme, bay leaves, and black pepper, while the onions develop a deep, caramelized sweetness that complements the tangy cider. The result is a dish that's equally impressive for weeknight dinners or holiday gatherings.
What you'll achieve is tender, fork-shreddable beef swimming in a glossy, aromatic sauce that's perfect for serving over mashed potatoes or alongside crusty bread. The slow cooking process ensures every bite is juicy and flavorful, with the apple cider adding just the right amount of sweetness to balance the rich beef. This recipe proves that with time and the right ingredients, even the toughest cuts become extraordinary.
Perfect for meal prep or last-minute entertaining, this dish reheats beautifully and tastes even better the next day. The combination of textures and flavors makes it a standout main course that will have everyone asking for seconds. Let's get started on creating this comforting classic.
Ingredients for apple cider braised beef shoulder
Six aromatic ingredients transform tough beef into melt-in-your-mouth perfection through slow simmering.
| Ingredient | Amount | Notes |
|---|---|---|
| Beef Shoulder (Chuck Roast) 🥩 | 4 lb | Bone-in preferred for flavor |
| Yellow Onions 🧅 | 2 whole | Yellow or red, sliced thick |
| Fresh Thyme 🌿 | ½ oz | Or 2 tbsp dried thyme |
| Garlic Cloves 🧄 | 6 cloves | Peeled and smashed |
| Fresh Bay Leaves 🌿 | 2 whole | High-quality dried if unavailable |
| Black Peppercorns 🌶️ | 1 tbsp | Freshly cracked preferred |
| Apple Cider 🍎 | 2 cups | Unfiltered for best flavor |
| Beef Broth 💧 | 2 cups | Low-sodium preferred |
| Olive Oil 🫒 | 2 tbsp | Extra-virgin for richness |
| All-Purpose Flour 🌾 | 1 tbsp | For thickening sauce |
| Brown Sugar 🍯 | 1 tbsp | Enhances caramelization |
| Salt 🧂 | 1 ½ tsp | Diamond Crystal preferred |
| Worcestershire Sauce 🍶 | 1 tbsp | Vegan if needed |
The beef shoulder is the star, and chuck roast delivers the best results—its marbling ensures rich flavor and tender texture. Look for cuts with visible fat between the muscles at Whole Foods or your local butcher shop; they'll often trim it for you. Fresh thyme and bay leaves elevate the dish, so Penzeys Spices or bulk bins at natural markets are ideal for quality. The apple cider should be unfiltered—Woodchuck Hard Cider or Angry Orchard work beautifully, but any dry cider will do. Caramelizing the onions slowly is key; don't rush this step or you'll miss the deep sweetness that balances the cider's tang.
No fresh thyme? Dried thyme at one-third the amount works in a pinch, but the flavor won't be as bright. Substitute apple cider with unsweetened apple juice plus 1 tsp lemon juice if needed, though the sauce won't be quite as complex. For Worcestershire, vegan versions like Annie's or homemade (soy sauce + vinegar + molasses) are perfect alternatives. The brown sugar isn't just for sweetness—it helps develop the sauce's depth during the long braise. If you're short on time, pre-sliced onions from the store work fine, but they won't caramelize as beautifully. The beef broth should be low-sodium; Swanson or Pacific Foods brands are reliable choices.
This dish tastes even better the next day as flavors meld, so make extra if you can. Store leftovers in an airtight container in the fridge for up to 5 days or freeze for 3 months. To reheat, cover with foil and warm in a 350°F oven for 20 minutes. The sauce thickens as it cools, so add a splash of apple cider or beef broth when reheating if it's too stiff. Portion into individual containers for easy meal prep—just reheat and serve. The onions keep well in the fridge for 1 week, while fresh herbs should be used within 5 days for peak flavor.
Why You'll Love This Recipe
- Leftovers That Shine: I make a double batch on Sundays because reheated slices are even better—crispy edges, juicy center, and that cider sauce clinging to every bite. Sandwiches? Yes. Tacos? Absolutely. Just don’t tell anyone I’m lazy.
- Budget Hero: A chuck roast stretches for days, and the rest of the ingredients? Basic pantry staples. You’re feeding a crowd for less than takeout, with flavors that’ll make them think you slaved all day. (Spoiler: you didn’t.)
Step-by-step instructions for apple cider braised beef shoulder
Master this slow-cooked technique for melt-in-your-mouth beef with deep caramelized flavors.
🍳 Step 1: Sear the Beef Shoulder for Maximum Flavor
Heat a heavy Dutch oven over medium-high heat until hot. Add 2 tablespoons olive oil and swirl to coat the bottom. Pat the 4 lb beef shoulder dry with paper towels—this ensures a proper sear. Place the beef fat-side down in the pot and sear undisturbed for 8-10 minutes until a deep golden brown crust forms.
Flip the beef and sear the other side for another 6-8 minutes. Remove the beef and set it aside on a plate. The goal here is to develop a rich, flavorful crust through the Maillard reaction—this is what gives your braised beef its depth of flavor. Don't rush this step; patience pays off in the final result.
👨🍳 Step 2: Build the Flavor Base with Caramelized Onions
In the same Dutch oven, add the 2 whole yellow onions sliced into ¼-inch thick rounds. Cook over medium heat for 12-15 minutes, stirring occasionally, until they develop a deep amber color and begin to caramelize. This process should take time—don't rush it.
When the onions are nearly caramelized, add the 6 smashed garlic cloves, 0.5 oz fresh thyme (stripped from stems), and 2 whole fresh bay leaves. Cook for another 2 minutes until the garlic is fragrant. The thyme and bay leaves will infuse their aromatic oils into the onions, creating a complex flavor foundation for your braise.
🍳 Step 3: Deglaze and Develop the Braising Liquid
Sprinkle 1 tablespoon all-purpose flour and 1 tablespoon brown sugar over the onions. Stir vigorously for 1 minute to coat everything evenly. This creates a roux that will help thicken your braising liquid and add body to the sauce. Pour in 2 cups apple cider and 2 cups beef broth, scraping up any browned bits from the bottom of the pot.
Add 1.5 teaspoons salt, 1 tablespoon black peppercorns, and 1 tablespoon Worcestershire sauce. Bring the liquid to a gentle simmer, then return the beef to the pot, fat-side up. The liquid should come about halfway up the sides of the beef shoulder. Cover the pot with a tight-fitting lid and transfer it to a 325°F oven.
⏰ Step 4: Braise Until Fork-Tender
Braise the beef for 3-3.5 hours until it's fork-tender. The internal temperature should reach 200-205°F when measured with an instant-read thermometer. You'll know it's ready when the meat easily pulls apart with just a gentle tug.
About 30 minutes before the beef is done, remove the lid and increase the oven temperature to 400°F to reduce the braising liquid slightly and intensify the flavors. This step creates a thicker, more concentrated sauce that clings beautifully to the beef. The liquid should reduce to about 1 cup with a glossy, syrupy consistency.
🍽️ Step 5: Rest and Serve with Pan Sauce
Remove the beef from the pot and transfer it to a cutting board. Tent loosely with aluminum foil and let it rest for 15-20 minutes. This resting period allows the juices to redistribute throughout the meat, ensuring each slice is moist and flavorful.
Discard the thyme stems and bay leaves, then strain the braising liquid through a fine-mesh sieve to remove any remaining peppercorns. Return the strained sauce to the pot and simmer over medium heat for 5 minutes to reduce it further if needed. Slice the beef against the grain into ½-inch thick pieces and serve with the pan sauce spooned over the top. The result should be tender, flavorful beef with a rich, caramelized sauce that's perfect for serving with mashed potatoes or crusty bread.
Pro Tips For Making Apple Cider Braised Beef Shoulder
- Sear the Meat First: High heat for 3-4 minutes per side until deep brown—this locks in flavor and prevents the beef from turning to mush later. I used to skip this, and the dish always tasted bland, no matter how long I braised it.
- Char the Onions: Cut onions into even chunks and cook them uncovered until the edges blacken slightly—about 10 minutes at medium-high. That caramelized bitterness cuts through the sweetness of the cider and beef fat, making the whole dish more complex.
- Don’t Crowd the Pot: Use a heavy pot with a tight lid, but leave room for steam to circulate—pack it too tight, and the beef will steam instead of braise, turning out soggy. I learned this after my first attempt ended with a watery, flavorless mess.
- Deglaze with Cider Early: After searing the meat, pour in 1 cup of apple cider right away and let it bubble hard for 2 minutes to lift all those browned bits from the pot. Scrape the bottom with a wooden spoon—this builds the base flavor and saves you from scraping later when the pot’s sticky.
Troubleshooting your apple cider braised beef shoulder
Undercooked Beef
If your beef shoulder feels tough or doesn't reach the ideal 200-205°F internal temperature, you likely didn't braise long enough. I've found that 3-3.5 hours at 325°F is the sweet spot for a 4 lb chuck roast. Use a meat thermometer (like the ThermoWorks Smoke) to check—insert it into the thickest part, avoiding fat or bone. If it's still firm, return it to the oven for another 30-60 minutes. 🌡️
Sauce Too Thin
A watery sauce usually means the braising liquid wasn't reduced enough. To fix this, remove the beef and simmer the sauce uncovered over medium-high heat for 10-15 minutes until it thickens. If it's still too thin, mix 1 tbsp cornstarch with 2 tbsp cold water, stir into the sauce, and simmer for 2-3 minutes until thickened. For next time, try reducing the liquid slightly earlier by removing the lid 30 minutes before the end of cooking.
Onions Burned
Caramelized onions are essential, but they can easily burn if left unattended. Cook them over medium heat (not high) and stir frequently—about every 3-5 minutes. If they darken too quickly, reduce the heat to medium-low. I've learned that patience is key—rushing this step ruins the sweetness. For extra insurance, add 1-2 tbsp apple cider to the pot when the onions start to brown, which also adds depth to the flavor.
Beef Too Salty
If your beef tastes overly salty, it's likely from the 1.5 tsp salt or the beef broth. To balance it, add ½ cup apple cider or beef broth to the pot and simmer uncovered for 10 minutes to dilute the saltiness. For future attempts, taste the braising liquid before adding the beef—it should be seasoned but not overwhelming. A pinch of brown sugar (about ½ tsp) can also help round out the flavors if the salt is too sharp.
Dry Beef Texture
Dry beef often happens when the meat loses moisture during cooking. To prevent this, ensure your pot is tightly covered and the liquid covers at least halfway up the beef. If your beef turns out dry, try this fix: Place the sliced beef in a shallow baking dish, pour ½ cup apple cider and ½ cup beef broth over it, cover with foil, and warm in a 300°F oven for 15 minutes. The beef will reabsorb some moisture and become more tender. For next time, avoid overcooking—remove the beef when it reaches 195°F and let it rest.
Weak Apple Cider Flavor
If the apple cider flavor feels muted, it might not have infused enough. For stronger flavor, use unfiltered apple cider (like Woodchuck Hard Cider) and reduce the braising liquid uncovered for the last 30 minutes of cooking. You can also boost the flavor by adding 1 tbsp apple cider vinegar or 1 tsp apple cider reduction (simmered until syrupy) to the sauce before serving. For next time, try deglazing the pot with ¼ cup apple cider after searing the beef to build more depth early on. 🍎
Nutrition facts
Frequently asked questions
Can I substitute apple cider with another liquid?
Yes, but the flavor will change. For a similar sweet-tangy profile, use unsweetened apple juice plus 1 tsp lemon juice or 1 tbsp apple cider vinegar. If you prefer a more savory approach, swap it for beef broth or red wine. Just reduce the cooking time slightly since these liquids won't add the same depth of caramelization as cider.
How do I make this dish ahead of time?
This recipe actually tastes better the next day! After braising, let the beef cool completely, then store it in an airtight container with the sauce in the fridge for up to 5 days. Reheat covered in the oven at 300°F for 20-30 minutes until warmed through. The flavors meld beautifully overnight, making it perfect for meal prep.
What's the best way to slice the beef?
Always slice against the grain for maximum tenderness. Look for the direction of the muscle fibers (they'll be visible when you cut into the roast). Use a sharp knife and cut into ½-inch thick slices. For easier serving, you can also shred it with two forks after removing from the pot.
Can I use a slow cooker instead of the oven?
Follow the same steps for searing and caramelizing onions, then transfer everything to a slow cooker. Cook on Low for 8-10 hours or High for 5-6 hours. The key difference is you won't get the same caramelization from the final reduction, but the beef will still be tender and flavorful. Just add a splash of apple cider at the end to brighten the sauce.
What's the secret to balancing the sweetness?
The perfect balance comes from the black peppercorns and Worcestershire sauce—they cut through the sweetness while adding depth. Don't skip the 1 tbsp brown sugar either; it helps caramelize the onions and enhances the apple cider's natural sweetness. Taste the braising liquid before adding the beef—it should be seasoned but not overwhelmingly sweet.