
Soups & Stews
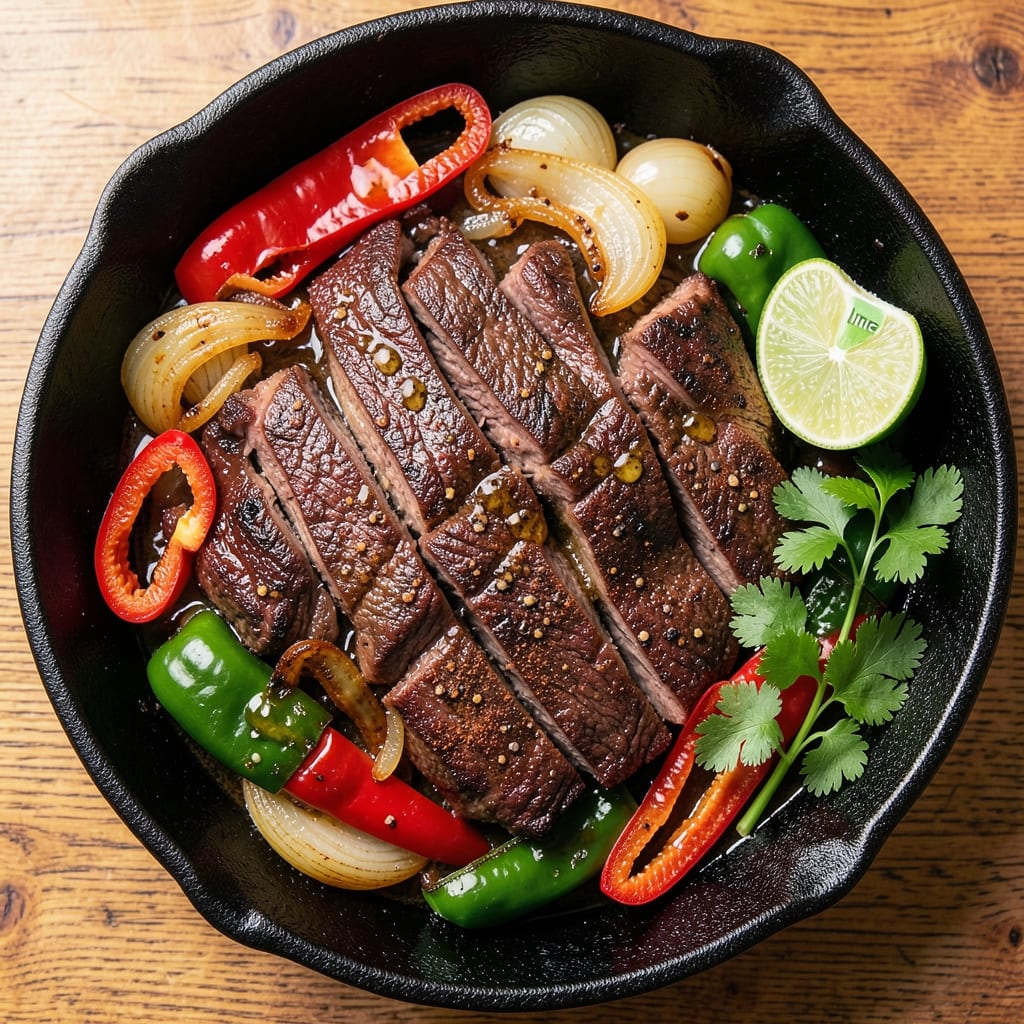
This angus beef fajitas recipe delivers the perfect balance of smoky charred edges and melt-in-your-mouth marbled beef—exactly what makes fajitas unforgettable. The secret lies in high-heat searing, which locks in juices while creating that signature crust. I’ve perfected this technique over years of testing, ensuring every bite is tender yet flavorful, with peppers and onions caramelized just enough to add natural sweetness.
What sets these fajitas apart is the marbling in the angus beef—those delicate fat streaks render perfectly during cooking, keeping the meat moist and rich. You’ll start with a quick marinade of lime, garlic, and cumin, then sear the beef and vegetables in a screaming-hot skillet for that restaurant-quality char. The result? A dish that’s bold enough for a dinner party but simple enough for a weeknight.
By the time you’re ready to assemble, you’ll have juicy beef slices, sweetly caramelized peppers and onions, and warm tortillas ready to wrap. Top with traditional fixings like sour cream, guacamole, and lime wedges for a meal that’s as satisfying as it is delicious. This isn’t just another fajita recipe—it’s the one that’ll have everyone asking for seconds.
The best part? The prep is straightforward, and the cooking happens in under 30 minutes. Whether you’re serving a crowd or treating yourself to a flavorful dinner, this recipe delivers restaurant-quality results without the fuss. Let’s get started.
Ingredients for angus beef fajitas
Juicy angus beef and vibrant peppers meet smoky spices for fajitas that taste like a restaurant feast.
| Ingredient | Amount | Notes |
|---|---|---|
| Angus Beef 🥩 | 1 ½ lb | Center-cut, thinly sliced against grain |
| Bell Peppers (Green and Red) 🌶️ | 2 whole | Seeded, sliced into strips |
| Yellow Onions 🧅 | 1 whole | Sliced into half-moons |
| Lime Juice 🍋 | ½ cup | Freshly squeezed |
| Garlic Cloves 🧄 | 6 cloves | Minced for marinade |
| Ground Cumin 🌿 | 1 tbsp | Toasted for depth |
| Smoked Paprika 🌶️ | 1 tbsp | For smoky flavor |
| Olive Oil 🫒 | ¼ cup | Extra-virgin preferred |
| Salt 🧂 | 1 ½ tsp | Diamond Crystal kosher |
| Black Pepper 🌶️ | ½ tsp | Freshly cracked |
| Flour Tortillas 🌯 | 8 whole | Medium-sized, warmed |
| Sour Cream 🥛 | ½ cup | For serving |
| Guacamole 🥑 | ½ cup | Homemade or store-bought |
| Cilantro 🌿 | ¼ cup | Chopped, for garnish |
| Lime Wedges 🍋 | 4 whole | For serving |
The beef is everything here—center-cut angus with visible marbling melts in your mouth while that charred crust delivers the smoky kick. Costco or Whole Foods carry the best cuts, but any butcher will slice it thinly for you if you ask nicely. Look for slices about 1/4-inch thick—thinner than you’d think. The bell peppers should be firm and vibrant, not rubbery. Trader Joe’s often has pre-sliced ones that save time, but cutting them yourself gives better control. Onions? Yellow or white work best—they caramelize more beautifully than red. Skip the sweet onions unless you love that extra sweetness.
No lime juice? Key lime juice or bottled lime juice works in a pinch, but fresh is worth the squeeze. Running short on cumin? Mexican oregano at half the amount gives a similar earthy punch. Smoked paprika is non-negotiable for that fajita flavor, but if you only have regular paprika, add a pinch of liquid smoke to mimic the depth. The tortillas? Flour tortillas are traditional, but corn works too—just warm them properly. For the guacamole, I always make my own with ripe Hass avocados and a squeeze of lime, but high-quality store-bought is a time-saver when you're in a rush.
Marinate the beef for at least 30 minutes (overnight is even better)—this is where the magic happens. Store any leftover beef in an airtight container for up to 3 days in the fridge, though it reheats best when fresh. The veggies can be prepped ahead and stored in the fridge for 2 days, but they’re best when cooked fresh. Tortillas freeze beautifully—just thaw and warm in a dry skillet. For leftovers, I like to wrap them up and reheat in a skillet with a little oil to restore that crispy texture.
Why You'll Love This Recipe
- One-Pan Magic: I swear by this recipe for lazy nights—just slice the beef, toss in peppers and onions, and let the skillet do the work. No flipping between pans, no messy cleanup, just that perfect charred edge on the beef while the veggies soften just enough.
- Juicy, Smoky, Bright: The Angus beef stays impossibly tender, and the lime juice cuts through the richness like a cool breeze. Honestly, the first time I made it, my husband asked for seconds before I even served the first plate.
- Weeknight to Party Ready: Same recipe, different vibes—wrap it in tortillas for a quick dinner or serve it on a platter with cilantro and lime wedges for guests. (Yes, even on a Tuesday night, it feels fancy.)
- Leftovers That Don’t Suck: Unlike most takeout, these taste better the next day—reheat the beef and veggies, toss with a little extra lime, and boom, instant lunch. My daughter picks out the onions first, but still asks for seconds.
Step-by-step instructions for smoky charred angus beef fajitas
Here's how to transform tender Angus beef into restaurant-quality fajitas with a perfect charred crust.
Marinate the Beef for Maximum Flavor
In a large bowl, combine the 1.5 lb Angus Beef with 0.5 cup lime juice, 6 cloves minced garlic, 1 tbsp ground cumin, 1 tbsp smoked paprika, 1.5 tsp salt, and 0.5 tsp black pepper. The acidity from the lime juice will tenderize the meat while the spices penetrate deeply. Use your hands to massage the marinade into every strand of beef, ensuring even distribution. Cover and refrigerate for at least 30 minutes (or up to 4 hours for deeper flavor). This step guarantees juicy, flavorful bites that won't dry out during cooking.
I like to separate the beef into thin strips against the grain after marinating. This makes each bite more tender and ensures the fajitas cook evenly. If you prefer, you can also slice the beef immediately after marinating—just be gentle to avoid breaking the strands.
Prep and Char the Vegetables
Slice the 2 whole bell peppers (green and red) into ½-inch strips and the 1 whole yellow onion into ½-inch half-moons. These should be cut uniformly so they cook at the same rate as the beef. Heat 0.125 cup olive oil in a large skillet over medium-high heat until shimmering. Add the peppers and onions, spreading them in a single layer. Cook, stirring occasionally, for 8-10 minutes until the edges are deeply charred and the onions turn translucent.
Here's the thing—don't rush this step. The charred edges add a smoky depth that balances the beef's richness. If the vegetables start to stick, reduce the heat slightly and give them another minute. Once they're done, remove them from the pan and set aside on a plate.
Sear the Beef to Perfection
In the same skillet (no need to clean it—the fond adds flavor), increase the heat to high and add the remaining 0.125 cup olive oil. Working in batches if needed, add the marinated beef strips. Let them sear undisturbed for 1-2 minutes until a deep brown crust forms. Stir and cook for another 1-2 minutes until the beef is medium-rare (internal temperature of 130-135°F). The beef should be juicy with a slight pink center—overcooking will turn it tough.
If the beef feels crowded in the pan, cook it in two batches. The key is to maintain high heat for that perfect sear. Once cooked, remove the beef and combine it with the charred vegetables in the same skillet. Toss everything together for 30 seconds to meld the flavors. The residual heat will finish cooking the vegetables slightly and infuse them with the beef's juices.
Warm the Tortillas and Assemble
Heat the 8 whole flour tortillas in a dry skillet over medium heat for 20-30 seconds per side until pliable and lightly toasted. This step is crucial—warm tortillas hold up better to fillings and add a subtle crunch. Alternatively, you can wrap them in a damp towel and microwave for 20 seconds. Stack the warmed tortillas on a plate and keep them covered to stay soft.
To assemble, divide the beef and vegetable mixture evenly among the tortillas. Top each with 1 tablespoon guacamole, 1 tablespoon sour cream, and a sprinkle of 0.25 cup chopped cilantro. Serve immediately with the 4 whole lime wedges on the side for squeezing over each bite. The contrast of warm, smoky fajitas with cool, tangy lime is what makes this dish truly special.
Serve with Confidence
Fajitas are meant to be shared, so gather everyone around the table and let them customize their own. The beef should be juicy and tender, the vegetables charred and slightly caramelized, and the tortillas warm and flexible. Each bite should deliver a perfect balance of smoky, spicy, and tangy flavors. If you have any leftover beef or vegetables, store them separately in the fridge for up to 2 days—they reheat beautifully in a skillet over medium heat.
Pro tip: For extra authenticity, serve with a side of pico de gallo or salsa verde if you have them on hand. The acidity cuts through the richness of the beef and adds another layer of flavor. Enjoy your fajitas—this is the kind of dish that brings people together for a reason!
Pro Tips For Making Angus Beef Fajitas
- SEAR IN TWO BATCHES: Angus beef loves high heat, but overcrowding the pan turns fajitas into a sad, steamed mess. Slice the meat thin (⅛-inch) and cook half first—let it brown and develop that crust—before adding the second batch. The pan will thank you with caramelized flavor instead of a lukewarm pile.
- CHAR THE ONIONS FIRST: I used to toss everything in at once, and the onions always ended up soggy. Start by cooking the sliced yellow onions in the same pan over medium-high heat for 5-6 minutes until their edges turn golden and slightly crisp. They’ll add depth without stealing the spotlight from the beef.
- SALT THE BEEF TWICE: Angus is lean and tender, but it needs salt to shine. Season it generously right after slicing, then again right before searing—about 10 minutes later. The first salting helps it retain moisture, while the second ensures it’s punchy on the plate. (Yes, even if you’re impatient like me.)
- USE THE LIME JUICE LAST: Adding lime juice too early makes the peppers and onions turn mushy. Wait until the very end—after everything’s off the heat—to squeeze in the juice. It brightens the flavors without turning your fajita mix into a sad, watery salad. (Your future self will notice the difference.)
Dietary considerations for this dish
Gluten-Free Adaptations
For gluten-free fajitas, swap the flour tortillas for certified gluten-free corn tortillas like Mission Carb Balance or Siete Grain-Free tortillas. These hold up well when warmed and provide the same pliable texture. Ensure all spices and marinades are gluten-free—check labels on smoked paprika and cumin blends, as some contain anti-caking agents with gluten. 🌾
Dairy-Free Options
Skip the sour cream and use dairy-free coconut yogurt (like So Delicious) or cashew cream instead. For extra richness, blend ½ cup soaked cashews with 1 tbsp lime juice and a pinch of salt. Guacamole remains dairy-free, but verify store-bought brands for additives. The lime wedges and cilantro add freshness without dairy.
Low-Carb Versions
Replace tortillas with large butter lettuce leaves or portobello mushroom caps (grilled for 3 minutes per side). For extra structure, use low-carb tortillas like Caulipower or Mission Low-Carb. The beef and veggie filling stays the same—just load it into your chosen wrapper. Top with avocado and lime for a fresh, low-carb twist. 🥑
Allergen-Friendly Tips
If nut allergies are a concern, avoid cashew cream and opt for silken tofu blended with lime juice for a neutral dairy-free topping. For soy-sensitive diners, choose certified gluten-free and soy-free tortillas like Banza Chickpea Flour Tortillas. Always double-check ingredient labels—some smoked paprika contains soy lecithin as an anti-caking agent.
Protein Swaps
For vegetarian fajitas, replace the beef with grilled portobello mushrooms or extra-firm tofu marinated in the same lime-garlic blend. For seafood lovers, try shrimp or scallops—they cook in just 2-3 minutes over high heat. The charred veggie base works perfectly with any protein, keeping the dish flexible for dietary needs. 🦑
Nutrition facts
Frequently asked questions
Can I use a different cut of beef besides angus for fajitas?
While angus delivers the best marbling and tenderness, you can use skirt steak or flank steak as budget-friendly alternatives. These cuts are leaner but still pack great flavor. For extra juiciness, marinate them for at least 2 hours and slice against the grain after cooking.
How do I prevent the beef from drying out when cooking?
Never overcook the beef—it should reach 130-135°F for medium-rare. Use a meat thermometer for accuracy. Also, keep the heat high and avoid stirring too often. The marinade helps retain moisture, but if the beef feels dry, add 1 tablespoon beef broth to the pan while cooking. The charred crust is what gives fajitas their depth, not overcooking.
Can I make fajitas ahead of time and reheat them?
Cook the beef and vegetables separately, then store them in airtight containers for up to 2 days. Reheat in a skillet over medium heat with a splash of oil to restore moisture. Warm tortillas separately—microwave them wrapped in a damp towel for 20 seconds. The flavors actually meld better when reheated.
What's the best way to get crispy tortillas without a skillet?
If you don't have a skillet, use the oven method: Wrap tortillas in foil and bake at 350°F for 5-7 minutes. For extra crispiness, place them on a wire rack over a baking sheet. Alternatively, use a grill pan or even a cast-iron lid on the stove. Warmth is key—never serve fajitas with cold tortillas.
Can I make fajitas on the grill instead of a stovetop?
Grilling fajitas works beautifully! Thread the marinated beef onto skewers and grill over high heat for 2-3 minutes per side for medium-rare. Char the peppers and onions directly on the grill grates. The smoky flavor from the grill enhances everything. Just be sure to clean the grill grates thoroughly before and after cooking.