
Main Courses
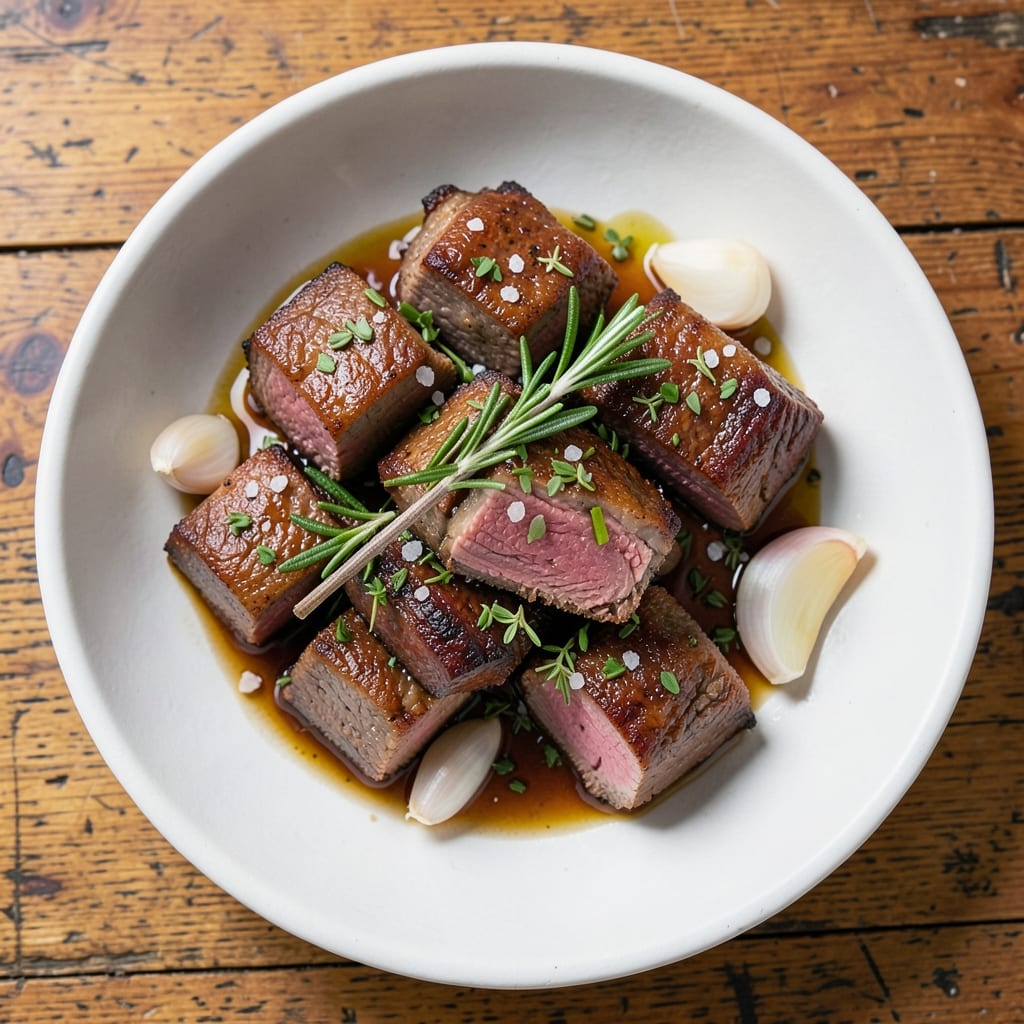
This Angus beef cubes recipe delivers restaurant-quality results with a crispy garlic-herb crust and melt-in-your-mouth centers—no fancy equipment required. The secret lies in high-heat searing followed by a slow finish, which locks in juices while building deep, savory flavors. I’ve perfected this method over years of testing, ensuring every bite stays tender despite the crust’s intensity.
What sets this recipe apart is the one-pan technique, which simplifies cleanup while maximizing flavor. Fresh rosemary, thyme, and garlic infuse the beef as it cooks, creating a fragrant crust that’s both aromatic and satisfying. The cubes are cut to an ideal size—large enough to stay juicy but small enough to cook evenly in under 30 minutes.
By the end, you’ll have juicy, perfectly browned beef cubes that pair beautifully with roasted potatoes, grilled asparagus, or a bold red wine reduction. The method is foolproof, whether you’re feeding a crowd or treating yourself to a weeknight upgrade. Ready to elevate your dinner table?
For extra depth, finish with a sprinkle of flaky sea salt and a squeeze of lemon—trust me, it makes all the difference. Let’s get cooking!
Ingredients for angus beef cubes
Juicy, restaurant-quality beef cubes start with these 12 ingredients—simple but game-changing.
| Ingredient | Amount | Notes |
|---|---|---|
| Angus Beef Chuck Roast 🥩 | 1 ½ lb | Cut into 1.5-inch cubes |
| Fresh Rosemary 🌿 | ¼ cup | Chopped, stems removed |
| Fresh Thyme 🌿 | 2 tbsp | Leaves only, finely chopped |
| Garlic Cloves 🧄 | 6 cloves | Minced, for crust |
| Extra-Virgin Olive Oil 🫒 | ¼ cup | High smoke point preferred |
| Diamond Crystal Kosher Salt 🧂 | 1 ½ tsp | For seasoning and finishing |
| Ground Black Pepper 🌶️ | 1 tsp | Freshly cracked |
| Unsalted Butter 🧈 | 2 tbsp | Cold, for finishing |
| Fresh Lemon Juice 🍋 | 1 tbsp | For brightness |
| Red Wine 🍷 | ½ cup | Bold dry variety, optional |
| Beef Broth 💧 | ½ cup | Low-sodium preferred |
| All-Purpose Flour 🌾 | 1 tbsp | For dusting pan |
The beef is everything here. Angus chuck roast delivers that perfect balance of tenderness and flavor—sirloin or ribeye won’t cut it for this technique. Grab it from the butcher counter for the best marbling, or Costco’s pre-cut Angus chuck if you’re short on time. Cut cubes to 1.5 inches for even cooking; larger pieces stay tough. Pat them dry before searing—this helps the crust form. Fresh herbs are non-negotiable: rosemary and thyme from the grocery store’s produce section (not the dried aisle) give that restaurant-quality aroma. If you’re feeling fancy, Whole Foods carries organic bundles that stay fresh longer.
No fresh rosemary? Dried at half the amount works in a pinch, but trust me, it’s worth tracking down. Running low on red wine? Beef broth with a splash of balsamic mimics the depth. The olive oil matters—California avocado oil has a higher smoke point if you’re searing at high heat. For the flour, King Arthur all-purpose is my go-to, but any basic brand works. Pro tip: Toast the flour lightly in the pan before adding the beef—it adds a subtle nuttiness. The butter should be cold and unsalted for finishing; salted will overpower the delicate seasoning. And if you’re using lemon juice, freshly squeezed is best—bottled loses that bright pop.
Store the raw beef cubes in an airtight container with parchment paper between layers for up to 2 days. Once cooked, they reheat beautifully—just 5 minutes in a skillet with a splash of broth revives that crispy crust. The herbs lose potency after 3 days, so use them up or freeze chopped portions in ice cube trays. For meal prep, I portion the cooked cubes into glass containers with a drizzle of olive oil—keeps them moist for 4 days in the fridge. Freeze for up to 3 months if you’re planning ahead. The butter and flour can sit at room temperature for 6 months; just keep them sealed tight.
Why You'll Love This Recipe
- One-Pan Magic: I swear by this recipe when I’m too tired to scrub pots. Toss the cubed beef, herbs, and garlic on a sheet pan, drizzle with olive oil, and let the oven do the work—no flipping, no fuss, just melt-in-your-mouth results.
- Herb-Packed Punch: That rosemary-thyme-garlic combo? It’s like a flavor bomb. The beef soaks up the aroma while searing, giving you that perfect balance of earthy, savory, and just a hint of garlic punch—no fancy marinades needed.
- Leftovers I Actually Crave: Between us, I always make extra. These cubes reheat like a dream—toss them in pasta, stir into rice, or pile on toast with a fried egg. (Yes, even on a Tuesday night.)
- Budget-Friendly Luxury: Angus chuck roast is surprisingly affordable for the quality, and a single cut feeds my family for days. The herbs and oil? Minimal cost, maximum impact. It’s the kind of meal that makes you feel fancy without breaking the bank.
Step-by-step instructions for one-pan garlic-herb crusted beef
Here's how to transform tough chuck roast into melt-in-your-mouth beef cubes with a crispy garlic-herb crust.
Prep the Beef and Herb Mixture
Begin by cutting the 1.5 lb Angus Beef Chuck Roast into 1.5-inch cubes—this size ensures even cooking and maximum tenderness. Pat each piece dry with paper towels, which helps the crust adhere better and prevents steaming. In a small bowl, combine the 0.25 cup chopped fresh rosemary, 2 tbsp finely chopped fresh thyme, 6 minced garlic cloves, 1.5 tsp Diamond Crystal kosher salt, and 1 tsp freshly cracked black pepper. This aromatic blend will infuse the beef with deep herbal notes while creating that signature crust.
I like to mix the herbs and spices with 1 tablespoon of the extra-virgin olive oil from the ingredients list to form a paste. This helps the seasoning cling to the beef cubes more effectively. Rub this mixture all over the beef cubes, pressing gently so the paste adheres to every surface. Let the seasoned beef sit at room temperature for 15-20 minutes—this allows the flavors to penetrate and the meat to cook more evenly.
Sear the Beef for Maximum Flavor
Heat a large oven-safe skillet over medium-high heat until it's very hot. Add the remaining 0.25 cup extra-virgin olive oil and swirl to coat the bottom evenly. Working in batches if needed (to avoid crowding), add the seasoned beef cubes and let them sear undisturbed for 2-3 minutes per side until they develop a deep golden-brown crust. This step is crucial—it locks in juices and builds layers of flavor through the Maillard reaction.
Once the first batch is browned, transfer the beef to a plate and repeat with the remaining cubes. Don't be tempted to move them around in the pan—they'll release when ready. If the pan starts smoking excessively, reduce the heat slightly to maintain control without losing the sear. After all cubes are seared, return them all to the skillet and sprinkle with the 1 tbsp all-purpose flour, tossing gently to coat evenly.
Deglaze and Simmer for Tender Results
Pour in the 0.5 cup red wine and scrape up any browned bits from the bottom of the pan with a wooden spoon—these bits are packed with flavor. Let the wine simmer for 2-3 minutes until it reduces by about half. Then add the 0.5 cup low-sodium beef broth and bring to a gentle simmer. The liquid should come about halfway up the sides of the beef cubes.
Cover the skillet with a lid and transfer it to a preheated 375°F oven. Let the beef cook for 45-50 minutes, turning the cubes occasionally and spooning the sauce over them. You're looking for tender beef that's just fork-tender—when you pierce a cube with a fork, it should offer some resistance but still be easy to cut through. The internal temperature should reach 195-200°F at this point.
Finish with Butter and Lemon
Remove the skillet from the oven and increase the heat to medium. Add the 2 tbsp cold unsalted butter and let it melt, stirring occasionally. Once the butter is fully melted, add the 1 tbsp fresh lemon juice and stir to combine. The acidity brightens the rich flavors and cuts through the fat beautifully. Taste and adjust seasoning with additional salt if needed—this is where all the flavors come together.
Let the beef rest for 5 minutes before serving. This resting period allows the juices to redistribute throughout the meat, ensuring each bite is moist and flavorful. Serve the beef cubes directly from the pan, spooning the garlic-herb sauce over the top. The contrast between the crispy crust and tender interior is what makes this dish truly special.
Pro Tips For Making Angus Beef Cubes
- CUT CUBES UNIFORM: I used to eyeball it, but these cubes need to cook evenly—aim for 1.5-inch chunks (about the size of a large walnut). Smaller pieces dry out faster; bigger ones stay tough. Use a sharp knife and don’t rush—this isn’t a race.
- SMASH GARLIC FIRST: Peel those cloves and smash them with the flat side of your knife before mincing. This releases more flavor and cuts down on prep time. (Yes, it looks messy, but your cubes will taste richer.)
- SEAR IN BATCHES: Don’t crowd the pan—this is the thing that matters most. Work in two batches over medium-high heat for 3-4 minutes per side. Overcrowding steams the beef instead of searing, and you’ll end up with sad, pale cubes.
- REST BEFORE CUBING: Take that raw chuck roast out of the fridge 30 minutes before cutting. Cold meat shrinks when cooked, so letting it sit ensures your cubes stay plump. (I learned this the hard way after serving dry, shrunken bites.)
Troubleshooting this dish
Uneven Cooking Fix
If your beef cubes are cooking at different rates, the issue is likely crowding in the pan. Overloading the skillet causes steam buildup, which prevents proper browning and creates uneven doneness. I’ve found that working in batches—searing only 8-10 cubes at a time—ensures a consistent crust and even cooking. After searing, return all cubes to the pan for the oven finish, but don’t let them overlap. 🌡️
Tough Beef Solution
Tough beef cubes usually mean the meat wasn’t cooked long enough or wasn’t cut properly. First, verify your cube size: they should be 1.5 inches (not larger). If they’re still tough after 45-50 minutes at 375°F, extend the oven time by 10-15 minutes and check the internal temperature—it should reach 195-200°F. For extra tenderness, add ½ cup beef broth to the pan during the oven phase to keep the cubes moist. 💡
Sauce Too Thin?
A thin sauce happens when the liquid reduces too quickly or the pan isn’t hot enough. To fix this, simmer the wine and broth uncovered for 3-4 minutes before adding the beef back to the pan. If the sauce is still too thin after cooking, remove the beef and reduce the sauce on its own over medium-high heat for 5-7 minutes until it thickens slightly. A splash of cornstarch slurry (1 tsp cornstarch + 1 tbsp water) can also help thicken it instantly. 🍲
Overly Greasy Crust
If the crust is greasy instead of crispy, the issue is likely too much oil or not enough heat. Start by using only 2 tbsp olive oil for searing (instead of the full ¼ cup) and ensure your skillet is ripping hot before adding the beef. After searing, pat the cubes dry again with paper towels before adding the flour—this removes excess moisture that can prevent crust formation. For extra crispiness, broil the cubes for 2-3 minutes at the end. 🔥
Herbs Not Infusing
If your herbs aren’t adding flavor, they might not have had enough time to meld with the beef. To fix this, double the herb mixture and let the beef marinate in it for 30 minutes before cooking. Another trick is to lightly toast the herbs in the dry skillet for 30 seconds before adding oil—this intensifies their aroma. If using dried herbs, increase the amount by 50% (e.g., 1 tbsp rosemary instead of ½ cup fresh). 🌿
Resting Time Too Short
Skipping the 5-minute rest after cooking can cause juices to spill out, leaving your beef dry. If you’re in a rush, tent the pan with foil and let it rest for at least 3 minutes—this still allows juices to redistribute. For best results, rest the beef on a wire rack over a plate to prevent sogginess. Serve immediately after resting for the perfect texture. ⏱️
Nutrition facts
Frequently asked questions
Can I use sirloin instead of chuck roast for this recipe?
Sirloin works but won't give the same tender results. Chuck roast has more marbling and connective tissue that breaks down beautifully during slow cooking, while sirloin is leaner and can turn tough. If you must use sirloin, cut the cubes slightly smaller (1 inch) and reduce oven time by 10 minutes to avoid dryness.
How do I adjust this recipe for a slow cooker?
Transfer the seared beef cubes to a slow cooker with the red wine, broth, and herbs. Cook on low for 6-8 hours or high for 3-4 hours until tender. Finish by melting 2 tbsp butter and adding lemon juice directly in the slow cooker. The texture will be more fork-tender than crispy, but still delicious.
What's the best way to reheat leftover beef cubes?
Reheat in a skillet over medium heat with 1 tbsp olive oil and 2 tbsp beef broth for 3-4 minutes per side until warmed through. For microwave reheating, cover with a damp paper towel and heat in 30-second bursts until internal temp reaches 165°F. Avoid reheating in the oven as it can dry out the cubes.
Can I make this recipe ahead of time?
Cook the beef cubes as directed, then store them in an airtight container with the sauce. Refrigerate for up to 4 days or freeze for 3 months. To reheat, warm in a skillet with a splash of broth or microwave with a damp paper towel. The flavors actually improve overnight as they meld further.
What sides pair best with these beef cubes?
Classic pairings include creamy mashed potatoes, roasted root vegetables, or a fresh green salad. For a heartier meal, try garlic bread or buttery egg noodles. The rich beef flavor also complements tangy salsa or a bright chimichurri sauce. Don't forget a bold red wine to match the dish!