
Soups & Stews
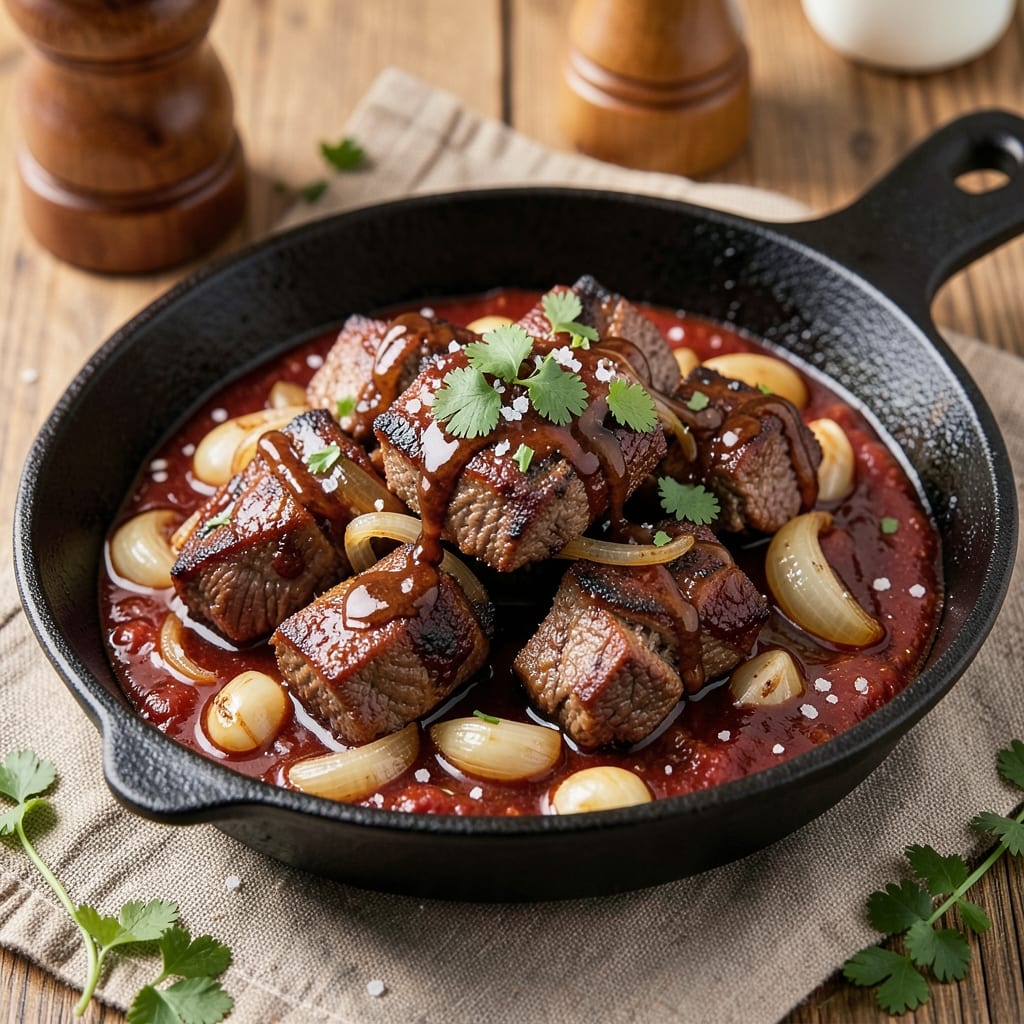
This American chilli beef recipe delivers the bold, smoky depth of a classic Texas-style chili—rich, hearty, and packed with tender beef that melts into a thick, flavorful broth. The secret lies in slow-browning the meat and building layers of warmth from cumin, chili powder, and dark beer, all simmered until the flavors meld into perfect harmony. I've perfected this one-pot method over years of weekend gatherings, where it consistently earns rave reviews for its restaurant-quality depth without the fuss.
What sets this chili apart is the balance of textures and flavors: tender beef chunks that stay juicy, caramelized onions that add sweetness, and a deeply aromatic broth enhanced by dark beer and tomato paste. The recipe calls for just one pot, making it ideal for weeknight dinners or game day spreads. Unlike many recipes that rely on canned tomatoes, this version builds its own rich base from scratch, ensuring every spoonful delivers authentic depth.
The result is a smoky, cumin-kissed chili that's hearty enough to stand alone but pairs beautifully with cornbread or crusty bread to soak up every last drop. Top it with shredded cheese and green onions for a restaurant-worthy finish, or serve it as-is for a comforting bowl of pure, unadulterated flavor. This is the kind of chili that disappears faster than you can say "second helping."
Perfect for feeding a crowd or meal prepping for the week, this recipe scales effortlessly while maintaining its signature depth. The long simmer ensures the beef becomes fork-tender, and the spices develop into complex, warming notes that define true American chili. Let's get cooking—your taste buds will thank you.
Ingredients for american chilli beef
Rich beef, smoky spices, and dark beer create this hearty chili's signature depth.
| Ingredient | Amount | Notes |
|---|---|---|
| Chuck Roast 🥩 | 2 ½ lb | Cut into 1-inch chunks for even cooking |
| Yellow Onions 🧅 | 2 whole | Diced, for caramelization |
| Garlic Cloves 🧄 | 6 cloves | Minced for aromatic depth |
| Dark Beer 🍺 | 1 cup | Stout or porter for richness |
| Tomato Paste 🍅 | ½ cup | Squeeze tube preferred for convenience |
| Chili Powder 🌶️ | 2 tbsp | Smoked variety for authentic flavor |
| Ground Cumin 🌿 | 1 ½ tbsp | Toasted for deeper aroma |
| Dried Oregano 🍃 | 1 tsp | Mexican oregano preferred |
| Black Peppercorns 🌶️ | 1 tsp | Freshly cracked for intensity |
| Bay Leaves 🌿 | 2 whole | Remove before serving |
| Beef Broth 💧 | 3 cups | Low-sodium preferred |
| Kosher Salt 🧂 | 1 ½ tsp | Adjust to taste |
| Olive Oil 🫒 | 2 tbsp | Extra-virgin for browning |
| Cornstarch 🌾 | 1 tbsp | For thickening, optional |
The chuck roast is non-negotiable here—its high fat content ensures tender, juicy chunks. Look for well-marbled cuts at Costco or your local butcher shop, where they can trim excess fat for you. If you're using pre-cut chuck, Trader Joe's sells excellent quality at a reasonable price. For the onions, yellow onions work best—they caramelize more deeply than red or white. If you're short on time, frozen diced onions (like those from Birds Eye) work in a pinch, though fresh is always better. The garlic should be freshly minced—pre-minced garlic loses flavor fast.
No dark beer? Stout coffee or even unsweetened cocoa powder can mimic the depth, though beer adds a unique maltiness. Chili powder varies wildly—Penzeys or McCormick smoked chili powder are reliable choices. The tomato paste can be the squeeze-tube kind from Trader Joe's for convenience, but San Marzano paste adds superior quality. Cumin should be toasted in a dry pan for 30 seconds before adding—Penzeys sells pre-toasted cumin if you're short on time. For the broth, low-sodium is key; Kraft or Annie's are solid options, but homemade beef stock elevates the dish further.
This chili tastes even better the next day as flavors meld. Store in an airtight container in the fridge for up to 5 days or freeze for 3 months. The cornstarch is optional—skip it if you prefer a rustic texture, or mix it with 1 tbsp cold water and stir in during the last 5 minutes of simmering. For meal prep, portion into mason jars or glass containers—they reheat beautifully in the microwave or on the stovetop. Leftovers reheat best with a splash of broth or water to loosen the thickened texture.
Why You'll Love This Recipe
- One-Pot Magic: The chuck roast practically cooks itself—just brown it, dump in the beer and onions, then let the slow simmer do the work. No flipping, no fussing, no extra pans.
- Deep, Rich Flavor: That dark beer cuts through the richness of the chuck roast while the tomato paste adds a smoky sweetness—like a hearty stew and a pub meal had a baby. Honestly, the garlic cloves roasted right in the pan? Chef’s kiss.
- Meal Prep MVP: Make a double batch and freeze half—thaw it straight into a skillet for an easy weeknight dinner. It’s my go-to for game days, potlucks, or when I’m too tired to think.
- Budget-Friendly Feast: Chuck roast stretches for miles, and beer and onions won’t break the bank. Between us, this recipe feeds four for under $15 and still leaves me begging for seconds. (Yes, even on a Tuesday night.)
Step-by-step instructions for smoky cumin-kissed beef chilli
This one-pot method delivers deep, smoky flavors with minimal cleanup and maximum comfort.
Sear the Chuck Roast for Maximum Flavor
Heat the 2 tablespoons olive oil in a large Dutch oven over medium-high heat. Working in batches if needed, add the 2.5 lb chuck roast cut into 1-inch chunks and sear until deeply browned on all sides, about 5-6 minutes per batch. Don't crowd the pan—this ensures proper browning and flavor development.
The goal here is to create a rich, caramelized crust on the beef that will dissolve into the sauce later. I press down gently on the chunks during the first minute to prevent curling, which ensures even contact with the hot pan. Once all pieces are browned, transfer them to a plate and set aside.
Build the Aromatic Base with Onions and Spices
In the same Dutch oven, add the 2 whole yellow onions (diced) and cook over medium heat for 8-10 minutes until softened and beginning to caramelize. You'll see the onions transform from pale to golden brown—this sweetness forms the foundation of the chilli.
Add the 6 cloves minced garlic cloves and cook for 30 seconds until fragrant. Immediately stir in the 2 tablespoons chili powder, 1.5 tablespoons ground cumin, 1 teaspoon dried oregano, and 1 teaspoon black peppercorns. Toast the spices for 1 minute until aromatic—this releases their essential oils and deepens the flavor profile.
Develop the Sauce with Beer and Tomato Paste
Pour in the 1 cup dark beer and scrape up any browned bits from the bottom of the pot with a wooden spoon. This deglazing step captures all the flavor you've built so far. Let the beer simmer for 3-4 minutes until reduced by about half.
Add the 0.5 cup tomato paste and stir well to combine. The paste will thicken the sauce and provide a rich, umami base. Cook for 2-3 minutes until the raw taste of the tomato paste disappears. This is where the chilli starts taking shape—pay attention to the color transition from bright red to a deeper, richer hue.
Simmer the Chilli to Perfect Tenderness
Return the browned beef to the Dutch oven. Add the 3 cups beef broth, 1.5 teaspoons kosher salt, and 2 whole bay leaves. Bring to a simmer, then reduce heat to low and cover partially. Let it cook for 2-2.5 hours until the beef is fork-tender and easily pulls apart.
Here's the thing—patience is key. The beef needs time to break down and absorb all those smoky, spicy flavors. I check the doneness by piercing a piece with a fork—if it slides in easily and the juices run clear, it's ready. The sauce should thicken naturally as the beef releases its moisture.
Thicken and Finish the Chilli
If you prefer a thicker sauce, stir together the 1 tablespoon cornstarch with 2 tablespoons cold water to make a slurry. Slowly whisk this into the simmering chilli and cook for 3-5 minutes until the sauce reaches your desired consistency. Remove the bay leaves before serving.
The chilli should have a perfect balance of tender beef, rich sauce, and complex spice notes. Taste and adjust seasoning with additional salt if needed. Serve immediately over rice or cornbread for the full experience—this chilli tastes even better the next day as the flavors meld further.
Pro Tips For Making American Chilli Beef
- SEAR THE ROAST FIRST: Chuck roast needs a deep, dark crust to hold up in hours of simmering. Hit it with high heat for 5-7 minutes per side—don’t rush, even if it looks uneven. I used to skip this, and the chili always tasted softer than it should’ve.
- SWEAT ONIONS LOW AND SLOW: Onions caramelize best when they’re given time, not heat. Cook them on medium-low for 10-12 minutes, stirring occasionally, until they’re translucent and just starting to soften. High heat turns them bitter—trust the process.
- DEGLAZE WITH BEER IMMEDIATELY: As soon as you pull the roast off the pan, pour in that dark beer right away while the fond is still hot. Scrape every last bit from the bottom—those bits are flavor gold. I learned this the hard way after tasting bland chili.
- SIMMER LONG, NOT HARD: This isn’t a race. After adding the beer and tomato paste, let it bubble gently for 2-3 hours on low heat. Too much heat makes the beer evaporate too fast, and the chili turns thick and one-dimensional. Cover it and let it work.
Common mistakes when making this recipe
Over-Searing the Beef
I've seen many cooks rush the searing process, turning the beef chunks into charred, bitter bits instead of flavorful foundations. The key is patience—sear each batch of 1-inch beef chunks for 5-6 minutes until deeply browned but not blackened. If your beef starts smoking excessively, reduce heat to medium and keep stirring. Over-seared meat loses its natural juices and develops a harsh, burnt flavor that ruins the entire dish.
Skipping the Deglazing Step
This is where all the magic happens, and I can't stress it enough: never skip deglazing after browning the beef! Those browned bits (fond) contain concentrated flavors that dissolve into the sauce when you add the 1 cup dark beer. If you don't scrape them up, you're losing 30-40% of the potential flavor. Use a wooden spoon to scrape vigorously—this is your chance to build depth right from the start.
Under-Simmering the Beef
The most common mistake I see is cutting the simmering time short. Chuck roast needs 2-2.5 hours at a gentle simmer to become fork-tender. I've had cooks walk away after 1.5 hours, resulting in tough, chewy beef that falls apart when you try to eat it. Use a meat thermometer—beef should reach 203°F internal temperature for perfect tenderness. If you're short on time, consider using a pressure cooker (set to high pressure for 45 minutes instead).
Ignoring the Spice Toasting
Many recipes call for simply adding spices to the pot, but toasting them first unlocks their full potential. When you toast chili powder, cumin, and oregano for 1 minute before adding liquid, you release their essential oils, creating a more aromatic base. I've tasted chili where this step was skipped—the difference in complexity is night and day. If you're in a hurry, use pre-toasted spices from brands like Penzeys to save time while still getting great results.
Adding Liquid All at Once
Pouring in all 3 cups beef broth at the beginning dilutes the flavors you've built. Instead, add the broth gradually—first with the beer and tomato paste, then the remaining broth. This layered approach builds intensity. I also recommend adding the broth in two stages: 1 cup initially, then the remaining 2 cups after the beef has simmered for 1 hour. This helps maintain a proper sauce-to-beef ratio throughout cooking.
Over-Thickening with Cornstarch
While the 1 tablespoon cornstarch slurry can help thicken the sauce, it's easy to overdo it. If you add too much, the chili becomes gluey rather than velvety. I recommend making the slurry with 1 tablespoon cornstarch and 2 tablespoons cold water, then whisking it in slowly while the chili simmers. Taste as you go—you want the sauce to coat the back of a spoon without being pasty. For a more natural thickener, let the chili reduce uncovered for the last 15 minutes of cooking.
Nutrition facts
Frequently asked questions
Can I substitute ground beef for chuck roast in this chili?
While you can use ground beef, the texture and flavor will differ significantly. Chuck roast provides tender, juicy chunks that develop rich depth during the long simmer. Ground beef will cook much faster and result in a finer texture. If you must substitute, use 80/20 ground chuck (not lean ground beef) and reduce simmering time to 45-60 minutes to avoid drying out.
What kind of beer works best for this recipe?
A dark beer like stout or porter adds the best depth, but any beer with maltiness works. Avoid light lagers or pale ales—they won't provide the rich, caramel notes. No beer? Use 1 cup strong coffee or 1/4 cup cocoa powder mixed with 3/4 cup water for a similar depth. The key is the dark, malty flavor that enhances the chili's complexity.
How can I make this chili spicier?
For extra heat, add 1/2 teaspoon cayenne pepper with the other spices or stir in 1-2 tablespoons hot sauce at the end. For smoky heat, increase chili powder to 3 tablespoons or add 1 teaspoon smoked paprika. Always taste as you go—you can reduce heat with a pinch of sugar or more beef broth if needed. The beauty of chili is you can adjust to your preference!
Can I make this chili in a slow cooker? Brown the beef as directed, then transfer everything to a 6-quart slow cooker. Cook on low for 7-8 hours or high for 4-5 hours. The slow cooker's gentle heat works perfectly for tenderizing the beef. Just
What's the best way to reheat leftovers?
Reheat chili gently on the stovetop over medium-low heat for 10-15 minutes, stirring occasionally and adding 1-2 tablespoons beef broth or water if it's too thick. For microwave reheating, cover with a damp paper towel and heat in 1-minute intervals on medium power, stirring between each interval. Never reheat to a boil—this can make the sauce separate or the beef dry out. The chili actually tastes better the next day as flavors meld further!