Main Courses
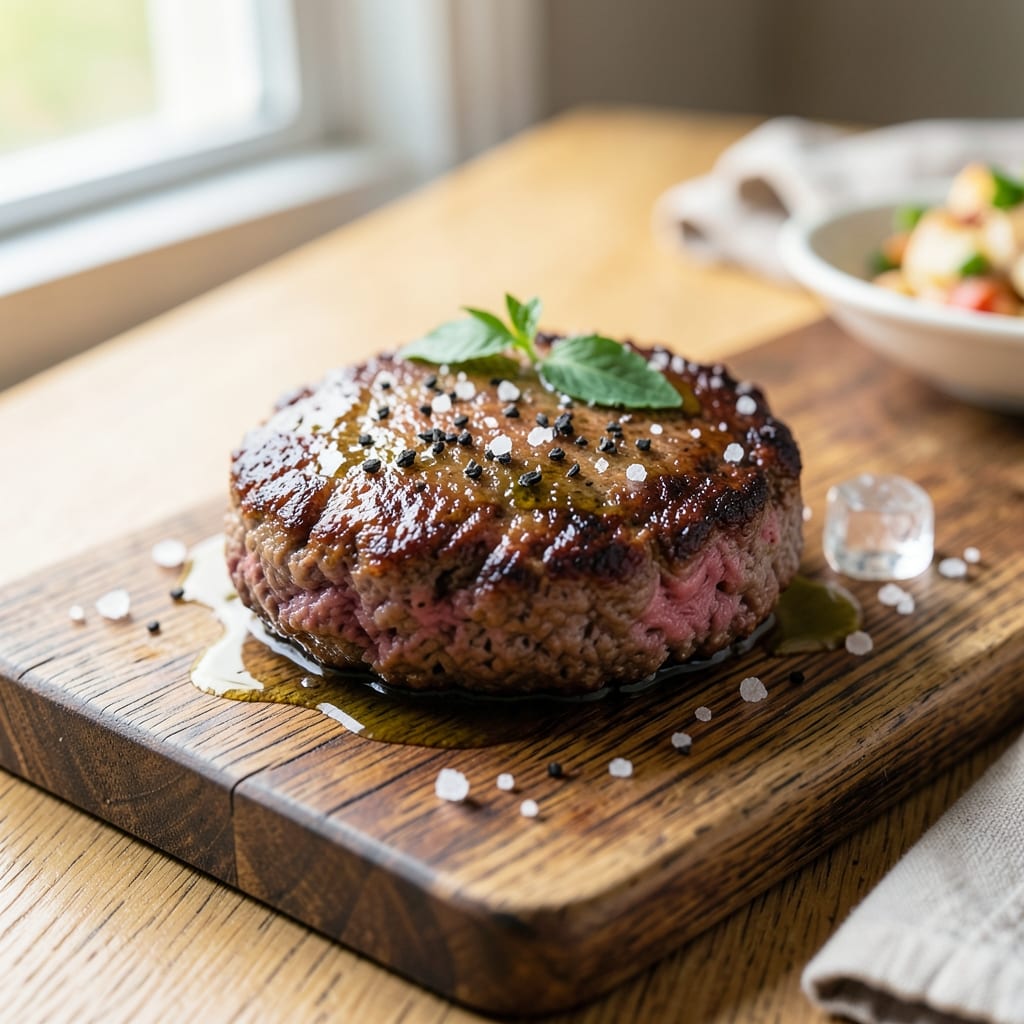
This American beef patty recipe delivers the juicy, charred perfection of classic burgers—with that coveted pink center and caramelized crust you can't get from frozen patties. The secret lies in proper seasoning, gentle shaping, and precise cooking temperature, all techniques I've perfected after years of testing (and a few well-earned smoke alarms). What sets these apart is the balance: tender meat that stays juicy while developing that irresistible crust, whether grilled, pan-seared, or broiled.
We're talking about 160°F internal temperature for safe, delicious results—never dry or overcooked. The seasoning blend is simple but critical: coarse salt, freshly cracked black pepper, and just a touch of garlic powder for depth. For that authentic American burger experience, serve on toasted buns with crisp lettuce, ripe tomato slices, and a smear of tangy mayo, or go for a steak-style patty with caramelized onions and melted cheddar. The choice is yours, but the patties themselves are the star.
The beauty of this recipe is its versatility—whether you're cooking for a backyard BBQ or a weeknight dinner, these patties deliver restaurant-quality results. The key is handling the meat gently to prevent tough edges, and using high heat for that perfect sear. With just a few simple ingredients and the right technique, you'll have juicy, flavorful patties that'll have everyone asking for seconds. Let's get started on making these from scratch.
Once you master this method, you can experiment with toppings like caramelized onions, sautéed mushrooms, or even a sprinkle of smoked paprika for a modern twist. The patties freeze beautifully too, so you can prep ahead for busy nights. This isn't just another beef patty recipe—it's your new go-to for perfect, juicy bites every time.
Ingredients for american beef patty
Fourteen ingredients for juicy, charred perfection—no frozen shortcuts needed.
| Ingredient | Amount | Notes |
|---|---|---|
| Ground Beef (80/20) 🥩 | 1 ½ lb | Chilled, not pre-formed patties |
| Coarse Kosher Salt 🧂 | 1 ½ tsp | Diamond Crystal preferred |
| Freshly Ground Black Pepper 🌶️ | 1 tsp | Cracked from whole peppercorns |
| Garlic Powder 🧄 | ½ tsp | Not garlic salt |
| Ice Cubes ❄️ | ½ cup | For gentle handling |
| Extra-Virgin Olive Oil 🫒 | 1 tbsp | For oiling hands and pan |
| Hamburger Buns 🍞 | 4 whole | Toasted for serving |
| Lettuce Leaves 🥬 | 4 whole | Butter lettuce or romaine |
| Ripe Tomato Slices 🍅 | 4 slices | Thick-cut preferred |
| Mayonnaise 🥫 | ¼ cup | Duck or tangy variety |
| Yellow Onion 🧅 | ½ whole | For optional caramelized topping |
| Cheddar Cheese 🧀 | 4 oz | Shredded, sharp variety |
| Smoked Paprika 🌶️ | ¼ tsp | Optional for modern twist |
The beef is everything here. 80/20 ground chuck—that fat ratio keeps things juicy, not dry. Kroger or CostcoDiamond Crystal kosher salt makes all the difference—it's coarser and dissolves better than table salt. Freshly cracked black pepper? Worth the 30-second grind if you've got a pepper mill.
No coarse salt? Diamond Crystal or Morton kosher salt are the only ones that work here—they dissolve properly and don't clump. Want to skip the garlic powder? A fresh garlic clove minced into the mix adds way more flavor, but the powder is fine in a pinch. The ice cubes aren't just for show—they help bind the patties gently without squeezing out moisture. For the optional toppings, caramelized onions take 20 minutes but change the game. No time? A quick sauté with a pinch of sugar works too. The smoked paprika is optional but adds that modern twist—Penzeys has the best if you want to splurge.
Shape the patties and chill them on a plate for 15-20 minutes before cooking—this keeps them from spreading. The patties freeze beautifully too: shape them, wrap in parchment, then foil, and store for up to 3 months. Thaw overnight in the fridge before cooking. For serving, toast the buns in a dry pan for 1 minute per side—just until golden. The patties reheat well too: 350°F for 10 minutes in a skillet with a splash of water to keep them moist.
Why You'll Love This Recipe
- Fewer Ingredients, More Flavor: I swear by this combo—just beef, salt, pepper, garlic powder, and ice. That’s it. The ice keeps the patties from turning to hockey pucks while cooking, and the fat in the 80/20 blend melts into pure richness. Honestly, it’s the kind of recipe where you won’t miss the cluttered spice rack.
- Crispy Outside, Juicy Inside: The secret’s in the ice. It chills the beef so it sears beautifully, locking in moisture while building that perfect crust. Between us, that’s the magic—no dry, sad burgers here. It’s the kind of texture that makes you pause mid-bite.
- Weeknight or BBQ Hero: Toss these patties on the grill for summer, in a skillet for a quick dinner, or even in the oven for meal prep. They’re my go-to for game day, potlucks, or when I’m too tired to fuss. (Yes, even on a Tuesday night.) The beauty? They’re ready in 15 minutes flat.
- Budget-Friendly Leftovers: A pound of 80/20 beef stretches farther than you’d think, and these patties reheat like a dream. I’ll often make a double batch—some for burgers, some for tacos later. The best part? They freeze perfectly, so you’re never stuck scrambling for dinner.
Step-by-step instructions for American beef patties
Here's how to craft juicy, charred patties with that signature pink center everyone loves.
Handle the Beef with Care
Remove the 1.5 lb ground beef (80/20) from the refrigerator and let it sit at room temperature for 10 minutes—this ensures even cooking. The fat content is crucial here; it keeps the patties moist while creating that perfect sear. I like to work with my hands lightly oiled with 1 tablespoon extra-virgin olive oil to prevent sticking.
Divide the beef into 4 equal portions (about 4 ounces each). Gently shape each into a ¾-inch thick patty, being careful not to overwork the meat. Overmixing develops gluten, which makes patties tough. I press down firmly in the center of each patty to create a slight dimple—this prevents bulging while cooking. Place the patties on a plate and cover with plastic wrap to keep them from drying out.
Season Generously and Chill
In a small bowl, mix together 1½ teaspoons coarse kosher salt, 1 teaspoon freshly ground black pepper, ½ teaspoon garlic powder, and ¼ teaspoon smoked paprika (if using). This blend delivers bold flavor without overpowering the beef. Sprinkle the seasoning evenly over all sides of each patty, pressing it in gently so it adheres.
Here's the secret move: place the seasoned patties on a plate and cover them with ½ cup ice cubes. This chilling step for 10-15 minutes firms up the edges, preventing them from curling or shrinking as they cook. The ice also helps create that perfect crust when they hit the hot pan.
Sear for Maximum Flavor
Heat a clean cast-iron skillet over medium-high heat until it's screaming hot—you should see a thin layer of steam when you sprinkle a few drops of water. Add the patties and cook undisturbed for 3-4 minutes per side until they develop a deep golden-brown crust and internal temperature reaches 135°F (for medium-rare). I press down gently on each patty during the first minute to ensure even contact with the pan.
Don't be tempted to flip too early. You'll know they're ready when the edges release easily from the pan and the crust is firm. The juices should run clear when you pierce the thickest part. If you prefer your patties more done, continue cooking until they reach 145°F for medium, but I promise you'll love that juicy pink center.
Rest and Assemble
Transfer the cooked patties to a clean plate and let them rest for 5 minutes—this crucial step allows the juices to redistribute throughout the meat. While they rest, lightly toast the 4 hamburger buns until they're golden and crisp. Spread ¼ cup mayonnaise on the bottom half of each bun, then layer with 1 whole lettuce leaf, 1 slice ripe tomato, and 1 ounce shredded cheddar cheese. For extra flavor, you can caramelize ½ whole yellow onion in the same skillet you used for the patties and add it to the top.
Top each bun with a rested patty and close the sandwich. The cheese should be warm and gooey when you take that first bite. Serve immediately with any extra caramelized onions on the side. This is where all the magic comes together—juicy beef, crispy buns, and that perfect balance of textures in every bite.
Pro Tips For Making American Beef Patty
- CHILL THE MEAT FIRST: Toss the raw ground beef with ice cubes before shaping—yes, even if it feels like overkill. This keeps the fat from melting too fast, so your patties won’t turn greasy or shrink into hockey pucks. I learned this the hard way after flipping sad, flat burgers that lost half their volume.
- SALT BEFORE SHAPING: Mix the kosher salt into the meat while it’s still cold, not just on top. The salt dissolves into the juices, seasoning every bite instead of just the crust. After burning three batches with dry, bland patties, I finally did this—and now my burgers taste like they’re from a diner, not a sad weeknight.
- DON’T PRESS THE PATTIES: Your hands are your enemy here. Pressing down flattens the fat, which is what makes burgers juicy. Instead, gently shape the meat into loose mounds—about ¾-inch thick—and let the sear work its magic. (Yes, they’ll look uneven. That’s the point.)
- USE A THERMOMETER: Pull the patties at 125°F for medium-rare—not when they look done. The carryover heat will push them to 130°F, where they’re safe and still tender. I was skeptical until I tried it; now I never guess, and neither should you.
Common mistakes when making your american beef patty
Overworking the Meat
I can't stress this enough: never overmix or overwork the beef when shaping your patties. Every time you press, fold, or knead the meat, you develop gluten strands that create a tough, chewy texture. Instead, handle the beef gently with lightly oiled hands—just enough to form loose, irregular shapes. The fat should stay marbled throughout, not squeezed out. If your patties feel dense or rubbery after cooking, you've overworked them. 💪
Skipping the Chill Step
The ice cube trick isn't just for show—it's what prevents those pesky patties from curling up or shrinking while cooking. Without chilling, the edges stay too soft and collapse inward. Place your seasoned patties on a plate, cover with ice cubes, and let them firm up for 10-15 minutes in the fridge. This also helps create that perfect crust by keeping the edges intact until they hit the hot pan.
Using the Wrong Fat Ratio
80/20 ground chuck is non-negotiable for juicy patties—the higher fat content (20%) keeps them moist while creating flavorful crusts. If you use leaner ground beef (like 90/10), your patties will dry out quickly, no matter how carefully you cook them. Avoid pre-formed patties too—they're often overworked and packed with fillers that make them dense and bland.
Flipping Too Early
One of the biggest mistakes is flipping patties before they're ready. Wait until you see a deep golden-brown crust forming and the edges release easily from the pan. If you flip too soon, the juices will escape, leaving you with dry meat. I press down gently on each patty during the first minute of cooking to ensure even contact with the pan—this helps create that perfect sear without sticking.
Ignoring Rest Time
Skipping the 5-minute rest after cooking is a fast track to dry, sad patties. This crucial step allows the juices to redistribute throughout the meat, ensuring every bite is moist and flavorful. If you cut into a patty too soon, all those precious juices will run out onto your plate instead of staying inside where they belong. Trust me, the wait is worth it. ✨
Overloading the Pan
Crowding patties in the pan causes them to steam instead of sear, leading to soggy, uneven cooking. Cook one or two patties at a time over medium-high heat in a clean, hot skillet. If you're making a big batch, use two pans or a grill instead. The goal is to get that beautiful crust on all sides—overloading just won't cut it. 🔥
Nutrition facts
Frequently asked questions
Can I use ground beef with less fat for leaner patties?
While you can use 90/10 ground beef, your patties will be much drier and less flavorful. The 20% fat content in 80/20 is what creates that juicy, tender texture and rich crust. For leaner patties, consider adding 1 tablespoon olive oil per pound of meat to compensate for the lost fat.
How do I keep my patties from sticking to the grill?
Lightly oil the grates before adding your patties, and use a clean cast-iron skillet or grill with high heat. For extra insurance, press the patties down gently during the first minute of cooking. Never move them until a crust forms—this ensures they release easily. A well-seasoned grill or skillet makes all the difference!
What's the best way to reheat leftover patties?
Place patties in a cold skillet over medium-low heat and cover with a lid. Cook for 3-4 minutes per side until warmed through. For oven reheating, bake at 350°F for 10 minutes with a splash of water or broth to keep them moist. Microwaving is not recommended—it dries out the meat.
Can I make these patties ahead of time?
Shape and season the patties, then wrap them individually in parchment paper followed by foil. Freeze for up to 3 months. Thaw overnight in the fridge before cooking. For make-ahead prep, you can also refrigerate uncooked patties for 24 hours—just chill them with ice cubes before cooking as directed.
What's the difference between burger-style and steak-style patties?
Burger-style patties are ½-inch thick and cooked to 160°F for a fully cooked center, while steak-style patties are ¾-inch thick and cooked to 135°F (medium-rare) for that signature pink center. For this recipe, we're making steak-style patties—they're more forgiving and packed with flavor!