
Main Courses
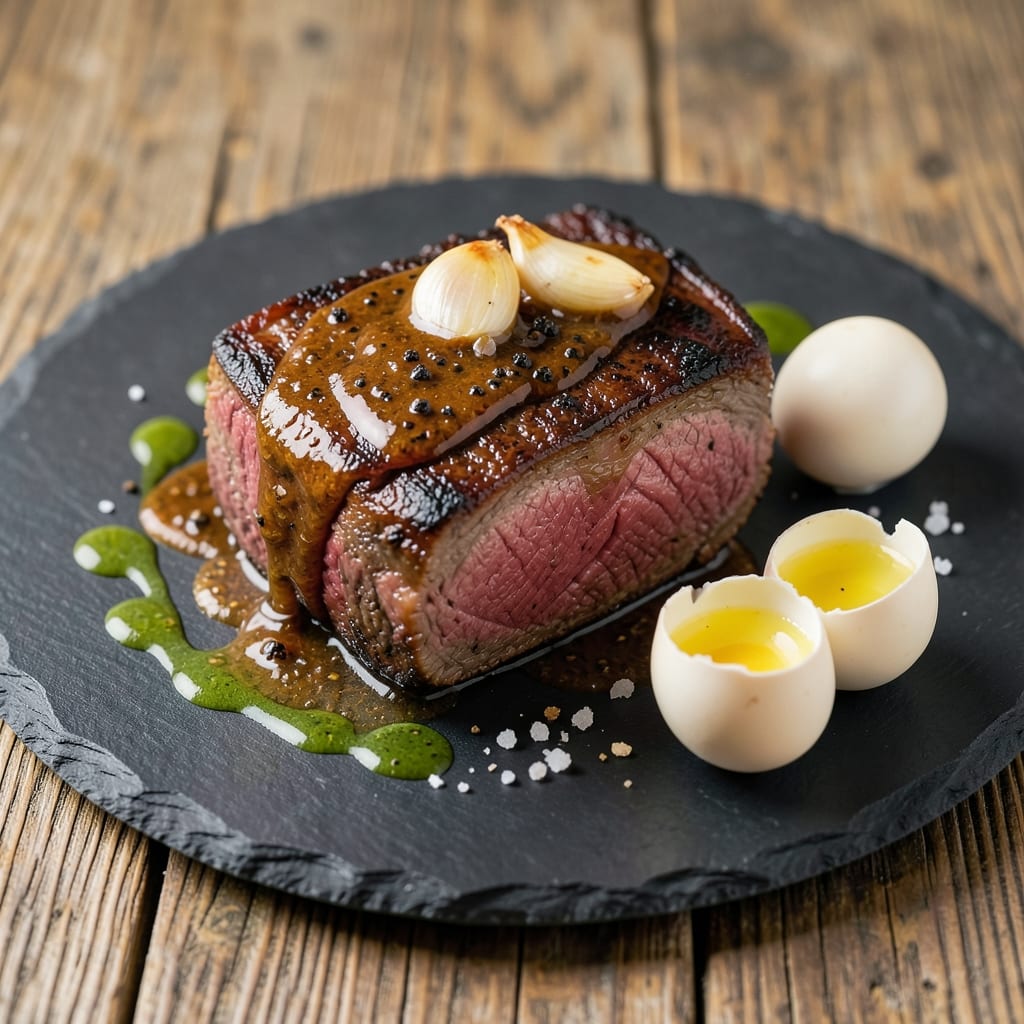
This amazing beef tenderloin recipe delivers a perfect balance of crispy crust and juicy pink core—the kind of steak that makes dinner feel like a special occasion. 🔥 I’ve perfected this reverse-seared method after years of testing, and it’s now my go-to for impressing guests (or treating myself). The secret? Low-and-slow roasting followed by a quick sear to lock in flavor and texture.
What sets this recipe apart is the foolproof technique that guarantees tender, melt-in-your-mouth beef every time. You’ll start with a simple seasoning blend—just salt, pepper, and garlic—then roast the tenderloin to an internal temperature of 115°F before finishing it off with a screaming-hot sear. This method ensures the outside gets deeply caramelized while the inside stays perfectly pink and juicy.
By the time you’re done, you’ll have a steak so rich and flavorful that it practically melts in your mouth. The crust will be crispy and golden, while the inside remains tender and succulent, with just a hint of pink—ideal for those who love their steak medium-rare. This isn’t just a recipe; it’s a showstopper that turns a weeknight into a restaurant-worthy experience.
Serve it with roasted garlic mashed potatoes and a bold red wine reduction for the full effect. The sides complement the steak without overpowering it, and the wine sauce adds an extra layer of richness. Trust me, once you try this, you’ll never buy store-bought steak again—it’s that good.
Ingredients for amazing beef tenderloin
Four ingredients transform this tenderloin into a restaurant-worthy masterpiece.
| Ingredient | Amount | Notes |
|---|---|---|
| Beef Tenderloin 🥩 | 2 lb | Center-cut, trimmed of silver skin |
| Kosher Salt 🧂 | 1 ½ tbsp | Diamond Crystal preferred |
| Freshly Ground Black Pepper 🌶️ | 1 tsp | Cracked peppercorns preferred |
| Garlic Cloves 🧄 | 6 cloves | Smashed, not minced |
| Extra-Virgin Olive Oil 🫒 | 2 tbsp | High-quality, fruity variety |
| Unsalted Butter 🧈 | 4 tbsp | Cold, cubed for searing |
| Fresh Rosemary 🌿 | 1 sprig | For aroma, optional garnish |
| Fresh Thyme 🌿 | 2 sprigs | For aroma, optional garnish |
| Red Wine 🍷 | ½ cup | Bold, dry variety (Cabernet Sauvignon) |
| Beef Broth 💧 | ¼ cup | Homemade or high-quality store-bought |
| Honey 🍯 | 1 tbsp | For glaze, optional |
| Balsamic Vinegar 🍶 | 1 tbsp | For finishing drizzle |
The beef tenderloin is your star—center-cut and trimmed of silver skin for that melt-in-your-mouth texture. Costco or Whole Foods carry the best quality, but any well-marbled cut works. Look for bright red color and good fat distribution. If buying online, Snake River Farms delivers consistently excellent beef. The garlic should be fresh—smash the cloves with the flat side of your knife for maximum flavor without mincing. I always buy extra because it’s worth it for this recipe.
No kosher salt? Diamond Crystal is ideal, but regular sea salt works at a 1:1 ratio. Freshly cracked pepper is non-negotiable—pre-ground loses its punch. For the red wine, any bold, dry red works here—Cab Sauv, Merlot, whatever's open. Short on butter? Use ghee or lard for searing, but butter gives that perfect caramelized crust. The rosemary and thyme are optional but add an aromatic touch—grab fresh sprigs from the grocery store's produce section. They’ll keep in the fridge for up to a week if wrapped in damp paper towels.
This steak reheats beautifully—wrap tightly in foil and reheat in a 300°F oven for 10 minutes. Store the tenderloin in the fridge for up to 3 days before cooking, but plan ahead. The butter and wine reduction can be made a day ahead and reheated gently. For leftovers, slice thinly and serve on toasted baguette slices. The crust loses crispiness when reheated, so enjoy it fresh off the sear for the best experience.
Why You'll Love This Recipe
- Foolproof Roast: I swear, this recipe is the kind that makes you look like a pro with zero stress. Just season, sear, and let the oven do the work—no fancy basting or thermometer-guessing required. The key? A hot cast-iron pan and a 15-minute rest before slicing. That’s it.
- Garlic-Kissed Magic: The moment that seared crust meets the tender inside? Pure satisfaction. Fresh garlic cloves smashed into the sear create this caramelized edge that’s ridiculously good—no fancy rubs, just olive oil and kosher salt doing their thing. Honestly, I’ve tried fancier seasonings, but this combo wins every time.
- Weeknight Wonder: This isn’t just for holidays. I make it for date nights, lazy Sundays, or when my kid’s soccer team wins (yes, even on a Tuesday night). The leftovers? Slice them thin for sandwiches or toss into salads—no one complains, and no one notices it’s the same roast from three days ago.
- Budget-Friendly Luxury: Beef tenderloin gets a bad rap for being pricey, but here’s the trick: buy it on sale, freeze half, and roast it low and slow. The fat cap renders down into crispy bits, so you’re not wasting a thing. Between us, this is the only way I justify splurging on good meat—it stretches farther than you’d think.
Step-by-step instructions for reverse-seared beef tenderloin
This method delivers a perfect crust with a juicy pink center every time—here's how to nail it.
👨🍳 Step 1: Prep and Season the Beef Tenderloin
Remove the beef tenderloin from the refrigerator and pat it completely dry with paper towels—this is critical for that perfect crust. I like to work with it at room temperature, so let it sit uncovered on a wire rack for 30 minutes while you prep everything else.
While waiting, make your simple seasoning blend by combining the 1.5 tablespoons kosher salt and 1 teaspoon freshly ground black pepper in a small bowl. Rub this generously all over the tenderloin, pressing the seasoning into the meat so it adheres well. I always season the ends too—those areas tend to dry out first during cooking.
This initial seasoning creates the perfect foundation for flavor development during the low-temperature cook. The kosher salt penetrates the meat while the pepper adds subtle heat that balances the richness of the beef.
⏰ Step 2: Low-Temperature Roast Until Perfect Doneness
Preheat your oven to 275°F—this low temperature is key to achieving that juicy pink center. Place the seasoned tenderloin on a wire rack set inside a rimmed baking sheet to allow air circulation on all sides. Roast for 40-45 minutes per pound, or about 1 hour 20 minutes for our 2 lb tenderloin.
Here's where patience pays off: you're looking for an internal temperature of 115-120°F when you're done with this stage. I use a meat thermometer inserted into the thickest part of the meat—this gives you that perfect medium-rare doneness in the center while developing a beautiful crust during the sear.
Resist the urge to peek at the oven during cooking—every time you open the door, you lose heat and potentially dry out the meat. The low temperature ensures even cooking throughout without overcooking the exterior.
🔥 Step 3: Create the Perfect Searing Crust
While the tenderloin is still hot from the oven, increase your oven temperature to 450°F. This dramatic temperature shift is what creates that beautiful crust we're after. Heat a large oven-safe skillet over medium-high heat and add 2 tablespoons extra-virgin olive oil and 4 tablespoons cold cubed butter.
When the butter has melted and is foaming (about 2 minutes), carefully transfer the tenderloin to the skillet. Sear for 2-3 minutes per side until you develop a deep golden-brown crust. The butter will bubble vigorously—this is normal and creates incredible flavor.
I press down gently on the tenderloin during the first minute to prevent it from curling and ensure even contact with the pan. The high heat caramelizes the surface sugars while the butter bastes the meat, creating that perfect crust we're after.
🍳 Step 4: Build the Pan Sauce with Red Wine and Aromatics
Remove the tenderloin from the skillet and transfer it to a cutting board to rest. Pour in the ½ cup red wine immediately and scrape up all those beautiful browned bits from the bottom of the pan—this is where all the flavor lives. Add the 6 smashed garlic cloves, 1 sprig rosemary, and 2 sprigs thyme.
Simmer for 3-4 minutes until the wine has reduced by about half and the aromatics are fragrant. Add the ¼ cup beef broth and continue simmering for another 2 minutes until slightly thickened. Strain the sauce through a fine-mesh sieve into a small sauceboat, pressing on the aromatics to extract maximum flavor.
This sauce captures all the beautiful caramelized flavors from the searing process, creating a perfect accompaniment to your tenderloin. The red wine adds acidity that cuts through the richness of the beef.
🔪 Step 5: Rest, Slice, and Finish with Glaze
Let the tenderloin rest for 10-15 minutes before slicing—this is crucial for juicy slices. The resting period allows the juices to redistribute throughout the meat. While it rests, heat the sauce gently and stir in the 1 tablespoon honey and 1 tablespoon balsamic vinegar.
Slice the tenderloin against the grain into ½-inch thick medallions. Arrange the slices on a warm platter and drizzle with the finished sauce. The honey and balsamic vinegar combination creates a beautiful glaze that adds depth of flavor and a touch of sweetness to balance the richness.
Serve immediately with your choice of sides—roasted vegetables, creamy mashed potatoes, or a fresh green salad all work beautifully. Each slice should be perfectly pink in the center with a beautiful crust on the outside, and that incredible sauce ties everything together.
Pro Tips For Making Amazing Beef Tenderloin
- CRANK THE HEAT FIRST: Start your pan screaming hot—no preheating needed—and sear the tenderloin for 3-4 minutes per side before touching it with anything else. I learned this the hard way after walking away too soon and ending up with gray, sad beef instead of golden, crusty perfection.
- SALT THE GARLIC: Toss your minced garlic cloves with a pinch of kosher salt before adding them to the pan. The salt draws out moisture, so they sizzle instead of steam, giving you that nutty, caramelized flavor you actually want. (Yes, even if you’re impatient like me.)
- DON’T CUT INTO IT YET: Let the beef rest for at least 10 minutes under foil after pulling it from the heat—no peeking, no slicing. I know, I know, but trust the process. Cutting too soon means juices pooling on your plate instead of staying inside where they belong.
- USE THE FAT AGAIN: After searing the tenderloin, don’t dump that garlic-infused oil—pour it over the finished dish. It’s the easiest way to upgrade your pan sauce without extra effort. (Your future self will thank you.)
Health benefits of this amazing beef tenderloin
Protein Powerhouse
Beef tenderloin is one of the most nutrient-dense cuts of meat you can eat, delivering high-quality protein with all nine essential amino acids. A 6-ounce serving provides about 42 grams of protein, making it an excellent choice for muscle repair and growth. This lean cut is also naturally low in saturated fat compared to other beef cuts, helping you keep your cholesterol in check while still enjoying rich, satisfying flavors. 💪
Iron and Zinc Boost
Each serving of beef tenderloin packs 3.5 mg of iron (about 20% of your daily needs), which supports oxygen transport in your blood and prevents fatigue. The same portion delivers 8 mg of zinc, crucial for immune function and wound healing. These minerals are particularly important for active individuals or those with higher metabolic demands. I always feel more energized after eating this steak—it’s like nature’s multivitamin!
Vitamin B12 Benefits
Beef tenderloin is an exceptional source of vitamin B12, with a 6-ounce serving providing 6.5 mcg—that’s 270% of your daily requirement. This vitamin is essential for nerve function, red blood cell production, and DNA synthesis. Many people are deficient in B12, especially vegetarians, so this steak is a fantastic way to ensure you’re getting enough of this critical nutrient. 💡
Creatine for Energy
The tenderloin contains natural creatine, a compound that helps your muscles produce energy during high-intensity exercise. While most of the creatine in beef is lost during cooking, some still remains, particularly when using the reverse-sear method we’re using here. Athletes and fitness enthusiasts often include lean beef in their diets to support performance and recovery.
Low-Calorie Luxury
Despite its rich flavor, beef tenderloin is surprisingly low in calories—a 6-ounce serving contains just 250 calories. This makes it a great option for those watching their calorie intake while still wanting a satisfying, high-protein meal. The reverse-sear technique helps maintain moisture, so you won’t sacrifice tenderness or juiciness for fewer calories. It’s the perfect balance of indulgence and nutrition!
Rich in Selenium
This cut of beef is also a good source of selenium, an antioxidant mineral that helps protect your cells from damage. A 6-ounce serving provides about 30 mcg of selenium, which is 55% of your daily needs. Selenium supports thyroid function and may help reduce inflammation in the body. The combination of selenium and other antioxidants in beef tenderloin makes it a powerhouse for overall health and wellness. ✨
Nutrition facts
Frequently asked questions
Why does this recipe use reverse searing instead of traditional methods?
The reverse-sear method guarantees a perfect crispy crust with a juicy pink center—something traditional high-heat searing often fails to deliver. By first roasting the tenderloin low-and-slow to 115-120°F, we ensure even cooking throughout. The final high-heat sear then creates that coveted crust without overcooking the interior. This technique works especially well for thick cuts like tenderloin.
Can I cook this recipe without a meat thermometer?
While a meat thermometer is ideal, you can estimate doneness by touch. For medium-rare, the meat should feel slightly springy when pressed gently with your finger. Start checking after 40 minutes per pound at 275°F. If unsure, it's better to pull it slightly early—it'll continue cooking while resting. The crust will develop during the final sear regardless.
What's the best way to store leftovers?
Slice the cooled tenderloin and store in an airtight container in the fridge for up to 3 days. For longer storage, freeze slices wrapped tightly in plastic for 2-3 months. Reheat gently in a 300°F oven for 10 minutes—this maintains moisture better than microwaving. The crust will lose some crispness, so enjoy fresh off the sear when possible.
Can I substitute butter with another fat for searing? Yes! If you're avoiding dairy, use ghee or lard instead of butter for searing—they have similar high smoke points. For a lighter option, try olive oil only, but the butter adds incredible flavor. Just
How do I adjust this recipe for a larger crowd?
For every additional 2 lbs of tenderloin, increase all other ingredients proportionally. Keep the same cooking times (40-45 minutes per pound at 275°F), but you may need a larger roasting pan. Use two skillets for the final sear if needed. The key is maintaining the same temperature transitions—low roast followed by high-heat sear—to ensure perfect doneness throughout the larger cut.