
Main Courses
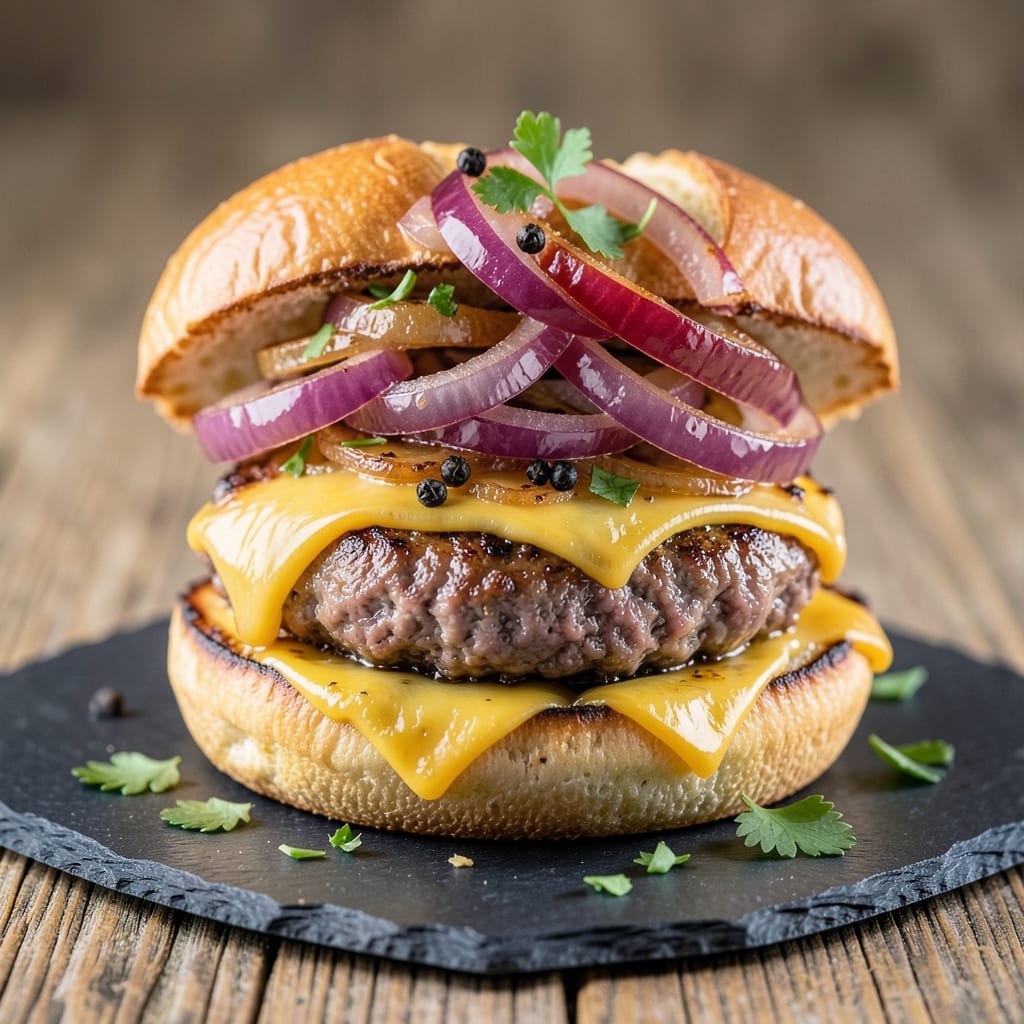
This 80/20 ground beef burger recipe delivers the juiciest, most flavorful patties you'll ever make—thanks to a simple smash technique that locks in moisture and creates a perfect sear. The higher fat content (20% fat) ensures rich flavor and tender texture, while the smash method eliminates the need for flipping and guarantees a consistent, crispy crust every time. I've perfected this approach after years of testing, and it consistently produces burgers that rival restaurant quality.
The secret lies in handling the patties with care: forming them gently, making a thumb impression to prevent bulging, and cooking them just until they reach 160°F internally. This method preserves juiciness while developing a flavorful crust, and the 5-minute rest before serving ensures those juices stay put. No fancy equipment is needed—just a cast-iron skillet or grill and a few basic ingredients.
What you'll end up with is a burger that's juicy to the core, with a caramelized exterior and a tender, beefy interior. The smash technique also creates a thicker edge that stays crispy, even when you add toppings. This is the kind of burger that makes people ask for the recipe—and the kind that holds together perfectly, even with messy toppings like caramelized onions or melted cheese.
Whether you're grilling outdoors or cooking on the stovetop, this approach works every time. Serve on a toasted bun with your favorite toppings, and you'll have a burger that's worth every bite. Let's get started on making the perfect patty.
Ingredients for 80/20 ground beef burger
The perfect blend of beef and seasonings transforms into restaurant-quality burgers with this smash technique.
| Ingredient | Amount | Notes |
|---|---|---|
| 80/20 Ground Beef 🥩 | 1 ¼ lb | Chilled for better handling |
| Diamond Crystal Kosher Salt 🧂 | 1 ½ tsp | Fine grain preferred |
| Freshly Ground Black Pepper 🌶️ | 1 tsp | Cracked peppercorns preferred |
| Garlic Cloves 🧄 | 2 cloves | Minced for seasoning |
| Yellow Onion 🧅 | ½ whole | Finely diced for topping |
| Fresh Parsley 🌿 | ¼ cup | Chopped for garnish |
| Butter 🧈 | 2 tbsp | Unsalted, for smash technique |
| Sesame Seed Buns 🍞 | 4 whole | Toasted for serving |
| American Cheese Slices 🧀 | 4 slices | Optional for melting |
| Dill Pickle Slices 🥒 | ¼ cup | Thinly sliced for topping |
| Vegetable Oil 🫒 | 2 tbsp | High smoke point for cooking |
| Mayonnaise 🥫 | 2 tbsp | For optional spread |
The 80/20 ground beef is non-negotiable here—this higher fat content ensures unmatched juiciness and flavor. Costco and Whole Foods carry it pre-ground, but if buying whole chuck, trim visible fat first. Keep the beef cold until ready to use; it handles better when chilled. The Diamond Crystal kosher salt is preferred because its fine grains dissolve evenly, enhancing flavor without overpowering. For the pepper, Penzeys cracked peppercorns add depth, but pre-ground works in a pinch. The garlic and onion should be fresh—no sad, shriveled cloves here.
No fresh parsley? Dried parsley at one-third the amount works, though fresh is ideal for that bright pop of color. Running low on butter? Olive oil or avocado oil can substitute in the smash technique, though butter adds richness. For the buns, Trader Joe's sesame seed buns toast beautifully, but any soft bun will do. Want to skip cheese? Caramelized onions or sautéed mushrooms add moisture and depth. The vegetable oil is critical—use a high smoke point like avocado or grapeseed oil to prevent burning during the sear. And if you're avoiding mayo, aioli or mustard** works just as well.
Store the ground beef in its original packaging for up to 3 days in the fridge, or freeze for 3 months. The buns stay fresh for 5 days in a sealed bag, while cheese should be used within 2 weeks of opening. Prep the toppings ahead: finely dice the onion and pickle, and chop the parsley—everything stores well in airtight containers for 4 days. For maximum juiciness, let the patties rest 5 minutes after cooking before assembling burgers. These reheat beautifully—wrap in foil and warm in a 350°F oven for 10 minutes to restore crispiness.
Why You'll Love This Recipe
- Five-Ingredient Magic: I swear by this lineup—just beef, salt, pepper, garlic, and onion. That’s it. No fancy binders or mystery spices clogging my pantry. The 80/20 fat ratio keeps it juicy while the garlic-infused onion (I pulse it raw in my food processor) adds depth without overpowering.
- Crispy-Juicy Balance: Between us, I’ve burned burgers and made hockey pucks. But this method—gentle forming, no overhandling—gives you that perfect crust with a melt-in-your-mouth center. The kosher salt (Diamond Crystal, because it dissolves) draws out just enough moisture to seal in flavor.
- Tailgate or Taco Night: Same patties, endless uses. Slap them on the grill for game day, crumble into tacos for a weeknight, or even toss them into pasta sauce for a lazy Sunday. Honestly, I’ve made these for my book club, my kid’s soccer team, and my own “I can’t be bothered” dinners—and they’ve never complained.
- Budget Bulk Buys: A pound of 80/20 runs $4 here, and I get four meals out of it. Freeze half the patties raw, and you’ve got a 30-second dinner later. No sad leftovers—just reheated perfection (cast iron or air fryer only, though). My wallet and my taste buds thank me.
Step-by-step instructions for juicy smash burgers
Master the smash technique for burgers that stay juicy through every bite.
Prepare the Ground Beef Mixture
Place the 1.25 lb 80/20 ground beef in a medium bowl. Using your hands, gently break up any large clumps while avoiding overworking the meat—this preserves texture. Add the 1.5 tsp Diamond Crystal kosher salt and 1 tsp freshly ground black pepper, then mix thoroughly with your fingers until evenly distributed. The 80/20 fat ratio ensures moisture retention, while the salt enhances flavor penetration.
Next, finely mince the 2 cloves garlic and 0.5 whole yellow onion using a sharp knife. Fold these into the beef mixture along with the minced ingredients. The garlic and onion will infuse flavor without altering the beef's natural texture. Let the mixture sit at room temperature for 10 minutes before shaping—this allows the seasonings to meld completely.
Form and Smash the Patties
Divide the beef mixture into 4 equal portions, each weighing about 4 ounces. Gently shape each portion into a loose, slightly irregular patty—don't press too firmly, as this releases juices prematurely. Keep the patties about ¾-inch thick for optimal cooking.
Heat a heavy skillet over medium-high heat and add 2 tbsp vegetable oil. Once the oil shimmers (about 1 minute), place one patty in the center. Press down firmly with a spatula for 5-7 seconds until the edges begin to seal and release. This smash technique creates a wide surface area for maximum browning while locking in juices. Repeat with remaining patties, spacing them 2 inches apart in the pan.
Cook to Perfect Doneness
Cook the patties for 3-4 minutes per side until they reach an internal temperature of 130°F for medium-rare (use an instant-read thermometer). You'll know they're ready when the edges are deep golden brown and the tops develop a crust. Avoid moving the patties excessively—they'll release easily when properly sealed.
During the last 30 seconds of cooking, add 2 tbsp butter to the pan. Tilt the pan slightly to baste the tops of the patties with the melted butter, adding richness and flavor. Remove patties to a warm plate and tent loosely with foil to keep them warm.
Assemble the Burgers
Toast the 4 whole sesame seed buns in a dry skillet over medium heat for 30 seconds per side until golden. Spread 2 tbsp mayonnaise on the bottom half of each bun if desired. Place a cooked patty on the bottom bun, then add 1 slice American cheese (if using) and 1 tbsp dill pickle slices. Top with 1 tbsp finely chopped fresh parsley for brightness.
Finish by closing the buns and serving immediately. The smash technique ensures a juicy interior with a crispy exterior, while the cheese and pickles add tangy contrast. Each bite should deliver rich beef flavor with a satisfying texture—no dryness here.
Pro Tips For Making 80/20 Ground Beef Burger
- Chill the Beef First: Take the 80/20 ground beef out of the fridge 30 minutes before shaping—cold meat sticks together like glue, and you’ll end up with dense, tough patties. Room temp also lets the fat distribute better, so your burgers stay juicy instead of turning into hockey pucks.
- Salt the Onion Right: Dice the yellow onion, then toss it with a pinch of Diamond Crystal kosher salt and let it sit for 10 minutes before cooking. This draws out moisture, so it caramelizes faster and adds sweetness without making your patty soggy—no one wants a watery burger from a weepy onion.
- Use a Meat Thermometer: Pull the burgers off the heat at 150°F (they’ll hit 160°F while resting). I learned this the hard way—overcooking 80/20 turns the fat to grease, and you lose that perfect melt-in-your-mouth texture. A quick read saves you from dry, leathery bites.
- Shape Loose, Not Packed: Handle the beef gently—just enough to mix in the minced garlic and onion, then form patties with your fingers, leaving a slight dimple in the center. Pressing too hard squeezes out fat and air pockets, so your burger won’t sear properly and stays flat like a pancake. Keep it loose.
Dietary considerations for this 80/20 ground beef burger
Leaner Options
If you're watching fat intake, swap the 80/20 ground beef for 90/10—just be prepared for slightly less juiciness. I’ve found that adding 1 teaspoon cornstarch to the beef mixture helps retain moisture, mimicking the fat’s role. For a leaner but still flavorful patty, try half 80/20 and half ground turkey—the fat ratio stays balanced while cutting calories. 💪
Gluten-Free Adaptations
Skip the sesame seed buns and opt for gluten-free buns like Canyon Bakehouse or Udi’s. These hold up well to juicy patties and toast beautifully. For extra stability, brush the buns with egg wash before toasting. If you’re avoiding all grains, serve the patties on a bed of crispy lettuce wraps or toasted gluten-free tortillas.
Dairy-Free Cheese
Replace American cheese with dairy-free alternatives like Miyoko’s or Violife. These melt well and add creaminess without lactose. For a tangy kick, try dairy-free feta crumbles on top. If you’re avoiding cheese entirely, add sautéed mushrooms or caramelized onions for moisture and depth.
Allergen-Friendly Swaps
For nut allergies, skip mayo and use seed-based spreads like sunflower seed butter or avocado mash instead. If you’re avoiding onions or garlic, boost flavor with extra fresh parsley, smoked paprika, or Worcestershire sauce. For egg allergies, ensure your buns are egg-free—many store-bought options label this clearly.
Meal Prep Adjustments
Cook patties ahead and store them in an airtight container for up to 3 days. Reheat in a skillet over medium heat for 2-3 minutes to restore crispiness. For assembly, keep toppings separate until serving to prevent sogginess. If prepping for freezing, cook patties to 160°F, cool completely, and freeze for up to 3 months. Thaw overnight in the fridge before reheating. ✨
Nutrition facts
Frequently asked questions
Why does this recipe use 80/20 ground beef instead of leaner cuts?
The 20% fat content in 80/20 ground beef is key for juicy, flavorful burgers. The fat melts during cooking, keeping the meat tender and moist while adding rich flavor. Leaner cuts like 90/10 will dry out more easily—this ratio is what gives you that perfect restaurant-quality texture.
Can I make these burgers on a grill instead of a skillet?
Preheat your grill to medium-high heat (400°F) and clean the grates first. Form your patties as directed, then place them directly on the grates. Use the smash technique with a spatula to flatten them. Cook for 3-4 minutes per side for medium-rare, basting with butter in the last minute. The grill adds great char flavor while keeping the juices locked in.
What's the deal with the thumb impression in the patties?
That little trick prevents the burgers from puffing up in the middle while cooking. Press a thumb-sized indentation into the center of each patty before cooking—this creates space for the meat to expand slightly without bulging over the edges. It also helps the patties cook more evenly and keeps them from falling apart when you add toppings.
How do I know when the burgers are done without overcooking them?
Use a meat thermometer for precision—130°F for medium-rare, 140°F for medium, and 160°F for well-done. The edges should be deep golden brown with a crust forming on top. For a visual cue, press gently: the meat should spring back slowly (not too firm) when you press the center. Never cook past 160°F or you'll lose all that juiciness.
Can I make these burgers ahead of time?
Cook the patties first, then store them in an airtight container in the fridge for up to 3 days. Reheat in a skillet over medium heat for 2-3 minutes until warmed through. Keep toppings separate until serving to prevent sogginess. For freezing, cook patties to 160°F, cool completely, and freeze for up to 3 months. Thaw overnight in the fridge before reheating.