
Soups & Stews
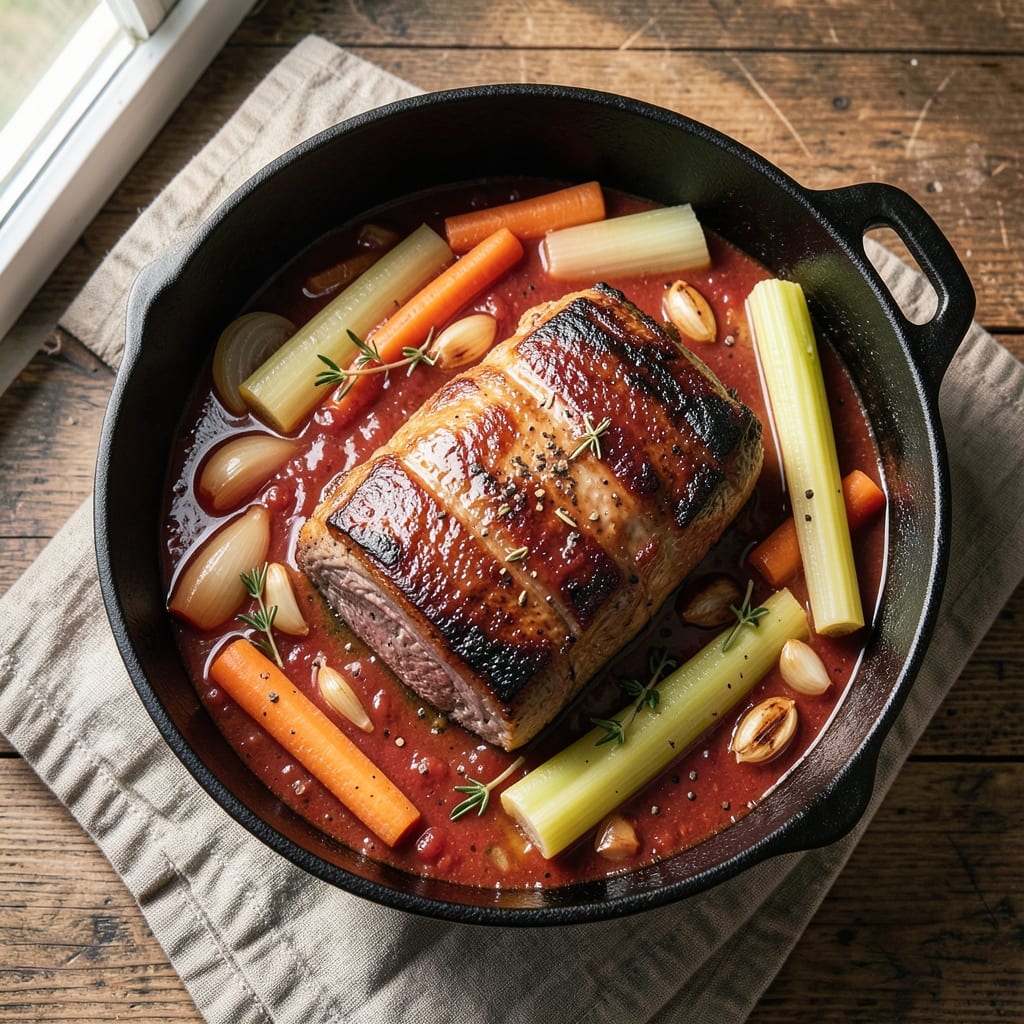
An 8-hour beef stew transforms tough cuts into melt-in-your-mouth perfection through slow braising—no fancy techniques required. The secret lies in patience and layering flavors: rich beef, aromatic vegetables, and a deep umami crust that develops as the stew simmers. This method ensures tender meat and a velvety broth that tastes even better the next day.
The process begins with searing the beef to lock in juices, then simmering low and slow to break down collagen into gelatin. This creates a naturally thickened stew with a deep, caramelized crust on the bottom—what makes restaurant-quality stews unforgettable. No need for roux or thickeners; the beef and vegetables do all the work.
By the final hour, your kitchen will smell like comfort food at its finest—warm, savory, and impossible to resist. The result is a hearty bowl of tender beef, caramelized onions, and perfectly softened vegetables swimming in a rich, flavorful broth. Serve with crusty bread to soak up every last drop.
This recipe is designed for beginners but delivers restaurant-worthy results. The 8-hour cook time ensures maximum tenderness, while simple steps make it approachable for home cooks. Whether you're feeding a crowd or meal prepping for the week, this stew is a game-changer for slow-cooked dinners.
Ingredients for 8 hour beef stew
Six aromatic vegetables, two cups of red wine, and a tough cut of beef—this is where simple ingredients transform into restaurant-quality comfort.
| Ingredient | Amount | Notes |
|---|---|---|
| Chuck Roast 🥩 | 3 lb | Tough cut for maximum gelatin release |
| Yellow Onions 🧅 | 2 whole | Medium, sliced into half-moons |
| Carrots 🥕 | 4 whole | Medium, cut into thick rounds |
| Celery Stalks 🌿 | 4 whole | Cut into 1-inch pieces |
| Garlic Cloves 🧄 | 6 cloves | Crushed, not minced |
| Tomato Paste 🍅 | ½ cup | High-quality, no sugar added |
| Red Wine 🍷 | 1 cup | Bold, dry variety like Cabernet |
| Beef Broth 💧 | 4 cups | Homemade or high-quality store-bought |
| Bay Leaves 🌿 | 2 whole | Fresh if possible, dried works too |
| Fresh Thyme 🌿 | ¼ cup | Leaves only, stems removed |
| Fresh Parsley 🌿 | ⅛ cup | Chopped, for garnish |
| Olive Oil 🫒 | 2 tbsp | Extra-virgin for searing |
| All-Purpose Flour 🌾 | 2 tbsp | For dusting beef |
| Salt 🧂 | 1 ½ tsp | Kosher or sea salt |
| Black Pepper 🌶️ | 1 tsp | Freshly cracked |
| Worcestershire Sauce 🥄 | 1 tbsp | For umami depth |
The beef is everything here. Chuck roast is the gold standard—it's tough enough to benefit from the long cook time, breaking down into tender, fork-shreddable pieces. Most grocery stores carry it pre-cut, but if you're buying a whole roast, ask the butcher to cube it for you. Costco or local butcher shops often have the best prices and freshest cuts. Look for good marbling—those little fat pockets are what melt into flavor as the stew simmers. If you can't find chuck, short ribs or brisket work too, but adjust the cook time accordingly.
No red wine? Beef broth with a splash of balsamic vinegar gets you close—just add an extra tablespoon of tomato paste to compensate. Fresh thyme is ideal, but dried works at one-third the amount. The Worcestershire sauce might be hidden in your pantry—check the condiment aisle if you don't have it. For the tomato paste, Trader Joe's squeeze tubes are perfect—they're convenient and last forever. The vegetables can be prepped ahead: chop the onions, slice the carrots, and cut the celery while you're searing the beef. It's a busy step, but worth it for that caramelized crust at the bottom of the pot.
This stew gets better with time—plan to make it a day ahead if possible. The flavors meld and deepen, and the broth thickens naturally. Store in an airtight container in the fridge for up to 5 days, or freeze portions for 3 months. I always make extra because it's perfect for meal prep: portion into containers with a scoop of broth, and you've got ready-to-reheat lunches. The crust? That's the magic. Let it sit in the pot for 10 minutes after cooking—it'll thicken up like a glaze. Scrape it into the stew before serving, and you've got restaurant-quality texture in your home kitchen.
Why You'll Love This Recipe
- Deep, Caramelized Magic: The onions and garlic melt into the beef until they’re practically syrup—sweet, rich, and clinging to every bite. That’s the kind of flavor that turns a weeknight dinner into something you’d pay for at a restaurant.
- Leftovers That Beg for More: This stew only gets better the next day. The beef gets fork-tender, the broth thickens, and suddenly you’ve got lunch, dinner, and a freezer meal. I’ve reheated mine three times and still crave it.
- Budget Meal for Crowds: A single chuck roast feeds six for under $20. Add some crusty bread, and you’ve got a hearty dinner that makes everyone feel like you slaved over it—without the grocery bill. (Between us, I’ve fed my whole book club this way.)
Step-by-step instructions for 8-Hour beef stew
Here's how to transform tough chuck roast into fork-tender perfection through slow braising.
Sear the Chuck Roast for Deep Flavor
Pat the 3 lb chuck roast dry with paper towels—this ensures maximum browning. Heat a heavy Dutch oven over medium-high heat and add the 2 tbsp olive oil. Once shimmering, add the beef and sear on all sides until deeply browned, about 5-6 minutes per side. The goal here is to develop that rich, caramelized crust that will infuse the stew with deep umami flavor.
While the beef browns, make a quick flour slurry by whisking together the 2 tbsp all-purpose flour, 1.5 tsp salt, and 1 tsp black pepper in a small bowl. Once the beef is browned, remove it from the pot and set aside. Pour the flour mixture into the hot pot and stir vigorously for 30 seconds to cook off the raw flour taste. This creates a fond that will form the base of your stew's rich sauce.
Sauté the Vegetable Base
In the same Dutch oven, add the sliced 2 whole yellow onions, 4 whole carrots cut into thick rounds, and 4 whole celery stalks cut into 1-inch pieces. Cook over medium heat for 8-10 minutes, stirring occasionally, until the vegetables begin to soften and release their natural juices. You want them to develop some color but not fully cook through—this happens during the long braising.
Add the 6 crushed garlic cloves and cook for another 30 seconds until fragrant. Then stir in the 0.5 cup tomato paste and cook for 2 minutes, stirring constantly. This step builds the flavor foundation by caramelizing the vegetables and developing the tomato paste's sweet, tangy notes. The vegetables should be tender but still holding their shape at this stage.
Deglaze and Build the Braising Liquid
Pour in the 1 cup red wine and scrape up all the browned bits from the bottom of the pot with a wooden spoon. This deglazing step captures all the flavor you've built so far. Let the wine simmer for 3-4 minutes until reduced by half. The alcohol will cook off, leaving behind concentrated wine flavors that deepen the stew's complexity.
Add the 4 cups beef broth, 2 whole bay leaves, and 0.25 cup fresh thyme leaves. Return the seared beef to the pot, along with any accumulated juices. The liquid should come about halfway up the sides of the beef. If it doesn't, add a splash of water or broth to ensure proper braising. Bring the mixture to a gentle simmer, then reduce heat to maintain a bare bubble at the surface.
Braise Low and Slow for Maximum Tenderness
Cover the Dutch oven and transfer to a 300°F oven. Braise for 6 hours, then carefully remove the beef and shred it slightly with two forks. Return the beef to the pot and continue cooking for another 2 hours (total 8 hours). The long cooking time is crucial—it breaks down the tough collagen in the beef, transforming it into tender, gelatin-rich meat that coats every spoonful.
About 30 minutes before the stew is done, add the 1 tbsp Worcestershire sauce. This final addition adds a savory depth that complements all the other flavors. The stew is finished when the beef is fork-tender and the vegetables are completely soft. The liquid should be thickened with gelatin from the beef, creating that signature stew consistency.
Finish and Serve with Fresh Herbs
Remove the bay leaves and adjust seasoning if needed. Stir in the 0.125 cup chopped fresh parsley just before serving to brighten the flavors with a fresh, herbal note. Ladle the stew into bowls, making sure each serving gets plenty of those tender beef shreds and flavorful vegetables.
Serve immediately with crusty bread to soak up every last drop of that rich, umami-packed sauce. The stew will continue to thicken as it cools, so don't be surprised if it's even more velvety the next day. This is one of those dishes that tastes even better reheated, as the flavors meld and deepen overnight.
Pro Tips For Making 8 Hour Beef Stew
- Sear the Chuck Roast First: Walk away from the pan after browning—that’s when the meat actually starts cooking through, not just getting a crust. I used to rush this step and wondered why my stew tasted more like simmered meat than rich, caramelized beef. Give it 3-4 minutes per side until deep brown, then let it sit for a minute before adding liquid.
- Cut Carrots and Celery Evenly: Uneven chunks mean some veggies stay crunchy while others turn to mush. Aim for 1-inch pieces—big enough to hold shape but small enough to soften in 8 hours. (Yes, even if you’re tempted to chop them smaller for faster cooking—this isn’t a race.)
- Deglaze with Red Wine: After searing the meat, splash in ½ cup red wine (or broth if you’re skipping alcohol) and scrape the browned bits off the bottom. That crust is flavor—don’t let it go to waste. I learned this the hard way when my first stew tasted bland despite all the herbs.
- Add Garlic Late: Toss the whole cloves (peeled) into the stew only in the last 30 minutes of cooking. Raw garlic burns easily, and you’ll end up with bitter, overcooked bits. (Pro move: Smash them lightly with the flat of your knife first—more surface area, better flavor.)
Creative variations of this 8 hour beef stew
Global Comfort Twists
Take your classic stew on a world tour with simple swaps. For a French bistro vibe, add 1 cup pearl onions and ½ cup brandy instead of red wine, finishing with fresh tarragon. In Hungary, stir in 2 tbsp paprika and 1 cup sauerkraut during the last hour—this adds tangy depth. For Mexican-inspired richness, swap Worcestershire for 2 tbsp chipotle powder and add 1 cup diced tomatoes with the broth. 🌍
Protein Alternatives
Short on beef? No problem. Swap the chuck roast for 3 lb pork shoulder for a smoky twist (reduce cook time to 6 hours). For chicken lovers, use 3 lb bone-in chicken thighs (cook 4 hours) and add 1 cup chicken broth instead. Vegetarians can use 3 lb extra-firm tofu (pressed and cubed) with ½ cup coconut milk in the broth—simmer 3 hours for tender results. 🥗
Vegetable Upgrades
Boost nutrition and texture with seasonal swaps. Add 2 cups mushrooms (cremini or shiitake) with the onions—they soak up flavors beautifully. For winter stews, include 1 cup diced sweet potatoes and 1 cup kale (add last 30 minutes). In summer, swap carrots for 2 cups zucchini and add ½ cup corn kernels for sweetness. Always prep veggies to similar sizes so they cook evenly. 🥕
Crusty Toppings
Elevate your bowl with creative garnishes. A sprinkle of crumbled feta adds salty brightness, while toasted breadcrumbs (mix ¼ cup panko with 1 tbsp butter) create crunch. For herb lovers, blend 2 tbsp fresh parsley with 1 tbsp chives and 1 tsp lemon zest for a vibrant swirl. Try a drizzle of truffle oil (just ½ tsp) for an unexpected luxury touch. 🧀
Slow-Cooker Adaptation
Transform this into a hands-off meal by using a 6-quart slow cooker. Sear the beef in a skillet first, then transfer everything to the pot. Cook on LOW for 8 hours (or HIGH for 5 hours). The slow cooker’s gentle heat mimics oven braising—just stir the Worcestershire in during the last 30 minutes. For extra richness, add ½ cup beef broth before serving to compensate for reduced evaporation. ⏳
Spice Level Customization
Adjust heat to your taste. For mild, skip the black pepper and add ½ tsp smoked paprika instead. Medium heat? Add ½ tsp cayenne with the Worcestershire. Spicy? Stir in 1 tbsp hot sauce (like Cholula) or 1 chopped chipotle pepper during the last hour. Balance with a splash of beef broth** if needed—acid cuts through heat beautifully. 🌶️
Nutrition facts
Frequently asked questions
Why does this stew need 8 hours to cook?
The 8-hour cook time is key for transforming tough beef into melt-in-your-mouth perfection. Slow braising breaks down collagen in the meat, creating a rich, gelatinous broth that naturally thickens the stew. This method also allows all flavors to meld deeply, resulting in that signature restaurant-quality taste.
Can I use a different cut of beef?
While chuck roast is ideal, you can use short ribs or brisket—just adjust the cook time. Short ribs may need 6-7 hours total, while brisket can take up to 9 hours for full tenderness. The key is to cook until the meat easily shreds with a fork.
What if I don't have red wine?
No problem! Substitute with 1 cup beef broth + 1 tbsp balsamic vinegar for depth, or use ½ cup apple cider + ½ cup broth for a fruity twist. The tomato paste and Worcestershire will still provide rich flavor, so don't skip those. The stew will just have a slightly different profile.
How do I make this stew in a slow cooker?
Sear the beef first, then transfer everything to a 6-quart slow cooker. Cook on LOW for 8 hours or HIGH for 5 hours. Add the Worcestershire sauce during the last 30 minutes to preserve its flavor. The slow cooker's gentle heat works perfectly for this method!
Can I prep this stew ahead of time?
This stew tastes even better the next day. Store in an airtight container in the fridge for up to 5 days or freeze for 3 months. The flavors deepen as it sits, and the broth thickens naturally. Just reheat gently on the stove before serving.