
Main Courses
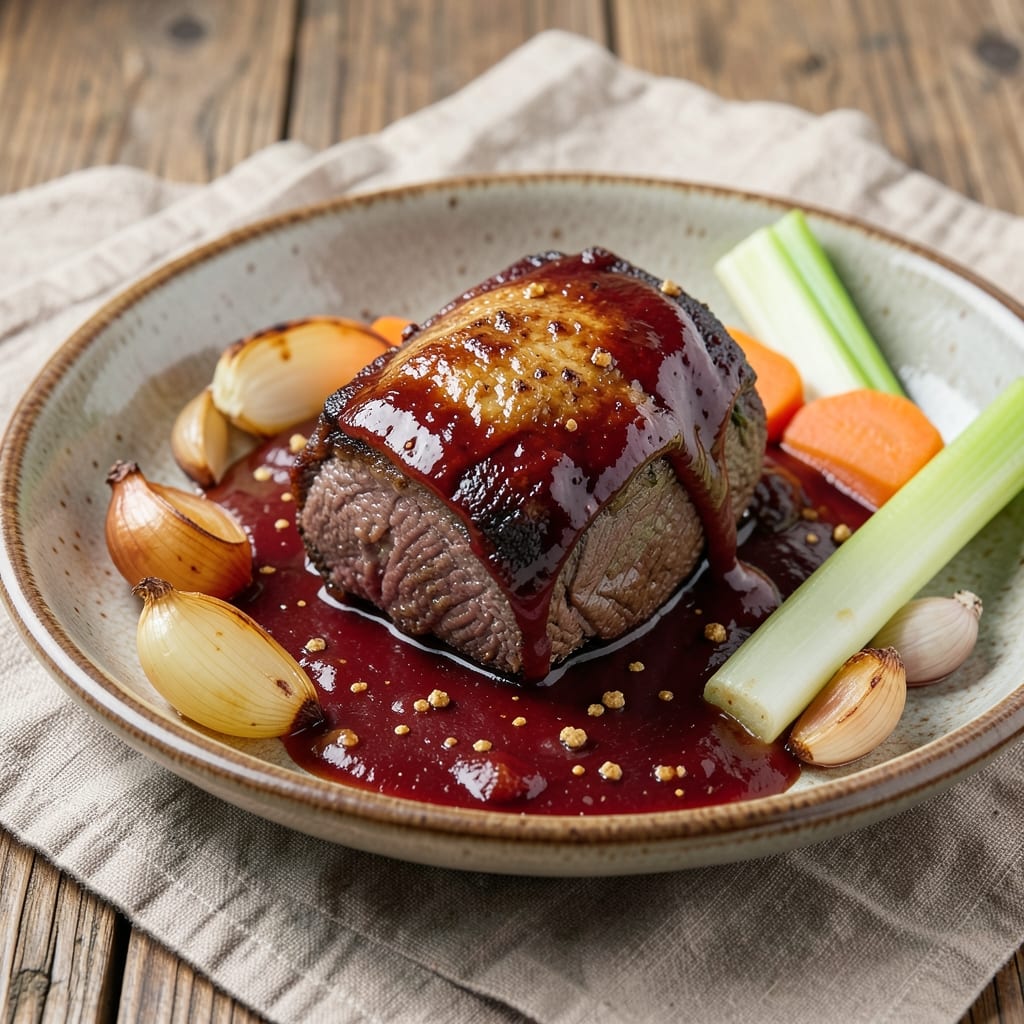
Transforming tough beef shin into melt-in-your-mouth tenderness requires patience and precision—this 500g beef shin recipe delivers restaurant-quality results with a slow-braised approach that unlocks deep, rich flavors. The key lies in low-and-slow cooking, where collagen-rich connective tissue breaks down into velvety, flavorful gelatin, creating a dish that’s both hearty and luxurious. Unlike quick-cooked cuts, shin benefits from hours of gentle simmering, transforming tough meat into succulent bites that practically fall apart at the touch of a fork.
This method relies on traditional braising techniques—searing the meat first to develop a flavorful crust, then slow-cooking it submerged in aromatic liquids until tender. You’ll need about 3 to 4 hours on low heat, but the effort pays off with a dish that’s perfect for feeding a crowd or meal prepping for the week. The slow cook transforms the shin into a tender, flavorful centerpiece that pairs beautifully with crusty bread, roasted vegetables, or mashed potatoes.
What you’ll achieve is a deeply flavorful, melt-in-your-mouth beef shin that’s rich, juicy, and packed with umami from the slow-cooked broth. The exterior remains slightly crispy from the initial sear, while the interior dissolves at the slightest pressure. This isn’t just a meal—it’s an experience, one that turns a simple cut of meat into a showstopping dish worthy of any table.
The beauty of this recipe lies in its versatility—use the finished shin in tacos, sandwiches, or as the star of a hearty stew. The slow-cooked broth can also be repurposed into a rich gravy or sauce, ensuring minimal waste and maximum flavor. Ready to master the art of slow-braised beef shin? Let’s get started.
Ingredients for 500g beef shin
Pantry staples plus a few specialty items transform tough shin into melt-in-your-mouth luxury.
| Ingredient | Amount | Notes |
|---|---|---|
| Beef Shin 🥩 | 1 lb | 500g equivalent, trimmed of excess fat |
| Yellow Onion 🧅 | 1 whole | Chopped into large chunks |
| Carrots | 2 medium | Whole, peeled, cut into 2-inch pieces |
| Garlic Cloves 🧄 | 4 cloves | Smashed, skin on for deeper flavor |
| Celery Stalks 🥬 | 3 whole | Cut into 1-inch pieces, leaves reserved |
| Tomato Paste 🍅 | 2 tbsp | High-quality, no sugar added |
| Dry Red Wine 🍷 | 1 cup | Bold variety like Cabernet Sauvignon |
| Beef Broth 💧 | 2 cups | Homemade or quality low-sodium |
| Olive Oil 🫒 | 2 tbsp | Extra-virgin for searing |
| Fresh Thyme 🌿 | ½ ounce | Or 1 tbsp dried thyme |
| Fresh Rosemary 🌿 | ¼ ounce | Sprigs, not ground |
| Bay Leaves 🍃 | 2 whole | Fresh preferred, dried acceptable |
| Salt 🧂 | 1 ½ tsp | Diamond Crystal kosher preferred |
| Black Peppercorns 🌶️ | 1 tsp | Freshly cracked |
| Balsamic Vinegar 🍶 | 1 tbsp | For finishing touch |
The beef shin is the star—look for well-marbled cuts at Whole Foods or your local butcher shop. Costco often has them pre-cut, but if buying whole, ask for the bone-in section near the knee joint. The extra collagen from the bone adds richness to the broth. Carrots and celery should be fresh, not limp—Trader Joe's has great organic selections. For the wine, any bold red works, but Cabernet Sauvignon or Merlot elevate the dish. Fresh herbs make all the difference here—Whole Foods bulk section has affordable sprigs.
No red wine? Substitute with extra beef broth plus 1 tbsp balsamic vinegar—it mimics the depth. Fresh thyme and rosemary are ideal, but dried works at one-third the amount. Short on celery? Substitute with extra carrots or fennel. The tomato paste can be skipped if you prefer, but it adds that umami punch. For the broth, homemade is best, but low-sodium store-bought in a pinch. The balsamic vinegar at the end? Don't skip it—it ties all the flavors together.
This dish tastes even better the next day—plan ahead. Store in the fridge for up to 5 days or freeze for 3 months. The broth thickens as it cools, so add a splash of water when reheating. I always make a double batch—one for dinner, one for tacos the next day. The leftovers keep beautifully in airtight containers, and the flavors deepen overnight.
Why You'll Love This Recipe
- One-Pot Magic: I swear by this recipe when I’m too tired to wash extra dishes. The beef shin, onions, carrots, and celery all simmer together—no straining, no fuss—just rich, falling-apart meat and tender veggies in the same pot. Honestly, the cleanup is basically nonexistent.
- Deep Umami Bomb: That beef shin? It’s the star. Slow-cooked until it’s melt-in-your-mouth tender with a crust so crispy it’ll make you groan. The onions and garlic caramelize into something sweet and sticky, while the carrots and celery soak up all the savory goodness. Between us, it’s the kind of flavor that sticks with you.
- Leftover Goldmine: This dish actually improves the next day. The flavors meld even more, and the beef gets even more fork-tender. I’ve turned it into tacos, sandwiches, or just reheated it with a sprinkle of fresh herbs—every time, it’s a win. (Yes, even on a Tuesday night.)
- Budget-Friendly Feast: For the price of a fancy cut, you get pounds of meat that’s way more flavorful. The shin is cheap, the veggies are basic, and one pot means no wasted ingredients. I’ll be real: my grocery bill thanks me every time I make this. Plus, it stretches to feed four or even six without breaking the bank.
Step-by-step instructions for slow-braised beef shin
This method transforms tough beef shin into fall-apart tenderness with deep, caramelized flavors.
Sear the Beef Shin for Deep Flavor
Pat the beef shin dry with paper towels—this ensures maximum browning. Heat the 2 tablespoons olive oil in a heavy Dutch oven over medium-high heat until shimmering. Place the beef shin fat-side down and sear for 8-10 minutes until deeply browned on all sides. I press down gently on the shin during the first minute to prevent curling and ensure even contact with the pan.
Flip carefully and continue searing until the second side reaches the same golden-brown color. Remove the beef shin and set it aside—this initial sear builds the flavor foundation for the long braise. The pan should have a rich, caramelized crust at the bottom; don't scrape it clean yet. This browned fond will dissolve into the sauce later, adding depth of flavor.
Sauté the Aromatic Vegetables
In the same Dutch oven, add the chopped yellow onion, 2-inch carrot pieces, 1-inch celery chunks, and smashed garlic cloves. Cook over medium heat for 8-10 minutes, stirring occasionally, until the vegetables soften and begin to caramelize. I like to leave the garlic skins on during this step—they infuse subtle floral notes into the braise.
Add the 2 tablespoons tomato paste and cook for another 2 minutes, stirring constantly. This creates a rich, concentrated base that prevents the wine from turning bitter during reduction. The mixture should darken slightly and develop a deep, savory aroma—this is your signal that the vegetables are properly caramelized and ready for the liquid components.
Deglaze and Simmer the Braise
Pour in the 1 cup dry red wine, scraping up all the browned bits from the bottom of the pan with a wooden spoon. Let the wine simmer for 5 minutes until reduced by half. This reduction intensifies the wine's flavor and removes any alcohol sharpness. Add the 2 cups beef broth, the 0.5 ounce fresh thyme sprigs, 0.25 ounce fresh rosemary sprigs, and 2 whole bay leaves.
Return the beef shin to the Dutch oven, fat-side up. Bring the liquid to a gentle simmer, then reduce heat to low. Cover partially with a lid and let it cook for 3 hours. The liquid should barely bubble—this slow cooking is what transforms tough connective tissue into tender, fork-friendly meat. I check the liquid level after 1 hour and add a splash of water if needed to maintain coverage.
Finish with Balsamic and Rest
After 3 hours, remove the lid and increase heat to medium. Stir in the 1 tablespoon balsamic vinegar and simmer uncovered for 15-20 minutes until the sauce reduces slightly and coats the back of a spoon. The beef shin should be fork-tender with a rich, dark sauce clinging to it. If the sauce is too thin, remove the beef shin and reduce the sauce further.
Transfer the beef shin to a serving platter and let it rest for 10 minutes. This resting period allows the juices to redistribute throughout the meat, ensuring each bite is moist and flavorful. The sauce can be served immediately over the beef shin or strained and reduced further for a thicker consistency. Serve with crusty bread to soak up every last drop of that rich, caramelized sauce.
Pro Tips For Making 500g Beef Shin
- CRANK THE HEAT FIRST: Beef shin needs that initial sear to build flavor, so don’t be shy—get your pan screaming hot before adding the meat. I used to rush this and end up with gray, rubbery shin; now I wait until the oil shimmers like a mirage before touching the meat to the pan.
- CUT SHIN IN 3CM CHUNKS: Uneven pieces mean uneven cooking. Split that 500g into chunks no bigger than 3cm thick—thinner edges cook faster, so they won’t turn to leather while the center stays tough. (Yes, even if it looks messy—your future self will thank you.)
- SWEAT VEGETABLES LOW AND SLOW: Onions, carrots, and celery should release moisture before they brown—otherwise, you’re just steaming them into mush. Cover the pan for the first 5 minutes, stir occasionally, and resist the urge to crank the heat. Patience here means depth later.
- SALT THE SHIN TWICE: First when you sear it (generous handful), then again after adding liquid. The second hit mid-cook helps tenderize the collagen—like a spa day for tough meat. (I know, it sounds excessive, but trust me: bland shin is a crime.)
Troubleshooting this recipe
Undercooked Shin?
If your beef shin isn't tender after 3 hours, it likely needs more time. Extend cooking to 4-5 hours—connective tissue breaks down gradually. Check internal temperature with a meat thermometer; it should reach 203°F for perfect tenderness. Never rush this process—patience is key with tough cuts. 💪
Sauce Too Thin?
Thin sauce? Remove the beef shin and simmer the liquid uncovered over medium-high heat for 10-15 minutes to reduce. For extra thickness, mix 1 tablespoon cornstarch with 2 tablespoons cold water, stir into the sauce, and cook until it gels. Avoid scraping up browned bits from the bottom—they add depth, not thickness. 🍲
Overly Greasy?
Excess fat? Skim it off with a spoon while the sauce simmers. For future batches, trim more fat from the shin before searing. If using a Dutch oven, ensure it's heavy enough to contain the liquid without spilling. A Le Creuset or All-Clad pot handles this perfectly. 🥄
Bitter Wine Flavor?
Bitter wine taste? You likely didn't reduce it enough. Always simmer wine until reduced by half before adding broth. For next time, deglaze with 1 cup beef broth first, then add wine to prevent bitterness. A splash of balsamic vinegar at the end balances any lingering astringency. 🍷
Dry Meat Texture?
Dry shin? Overcooking is the culprit. Keep the pot covered and maintain a gentle simmer—never a rolling boil. If the sauce evaporates too quickly, add ¼ cup warm broth during cooking. Resting the meat for 10 minutes before slicing traps juices inside. 💧
Uneven Cooking?
Uneven doneness? Your heat source may be inconsistent. Use an oven thermometer to confirm your oven stays at 300°F (or your target temperature). For stovetop braising, maintain low heat—never medium or high. A cast-iron Dutch oven** distributes heat evenly, preventing hot spots. ⚡
Nutrition facts
Frequently asked questions
How long should I marinate beef shin before braising?
A short 1-2 hour marinade with olive oil, garlic, and herbs helps tenderize the meat, but it's not required. The real magic happens during the slow braise, where collagen breaks down naturally. For extra flavor, add 1 tbsp soy sauce or 1 tsp smoked paprika to your marinade.
Can I use a slow cooker instead of an oven?
Sear the shin first, then transfer everything to a slow cooker and cook on low for 8 hours or high for 5 hours. Add ½ cup water if needed to prevent burning. The slow cooker's gentle heat works perfectly for this recipe—just monitor the liquid level occasionally.
What's the best way to slice beef shin for serving?
Let the shin rest for 10 minutes after cooking, then slice against the grain into ½-inch thick pieces. For sandwiches or tacos, slice into ¼-inch strips. The grain runs lengthwise, so look for the muscle fibers and cut perpendicular to them for maximum tenderness.
How do I store leftovers?
Store in an airtight container in the fridge for up to 5 days or freeze for 3 months. The sauce thickens when chilled, so add a splash of water when reheating. Leftovers make amazing tacos, sandwiches, or stews—the flavors only get better!
What's the ideal internal temperature for perfect doneness?
Use a meat thermometer to check the thickest part of the shin—it should reach 203°F (95°C) for melt-in-your-mouth tenderness. This is higher than most cuts because we're breaking down collagen, not just cooking meat. A fork should pierce it easily when done.